Introduction to NoReplyAll
Despite its ubiquity and value, there are an awful lot of things that annoy us about email - one sin that seems to be almost unforgivable is doing a reply to all ("big R reply") when reply to sender ("little r reply") was intended. I have to say I don't see all that many of those erroneously propagated messages so I don't quite understand precisely why I find them so irritating! Anyway, it seems I'm not the only person - a few years ago Scott Hanselman offered an Outlook macro to reduce the level of email-related angst in the world. I liked that, but I didn't like the way it looked and, since was learning VSTO at the time I came across Scott's post, I thought I'd try to replicate it in C#. I'm quite pleased with the end result and I was also taken by surprise at how many people downloaded it. (BTW: new version coming real soon...)
People still ask for new features and occasionally ask how I did it. While the VSTO documentation isn't too bad, it still seems to be somewhat confusing - so I thought I'd make a series of blog posts out of the process of creating the addin. With that, here's the first in the series, a very gentle introduction to creating a VSTO add-in.
First off, I'm afraid that VSTO functionality is not available in the Express edition - you need at least Visual Studio Professional. I'm using Visual Studio 2010 (and will make use of some of the facilities in .NET 4.0, such as type embedding) but I'm pretty sure that most of what I'm talking about will work with Visual Studio 2008.
To begin, fire up Visual Studio and create a new Outlook add-in project: the Outlook 2010 project selection is shown below -
The difference between the Outlook 2010 and 2007 add-ins are in which version of the .NET runtime is targeted and which assemblies are referenced. Outlook 2007 project add-ins can generally be loaded in Outlook 2007 and, if you're careful about what features of the product you use, Outlook 2010 project add-ins can be used in Outlook 2007, regardless of which .NET framework version you use. You can also start off with an Outlook 2010 project and later on swap it from the .NET 4 client runtime to the .NET 3.5 runtime - though it seems that it has to be the full runtime, the 3.5 client is not sufficient. And, of course, you can choose the VB Office templates too if you prefer, though I'm going to stick with C# here.
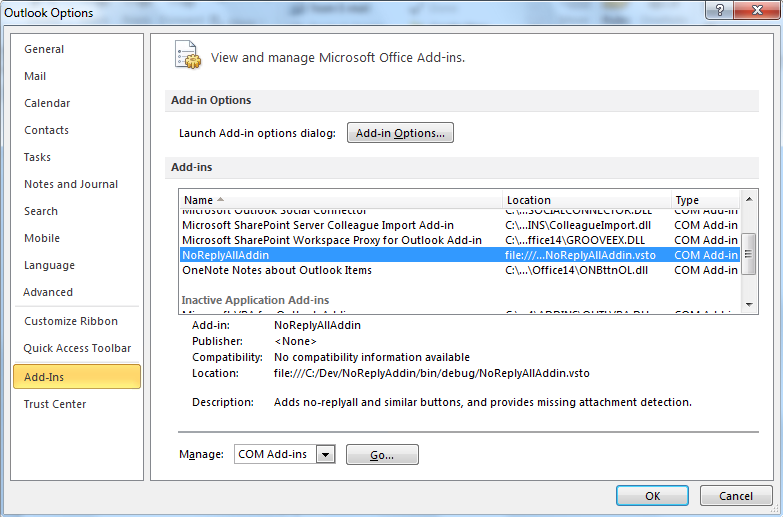
The project created at the end of this does nothing but load itself into Outlook, as you can see by hitting F5. The build process will register the add-in in the right place for Outlook to see it, and "running" the project causes Outlook to start. (A "build clean" will unregister the add-in, so if you find that something you've done is causing Outlook to crash, that's one way to remove it.) You can see that the add-in is loaded by going to Outlook's options page and selecting add-ins, shown below:
In Outlook 2007, you get to the add-ins list via Tools, Trust Center.
That's just about enough for today, I'll write some code next time...
Comments
- Anonymous
July 25, 2011
Looking forward to part II :)

