(Part 2) Backup is good. Restore is great. But test your data is even better: the script.
In part one of this Blog, I have introduced the idea which is to automate (via Powershell) data restore, and then run checks (antivirus, data structure, ransomware) on this restored data.
Click here to read Part 1 which contains the introduction of the concept, and how to configure your machine used to restore data.
Click here to read Part 3 that will focus on security checks (examples).
In this second Post, I will focus now on the script itself, and share with you a few thoughts to even enhance this. The global structure of the API follows this diagram :
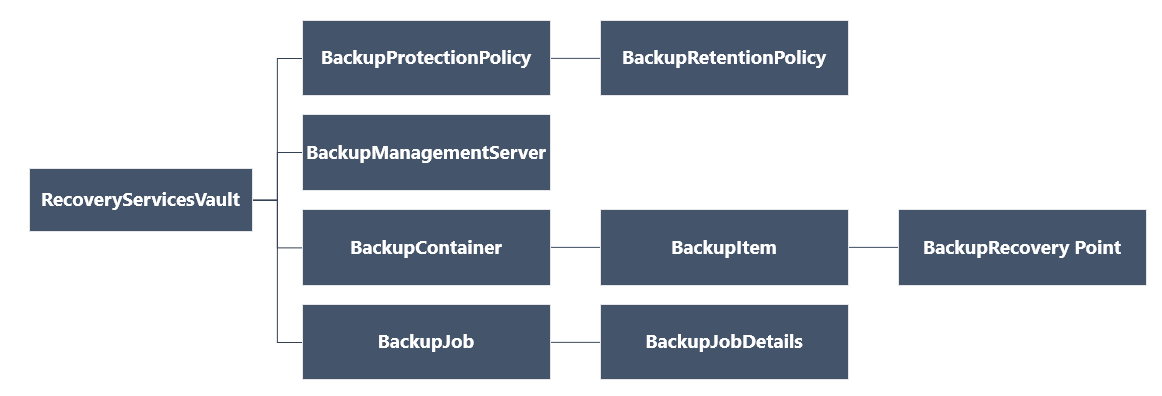
Let’s see now how it works.
Step 1 : Authenticate Azure
As I mentioned in Post 1, this script has to be executed as an administrator otherwise you will get explicit errors asking for this level of privilege.
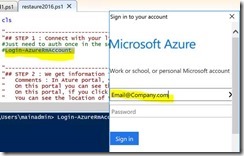
First of all, you will need to authenticate Azure in order to read the properties of your Vaults.
To do so, run this Login-AzureRmAccount command. Depending on the level of security you set for this account you will be asked for an indentifier and a password. If you turned on Stong Authentication on this identity, you will be called by MFA to validate who you are.
TIP : if you need to run this script several times - for example if you are testing/enhancing it – note that you just need to run this authentication command once. When first authentication has succeded, the best practice is to just comment (by adding #) the line.
Once authenticated, the command will return this :
Step 2 : Connect the Vault
The Vault is where the data has arrived when you did backup a server or a workstation.
This Vault has several properties that you can set in the Azure portal (such as the name, type of storage( LRS/GRS), some of them are exposed by the Powershell API, some others are not.
Calling this API will give me in return an array containing the list of « Vaults » I have on my subscription.
Note : In my scenario I just have one, so $vault[0] is my first (and only) Vault.
Here you can see the name starting with « bac… », the datacenter used (northerneurope) to store the data, and several confidential data that I have hidden.
Step 3 : Get Vault properties and access it
In this command below, I pass a parameter named $Vault[0] which specifies the Vault I want to work with. This is in fact what we got from the previous command.
But you can’t access the structure of a Vault if you don’t have an “access key”, sort of temporary certificate.
With the 3 first lines of code, I download locally this « access key ». The file is an XML structure, it contains some credentials (the “certificate”) that will be available only for 2 days.
Now that I have this key, I can call the Get-OBAlternateBackupServer command to access the Vault. I just pass the key as a parameter, and get in return an array that will contain interesting information about the Vault itself.
Step 4 : List servers backing up in this Vault.
We have access to the Vault now. We need to see who (servers, workstation) is backing up in this vault in order to select the machine, and then go to the restore phase.
This script below has in fact two goals.
1) The two first lines just create a variable that will contain the name of the server I want to work with.
2) This basic « for » code laverages the result generated by the « Get-OBAlternateBackupServer» command and just display the result (What we get in this array). Then, having the list of machines in the vault, you can pick the one you want, identify the position in the array, and set accordingly the value in the 2 first lines of code.
TIP : As you probably know, if you select these « if » lines in the ISE interace, and if you press F8… the GUI will just execute the selected lines. In our scenario, it will list the servers contained in the Vault.
Now that we identified the machine we want to work with, and set our $Obj variable with its name, we call the appropriate Azure Backup command to connect this server. To do so, we call below the Get-OBRecoverableSource command and pass the name as a parameter.
Then we display the value of the object created ($source[0]), and it displays again the ServerName we have passed. We are good !
Step 4 : Select the Backup (Recovery Point) to restore
Since we can do backup every day, our Vault will contain a lot of « recovery points », and we need to specify in the script which « day » to restore.
As you can see in the code, the parameter passed to the command is in fact the variable that is connected to the server.
Same remark as previously, if you run the « For » code you will get the list of recovery point.
TIP : I am not a powershell Guru, but a nice Function where we can pass a date, and get in return the index in the Array would be usefull in production !
We will require the « index » of that recovery point in order to call the next command. As an example, here is what displays the « for » code (here index=11). The key value would be the Date.
TIP : Surprisingly (under investigation) ItemSize is empty.
Step 5 : Let’s restore now
We are almost ready to restore the data.
First we need to create a « recovery option » variable (array) that will contains several « options » for our restore phase. In the example below, we set the destination directory, and provide some guidance in case some files are already there.
We also prepare a $key variable that will in fact contain the encryption key used when you installed the agent, and generated this key. Since the data is encrypted « at the source » when we run the backup, without this key we can’t access the data and start the restore phase.
Now we are ready to go !
Below, I have of course added some code to display text to analyze performance (time to start/end) of such restore.
The « Recovery » command takes some basic parameters such as :
- Recovery point to restore,
- Options to do such process and if course the key to restore this data.
User experience when you run this script
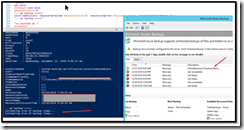
It is very interesting to notice that when you run the Script, it will in fact « remote control » the Azure Backup Agent.
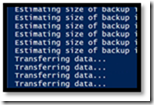
Below you can see that the script is saying that « it is estimating size »… and if you run the Backup agent GUI at the same time, you will also get the same information demonstrating this « remote control » approach.
Just to let you know, the script will start by an « Estimating size of a backup », then it will turn into a « Transferring data ». Then after a few mn/hours depending of the size, you get your data.
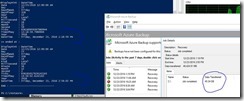
TIP : You can run the Azure Backup Agent to see the size of the data restored :
The full script
Here is the script I used to restore the data.
You will need to add your key in the corresponding variable :
Login-AzureRmAccount
$vault = Get-AzureRmRecoveryServicesVault
$vault[0]
$credspath = "C:\restaure"
$credsfilename = Get-AzureRmRecoveryServicesVaultSettingsFile -Backup -Vault $vault[0] -Path $credspath
$fileToLoad=$credsfilename[0].FilePath
$AltSrv = Get-OBAlternateBackupServer –VaultCredentials $FileToLoad
$AltSrv[0]
$obj = new-object Microsoft.Internal.CloudBackup.ObjectModel.OMCommon.CBBackupServer
$obj.ServerName = $AltSrv[2].ServerName[0]
"List of Servers found : "
for ($i=0;$i -le $AltSrv[2].Count-1;$i++)
{
"$i : "
$AltSrv[2].ServerName[$i]
}
$source = Get-OBRecoverableSource -Server $obj
$source[0]
$rps = Get-OBRecoverableItem -Source $source[0]
$rps[0]
$recoverysource=$source[0]
$RecoveryPoint = Get-OBRecoverableItem -Source $recoverysource
$RecoveryPoint[0]
"List of recoverypoints (Array 0 is the last one): "
for ($i=0;$i -le $RecoveryPoint.Count-1;$i++)
{
"$i : "
$RecoveryPoint[$i]
}
$key = ConvertTo-SecureString -String "<yourkey>" -AsPlainText -Force
$recovery_option = New-OBRecoveryOption -DestinationPath "d:\restaure" -OverwriteType Skip
$recovery_option[0]
$thebegin=Get-date
$RecoveryPoint[0]
".. we backup : start ====>"
Start-OBRecovery -RecoverableItem $RecoveryPoint[0] -RecoveryOption $recovery_option -EncryptionPassphrase $key
"Get Statistics : (check in the agent backup GU for volume of data transfered)"
"== Started at :"
$thebegin
"== ended at :"
Get-Date
#Add your security checks here…
Now it is your turn !
In real life, this script will have to be enhanced :
1) Add the security checks I was talking about.
2) Add a loop, running this script several time, once per service in a list.
3) Generate some tracing (especially during the Checks), or send results automatically via email to the security team.
Enjoy Azure Backup !
