Using IIS to generate a X509 certificate for use with the Windows Azure Service Management API – step by step
This is one of a series of posts on my preparations for sessions on Azure and ORMs at Software Architect 2009.
One of the things that has been added to Windows Azure while i have been “elsewhere” is the Service Management API which the team introduced on the 17th of this month (Sept 2009).
This is a REST-based API which allows:
- Deployments – Viewing, creating, deleting, swapping, modifying configuration settings, changing instance counts, and updating the deployment.
- Listing and viewing properties for hosted services, storage accounts and affinity groups
It uses X509 client certificates for authentication. You can upload any valid X509 certificate in .cer format to the Windows Azure developer portal and then use it as a client certificate when making API requests.
But… you need an X509 certificate. If you have the Windows SDK installed then you can use makecert (details on the original post). An alternative is to use IIS 7. I decided to use IIS to get my X509 but it turned out a little less obvious than I expected. Hence a step by step is called for:
First use IIS Manager (inetmgr.exe) to create a self signed certificate:
Next use Certificate Manager (certmgr.msc). Find the certificate you just produced under “Trusted Root Certificates”:
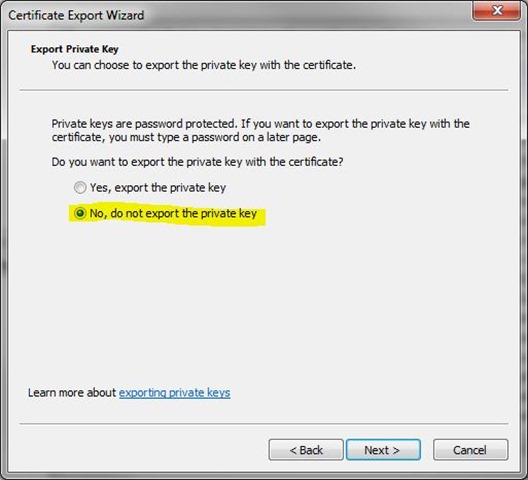
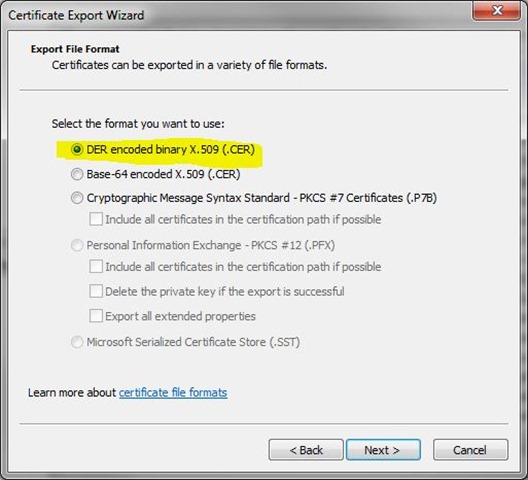
Then Export the certificate from the Action menu. Use the following options (which were the defaults for me):
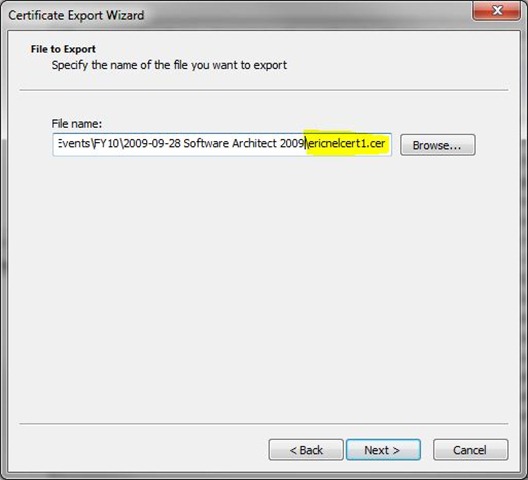
And select a name for your *.cer file:
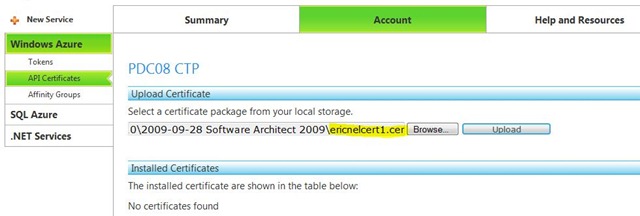
Now navigate to https://windows.azure.com. Open your Project (PDC08 CTP for me) and then click on Account (Don’t click on Account before opening your project). Next select Manage My API Certificates. Use Browse to find the file you created above and then click Upload.
You should now see one installed certificate.
You are now done. Except… you need to read the documentation to find out how to actually use the API :)
Hope that helps.


