Secure Boot on Virtual Machines
Hello
It’s Rafal Sosnowski from Microsoft Dubai Security PFE Team. Today I will explain how to configure Secure Boot on VMs.
Note: To better understand subjects presented in this article I strongly recommend to read my post about Secure Boot: https://blogs.technet.microsoft.com/dubaisec/2016/03/14/diving-into-secure-boot/
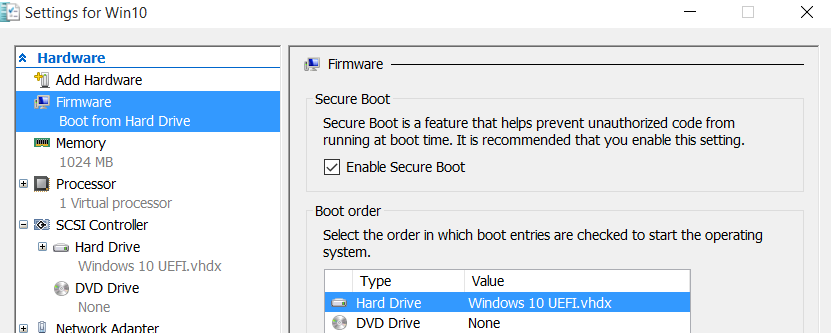
Support for Secure boot in virtual machines has been added in Hyper-V for Windows Server 2012R2 and Windows 8.1. You can simply go to VM’s settings and check “Enable Secure Boot”. This option is only available for Generation 2 of virtual machines because only this generation supports UEFI (required for Secure Boot).

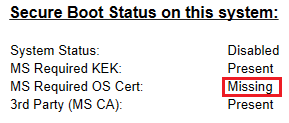
However, this would only work for VMs with Windows Operating systems. This is because during creation of VM, UEFI firmware injected into VM, by default contains only Microsoft certificate used to sign Windows bootloaders. Certificate used to sign 3rd party bootloaders is missing:

If you have Linux (like Ubuntu or Fedora) that have its bootloader signed by Microsoft Authenticode certificate, then you need to deploy it as VM on host running Windows 2016 or Windows 10. Full support for these Operating Systems has been added in Hyper-V on Windows 10 and Windows 2016.
In order to run Linux VM with Secure Boot enabled on Hyper-V you need to execute:
Set-VMFirmware “VM Name” -SecureBootTemplate MicrosoftUEFICertificateAuthority
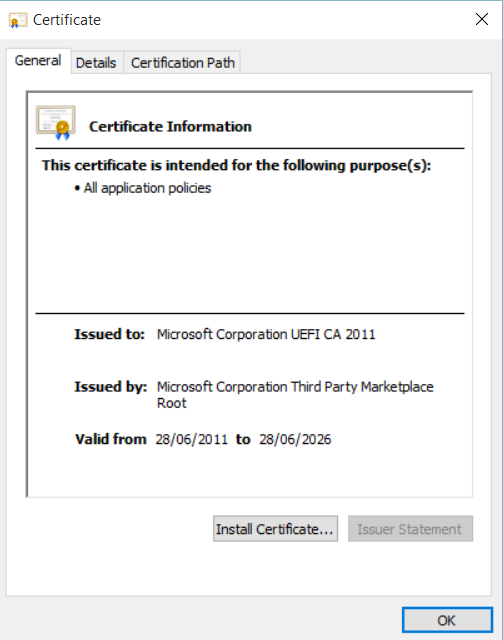
This command will simply add Microsoft CA certificate used to sign bootloaders of 3rd party OS (Microsoft Corporation UEFI CA 2011; thumbprint 46def63b5ce61cf8ba0de2e6639c1019d0ed14f3):

However, it will also prevent Windows to run because Secure boot template “MicrosoftUEFICertificateAuthority” used by Hyper-V to prepare UEFI for VM guest, removes Microsoft certificate used to sign Windows bootloader.

So if we want to revert back to previous configuration (with Secure Boot working for Windows OS) we will have to execute:
Set-VMFirmware “VM Name” -SecureBootTemplate MicrosoftWindows
This command will add Microsoft CA certificate used to sign bootloaders used by Windows OS (Microsoft Windows Production PCA 2011; thumbprint 580a6f4cc4e4b669b9ebdc1b2b3e087b80d0678d) to UEFI firmware:

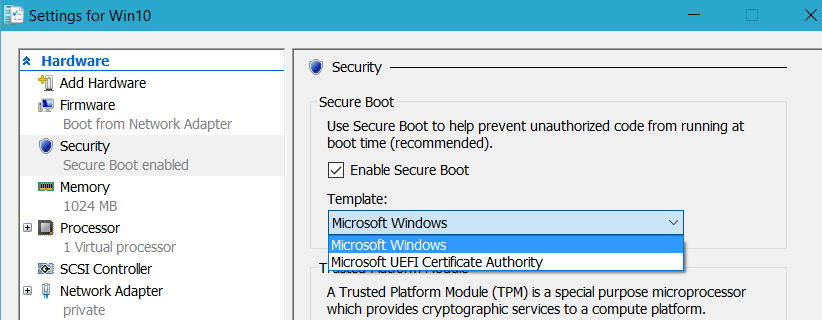
If you have Windows 10 build 10586 you can use GUI instead of above commands to enable Secure boot with proper certificates:

As for now (March 2016) dual boot configuration with Secure Boot, where we have Windows bootloader and 3rd party bootloader is not supported.