Windows 8, Azure Mobile Services & Office Apps – A Heady Cocktail
Azure Mobile Services, launched a few days back, make it incredibly easily for one to start developing Windows 8 apps which require a database backend and authorization services. There is an excellent blog post and video by Scott Guthrie on getting started with Azure Mobile Services.
But there are scenarios where we would want to get the data generated by our Windows 8 app into other applications. This blog post will talk about how we can fetch this data residing in the cloud for an Excel app which will then generate a report out of the data.
Lets imagine a fictitious supermarket where Windows 8 slates are being used at Point of Sales counters for billing purposes. There may be various such counters operating all day which use a Windows 8 app for its touch friendliness and send all the sales data to Azure Mobile Services. At the end of day (or week), the manager of the supermarket wants to create a sales report in Excel for sales happened in the entire duration. Since this is a routine process, he wants an app which can quickly do this task for him – an Excel app.
Now comes the question of how to connect Office 15 to Azure Mobile Services. If we look at the Fiddler log generated by the sample To-do application which comes with Azure Mobile Services, we see that these are nothing but REST calls along with some data and authentication headers. The REST calls are in this format -
| REST Method | URL | Comments |
| GET | https://MOBILE_SERVICE_NAME.azure-mobile.net/tables/TABLE_NAME | Gets all the data contained in TABLE_NAME. |
| GET | https://MOBILE_SERVICE_NAME.azure-mobile.net/tables/TABLE_NAME$filter=(COLUMN_NAME%20eq%20VALUE) | Gets all the data contained in TABLE_NAME which satisfy the described filter. |
| POST | https://MOBILE_SERVICE_NAME.azure-mobile.net/tables/TABLE_NAME | Creates a new row in TABLE_NAME with appropriate data sent with the request. |
| PATCH | https://MOBILE_SERVICE_NAME.azure-mobile.net/tables/TABLE_NAME/ROW_ID | Updates the record at the specified ROW_ID with the supplied data. |
Note that the above list is not exhaustive and was prepared by me by looking at Fiddler logs.
Along with the REST request, we also have to send authentication headers namely
- X-ZUMO-APPLICATION – This is the Application Key of your Azure Mobile Service. This optional if you set the Table permission to Everyone.
- X-ZUMO-INSTALLATION-ID – This is ID of your Windows 8 app. We can send any GUID in this header. This is optional. (Thanks Josh Twist for the update)
Show me the code!
Let’s begin creating our solution by designing the tables that our app will use. I have created two tables here –
- Products – This table will hold information about the products available in supermarket.
- Sales – This will hold all the data regarding a particular sale.
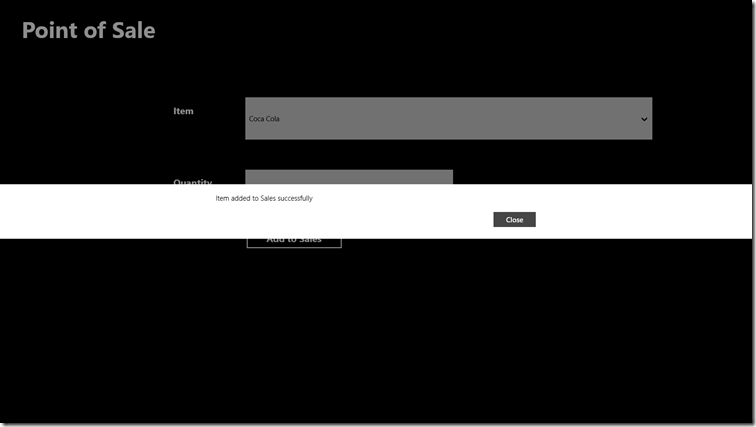
Our Windows 8 app is a simple app just for entering data in Sales table.
Now we will create a Task Pane app for Excel. Our Excel app cannot directly call the Azure Mobile Service due to cross-domain restrictions. We also cannot use JSONP for communication since it does not allow adding headers. To work around this problem, we will create a RESTful WCF Service in our Office App web project which will in turn call the Azure Mobile Service. This does not involve creating additional infrastructure since our Office app needs to be hosted somewhere and we will utilize the same host for our WCF service too.
This is the code our REST service uses to get Products data from Azure Mobile Service. Similarly we can get all the Sales data and send it back to our Excel app.
 HttpWebRequest request =
 WebRequest.Create("https://MOBILESERVICEURL.azure-mobile.net/tables/Products") as HttpWebRequest;
 request.Method = "GET";
 request.Accept = "application/json";
 request.Headers.Add("X-ZUMO-APPLICATION", "APP_KEY");
 request.Headers.Add("X-ZUMO-INSTALLATION-ID", Guid.NewGuid().ToString());
 request.KeepAlive = true;
 var resp = (HttpWebResponse)request.GetResponse();
 var stream = resp.GetResponseStream();
 var json = new DataContractJsonSerializer(typeof(List<Product>));
 if (stream != null)
 {
 var allProducts = json.ReadObject(stream) as List<Product>;
 stream.Close();
 }
In the JavaScript file our app, we will implement a CreateReport method which will then create a report in Excel.
 function createReport() {
 $.get('../MobileDataService/GetReportData', function (data) {
 var reportTable = new Office.TableData();
 reportTable.headers = [['Product Id', 'Product Name', 'Quantity', 'Sale Date']];
 var dataRows = new Array(data.length);
 for (i = 0; i < dataRows.length; ++i)
 dataRows[i] = new Array(3);
 reportTable.rows = dataRows;
 for (var i = 0; i < data.length; i++) {
 var item = data[i];
 reportTable.rows[i] = [item.ProductId, item.ProductName, item.Quantity, item.SaleDate];
 }
 Office.context.document.setSelectedDataAsync(reportTable, { coercionType: "table" });
 });
 }
Note how we have created headers for our TableData object. If you currently look at MSDN documentation on creating Table Headers, it contains wrong information on how to create multiple column headers. Hopefully it will be corrected in future.
This will create a simple report in Excel from the Sales data stored in Azure!
All the code used in this post is attached below. You will need to create your own Azure Mobile Service, create table structures as shown and replace your App Key in the code to play around with the sample.
Conclusion
In this post we learnt how to connect our Office App to a Azure Mobile Service and to create report out of it.
Comments
Anonymous
September 02, 2012
Thanks Mayank, great post. Note the X-ZUMO-INSTALLATION-ID header is completely optional (as is X-ZUMO-APPLICATION, if you set the table permissions to Everyone). Josh http://www.thejoyofcode.com/ http://twitter.com/joshtwistAnonymous
September 02, 2012
Thanks Josh. Updated the article.Anonymous
February 01, 2013
Nice!


