Migrating SAP ASE database to Microsoft SQL Server using SSMA
Hi all,
This blog covers the process of migrating SAP ASE databases to Microsoft SQL Server using SQL Server Migration Assistant (SSMA) tool.
Sybase SAP Adaptive Server Enterprise (ASE) database can be migrated to Microsoft SQL Server 2008/2008 R2/2012/2014/2016/SQL Server 2017/Azure SQL database on Windows/Linux using Microsoft SQL Server Migration Assistant (SSMA) for SAP Adaptive Server Enterprise (ASE) tool. SSMA for Sybase converts ASE database objects to SQL Server database objects, creates those objects in SQL Server and then migrates data from ASE to SQL Server or Azure SQL database.
SSMA tool consists of the following:
- SSMA for SAP ASE client (SSMA Client) which need to be installed on Client machine
- SSMA extension pack for Sybase component which need to be installed on SQL Server machine
You install the client application on the computer from which you will perform the migration steps. You must install the extension pack files on the computer that is running SQL Server where migrated databases will be hosted.
In this blog, we are covering the below:
- Prerequisites for Installing SSMA tool
- Installing the SSMA for Sybase (Client Component and the extension pack)
- Creating SSMA project for Migration
Prerequisites for Installing SSMA tool:
SSMA is designed to work with ASE 11.9.2 or later versions and all editions of SQL Server. Before you install SSMA, make sure that the computer meets the following requirements:
- Windows 7 or later versions, or Windows Server 2008 or later versions.
- Microsoft Windows Installer 3.1 or a later version.
- The Microsoft .NET Framework version 4.0 or a later version. The .NET Framework version 4.0 is available on the SQL Server product media.
- The Sybase OLEDB/ADO.Net/ODBC provider and connectivity to the Sybase ASE database server that contains the databases you want to migrate.
- Access to and sufficient permissions on the computer that hosts the target instance of SQL Server where you will be migrating database objects and data.
Installing the SSMA for Sybase Client Component:
Before Installing Sybase client components, ensure that Sybase providers component is installed on the client machine. The following instructions provide the basic installation steps for installing Sybase providers. The exact instructions will differ depending on the version of the Sybase Setup program.
- Run the Sybase ASE Setup program.
- Select custom setup.
- On the feature selection page, select the ODBC, OLE DB and ADO.NET data providers.
- Verify the selected features, and then click Finish to install the data provider
Once the Sybase provider component is installed, download the latest version of SSMA client tool, refer the link SQL Server Migration Assistant download page
To install the SSMA client, launch the msi file.
If the Sybase Components are not installed below, required component missing window appears. Ensure that the Sybase provider component is installed prior to SSMA client tool installation.
Installing SSMA for Sybase extension Pack:
Once the Installation of client tool is complete on client machine, for using Server-side data migration, you must also install components on the computer that is running SQL Server. These components include the SSMA extension pack, which supports data migration, and Sybase providers to enable server-to-server connectivity.
When you migrate data from ASE to SQL Server, the data migrates directly between ASE and SQL Server. It does not go through SSMA client because this would slow down the data migration.
Before Installing the Sybase extension pack on the SQL Server, ensure that the Sybase provider components are installed on the SQL Server machine as well.
Once the Sybase provider components are installed, double click on the Sybase Extension pack.msi file:
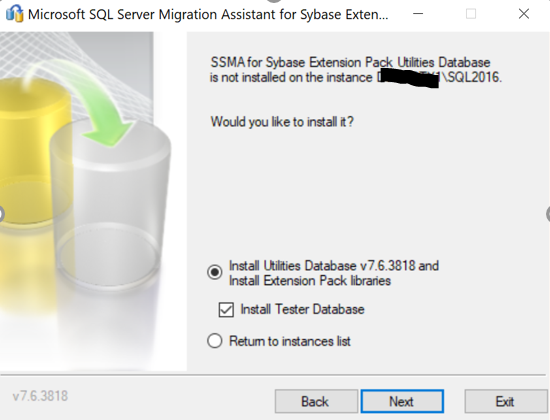
During the Sybase extension pack installation, setup points for the SQL server instance details where the extension pack database is created.
Extension pack installs the utility database in SQL instance mentioned in the previous step.
The installation creates the below databases:
Sysdb: Contains the tables and stored procedures that are required to migrate data
Ssmatesterdb_syb: Contains the schema ssma_sybase_utilities, in which the objects (Tables, Triggers, Views) used by the SSMA tester component are created.
Once the extension pack is installed, control Panel Add or remove program reflects the SSMA for Sybase extension pack.
Create a SSMA Project for Schema/Data Migration:
Launch the Microsoft SQL Server Migration Assistant for Sybase:
Click on File New Project and mention the destination SQL version.
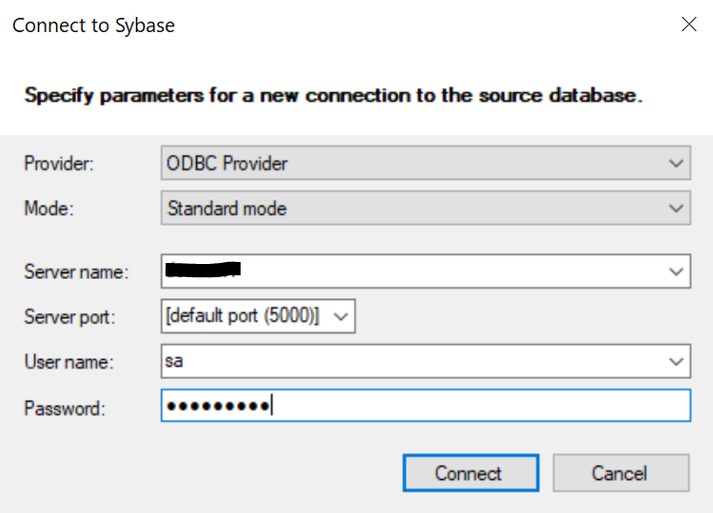
Next step is to connect to the Sybase data source:
Post connecting to the Sybase database source, select the database/Objects which are to be migrated to SQL Server.
Connect to the destination SQL Server instance:
Ensure that the Sybase database and the SQL Server have the same compatibility. If they are different, the below warning message is displayed.
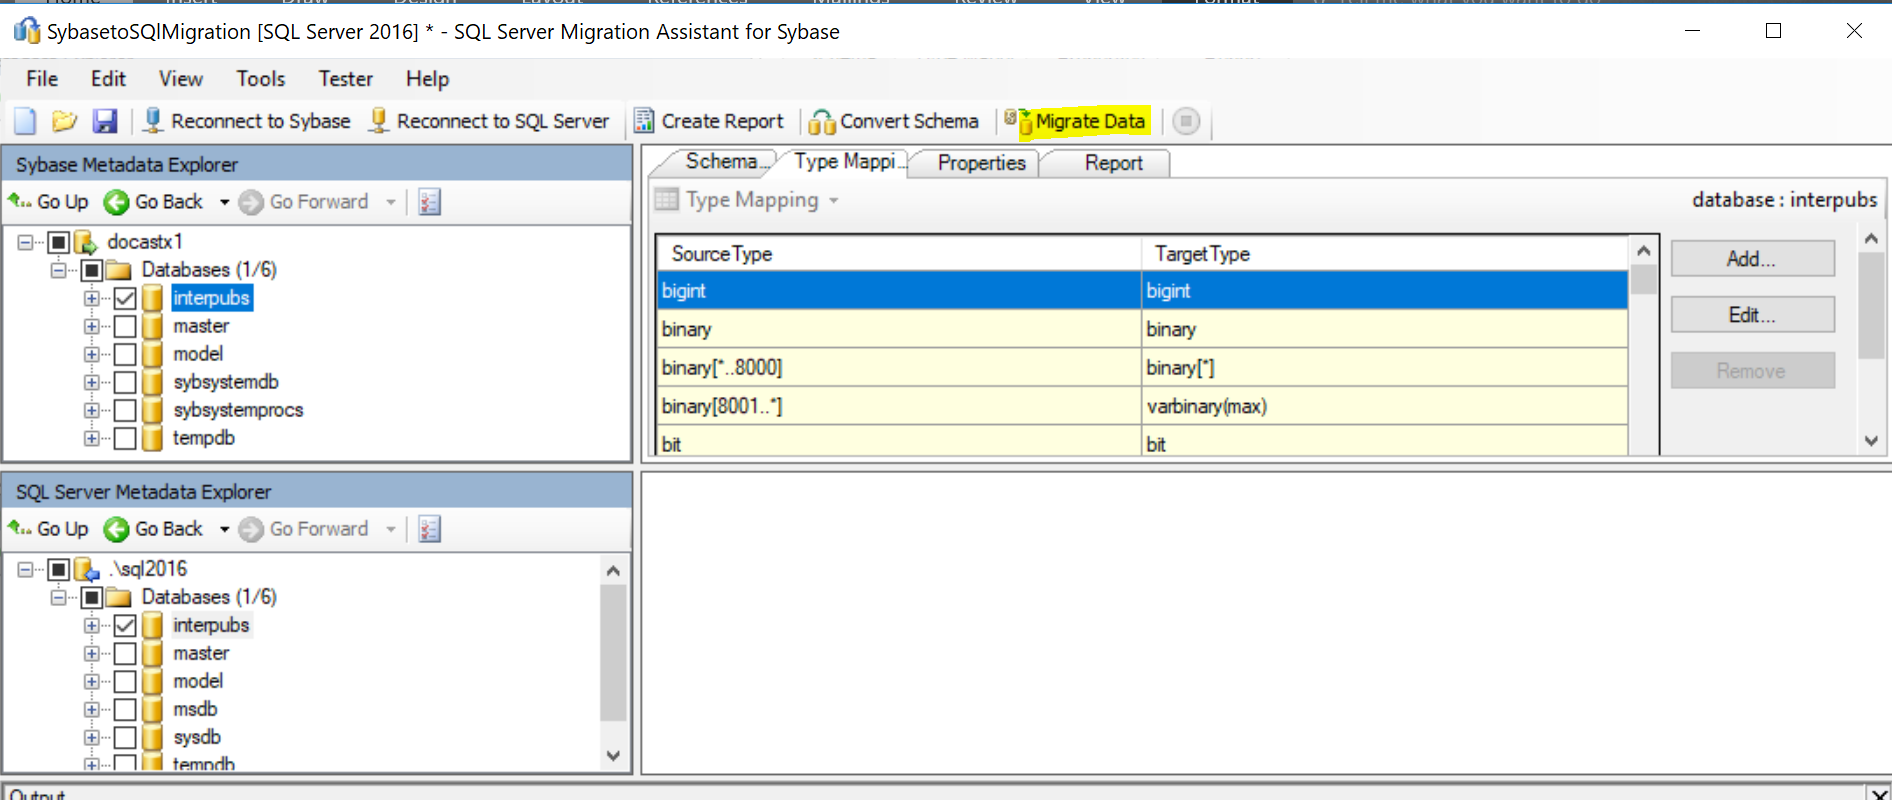
Post connecting to both Sybase and SQL Server, SSMA tool automatically, maps the data type from Sybase to SQL Server as highlighted in the below screenshot:
Create the conversion report by selecting the Sybase schema and click on "Create Report" option:
The report is created in html format and is stored at location specified during Project creation: The report gives an inventory of the Sybase schema and the effort needed to convert the Sybase schema to SQL Server schema.
Sample report looks like below which can be drilled down further:
Next step is to “Convert Schema” if the default type mapping selected by the SSMA tool are not preferred:
The Output pane can be referred for schema conversion status:
Converting the schema creates a database in the Local metadata, but it’s not reflected on SQL Server yet, which can be verified from connecting to SQL Server instance using SSMS tool.
To replicate the schema of Sybase objects on SQL Server, right click on the Local Metadata database from SSMA tool and click on “Synchronize with database” which creates the database in SQL Server and applies the schema.
Note that only the schema is replicated and not the data.
Next step is to Migrate the data using “Migrate data” option.
Once the data migration is complete, migration report can be reviewed to check the Total and Migrated Rows and the success rate of migration.
Output pane also displays the status of Migration operation.
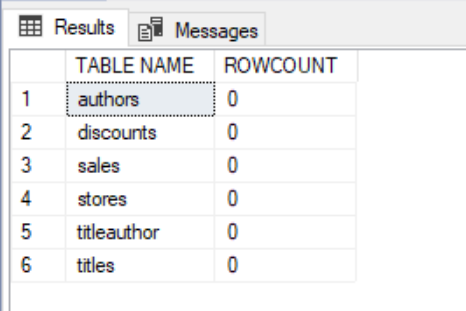
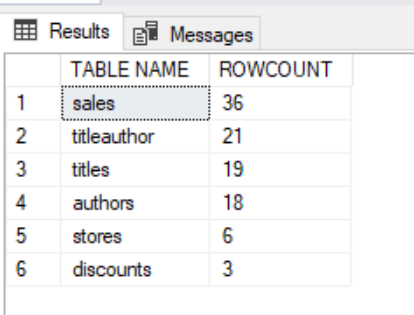
Now, row count in SQL server displays the number of rows migrated to SQL server.
Refer the below article to perform the incremental data migration using SSMA.
Once the data is successfully loaded to SQL Server, next step is to point the application connection strings to SQL Server and access the data stored in SQL Server.
Hope the above steps mentioned will help you in migration process.
Please share your feedback, questions and/or suggestions.
Thanks,
Don Castelino | Premier Field Engineer | Microsoft
Disclaimer: All posts are provided AS IS with no warranties and confer no rights. Additionally, views expressed here are my own and not those of my employer, Microsoft.


