Lync 2010RC : Some lessons learned testing upgrade from OCS2007 R2 to Lync 2010RC (continued)
This is a continuation of my previous blog post on my initial testing experience with Lync 2010.
- After running the Import command, I was able to move that user to the new Lync pool and then login with the Lync client.
- I then tried to move another user and got an error ("Unable to update the destination"). I search through the event logs and tried various permutations, but still wasn't able to move this user. A teammate recommended that I try the powershell command. I tried it and amazingly, it worked. I was able to move the user from the OCS 2007 R2 pool to the Lync pool. So, if you have problems moving the user from OCS 2007 R2 to the Lync pool using the GUI, try the Powershell. Here is the command that I used;
Now, I began some testing. I was able to IM and start an audio/video/desktop share between OCS user to Lync user and , Lync user to Lync user.
One of the neat things that I discovered was that my DNS SRV records were still pointing at my OCS 2007 R2 pool. The Lync automatic login process worked without any changes. The Lync client used DNS to find the users pool. DNS referred the client to the OCS 2007 R2 server. The OCS 2007 R2 pool redirected my Lync client request to the Lync 2010 server and the user login happened.
Ok. Testing was going fine until I tested Exchange UM. Exchagne UM no longer worked for the users that I moved to the Lync pool.
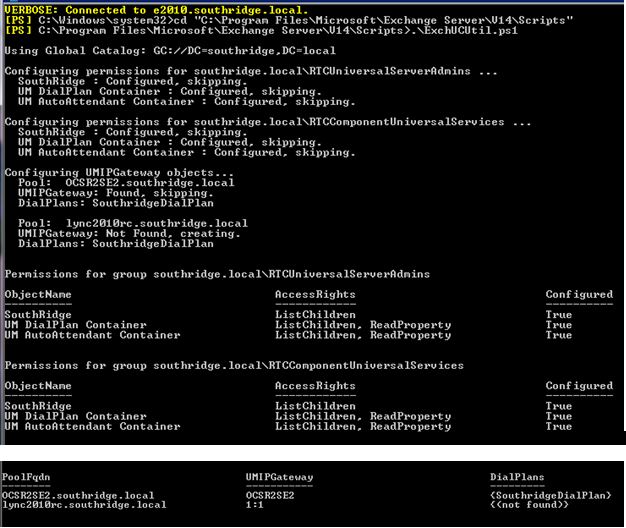
I discovered that the fix to this issue is to rerun the ExchUCUtil.ps on the Exchange 2010 server. This command adds the new Lync server as a gateway. See here for more information.
I actually discovered that I need to rename the Lync gateway. I was initially named 1:1 so I renamed it to Lync2010. I also needed to run the ExchUCUtil.ps twice. The first time, the Lync server didn't get associated with any dialplans. I reran it and it was associated with the dial plan.
UM worked for the upgraded users after running this step.

