Use Azure DNS Service (preview) from Azure VMs
Azure DNS service (preview) is a hosted service for DNS domains, providing name resolution using Microsoft Azure infrastructure. Instead of creating your own DNS servers in an Azure environment, you can use Azure DNS service for name resolution in your Azure environment very conveniently. This article walks through how Azure IaaS VMs (windows or Linux) use the service.
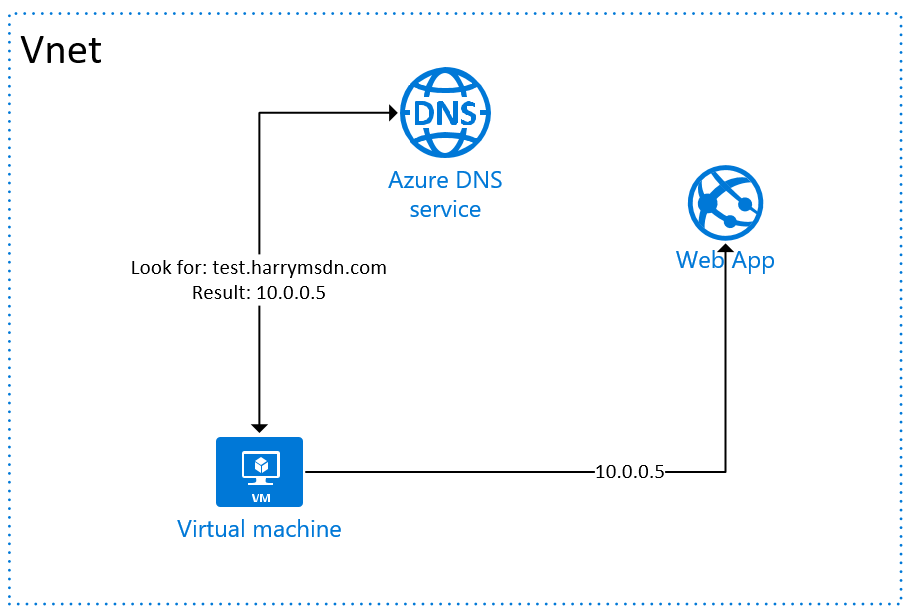
In this lab, I have a private domain (dnslab.com) that I want to setup so all VMs in my Azure resource group(s) can use to resolve the dnslab.com to the internal IP addresses (10.0.05). Below is the setup of the lab. DNS, VMs, and Web Apps can be in different resource groups as long as they can reach the same network (either directly or via VNet-VNet connection).
Below are the details of the steps:
Step 1
Create Azure DNS service in the selected resource group as described at: https://azure.microsoft.com/en-us/documentation/articles/dns-getstarted-create-dnszone/ 
Step 2
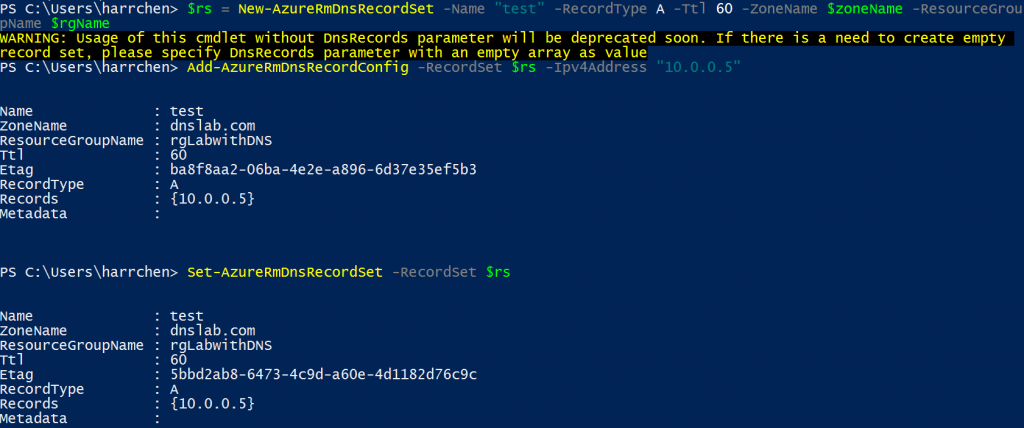
Create a test record for test.dnslab.com as described at: https://azure.microsoft.com/en-us/documentation/articles/dns-operations-recordsets/:
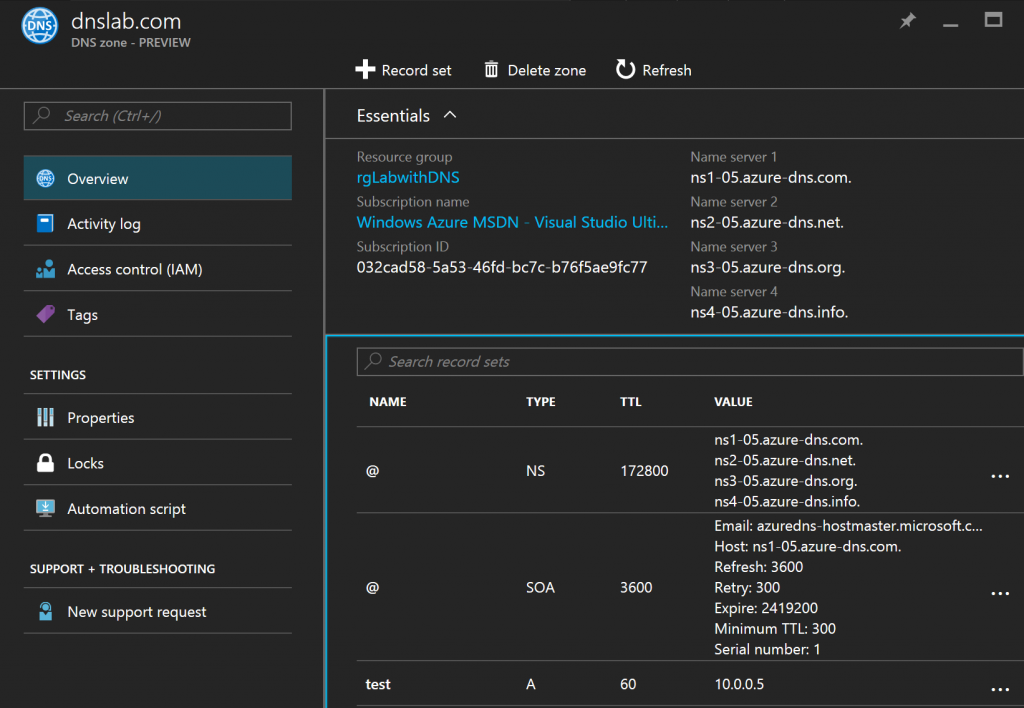
The resulted DNS zone looks like this from the Azure portal:
Step 3
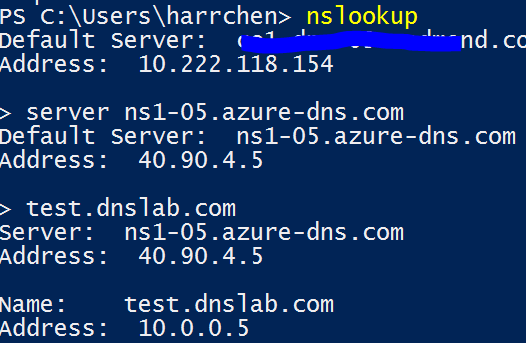
Test the name resolution and make sure the name resolution works as expected.
Step 4
Now we can configure the VMs to use the DNS zones we created. It may be worth pointing out that these steps can be automated through PowerShell Extension (for Windows VM) or custom script extension (for Linux VM).
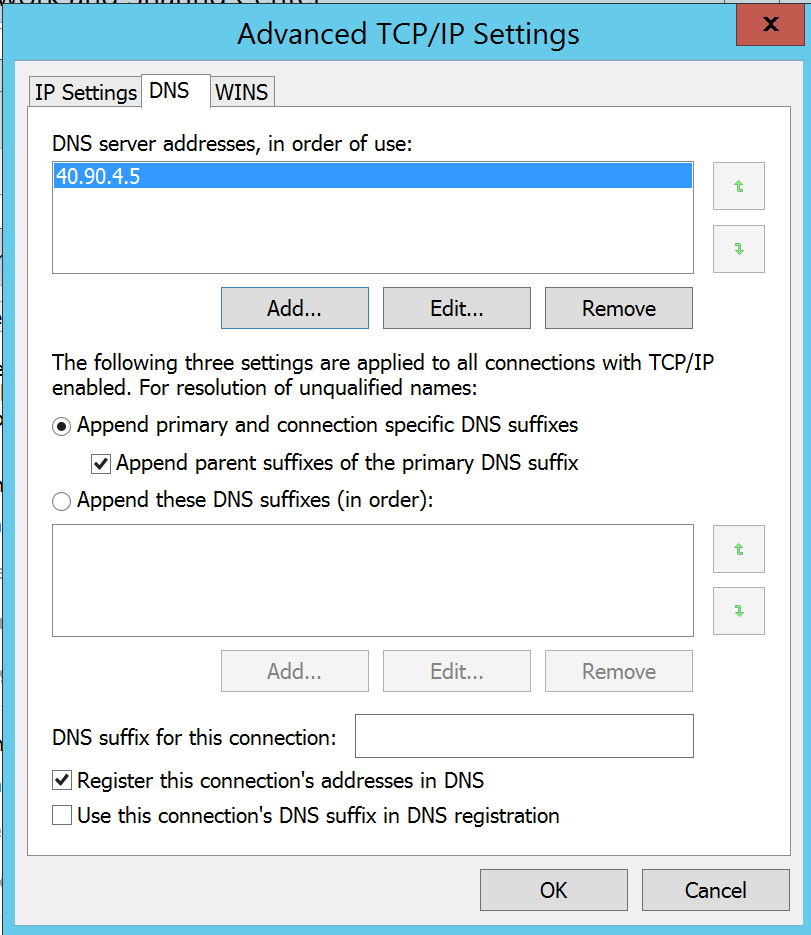
- For windows, this can be done via Control Panel -> Network to add the DNS name server (see below).
I also needed to disable IPv6 protocol otherwise browser was not able to resolve names.
After you click OK, you will lose your RDP session. Go to the Azure portal to restart the VM:
After reboot, you should be able to resolve the test.dnslab.com to the 10.0.0.5 address.
- For Linux, I used Ubuntu 14.04 LTS as an example.
First, the dns server name need to be added to the name server in /etc/resolv.conf. To do that, I added the server to the /etc/resolvconf/resolv.conf.d/head:
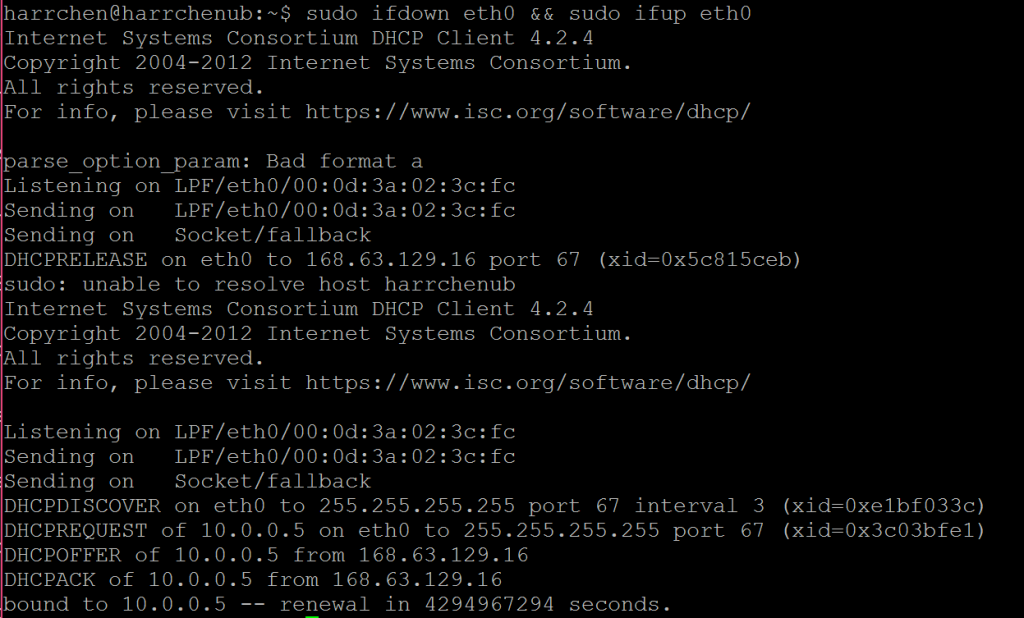
Then regenerate the resolv.conf file:
You can check the generated resolv.conf file and see that the name server is added:
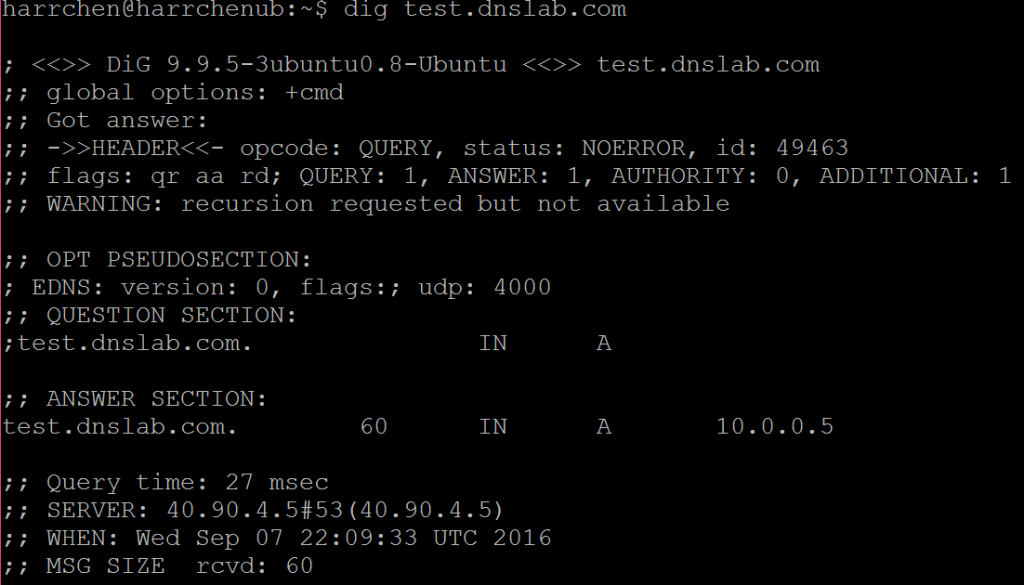
We now can test for name resolution:
Or access web page:
This blog is the result of collaboration with my teammate Anand Raman. I also wish to thank Paul Fox for his expert assistance.
Comments
- Anonymous
November 28, 2016
The comment has been removed
