Step by Step Apps for non coders – Publishing to the Store
Windows Phone App Studio gives you the ability to build an app in your browser without any coding.
NOTE: This tutorial is intended for developers who have completed an app with Windows Phone App Studio. If you are new to the tool you may want to visit our Windows Phone App Studio resources page for instructions to help you get started. It is recommended you complete that tutorial before continuing with this one!
Don’t forget apps published in Canada could earn you rewards through the Developer Movement
So you’re finished creating your app – congratulations! Now you can move on to publishing. This tutorial will show you how to capture the screenshots you’ll need to publish your app, and will show you how to publish your app in the Windows Phone Dev Center. In the previous tutorial we built an app for Manotick. This tutorial uses an app I created for Halifax, Nova Scotia, so the app will look different, but the steps will work for any app you’ve created.
NOTE: the images in this post are a bit small – a document with larger images is available for download here.
Let’s begin!
Generating the App Publishing Files
First, open up the app you want to publish in the Windows Phone App Studio browser. It doesn’t matter what page you’re on. Press the FINISH button, shown below:
This will take you to a page where you can GENERATE your app packages. You’ll notice that there is a section labelled “Previous versions” – currently this is blank, because this is the first version you have created.
When you click Generate, a pop up will appear that gives you two options. The left option will give you a publishable .XAP file that you can use to publish your app for Windows Phone 8.0. The right option is a preview of a feature currently being developed – it will give you three versions of a Windows 8 app and a demo on how to share code between Windows 8 and Windows Phone. This is still in preview, so if you don’t know how to code, do not select this option.
Once you’ve generated your app, you will see a version listed in the “Previous versions” section. Now, in the main body of the page, you will see three major options:
· Download package – choose this option if you want to download your app to your own phone only. This is useful if you want to use your app yourself without publishing to the store, or if you want to see how it works on your phone before publishing it.
· Download publish package – choose this option to go straight to publishing without changing your code or taking screenshots. If you do not have Visual Studio, this is the option you should take.
· Download source code – choose this option if you want to edit your code or take screenshots using an emulator.
Capturing Screenshots for Publishing
At this point, we are going to choose to download the source code, so we can use the emulator to take screenshots to publish with our app in the store. NOTE: if you do not have Visual Studio, download the free trial version HERE.
Once you select this option, you will see the following popup. Select Download and when prompted, select “Save and open” to view the files.
Then, extract the files to a place you can easily find them. I like to create a new folder in Visual Studio > Projects.
Once you’ve extracted it, double click on the solution (the only item that is not a folder, it should be labeled “App”) to open your app in Visual Studio. At this point you may get a popup asking if you trust the source – this is because you downloaded the file and didn’t create it on your own computer. No worries, just uncheck the box (because yes, we trust Windows phone App Studio) and press OK.
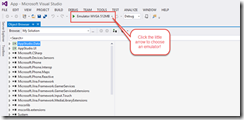
If you’re not familiar with Visual Studio, the solution will look like garbled text. Don’t worry, we’re just going to run the phone emulator to get screenshots! Click on the little drop down arrow to get a list of available emulators.
There are a few options. For the highest resolution screenshots, choose Emulator WXGA.
Once you’ve selected it, click on the green arrow. The emulator will take a little while to load, just be patient! You’ll notice that it displays way larger on your screen than the actual size of a phone. In my case, it’s larger than the height of my laptop screen – but that’s okay, we’ll use the screenshot tool within the emulator to get our screenshots. As shown below, click the double arrows on the emulator tool bar for more tools, where you’ll find the screenshot tool.
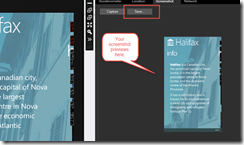
We’re going to take a few screenshots for our app, one for each page type. Simply navigate through your app so the emulator displays what you want to capture, then press the capture button as shown below.
Once you’ve captured a screenshot, check the preview to make sure you’re happy with it. Save and repeat until you have as many as you want!
Then go ahead and close the emulator, and close Visual Studio.
Publishing Your App
Before we head to the final steps, we need to download the .XAP file for your app. To do so, go back to the Generate page in Windows Phone App Studio and select “Download publish package”. Save this file to an easy-to-find place.
Now you have all the tools to publish your app! Next you need to create an Windows Phone Dev Center account. If you are a student, you can get one for free through DreamSpark. If not, you’ll have to pay a registration fee of $20. We won’t look at the exact steps in this tutorial, but you can create an account here!
Once you’ve registered and logged in to your account, go to the Dev Center home page and click on “Submit an App”.
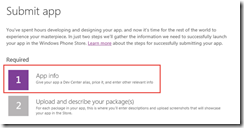
This button takes you to the publishing steps page, where you can see a list of required and optional steps. In this tutorial we’ll only do the two required steps. First, let’s do step 1, inputting app info.
Input all the basic info for your app. In this case, here is the data for the Halifax app:
We’re just going to go with a free version for this app, but if you want to add a price you’ll have to input your personal banking information so you can get your profits.
Selecting More Options will give you a bit more customization, but these only apply if you want to change your distribution channels or when it publishes. For most apps, these options can be left as default.
When you’re ready, press Save and you’ll be taken back to the Steps screen.
Next select Step 2 to upload your package.
This will take you to a page where you can upload your package. Remember the .XAP file we saved earlier? That’s the one! Select “Add new” to upload it. And when that’s done, click Save
Now it’s time to fill in the details about your app. What language? What version?
What does your app do? What subjects or topics does it relate to?
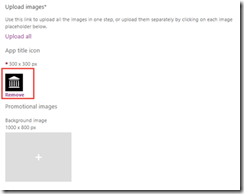
Next you have to upload the related images. Upload your app icon first, and make sure it is exactly 300px by 300px, otherwise it won’t upload properly. Add a promo image if you want, too.
Here’s where our screenshots come in handy! Select the + to add up to eight screenshots of your app.
When you’re ready, click Save at the bottom of the page. You’ll be brought back to the Steps page, where you can go through the optional steps if you want to add ads to your app, set the pricing options for different markets worldwide, or get the map token you need if you developed an app using a map. Since none of those features apply to this app, we’ll just click “Review and Submit” to go on to the last step!
Now, review your app details and, if you’re happy with it, press Submit! If you want to make changes, select “Go back and edit”.
Congratulations! You’ve now submitted your first app to the app store, without ever touching any code!


