Microsoft Intune and Apple Mac Management
The Microsoft Intune team recently announced the ability to enroll and manage the Apple Mac. I’m happy to say that the feature has been deployed as part of the recent Intune release. Today’s post will focus on Mac enrollment and management via Intune.
For details you can read more about the update and what management features are offered for Mac here: https://blogs.technet.com/b/microsoftintune/archive/2015/11/23/introducing-intune-support-for-mac-os-x-management.aspx & https://docs.microsoft.com/en-us/intune-user-help/enroll-your-device-in-intune-macos
Requirements
- A Mac running OS X 10.9 or later
- An Intune Subscription
- User(s) assigned an Intune license so they can enroll
UPDATED INFORMATION - May 2017
Let’s get started
On the Mac navigate to https://portal.manage.microsoft.com
Log in with an Azure Active Directory (Azure AD) user credential (someone who also has an Intune license assigned):
Notice the customization of the login page, this can all be changed via Azure Active Directory in the Azure portal.
Select “This device is either not enrolled or the Company Portal can’t identify it.”
Note: if you cancel out of the enrollment and go back later and don’t see the option to enroll, clear browsing history and close down Safari then reopen Safari, login, and the option should show up again.
Select “ENROLL” to begin the Intune enrollment process.
Select “Install” to install the Intune management profile.
Select “Show Profile” to view more about the profile being installed and select “Install” to continue with the installation. Depending on your settings you may be promoted to type in your Mac account password.
Another install prompt may appear, select “Show Profile” again to show the new information and rights being deployed. When finished reviewing, select “Continue” and “Install”.
Once the profiles are installed you’ll see a screen similar to the following:
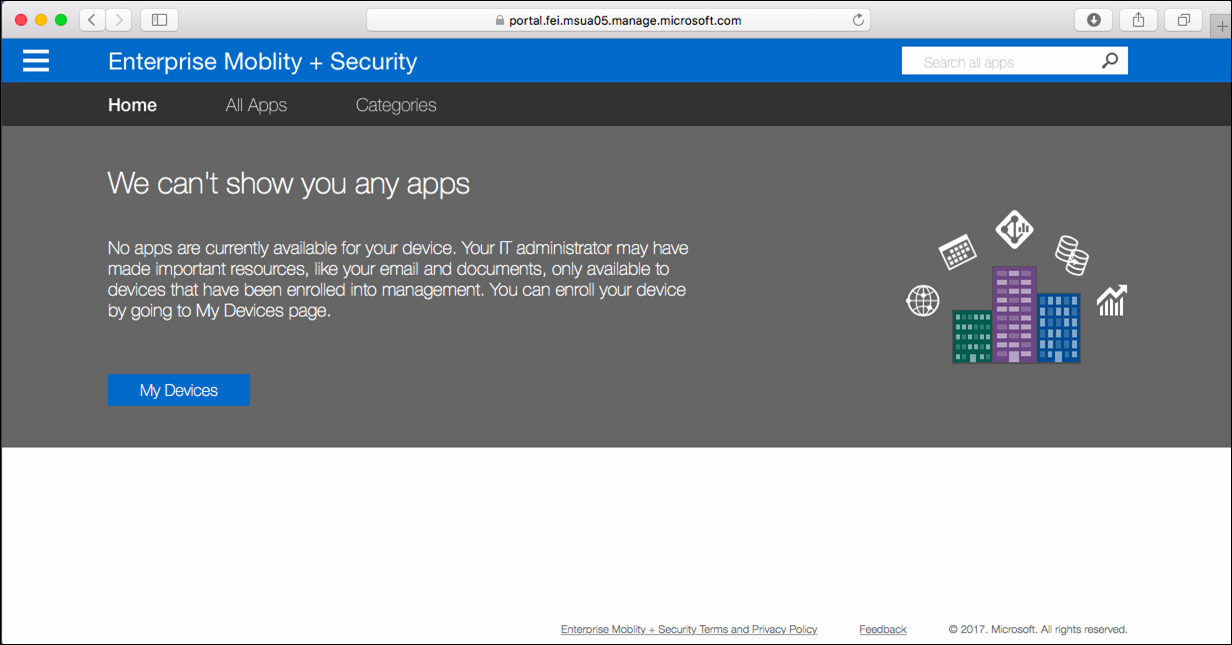
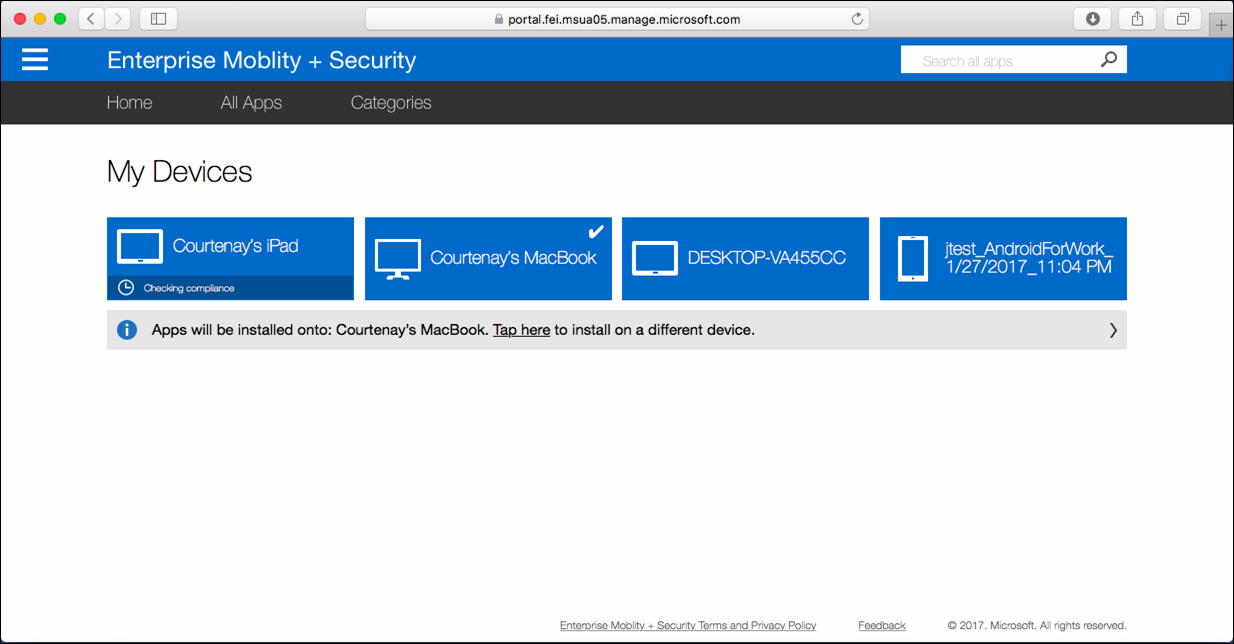
After installation is complete, the enrollment windows in Safari will remain open. Go ahead and close those out and refresh the page that has “My Devices” on it. After the reload is complete, the Mac will show up with a check box.
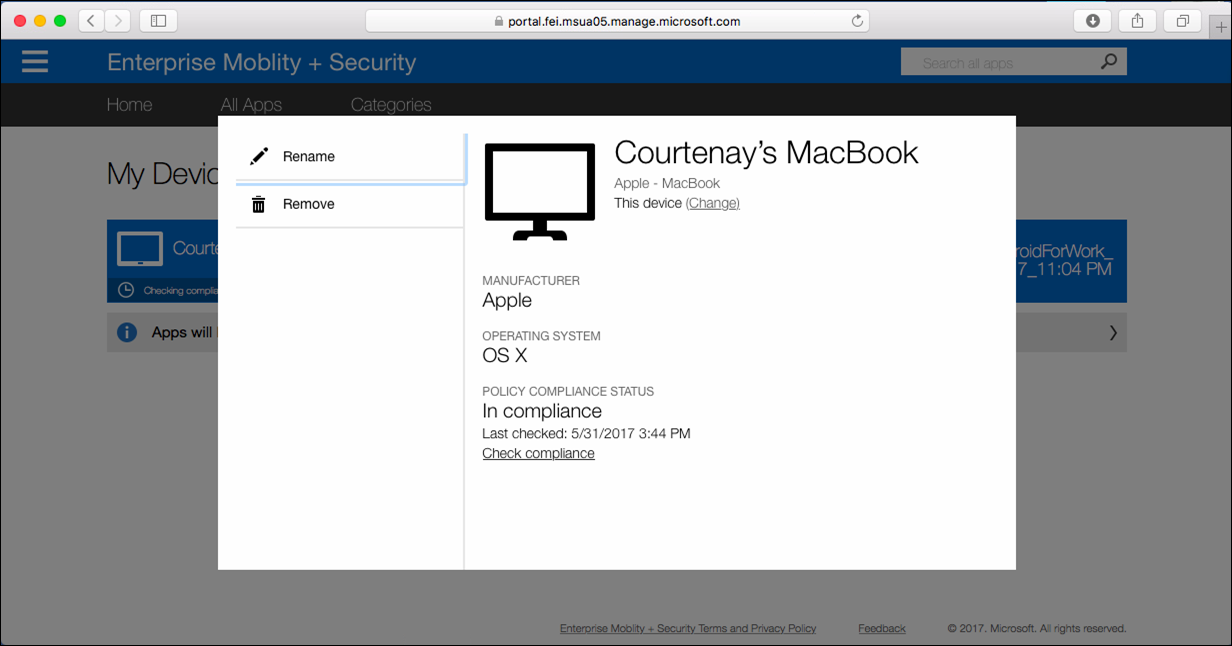
Select the Mac to view whether or not it’s in compliance:
Once Mac’s are enrolled they’ll download and apply policies whether created before or after enrollment.
Intune Mac Policies
Policies available for Mac in this release are as follows (more info: https://blogs.technet.com/b/microsoftintune/archive/2015/11/23/introducing-intune-support-for-mac-os-x-management.aspx):
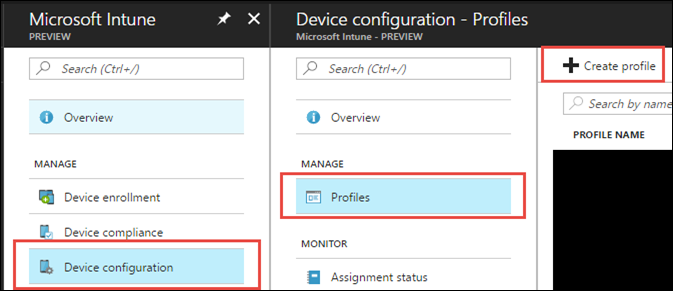
To set up a new Mac policy navigate to https://portal.azure.com select Intune –> Device configuration –> Profiles –> Create profile
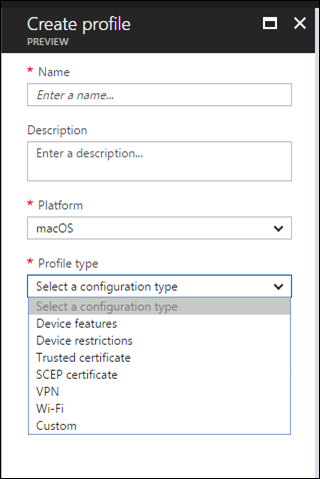
Select the type of Profile you’d like to deploy:
Overview of Mac OS X configuration policies with Intune: /en-us/intune-classic/deploy-use/mac-os-x-policy-settings-in-microsoft-intune
Note: for custom configuration you’ll need to utilize download and utilize Apple Configurator on a Mac: https://itunes.apple.com/us/app/apple-configurator-2/id1037126344?mt=12
Classic Intune Portal
In addition to the policies above Intune will track and report on Hardware and Software:
Need to deploy apps and go beyond Intune Mac management features? Have a look at Mac management with System Center Configuration Manager (SCCM).
- Mac app deployment with SCCM (Mac must be managed by the SCCM agent): https://technet.microsoft.com/en-us/library/jj687950.aspx (Intune only does not support app deployment to Macs yet)
- Here’s an older blog post but still relevant, that shows Mac management: https://blogs.technet.microsoft.com/pauljones/2013/06/02/managing-mac-os-x-with-system-center-2012-configuration-manager/
- Supported Mac OS versions for the SCCM client: https://technet.microsoft.com/library/gg682077.aspx#BKMK_SupConfigMacClientReq
Need to manage devices beyond Mac? Intune will manage Android, iOS, Windows Phone, and Windows as well. Read more here: https://technet.microsoft.com/en-us/library/jj676587.aspx
Keep an eye out for new Intune updates here: https://blogs.technet.com/b/microsoftintune/default.aspx


