DevOps Basics: Deploying Azure Resource Manager Templates with Visual Studio Team Services
When you are using Azure, you are consuming resources. For example, when you want to deploy one virtual machine, in fact you also need one storage account to store the virtual hard disk on it, one network interface to have an internal IP, etc… It’s the concept of Azure Resource Manager (ARM).
Azure Resource Manager is like a lego box, and you can build your environments on it.
So now, imagine you are developing an application, a website or a simple script, and the result of this development will be deployed on Azure or you simply want to test it on a brand new environment. The concept will be to prepare your destination on Azure : a WebApp + SQL or a Virtual Machine, etc…
In this mindset, you don’t want to manually recreate everytime your environment through the portal, right ?
One of the concepts about DevOps is automation. When you’re using Azure and want automate your resources deployment, the best practices will be to use an ARM Template with all your Azure resources already configured : VM Size, DNS name, IP, etc… To do that you need to create a JSON file.
This concept’s name is : Insfrastructure as Code (IaC).
The best way to train yourself on ARM and see how it looks like, is to clone the Azure Quickstart Templates : https://github.com/Azure/azure-quickstart-templates and read this previous article : DevOps Basics: Infrastructure as Code – ARM Templates
After this quick introduction, let’s see how to automatically deploy an ARM template on an Azure Subscription. Like I said, in a development flow, at high level we have : CODE + TEST + DEPLOY
I’ll use this basic ARM template : https://github.com/Azure/azure-quickstart-templates/tree/master/101-vm-simple-windows
I’ll use Visual Studio Team Services (VSTS) as a repository. I’ll create a project, push my template, and automatically deploy the content of this template on an Azure Subscription. Also, every time I will update this template, I will also want to update my resources on Azure.
A complete walkthrough of the steps below can be viewed here :
Prepare our local Git repo
1.First of all, we need to clone the Azure Quickstart Templates.
To do that, I browse my folder “demo” in the "C:\Data" folder and run this git command:
"Git clone https://github.com/Azure/azure-quickstart-templates"
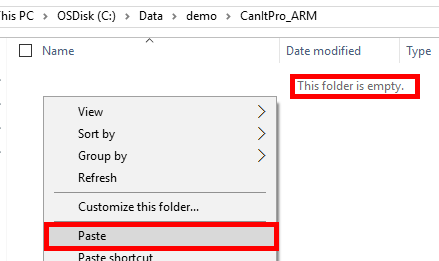
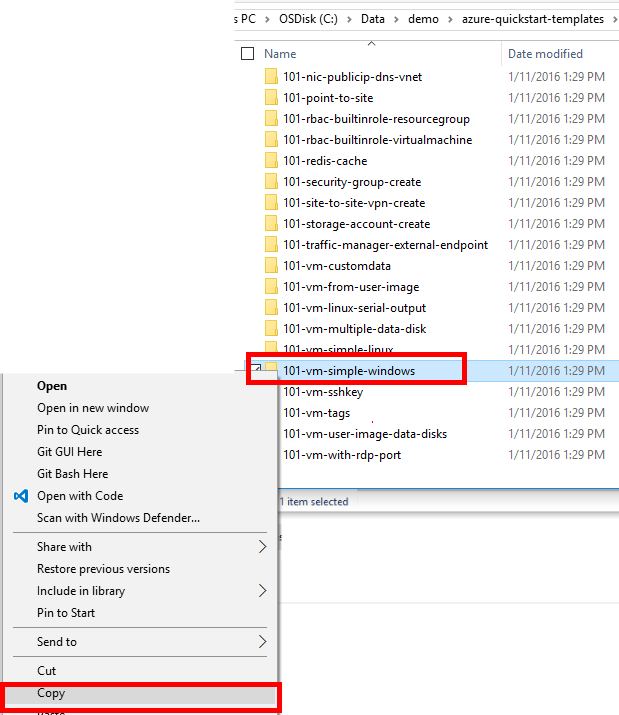
2. After that, I will simply copy the 101-vm-simple-windows folder and paste it in a new empty folder C:\Data\demo\CanItPro_ARM
So here I simply clone the Microsoft’s repo, copy one folder with my configuration and paste it in a new folder.
3. Now we need to initiate our folder as a Git Project with the following git command :
"Git init"
At this time, we have a local repository with one ARM template from Microsoft but it can be your custom one.
Now, it’s time to play with Visual Studio Team Services.
Visual Studio Team Services – Create a project
If you are not familiar with VSTS or TFS, I highly recommend you to start by looking on it! It can be the heart of your automatization in terms of deployment. It is also important to notice that VSTS / TFS is not only a tool for the developer! Indeed, like I do in this article, it can be used by the ops team to deploy some environments in Azure, scripts, or launch some Load Test for example.
If you don’t have a VSTS account, it is very easy to get one; it is free and it will take you 1 minute to create one.
Just go here and follow the instructions: https://www.visualstudio.com/products/visual-studio-team-services-vs
Let’s prepare our environment.
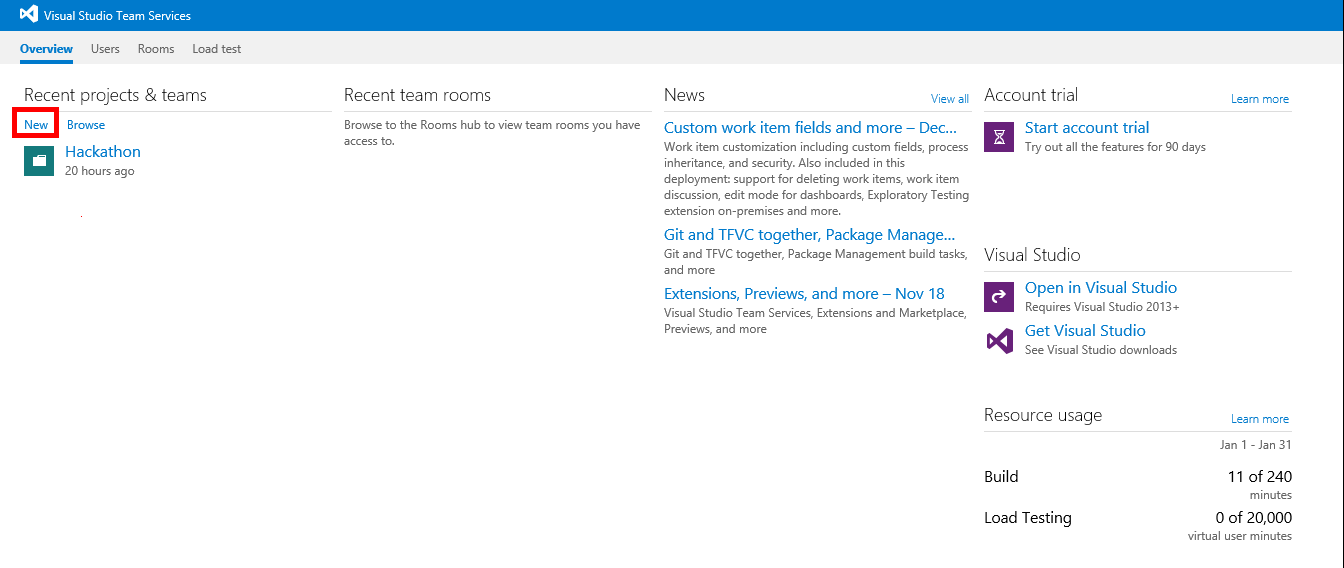
1. First we need to create our project on VSTS. Search for the New link in the “Recent projects & teams” section :
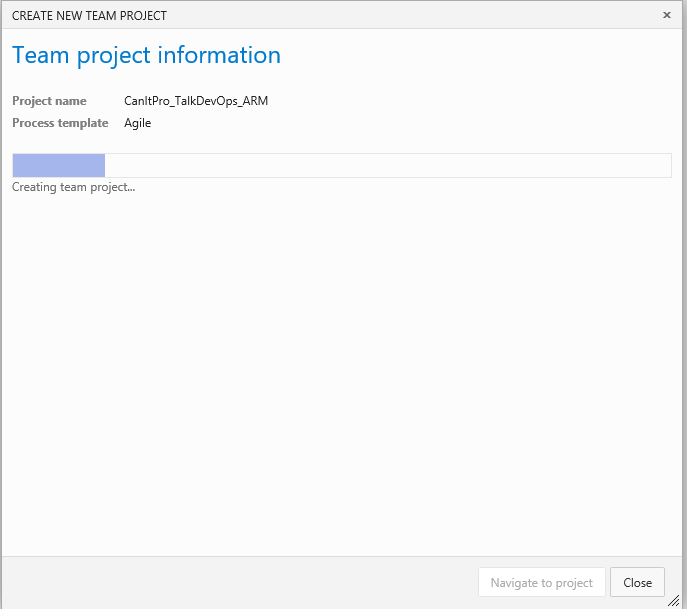
2. Name your project and choose Agile as Process template and Git as Version Control, and then click on “Create Project”
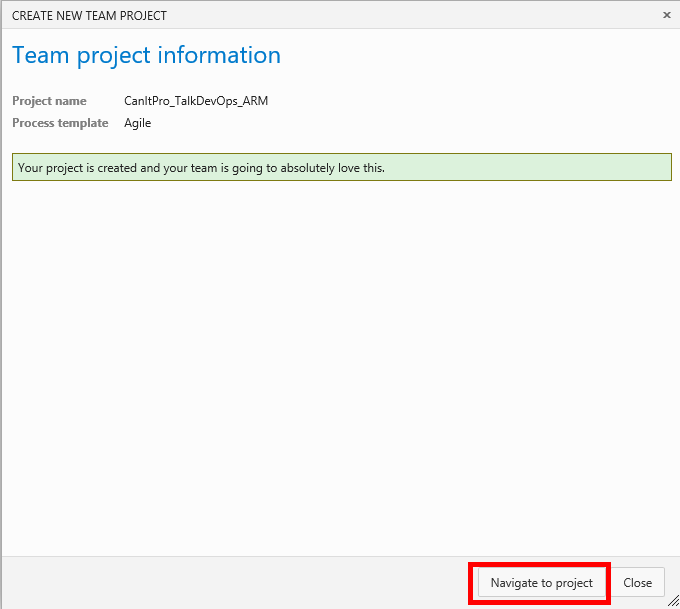
After a few seconds, your project is ready.
3. Click on “Navigate to project”
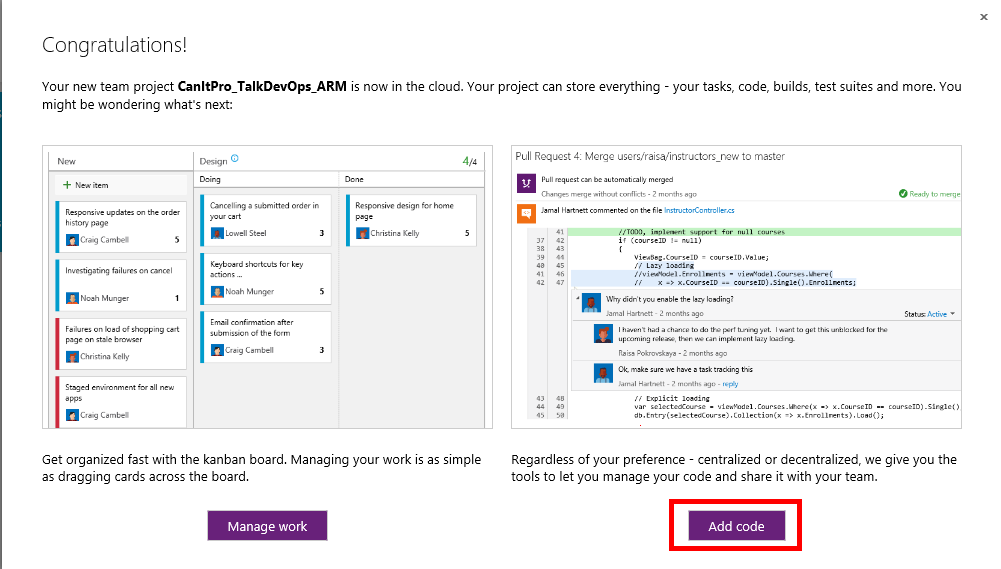
4. The next step is to push your local repository on this site, for that click on “Add code” in the “Congratulations!” page :
Visual Studio Team Services – Push our code in a remote repo
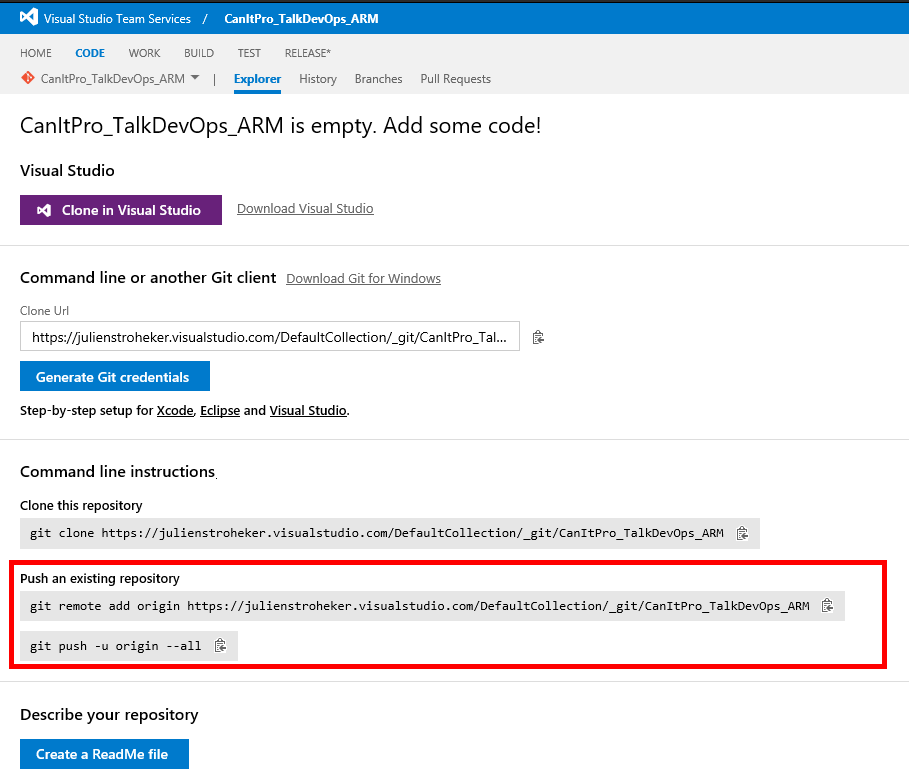
VSTS explains to us how to “Add some code!”.
1. It is very simple, we just need to run the command line instructions directly from the our local repository :
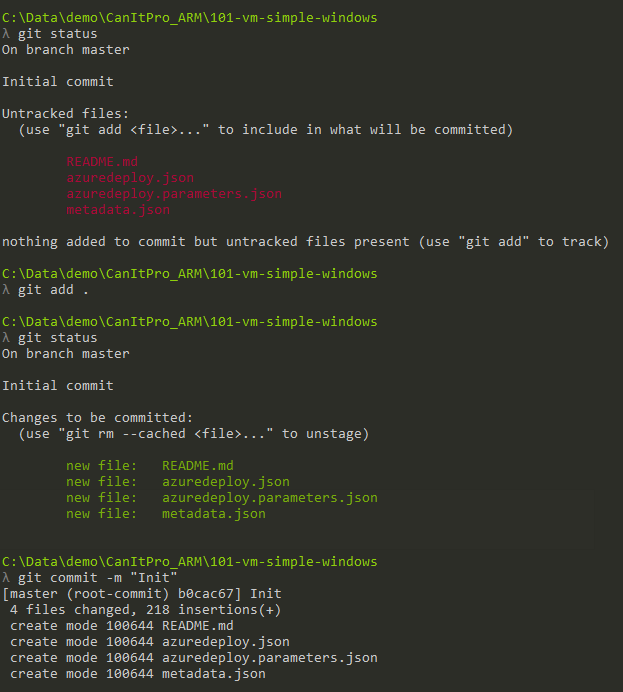
So, back to our command line. We can check the “status” of our local repository thanks to the git command “git status” .
2. In our case, git, lists our untracked files (in red), so we need to add them in our repo thanks to this git command : “git add .”
3. Finally, we send our first commit thanks to “git commit -m “Init"
After that, we can run this two command from VSTS
4. “git remote add origin https://XXXXXXX.visualstudio.com/DefaultCollection/\_git/YYYYYY”
5. “git push -u origin –all”
6. You will have an authentication form to validate your credentials on VSTS
If everything works fine you should have something like that :
7. You can refresh the “Code” page from VSTS and see your repository:
Visual Studio Team Services – Edit your code online
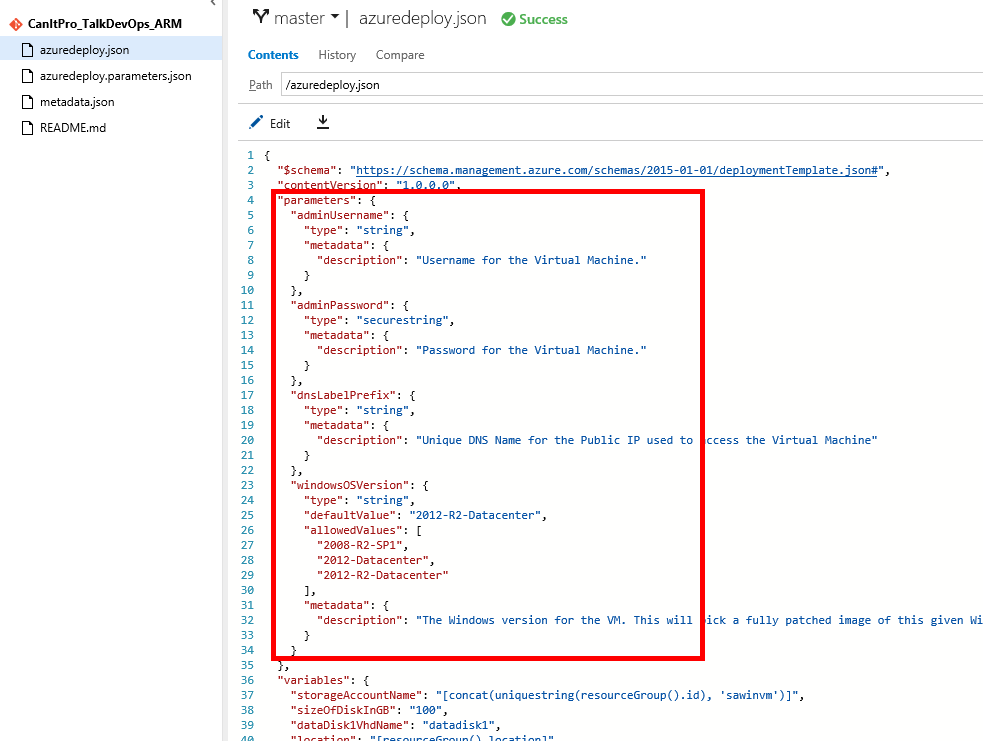
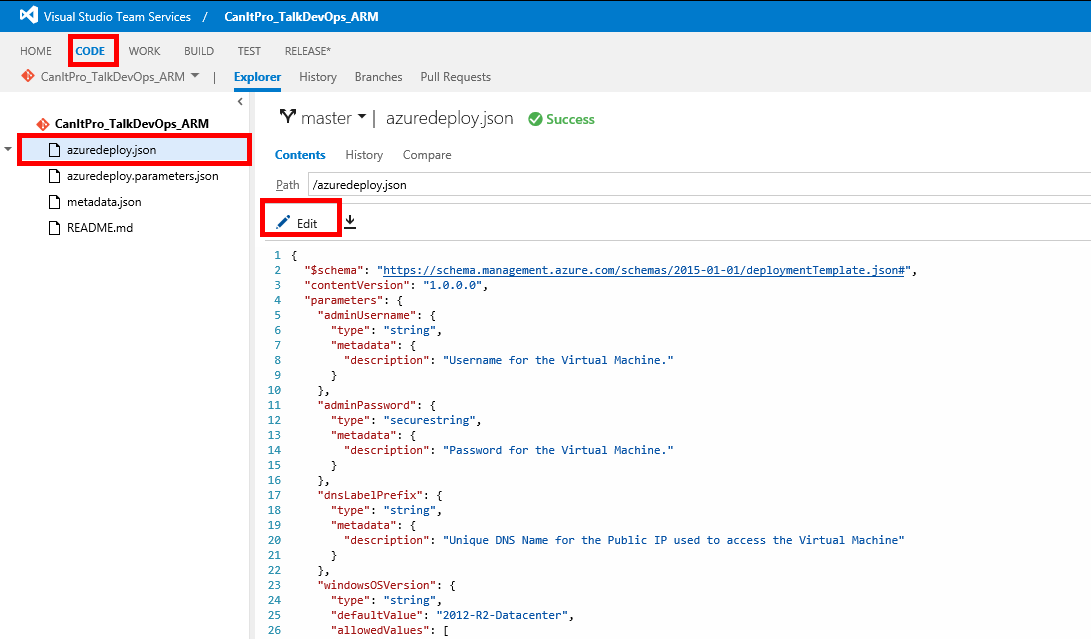
1. Now just click on azuredeploy.json to see our ARM template :
As we can see, we have 3 parameters plus one with a defaultValue (2012-R2-Datacenter)
That means, to use this template, Azure will wait to have these three values from us. That is why we have another file named: azuredeployparameters.json
2. Click on this file, and select “Edit” to change the values inside of it:
3. As we can see, we have our three values required to run this template. For this example, I will use the following settings:
- adminUsername (local administrator login) : CANITPRODEMO
- adminPassword (local administrator password) : CANITPRODEMO123!
- dnsLabelPrefix (DNS name for the VIP : xxxxx.DCLOCATION.cloudapp.azure.com) : canitpro123 (miniscule is important)
4. When we are done, we click on save (We can have a custom comment to justify this edition)
Visual Studio Team Services – Create a build definition
Our template is now ready to be deployed, the next step will be to create a build definition.
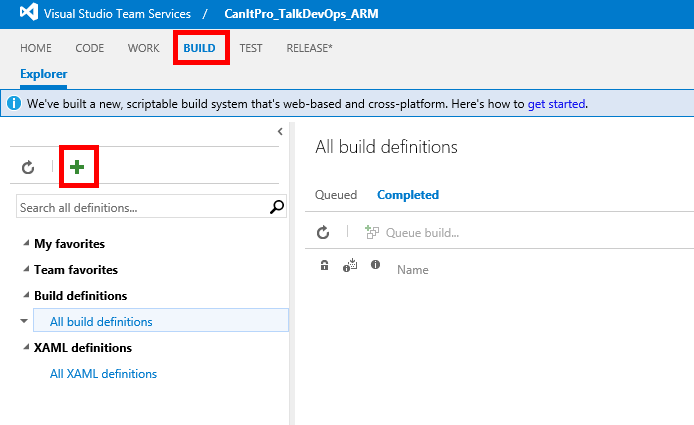
1. To do that click on the “build” tab, and choose “Create New Build Definition” :
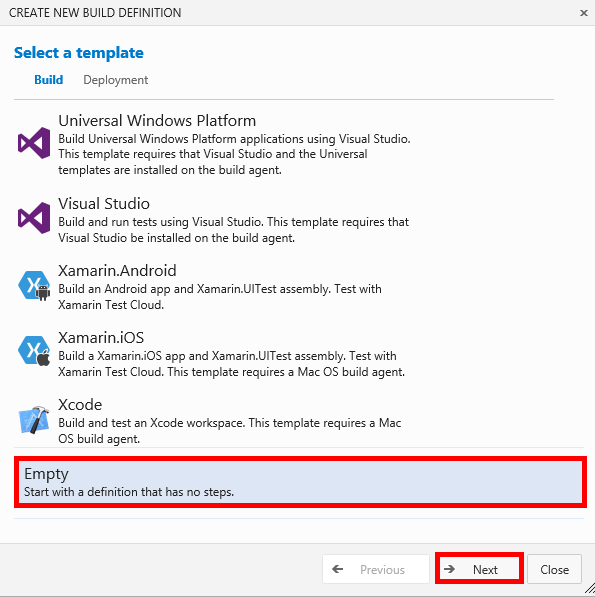
2. Choose an “Empty” template and then “Next” :
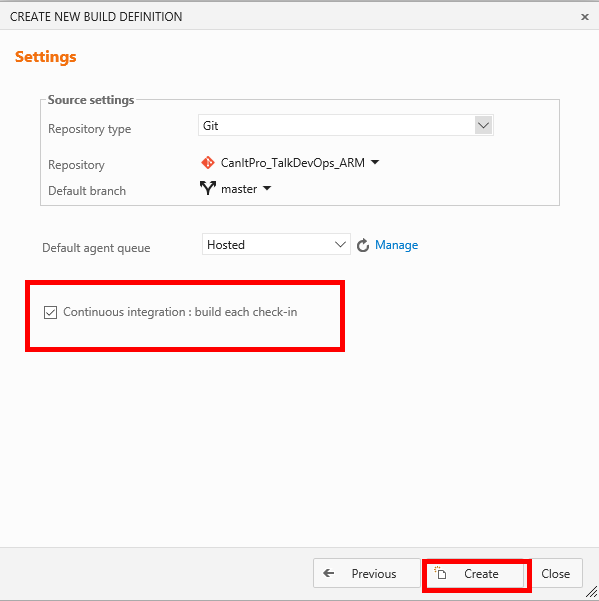
3. Tick “Continuous integration” and be sure the “Source settings” make sense :
NOTE : Continuous integration means that for each modifications of our code (.json files for examples) all the steps of this build will be executed.
4. Select “Add build step”
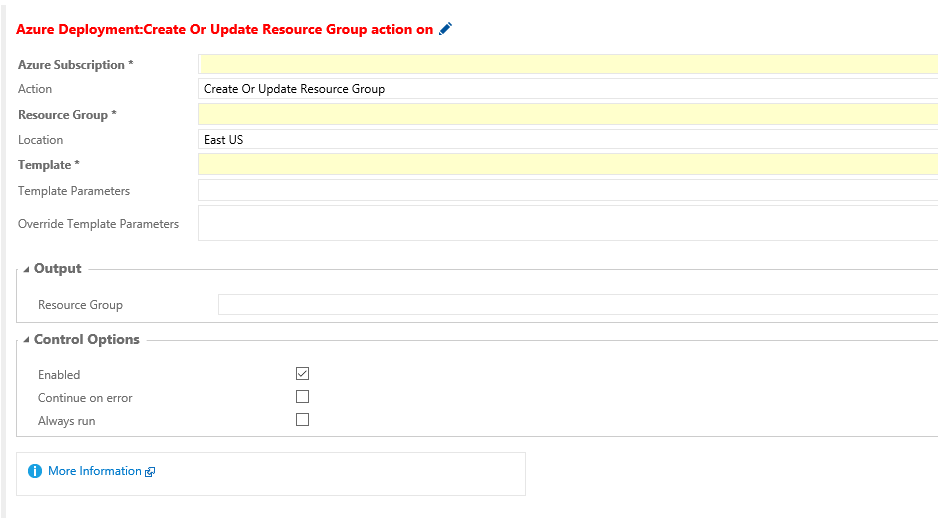
5. From the “Deploy” section, choose “Azure Resource Group Deployment”, click on “Add” and then “Close”
6. You should have something like this :
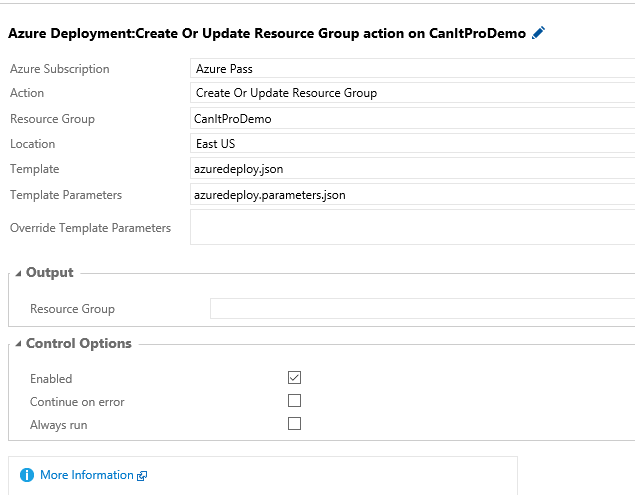
7. Fill the following elements :
- Azure Subscription : Choose one of your Azure EndPoint (If you want to know how to add your Azure Subscription click here)
- Action : Create Or Update Resource Group
- Resource Group : The name of your Resource Group in your Azure Subscription
- Location : Azure Data center location to deploy our Resource Group
- Template : Click on the three point box and choose your azuredeploy.json file
- Template Parameters : Click on the three points box and choose your azuredeployparameters.json
8. You should have something like this :
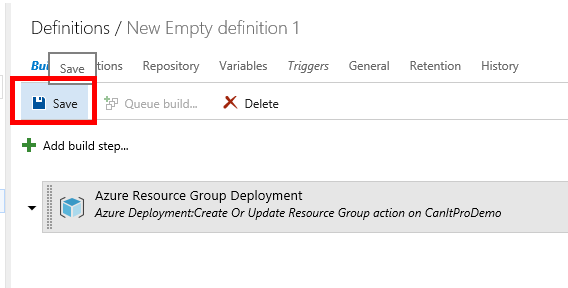
9. Click on the Save button :
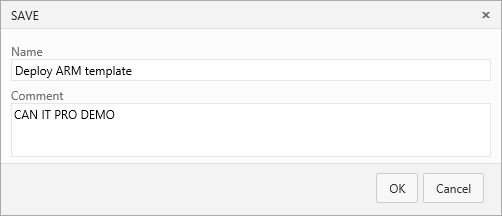
10. Name this build definition:
Next step, we will test our deployment and run our build.
11. To do that simply click on “Queue build..” to strat this build sequence
12. Click on OK :
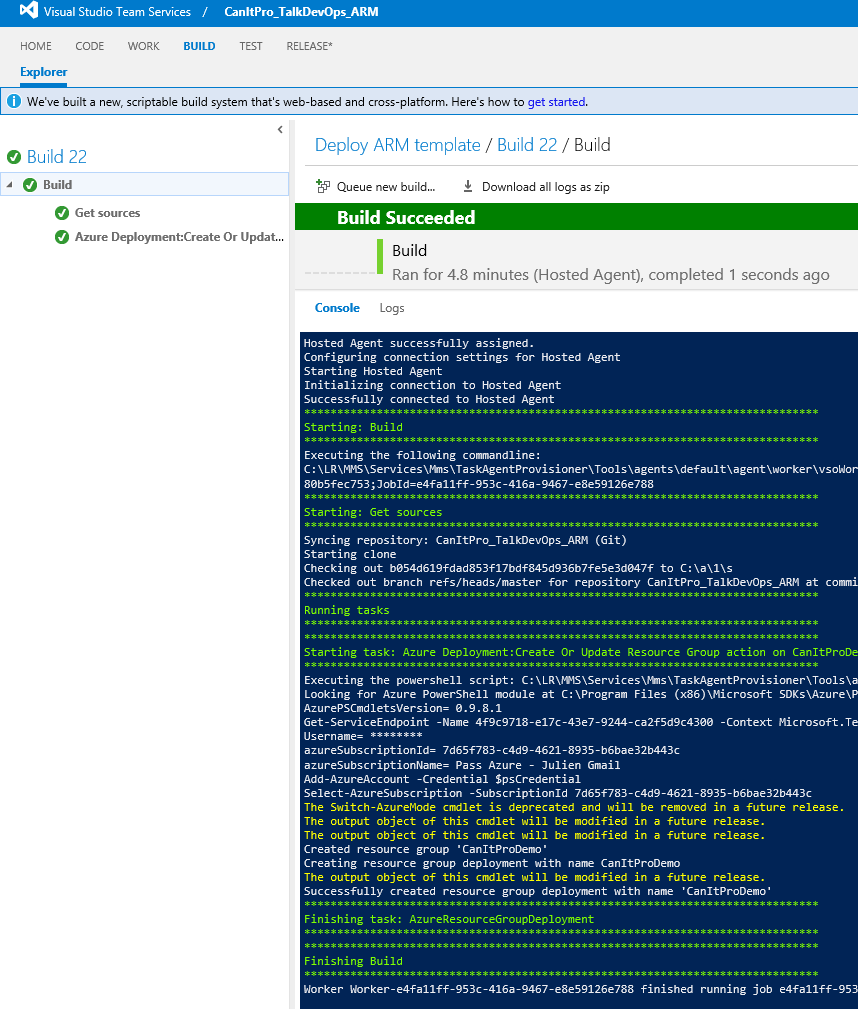
13. It will redirect you to the build process to follow the live deployment of this build :
14. If you have a successful build like me, we can now check on the Azure side if we have our resource group with all our elements inside :
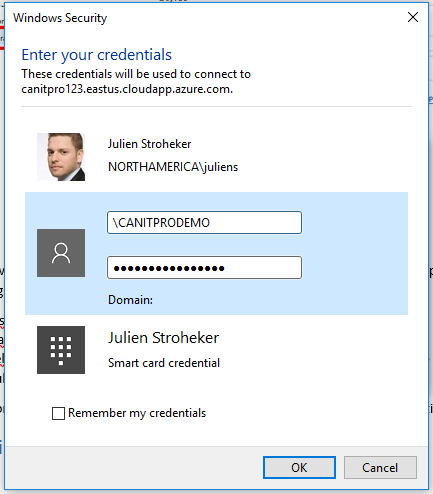
15. Last check : initate a RDP connexion on the virtual machine to validate our credentials and the dns name previously provided; in my example : canitpro123.eastus.cloudapp.azure.com
Updating our template with the continuous integration
With this configuration, you can deploy a brand new environment on each modification of your application or you can simply update your resources without removing everything.
We can simply test the editing our ARM template for example.
1. Go back on the “Code” section and edit the azuredeploy.json file by clicking on Edit :
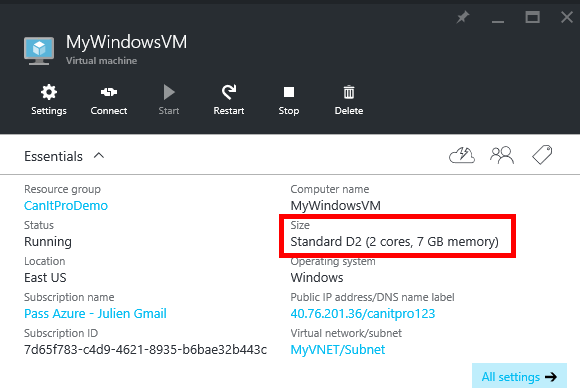
2. Next, change the vmSize from D1 to D2, add a comment to your edition and click on save :
You should have a “Committed” notification on the same page.
3. Go on the “Build” section, and in the “Queued” tab in your “All build definitions”, you should see a build process lunched :
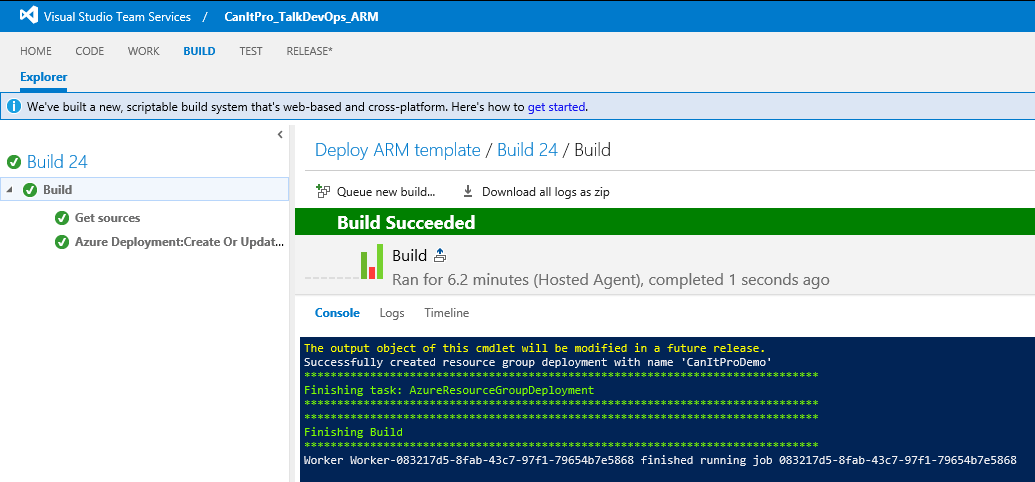
4. Double click on it to see the logs, and wait for the “Build Succeeded” message like this :
5. After few minutes completed, go back on your Azure Resource group to see if your updates are applied :
You can try to relaunch a RDP session on this VM; it should be working with the same credentials.
Here, it is important to know the concept of continuous integration. We just editied our ARM template and commited our change. VSTS trigged our modification and launched our build definition. It checked if our ARM template is already there in Azure. In our example, it only apply the change on it, indeed we just changed the vmSize, so it did not remove all the resources but just changed the settings on the VM. We can also force to remove and redeploy everything every time…
Just think about the time we just saved here ;)
Hope you enjoyed this step by step.
If you want to follow the conversation on DevOps, follow #TalkDevOps on Twitter.
Thanks
Julien Stroheker

