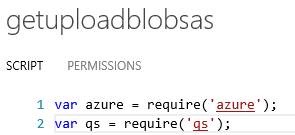
How to upload Node Packages to Azure Mobile Services
Node.js applications uses packages to add functionality
You can think of these as libraries
The goal of this post is to show you how to upload these packages up to Azure Mobile Services so that you can give your node code more power
This post is about adding QueryString to Azure Mobile Services.
Related Posts
DOWNLOAD THE GIT CLIENT FOR WINDOWS
You will need a GIT client.
Git is a distributed revision control and source code management (SCM) system with an emphasis on speed.
Git was initially designed and developed by Linus Torvalds for Linux kernel development in 2005.
We will need Git in order to be able to add node packages to Azure mobile services
Figure 1: Downloading the Windows Git Client
You can download it here: https://git-scm.com/download/win
Once you install, consider a reboot.
DOWNLOADING THE NODE.JS APPLICATION FROM AZURE MOBILE SERVICES
Your first goal is to download the Node.js code and packages down to your local machine
You will then modify the package package.json, which contains a list of packages that need to be installed into Azure Mobile Services.
You can't just copy packages directly. You must use Git to copy packages Azure mobile services
GETTING THE GIT ENDPOINT FROM AZURE MOBILE SERVICES
Azure Mobile Services directly supports git.
Navigate to the Azure Portal
Select Mobile Services
Select the CONFIGURE menu
Figure 2: Getting to the Git URL from Azure Mobile Services
COPY THE URL TO THE CLIPBOARD
Once you copy the url to the clipboard, proceed to the next step.
OPENING A COMMAND PROMPT
You will need to open a command prompt
Type in git clone [ your git url from the
Figure 3: Cloning the repository to your local computer
VIEWING THE RESULTS
You will need to provide a user name and password
Figure 4: What your screen should look like
Now if you take a look at the c:\IoT folder (the one I am using), you will see the following:
Figure 5: Viewing the folder structure of the cloned repository
Now navigate to the raspberrypiservice folder. Yours will be different. You defined it when you created your Azure Mobile Service.
Navigate into the service folder and view the files
Figure 6: Moving to the service folder (to see package.json)
You can see the package.json file.
This is the key file to edit.
MODIFY THE PACKAGE.JSON FILE
Now you will need to modify the package.json file to include new node packages.
For example purposes, we will include the packages qs (QueryString)
- QS is a query string parser for node and the browser supporting nesting
WHAT PACKAGE.JSON LOOKS LIKE
We need to modify the dependencies section of package.json.
We will add qs there
Figure 7: Viewing the package.json file
HERE IS THE FINISHED PRODUCT
- Save and close the package.json
Commit the changes
You will need to commit the changes before you push them up to the portal.
The command is, git commit .
Figure 9: Commiting the changes
You will be asked to enter in a commit comment. Seen in yellow below.
Figure 10: Adding a comment for the changes
In the editor VI, you w ill hit w follow ed by q .
PUSHING OUR CHANGES BACK UP TO AZURE MOBILE SERVICES
Now we will push our changes upstream.
The command for this is simple: git push [remote-name] [branch-name] .
But we want to push our master branch to the origin server (Azure Mobile Services)
We will push our work back up to Azure Mobile Services with this command:
- $ git push origin master
Figure 11: Pushing the changes back up to Azure Mobile Services
MISSION ACCOMPLISHED OF THE NODE PACKAGE ADDED TO AZURE MOBILE SERVICES
We completed what we set out to do
We have added the node package qs to our Azure Mobile Services


