How can you change your default Azure AD in your subscription?
There is now a new way to change your default Azure AD in your subscription. I ran into a few gotchas so I documented them below.
Why would you need to change your default Azure AD for your Azure subscription?
You might have setup your Azure subscription with the wrong Azure AD and need to switch. A common scenario I have seen is you unknowingly use your Microsoft account (joe@hotmail.com) rather than an OrgID (joe@contoso.edu) to setup the subscription and it creates a strange default Azure AD with your Hotmail name which you do not want as a default. Another common scenario is merger or divestiture and you need to switch the default Azure AD for the subscription.
Prerequisites to changing your Azure AD in your subscription
Step 1: Very Important: Make sure the ‘Service Administrator’ for the subscription is a user that is associated with the new Azure AD. If you skip this step it will create some challenges when you log into the new subscription with the new Azure AD users as it won’t list the subscription under that new Azure AD context under ‘subscriptions’
To check to go to https://ea.azure.com and check who is the current ‘Service Administrator’ for the subscription.
1a - To view ‘Service Administrator’, in the EA portal – go ‘Manage’ and ‘Subscription’ and view the Account name – if the user is a Microsoft Account or a user from the OLD Azure AD it must be changed first. If this is not changed you will not be able to manage the Azure subscription properly from any account after you change the default Azure AD.
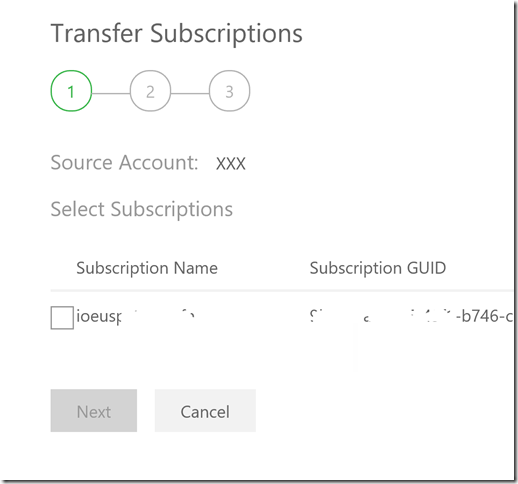
1b – To change the ‘Service Administrator’, in the EA portal, go to ‘Manage’ and ‘Account’ and hover over the account name you need to change from. You will see four icons and you want to select the last icon is called ‘Transfer subscription’. You will want to transfer this subscription to a user that is a valid user in the new Azure AD you want to switch the subscription to (e.g. joe@contoso.edu).
Switching the default Azure AD for the Azure subscription
The new process is fairly straight forward:
Step 1: Log into Azure portal at https://portal.azure.com
Step 2: Click on ‘Subscriptions’
Step 3: Click on the subscription you want to change Azure AD on
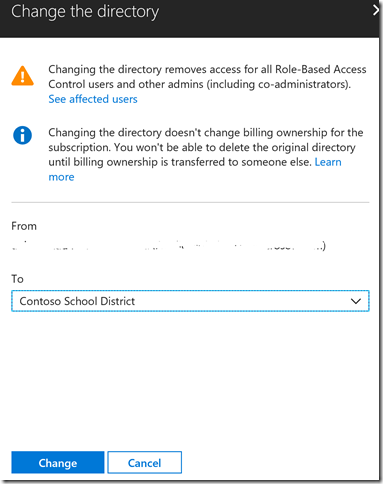
Step 4: Click on ‘Change directory’
Step 5: Select the new target Azure AD you want to change to
Step 6a: Click ‘Change’ and wait about 10 minutes for the change to take hold
Step 6b: Important step: Note: changing your default Azure AD will remove any Subscription owners from the subscription so you will have to re-add Subscription owners and you can use the ‘Service administrator’ account you added in the previous steps and add in any Azure AD users from the new Azure AD (e.g. joe@contoso.edu) as Subscription owner
Step 7: Close all browsers to kill sessions and then log into https://portal.azure.com with NEW Azure AD credentials from new Azure AD default you switched to (e.g. joe@contoso.edu)
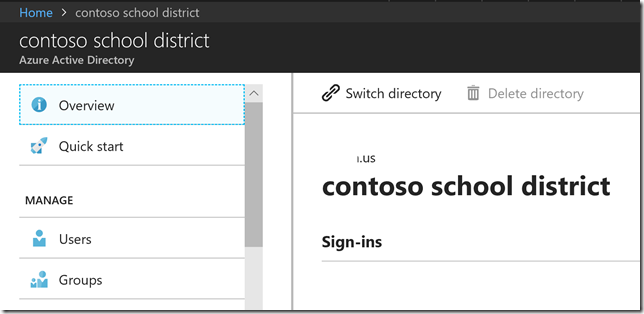
Step 8: Validate the new Azure AD is default – in the Azure portal go to ‘Azure Active Directory’ and the default Azure AD for that subscription should be the new one you have just switched to:
See official documentation here
Comments
- Anonymous
February 17, 2018
Very useful post, this is a common question from customers, thanks!


