Using the updated Desktop App Converter to manually convert a desktop application
In one of the first blog posts of the series we’ve learned how the Desktop App Converter is a great tool when it comes to convert a desktop application for which you already have an existing installer. But if you’re starting from an application without an installer or your own project, you have to switch to manual deployment, either with copy & paste, with the help of Visual Studio 2017 and the Desktop Bridge Debugging Project or with the new approach based on the WinJS project.
However, in all these cases, the initial setup of the project is always quite repetitive and, 99% of the times, you must:
- Manually create the folder with the files required by an app package, like the assets, the executable with its dependencies, the manifest file, etc.
- Look on the web for an example of an AppxManifest.xml file related to a Desktop Bridge app to copy and paste, since it’s quite different from the standard one generated for an UWP app and it’s almost impossible to remember every change to apply, and then adapt it to your scenario (like setting the proper publisher, app name, app executable path, etc.)
- If you have added assets which support all the Windows scaling factors, you will have to manually generate the various resources.pri files, as explained in the official documentation.
Since a few days, there’s a new option on the shelf: on 6th March the Desktop Bridge team has released on the Store version 1.0.9.0 of the Desktop App Converter, which has added a new super useful feature. Now you can point the tool not to an installer, but to a folder that contains your application (the executable and all its dependencies) and the tool will take care of:
- Generating the basic folder for your app package.
- Adding a proper manifest file with all the correct information already in place, based on the parameters you have passed to the tool.
- Extract the main icon of the app and generate all the assets for all the various scale factors supported by Windows, including the resource.pri files which are required to make them working. This feature isn’t specific of the manual conversion, but it has been previously added in version 1.0.6.0 of the tool and it works also with regular installers.
Additionally, like with a regular installer, you have also the option to pass to the Desktop App Converter the –MakeAppx and –Sign parameters and let it generate a signed app package that you can easily side load on your or others’ computer, prior to having installed the auto-generated.cer certificate which is generated during the process.
How can you leverage this new feature? First, you have to make sure you have the last version of the Desktop App Converter, which you can get from the Store. Then, the usage is the same with a regular installer (so you can refer to the original blog post to learn all the details), except for two parameters:
- The –Installer parameter shouldn’t point to the path of a setup file, but to the folder which contains all the files of the application you want to manually convert.
- Since, this time, you don’t have an installer, the Desktop App Converter isn’t able to automatically understand which is the main executable of your app, so you will have to manually specify it with the –AppExecutable parameter.
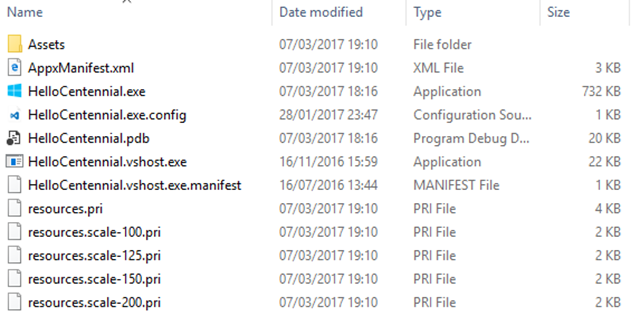
Let’s reuse the sample app I have on my GitHub repository (https://github.com/qmatteoq/DesktopBridge/tree/master/1.%20Desktop%20App%20Converter/HelloCentennial) and let’s say that you have placed all the files of your application in a folder called HelloCentennial stored on your desktop. The folder would have the following content:
In a real world scenario, you would need to include just the executable and its dependencies, like a third party DLL; here I’m just showing how, if you want, you can just pass to the Desktop App Converter the output folder of the build made by Visual Studio for the traditional desktop project and it would just work.
As you can see, the main process to launch is the executable called HelloCentennial.exe. Here is the command that we can execute in order to get our app converted in a manual way:
DesktopAppConverter.exe -Installer "C:\Users\mpagani\Desktop\HelloCentennial\" -AppExecutable "HelloCentennial.exe" -Destination "C:\Users\mpagani\Desktop\AppOutput" -PackageName "HelloCentennial" -Publisher "CN=mpagani" -Version "1.0.0.0" -MakeAppx -Sign -Verbose
As you can see:
- The –Installer parameter doesn’t point to a MSI or EXE file, but to the directory on the desktop we’ve seen in the previous image.
- We have manually specified that the main process to launch is the HelloCentennial.exe one with the –AppExecutable parameter.
Except for these two changes, everything else is exactly like we’ve seen in the original post about using the Desktop App Converter.
When you run this command, you’ll notice that the tool will be much quicker than when it needs to process a traditional installer: the reason is that it will simply take care of generating the missing files and structuring the folder in the proper way, it won’t have to create a Windows container, launch the installation inside it and capture all the changes. Another consequence of this different approach is that, unlike when you work with a regular installer, you can use the Desktop App Converter without having to setup a base image, since there won’t be any Windows Container involved in the process.
Also the output will be the same, as you can see from the following images. This is the main root, which contains the original app folder (the PackageFiles one) and, since we have specified both the –Makeappx and –Sign parameters, it contains also an AppX package ready to be manually installed, together with the certificates used to sign it:
This is, instead, the content of the PackageFiles folder, the one you need to edit in case you want to make some changes to the original application. As you can see, the tool has automatically generated for us the resources.pri file, plus a specific resource file for each of the most important scaling factors supported by Windows 10.
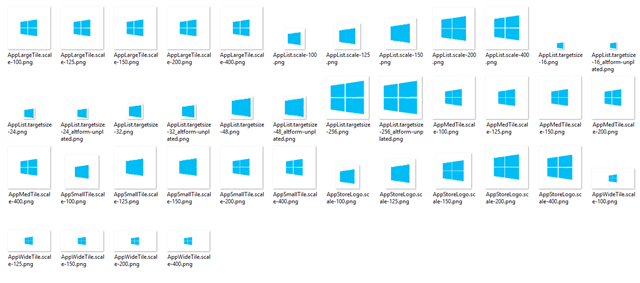
This is, instead, the content of the Assets folder: as you can see, the Desktop App Converter has automatically extracted the icon from the main executable HelloCentennial.exe and it has generated all the various images for all the main scaling factors .
In the end, if you open the AppxManifest.xml file with a text editor, you will notice that everything has been properly configured in the right way: from the runFullTrust capability to the correct paths for the various assets or the list of supported scaling factors.
Check if the converted app satisfies all the Desktop Bridge requirements
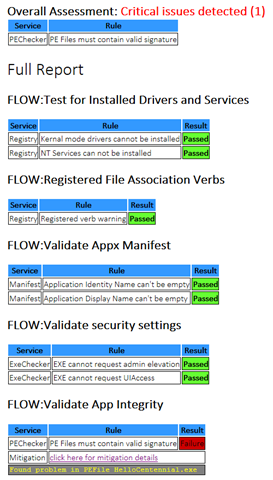
The 1.0.9.0 version of the tool has added also a new parameter, called –Verify, which runs a set of tests that validates if the converted app satisfies all the requirements that a Desktop Bridge app must respect. This parameter, of course, isn’t specific of manual conversion: it can be used also with traditional installers. When you add this parameter, you will notice that, at the end of the conversion, the tool will start a batch of tests and then it will generate, in the output folder, a file called VerifyReport.xml. If you open it with a web browser, you will see a list of all the tests that have been executed with a Passed label if everything is ok or a Failure label if the test has failed.
The tests that are performed are:
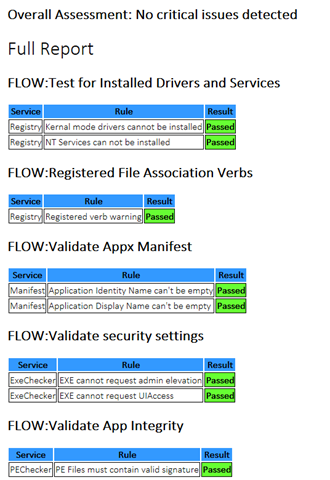
- Test for Installed Drivers and Services: it checks if the application tries to install any driver or Windows service.
- Registered File Association Verbs: traditional desktop apps can integrate in File Explorer (for example, by associating themselves to support a set of extensions) using the registry. This approach isn’t supported by converted desktop apps in such a way (since the AppX deployment process can’t write keys in the system registry), but they need to leverage a set of specific manifest extensions.
- Validate Appx Manifest: it checks if the minimum set of required information by the manifest are included.
- Validate security settings: a converted desktop app can’t elevate itself or require the user to be an administrator in order to run.
- Validate App Integrity: it checks if all the binary files (executables and DLLs) are digitally signed. At the current time of writing, this is the only test that, even if it fails, it won’t block you to distribute your app. The reason is that app packages are already digitally signed and, at the moment, you can’t submit an app on the Store without prior approval after you have nominated your app, so the AppConsult engineer that will work with you will make sure that the app is trusted and legal.
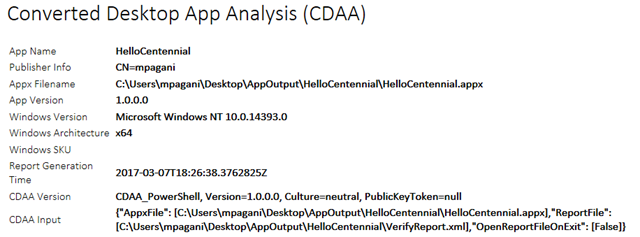
Here you can see some images taken from a generated report. This is the header, with a recap of the application that has been tested:
The two below images show instead, on the left, an application that has successfully passed all tests, while on the right another one that, instead, is failing the Validate App Integrity test.
 |
 |
Wrapping up
In this post we have seen thanks, how to the latest version of the Desktop App Converter, is now much easier to generate a package using the manual deployment approach: no more copy, paste and edit from an existing manifest file, no more manual generation of the resources, everything can be done with a simple command.
Happy conversion and, once you have converted your app, don’t forget to nominate it!


