“Failed due to unknown reasons” error when you try to sideload a Desktop Bridge app
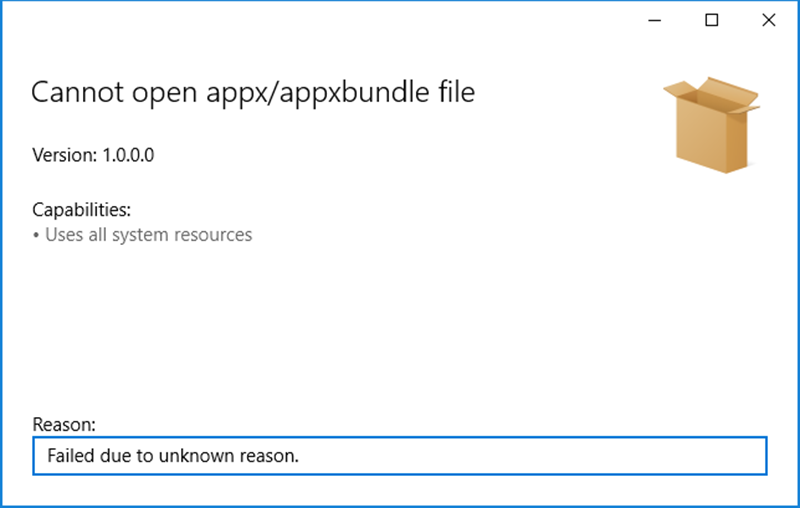
If you’re working since a while with the Desktop Bridge to convert classic desktop applications in Universal Windows Packages that can be, other than distributed using traditional channels, also published on the Store, it may happened that you have stumbled across the following error trying to manually install an AppX file for testing purposes:
This error is very common when you have used, as a starting point, the Desktop App Converter to convert an installer or a self-executable application, then you have applied some changes and you have recreated the package using the makeappx tool as explained in the section titled Repackaging the app in the following blog post: https://blogs.msdn.microsoft.com/appconsult/2016/10/17/desktop-bridge-converting-an-installer/
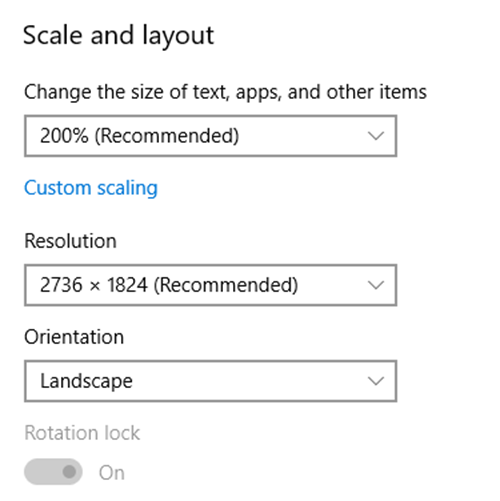
The reason is that the latest version of the DAC, other than just converting the application, is able to extract its main icon and to generate all the required assets from it. However, the tool doesn’t simply take care of the images in the various required sizes (like the icon for the Start menu, the various tile formats, the icon for the taskbar, etc.), but it also takes in consideration the different scaling factors supported by Windows 10. One of the biggest challenges for classic and modern apps is that there’s a wide variety of computers out there, with an increasing number of models with screens that offer a very high resolution and DPIs. Just as an example, I’m writing this post from a Surface Pro 4, which has a 12.3’’ screen and a 2736x1824 resolution. Without a scaling system in place, my device would be really difficult to use, because everything would be too small to be visible due to the very high resolution on such a relatively small screen. As such, Windows 10 offers a built-in scaling system, which can be leveraged also by developers, in order to make sure that applications are still usable despite the screen configuration of your device. You can check the scaling factor assigned by Windows simply by going into Settings –> System –> Display. In the section titled Scale and layout you can find all the information you need. For example, the below screenshot is taken from my Surface Pro 4: as you can see, Windows 10 has assigned a 200% scaling factor to my device.
When the Desktop App Converter generates a converted version of your application, it creates also a version of every asset specific for each scale factor. As such, if you enter into the Assets subfolder of the PackageFiles folder generated by the tool, you will find that the same image (for example, the one used for the wide tile called AppWideTile.png) will be available in multiple version, each of them with a different suffix that refers to a specific scaling factor (like AppWideTile.scale-100.png, AppWideTile.scale-200.png, AppWideTile.scale-400.png, etc.). Why not simply generating an image at the highest possible resolution and use it on any device? To optimize the deployment and downloading phase. If you look at the content of the PackageFiles folder you will find that, other than the files that belong to your application, there’s a set of resources files, which are identified by the .pri extension. Thanks to these files (which maps all the available resources), during the deployment / downloading of the application, the user will get only the resources which are correct for his device. This way, for example, a user with a traditional laptop with a Full HD screen (1920x1080) won’t download the assets dedicated to devices with 4K screens, saving space and bandwidth.
Now that we have understood the work done by the Desktop App Converter, let’s go back to our original problem and understand why we might get the initial error trying to sideload an app package. The tool applies to these resource files a signature, which is generated based on some information from the manifest file, like the Identity of the app. As such, the most common scenario where you can face the initial problem is the following one:
You generate a converted application using the Desktop App Converter. Since you just want to test if your converted application will behave fine, you specify a fake PackageName and Publisher with a command similar to the following one:
DesktopAppConverter -Installer "C:\ExpenseIt\ExpenseIt.msi" -Destination "C:\ExpenseIt-AppX" -PackageName "ExpenseIt" -Publisher "CN=mpagani" -Version "1.0.0.0" -MakeAppx -Sign -VerboseAfter testing that everything is ok, you’re ready to publish the app on the Store or to distribute it within your company. As such, you open the AppxManifest.xml file with a text editor and you change something in the <Identity> node (like the Name or the Publisher attribute). For example, if your goal is to publish your application on the Store, the Name attribute of the <Identity> element must match the value that the Dev Center has assigned to your app when you have reserved its name, it can’t be a random name.
Once you’ve made the required changes, you generate a new package using the makeappx tool. Then, as soon as you try to install it, you get the issue highlighted in the screenshot published at the beginning of the post. Unfortunately, the message is very vague and it isn’t helpful, but the real reason of the problem is that now there’s a mismatch between the identity of the application and the identity used to generate the resources files.
To solve the problem, you need to recreate the resources files from scratch.
Generate a new set of resource files
The first step is to delete, inside the PackageFiles folder generated by the Desktop App Converter, all the existing resources, which are all the files with .pri extension. Then you need to open the Visual Studio developer command prompt, that you can find simply by start typing “developer” in the Start or Search menu: the prompt to open is called Developer Command Prompt for VS20XY (which can be VS2015 or VS2017, based on the Visual Studio version you’re using).
Then you need to launch the following two commands. The first one is:
makepri createconfig /cf priconfig.xml /dq en-US
You need to launch this command inside the PackageFiles folder, so make sure that you have used the cd command to move to the output folder created by the Desktop App Converter before launching it.
Then you need to launch the second command:
makepri new /pr <PHYSICAL_PATH_TO_FOLDER> /cf <PHYSICAL_PATH_TO_FOLDER>\priconfig.xml
In this case, instead, it doesn’t matter where you launch the command, because you will have to replace the <PHYSICAL_PATH_TO_FOLDER> placeholder with the full path of the PackageFiles folder. For example, considering the previous Desktop App Converter sample command (which has generated the output in the C:\ExpenseIt-AppX folder), the command to launch would be:
makepri new /pr "C:\ExpenseIt-AppX\ExpenseIt\PackageFiles" /cf "C:\ExpenseIt-AppX\ExpenseIt\PackageFiles\priconfig.xml"
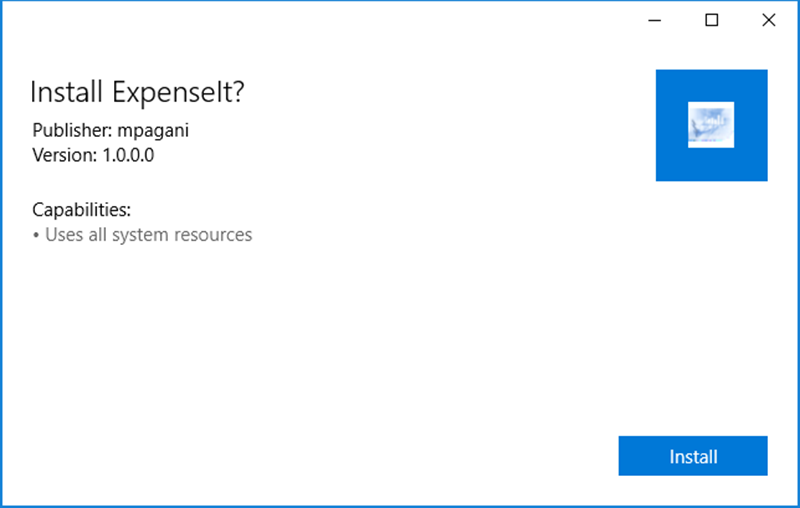
That’s all. If you have done everything properly, you should find now, in the PackageFiles folder, a new set of resources files which, however, this time have a signature that matches the identity of the application. As such, if you generate a new app package using the makeappx tool and then you double click on it, this time you’ll get as result the expected experience:
Happy conversion!
Comments
- Anonymous
June 12, 2017
The comment has been removed- Anonymous
June 14, 2017
Thanks, I'm glad you find it useful!
- Anonymous
- Anonymous
August 01, 2017
Thanks Matteo, saved me a lot of time!- Anonymous
August 02, 2017
Great to know and always happy to help :-)
- Anonymous
- Anonymous
September 09, 2017
I've now got the same problem. But am creating a UWP app direct from Visual studio, (that is, is not a converted app). So the remedy given above is Not Applicable.This didnt happen before, but has started happening recently, so it is probably related to either a recent Windows-10 upgrade, or because upgraded to VS-2017 (The VS-2017 upgrade was a messy procedure, requiring work-arounds to get it installed).Note I did have DesktopAppConverter installed on my machine, but it is now removed. Also ran "cleanup" to get rid of the WIM.Any suggestions to get overcome the problem in my situation ?Thanks,- Anonymous
September 09, 2017
Update. If I right-click on the Add-AppDevPackage.ps1 file and Run with PowerShell, then the app gets installed and runs OK. But trying to install the appbundle directly by clicking on it still fails, as mentioned above.- Anonymous
September 11, 2017
Hello Michael,I admit I have never faced this problem with a pure UWP application. Can you try to repair your existing Visual Studio installation? Can you elaborate more also what you mean with "upgraded to VS2017?". You can't upgrade to VS2017 from a previous version of Visual Studio, it just gets installed side-by-side if it finds any older version during the setup process.Thanks!Best
- Anonymous
- Anonymous


