Unit Testing the Windows Phone 7 applications
It’s been a long while since my last blog post. With some additional responsibilities at work, and a long trip to the US, I just did not find the time to update the blog with the latest developments. But I am happy to find time this weekend to bring the Chronometer Windows Phone 7 application to a logical closure. In this post I will also concentrate on the topic of unit testing windows phone applications.
A functional change first – clearing the history
However, before I get to unit testing, I would like to add a small feature to the application. This is about clearing the history of the events that get displayed in the Stopwatch page. I do this by adding a “Clear History” menu item to the AppBar and then add a handler for the menu item to do the job.
Here is the change in the XAML to add the menu item – notice the new ApplicationBar.MenuItem – the auto-completion intellisense feature when editing the XAML directly makes is very easy to add these UI elements.
The code for the click handler looks as follows:
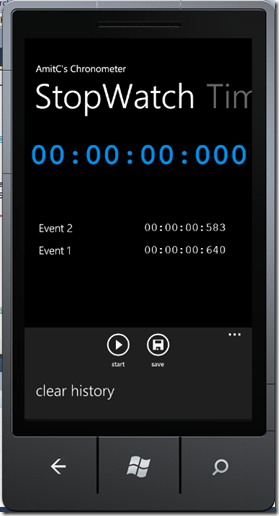
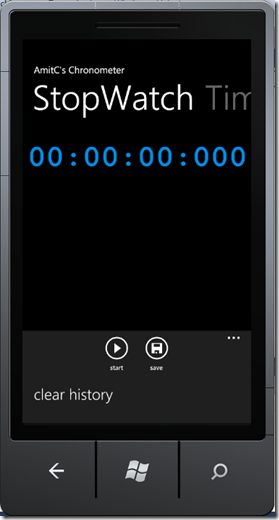
The screens below capture how the menu item shows up, and (on clicking) clears up the event list history captured till that point.
Using Jeff Wilcox’s unit testing framework …
For unit testing Windows Phone (and other Silverlight) applications, I recommend using Jeff Wilcox’s framework for unit testing. I highly recommend you watch Jeff’s MIX10 session on this topic from this link. There are some limitations in the here – for example, you cannot unit test controls in the AppBar – but this is a pretty nice framework, and served my purpose of unit testing the application.
Jeff Wilcox’s blog explains the framework and you can also use this link to download the bits needed from the bottom of his blog page. Another useful link that helped me in setting up the framework was this Cheat Sheet.
As explained in the cheat sheet, I add a new Windows Phone project to the solution called WP7ChronomterUT, add a dll folder where I download the unit testing framework (and unblock the files), add references to the two dlls there, and create a new file call MainPageUT.cs where I will add the unit test. I also add a reference to the WP7Chronometer project. Below is a snapshot of how the new project looks – observe the references added.
Few more housekeeping things …
I need to do a few more things before I get to the unit testing.
First, I move the TimeSpanPicker1 style definition from app.xaml (application scope) to MainPage.xaml (main page scope). Please note that this needs to be included in the <phone:PhoneApplicationPage.Resources> section and that entire section needs to be ahead of the Grid definition in MainPage.XAML. This scope change is being done to avoid some limitations of the unit testing framework.
Second, we need to add a reference to the Coding4Fun.Phone.Controls.Toolkit that we installed via NuGet, to the new unit test project. To do this, you simply click on “Add Library Package Manager Reference” option for adding a new reference, and simply “install” the reference for the above toolkit from the list presented (note, the toolkit will already be listed there since we have installed is as part of the solution).
Third, I need to allow the unit test project access to the internal UI elements in the main application. To allow this, I add the following line at the end of the AssemblyInfo.cs file under ‘Properties’ node of the WP7Chronometer project (the main application)
Launching the unit test framework …
Since the project we are working on is specifically for unit testing, I would like “application” in this case to straightaway launch the unit testing framework and run the unit tests that I will write. To do this, I add the following code to the MainPage.xaml.cs file:
The above code instantiates the unit test framework, sets the root visual of the page to it (that is, what ever it will display), and also hooks up the back button to allow you to return back from drilling into test results.
Note, I also hide the system tray, otherwise it will hide the top of the test results screen.
I have also changed the page title and the application title in the MainPage.xaml file as follows:
Now we can write the actual unit tests …
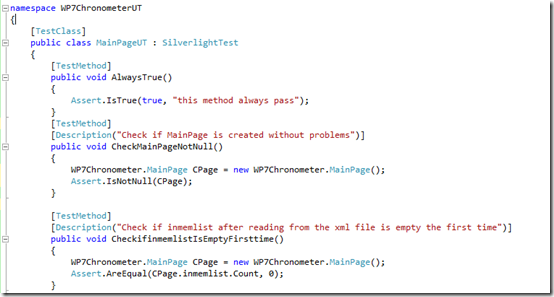
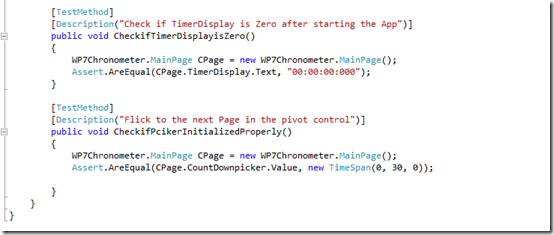
The framework, once launched as above, will look for a TestClass and TestMethods in the dll as is normal for unit testing. Below I have a set of simple unit tests written up, to verify some of the initial states of the Chronometer application
The code above is pretty self-explanatory, and we are now ready to run the tests
Running the unit tests …
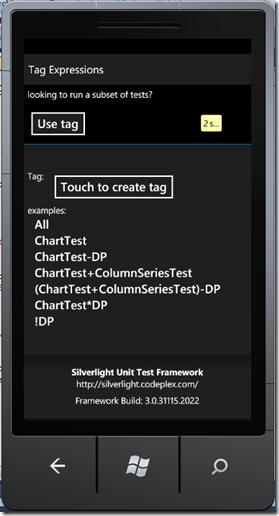
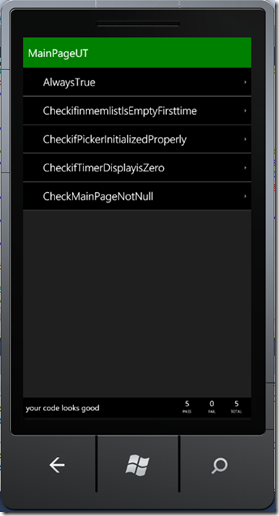
Simply set the WP7ChoronometerUT project as the start up project in the solution, build the solution, and launch it. The unit test framework loads, based on the above start up code, and presents the initial page of instructions as shown on the left below. It allows you the option of choosing the set of tests you want to run via tags (and gives instructions on how the tags work), and also counts down five seconds to choose the default option of running all tests. The screen on the right shows that all of the tests have been run, and all have passed (the green bar at the top). Also note the statistics at the bottom where it says 5 out 5 tests have passed (BTW, to allow this display to come through we disabled the SystemTray earlier).
You can drill down into the tests by clicking on the name MainPageUT (which is the file which has the tests), and you see the lists of tests in that set on the screen below left. You can drill down into each of the tests – for example, clicking on the “CheckifTimerDisplayisZero” shows the screen on the bottom left. It tells you more information about the test, including pass/fail status, and start/end/duration for that test. Also notice that the back button on the phone allows you to navigate back to the previous screen.
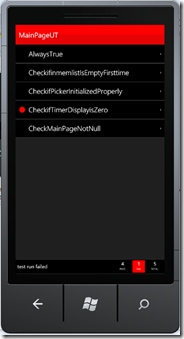
Just to give you a sense of how failing tests get reported, I can deliberately make one of the tests fails – for example, changing the Assert.AreEqual in the ‘CheckifTimerDisplayisZero” to Assert.AreNotEqual, and then on building and running the application you get the screens below. The framework calls out the overall status as fail, calls out the test that has failed, and allows you to drill down into why it has failed.
This is all pretty neat! It felt great to experiment with the unit test framework for the phone!
I am almost done with this set of blogs – what remains is to create an account in the marketplace and actually deploy the app! I will come back shortly with that.
Cheers!
Comments
- Anonymous
June 27, 2011
The comment has been removed - Anonymous
June 27, 2011
Eric, thanks for the feedback and useful information on TestDriven.Net


