Windows Containers - Getting started - A step by step guide, walkthrough, tutorial
The world of containerization has seen some pretty incredible innovation over the past couple of years. Yet there has been a whole class of applications that have been absent from the conversation - applications that run in containers on a Windows operating system. But that is about to change over the next few months as Microsoft goes GA with the next version of Windows Server, which is Windows Server 2016.
Docker: The Big Picture
- Docker uses a client-server architecture
- The Docker client talks to the Docker daemon
- The Docker daemon does the building, running, and distributing your containers
- The Docker client and the daemon can run on the same system
- You can also connect a Docker client to a remote Docker daemon
- The Docker client and daemon communicate via sockets or through a RESTful API
Running containers
The figure below depicts the workflow for running containers. The important thing to note here is that the Docker Host is the virtual machine that runs our containers. There may be multiple virtual machines that participate in the cluster to do this job. In addition, there might be an orchestrator to manage these containers running on the various Docker hosts. I've addressed these orchestrators in previous posts, if you are interested.
What is an image?
One thing to note is that images are the static binary file on disk that become containers once they are run. The "docker run" command takes an image and makes it a running container.
The Registry
There is a global registry that acts as a repository for all images that have been uploaded to it. There are both Linux and Windows and images there. An image gets built with the "docker build" command, and that will be demonstrated below. The "docker pull" command takes an image from the registry and places it on a docker host, so that it could be run as a container. Notice that our Docker host depicted below has two images on the VM disk. Each of those images can be run one or more times as containers on the docker host. However, when you are talking about Web servers, you need to be careful with port conflicts when running multiple Web servers on a single Docker host. in other words, when a web request columns on the VM's port 80, which container will that requests get routed to?
Client tools
The "client" you see in the diagram is a series of commandline tools that communicate with the docker daemon running on the Docker host. The client tools can be run on docker host itself or can be run remotely from another machine that has the client tools installed.
Figure 1: The Docker Ecosystem
Supporting Windows and Linux
The Docker client tools exist both for Windows and for Linux. There is also a Docker engine for both Windows and Linux.
Figure 2: Supporting both Windows and Linux containers
Provisioning a Docker host that has built-in support for Windows containers can be achieved at the Azure portal, as seen below. At the time of this writing it is still in preview mode, but will go GA in the coming weeks.
Figure 3: Provisioning a containerized version of Windows Server 2016
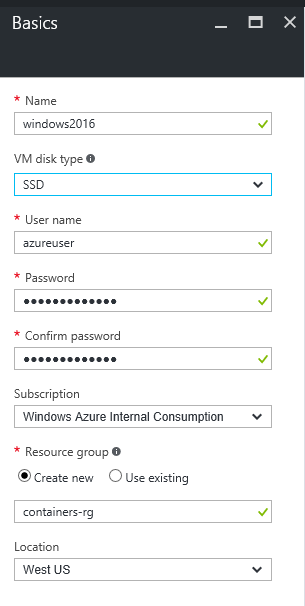
When you provision your Windows server 2016 virtual machine at the Azure portal, you will obviously need to enter some basic information, such as the name of the virtual machine, the type of VM disk you would like, etc.
Figure 4: Some basic details at the Azure Portal about the virtual machine we are about to provision
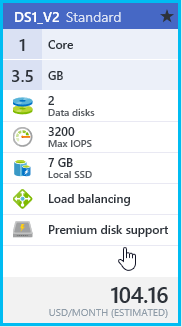
There will also come a point where you will need to identify the hardware characteristics of your virtual machine. The DS1_V2 is a fairly performance machine and does not represent the least expensive option. You can select and A1 series if you would like a more economically attractive option.
Figure 5: Selecting a small moderately priced VM
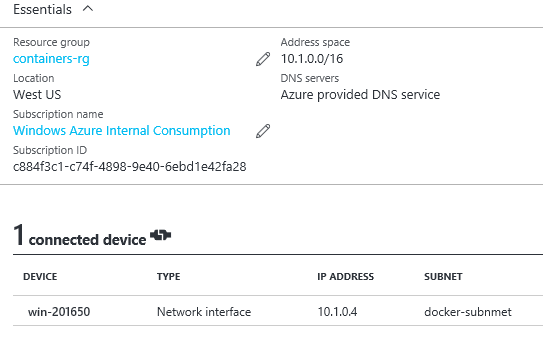
One of the limitations of the preview version of this VM, is that your network interface has to have an IP range of 10.x.x.x or 192.x.x.x. This will be corrected in the production version but is required now in preview.
Figure 6: Verify you are placing your VM in a 10.x.x.x or 192.x.x.x VM (only for the preview release of Windows server 2016)
Figure 7: Waiting for the provisioning to take place
Some basic confirmation information about our virtual machine. the public IP address is subject to change, if you decide to shut down and restart the VM. You will notice two different public IP's being used in this post because of that.
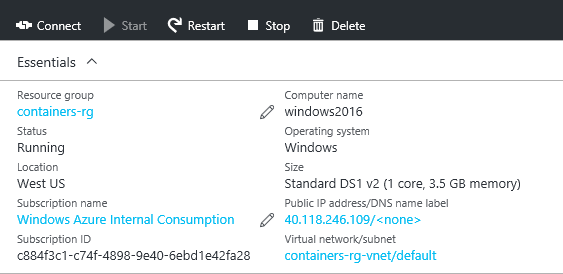
Figure 8: Some basic information about the VM that was just provisioned
In the figure titled, "Some basic information about the VM that was just provisioned" you will notice there is a connect button which will allow you to use Remote Desktop to connect. Much of our work for this lab will be through this new Docker host virtual machine. In the next step we will invoke Powershell to review some basic Docker commands.
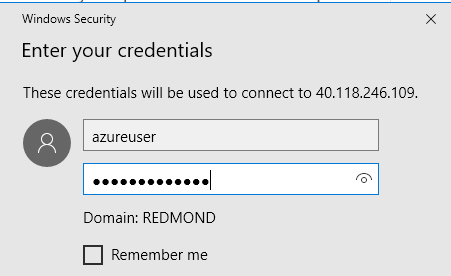
Figure 9: Remoting into our virtual machine
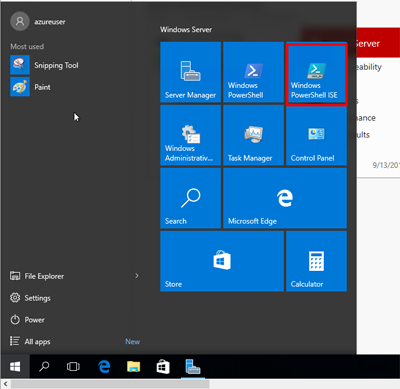
Starting the Powershell ISE
The next few steps will illustrate how to build up our own docker image container
Figure 10: Starting a Powershell command prompt
Install Base Container Images
Docker images are built in layers. That means if we want to build our own docker image, we will need to start with the base layer.
The following command will download the Windows Server Core base image.
docker pull microsoft/windowsservercore
Figure 11: Pulling a basic Windows server core machine from the Docker repository
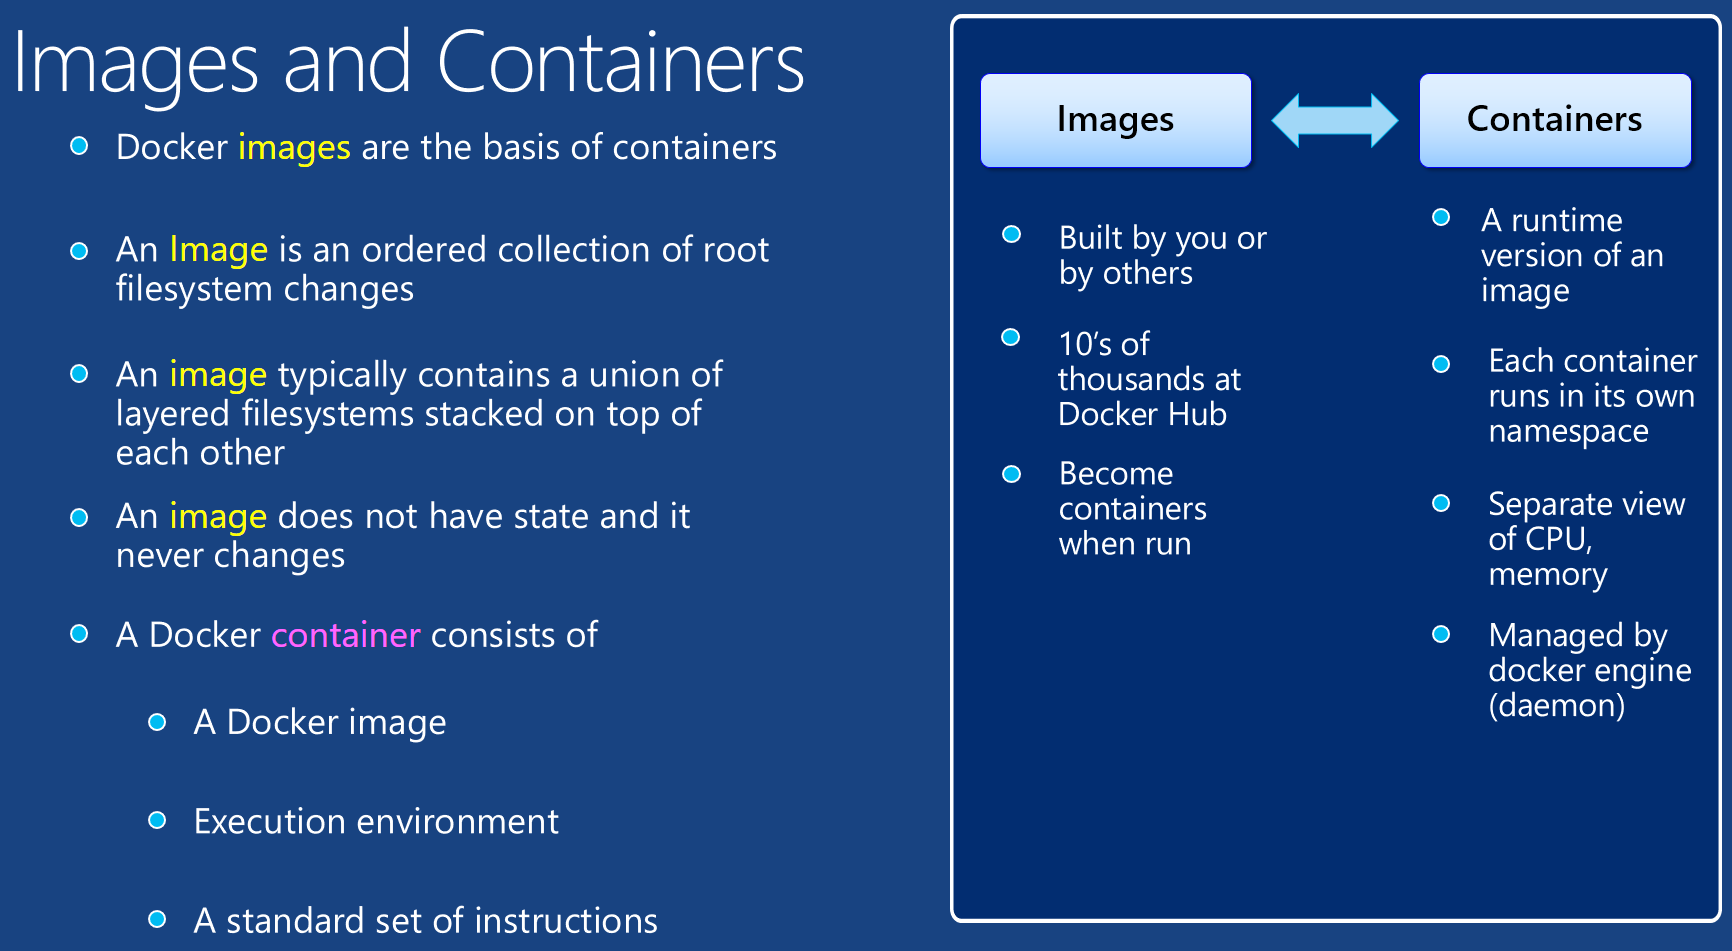
It is important to understand the distinction between images and containers, as explained below.
Figure 12: The difference between images and containers
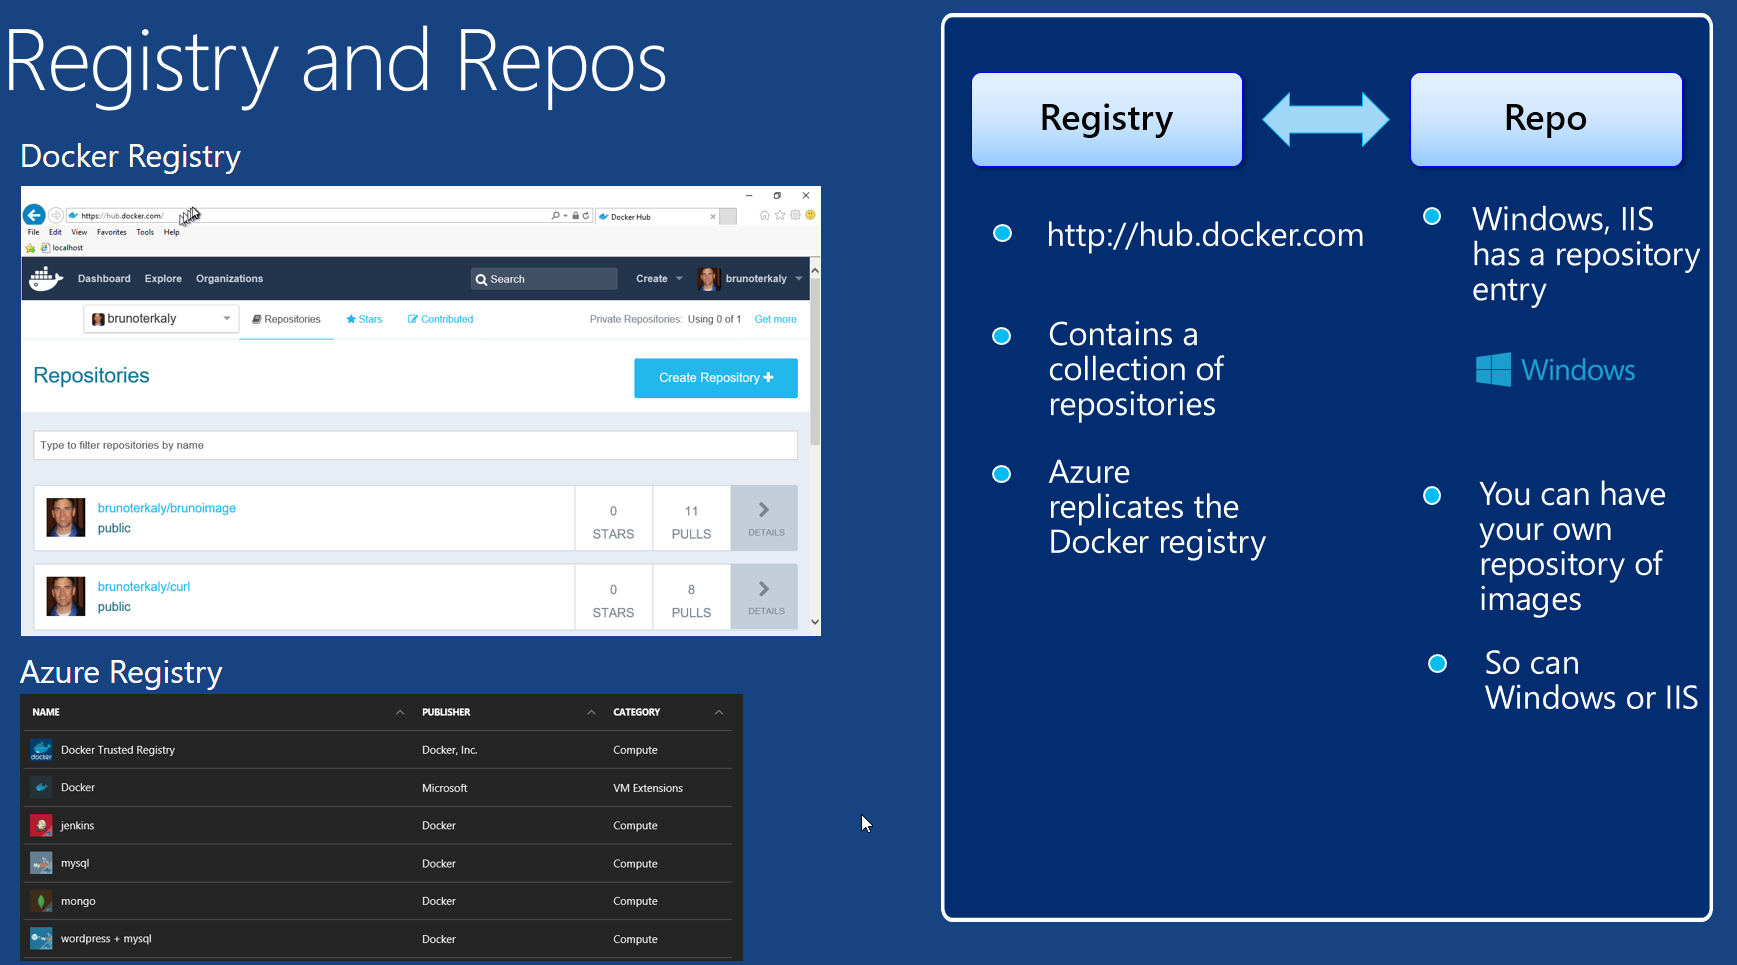
It's also important to understand the distinction between a registry and a repo, once again, explained below.
Figure 13: The difference between a registry and a repo
You can use the docker images command to get a list of available, locally stored images.
Figure 14: Listing the images that have been downloaded to the local virtual machine
Searching for Windows Images
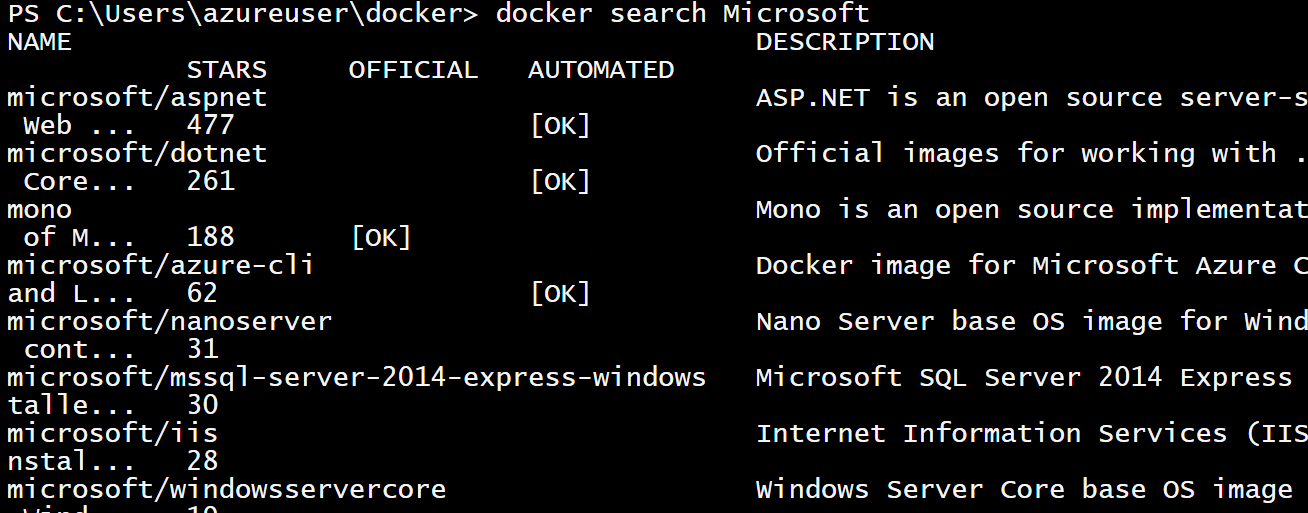
To search Docker Hub for Windows container images, run docker search Microsoft.
docker search Microsoft
Figure 15: Searching for Microsoft-based images
Working with the Web - IIS - Microsoft's Windows-based Web Server
In this next section, let's start playing with the web. The goal for this section is to simply run IIS and to connect to it from the outside world, namely my own laptop. There are a few things we need to do to make this happen:
- Download the IIS image
- Go to the Azure portal and open up port 80
- By default these ports are locked down
- Run the IIS image
- Images become containers when they are running
- Use the browser to verify you can connect
Download the IIS image
Figure 16: Pulling down the IIS image
Let's now verify that it is downloaded.
Figure 17: Verifying the IIS image got downloaded to the local VM
Go to the Azure portal and open up port 80
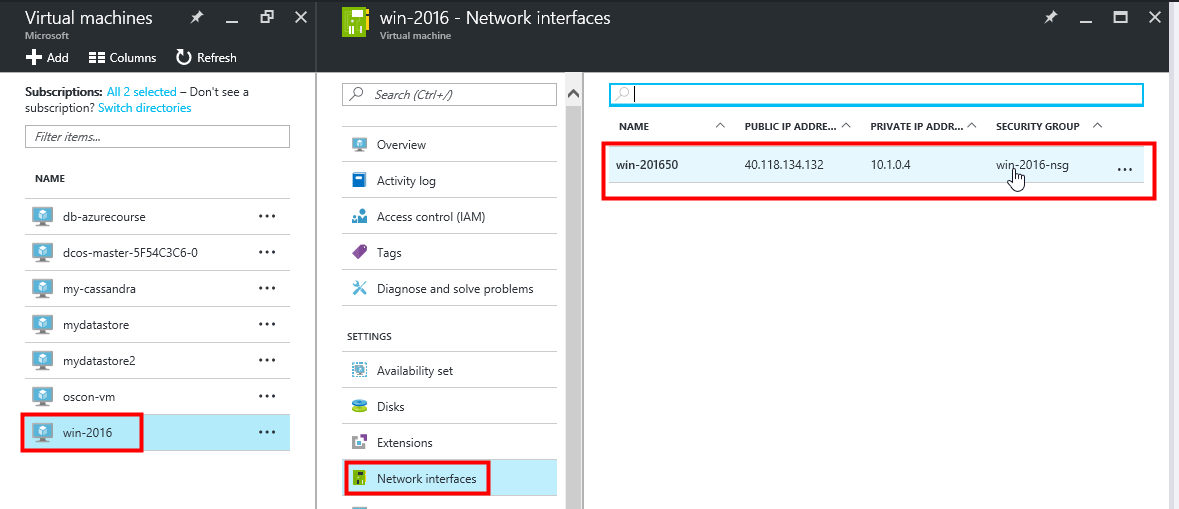
By default port 80 is locked down for the Windows Server 2016 VM running in Azure. the way to open up those ports is to create a network security group (NSG), as seen in the two figures below.
We begin this by going to the portal and selecting the virtual machine (the same one we created in previous steps).
You then select the network interface.
Figure 18: Modifying the network security group to open port 80
Then at the appropriate time you will add inbound and outbound security roles. A network security group is composed of a list of rules.
The instructions for doing so can be found here:
https://azure.microsoft.com/en-us/documentation/articles/virtual-networks-create-nsg-arm-pportal/
Figure 19: Adding inbound and outbound security rules
Run the IIS image
The command below will run the downloaded IIS image as a container. Once that container is running we can then connect to it and actually leverage the running Web server within that container.
docker run -d -p 80:80 microsoft/iis ping -t localhost
Understanding Port Mapping
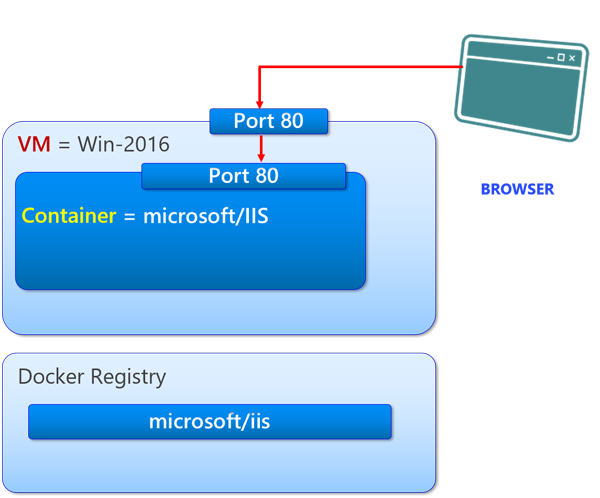
It is important to notice the port mapping. The 80:80 is best illustrated with the diagram below. The browser is coming out port 80 on the virtual machine, and then the software defined network will route that to the port on the container. It's port 80 in both cases but it doesn't have to be.
Figure 20: Understanding port mappings
Verifying Containers are running
We can confirm that IIS is running within the container by issuing the following command:
docker ps
The figure below demonstrates the information available about a container that is running, including the image ID, the automatically assigned name, the command used to start the container, and more.
Figure 21: Verifying that our container for IIS is running
Connecting to the running container from your local laptop (or from anywhere else)
The Windows Server 2016 virtual machine that's running in Azure has a public IP address.
Figure 22: Making sure we have the correct public IP address to connect to for our running IIS container
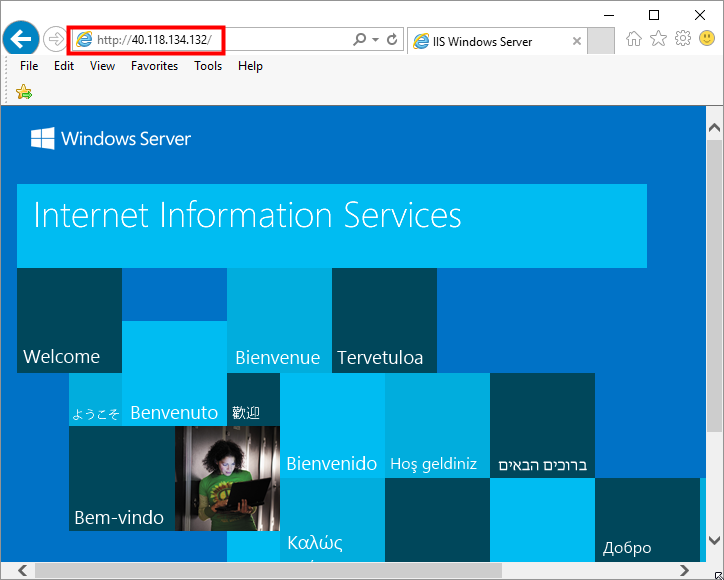
Armed with an IP address now you can go to any browser and connect up to our running container.
Figure 23: Successfully connecting to a Web server running in an IIS container
Building web-based docker images and running them as a container
We will learn how to support web workloads in Docker containers.
We have learned about downloading containers so lets talk about using IIS as the base image. IIS is Internet Information Server and is the de-facto standard for running web workloads on Windows.
From there we will create a Dockerfile to automate this entire process. In the end, using this IIS docker image, we will be able to create self-contained sandboxes running IIS, which can be used to serve your "dockerised" applications.
You'll notice that there are many layers to the image, one or more of which allow you to run web content.
Building Dockerfile
You can think of the Dockerfile as a blueprint for the image that you wish to build. As explained previously, the image becomes a container at runtime. And based on the first part of this post, you probably realize that we could upload our built image up to the Docker repository, making it available to the world as a download
Figure 24: Creating Dockerfile (capitalization matters, and add a “.” to the end of the filename if using notepad)
There's only two lines to this Dockerfile. Later, as we explore more sophisticated scenarios, the size of the Docker file will grow. In this case, all we are doing is starting with the base image of microsoft/iis. it will leverage the previously pulled image. If it were not present, it would download it automatically from the Docker repository
He will also notice that all we are doing is creating a very simple webpage, called index.html. naturally it will show up in the Web server folder (c:\inetpub\wwwroot). This folder is where IIS looks to host web content. In a future post we will copy a set of files into this folder to produce a restful web service back-end in hosted in the Windows container.
Figure 25: Building Dockerfile to say "Hello World"
The docker build command will look in the current folder (note the ".") for the Dockerfile and then will proceed with creating the image.
Figure 26: Build an image using Dockerfile
Since we had two lines in the Dockerfile, you notice that the output has only step one and step two. At the end of the output you will see that it successfully built the image, providing the image ID (3a2fc5abdc03).
Figure 27: Verifying the correct build
The docker ps command will output any running containers on this Docker host. Notice that it is still running the previous image from the earlier exercise. So we will use the Docker stop command to halt the execution of this container. after all, you can only run one Web server and a single Windows container. However, you can run multiple Windows containers on a single host ( Azure hosted virtual machine ). But to do so you will have to work with different port mappings, which is beyond the scope of this post.
Figure 28: Stopping the existing container from running
We will now use the docker images command to view the previously created containers. And you can see that at the top of the list we have an image ID of 3a2fc5abdc03, which is the simple "hello world" Web server we just created. the next step is to run this image as a container.
Figure 29: Verifying the image we built previously
The Docker run command below will start our container based on the previously created image. Once complete, we can navigate to the public IP address of this virtual machine and Azure and actually see "Hello World" in a browser.
Figure 30: The "docker run" command followed by "docker ps"
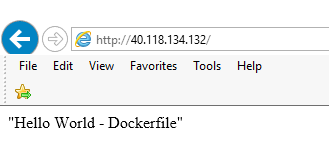
From my local laptop, or any computer connected to the web for that matter, we will navigate to the public IP address of the virtual machine hosting your container. That public IP address is 40.118.134.132. As expected we see the text "Hello World - Dockerfile".
Figure 31: Connecting to our running "hello world" container
Conclusion
This post started with an overall background on containerized workload, explaining the various components, such as the Docker client tools, the Docker daemon, the virtual machine host for running containers, and the repository for storing publicly or privately available images.
We also explored the various Docker commands that can be used to view available images, search for available images, build images, and run these images as containers.
We also explored the mechanics of the Dockerfile to create a Windows-based image hosting IIS with their own custom web content. In future posts we will produce more sophisticated versions of web content. But this post should give you the groundwork for creating your own Windows-based containerized web workloads.
Comments
- Anonymous
September 16, 2016
Good article to think more learn more ..Thanks - Anonymous
September 29, 2016
It would be nice to provide another article with a more advanced usage - like and asp.net mvc / webAPI app.- Anonymous
September 29, 2016
Roy, that is precisely what I am working on next. It turns out it is not as easy as I had hoped.Using Dockerfile absolutely everything must be fully automated without any user interaction. - Anonymous
October 04, 2016
here is the post I was referring to that performs a more sophisticated deployment of an ASP.net web application. https://blogs.msdn.microsoft.com/allthingscontainer/2016/10/04/windows-containers-how-to-containerize-a-asp-net-web-api-application-in-windows-using-docker/
- Anonymous


