Hello @simgib,
Thank you for posting your query on Microsoft Q&A.
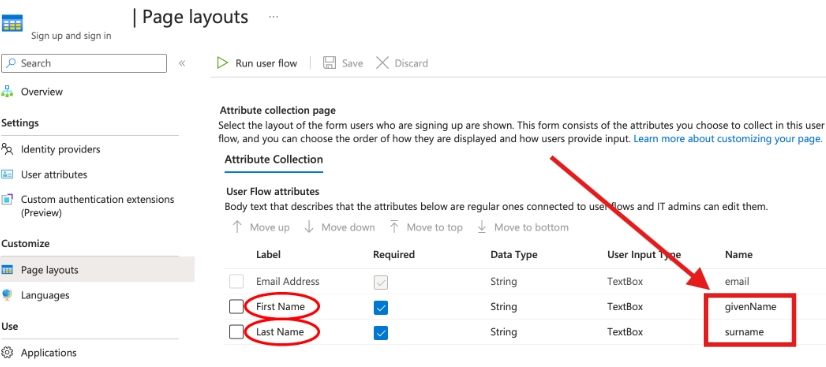
Based on your description, you want to collect First Name and Last Name as user attributes when a new account is created in your External ID tenant. However, when you run the user flow and try to create a new account, the attributes still appear as Given Name and Surname instead of First Name and Last Name.
From the screenshot you shared, I see that you modified the display names of the built-in Given Name and Surname attributes in the Page Layouts section. However, you did not create custom user attributes. Since you only renamed the built-in attributes rather than creating new ones, they continue to appear as Given Name and Surname when users register a new account.
To resolve this issue, follow these steps:
As per the document, it is suggested to create a new custom user attribute.
- Login into Azure Portal.
- Search for External Identities > Overview.
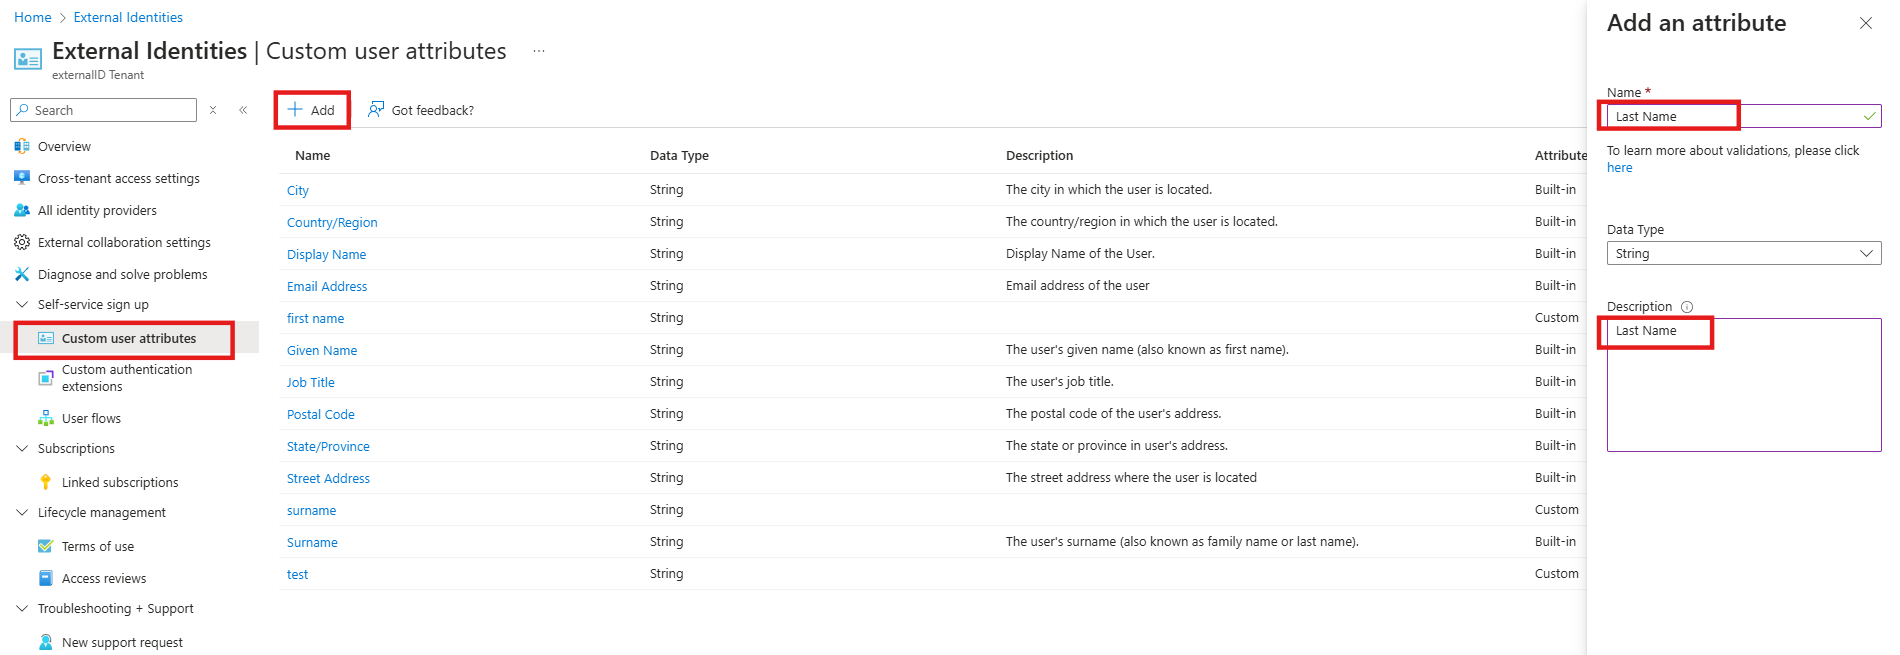
- Select Custom user attributes
- Select Add. In the Add an attribute pane, enter a Name for the custom attribute (for example, "First Name" and "Last Name").
- Select Create. The custom attribute is now available in the list of user attributes and can be added to your user flows.
Please refer the screenshot below for reference.
Step 2: Add Custom Attributes to Your User Flow
- Go to User Flows in your External Identities.
- Select the user flow you created.
- Open the User Attributes blade.
- Select the custom user attributes (First Name and Last Name) that you created in the previous step.
- Click Save.
Please refer the screenshot below for reference.

Now, when you run the user flow and create a new account, the system will prompt users to enter First Name and Last Name instead of Given Name and Surname.
I hope this information is helpful. Please feel free to reach out if you have any further questions.
If the answer is helpful, please click "Accept Answer" and kindly upvote it. If you have extra questions about this answer, please click "Comment".
' cx='32' cy='32' r='32' /%3E%3Ctext x='50%25' y='55%25' dominant-baseline='middle' text-anchor='middle' fill='%23FFF' %3ES%3C/text%3E%3C/svg%3E)
' cx='32' cy='32' r='32' /%3E%3Ctext x='50%25' y='55%25' dominant-baseline='middle' text-anchor='middle' fill='%23FFF' %3ERP%3C/text%3E%3C/svg%3E)