Rippling HCM integration with Microsoft Entra ID/Active Directory
The document provides a step-by-step guide for integrating Rippling HCM with Microsoft Entra ID/Active Directory. The steps include establishing a connection, configuring attribute mapping, testing account provisioning, configuring account access rules, and monitoring provisioning. This integration allows IT admins to automate business processes using Microsoft Entra ID Governance Lifecycle Workflows.
For detailed guidance on how to integrate your Rippling HCM environment, reference the Rippling guide here. Click the Help docs link next to the application name.
Here are the high-level steps for configuring the app integration with Microsoft Entra ID/Active Directory in the Rippling App Shop:
Note
The steps and screenshots listed below depict experiences built in the Rippling app and highlight the depth and flexibility of the integration.
Step 1 – Establish connection
In this step, the IT admin provides consent to Rippling to create an API-driven provisioning app in their Microsoft Entra ID tenant. The IT admin also provides details of the Active Directory domain and organizational unit container to use for new user creations.
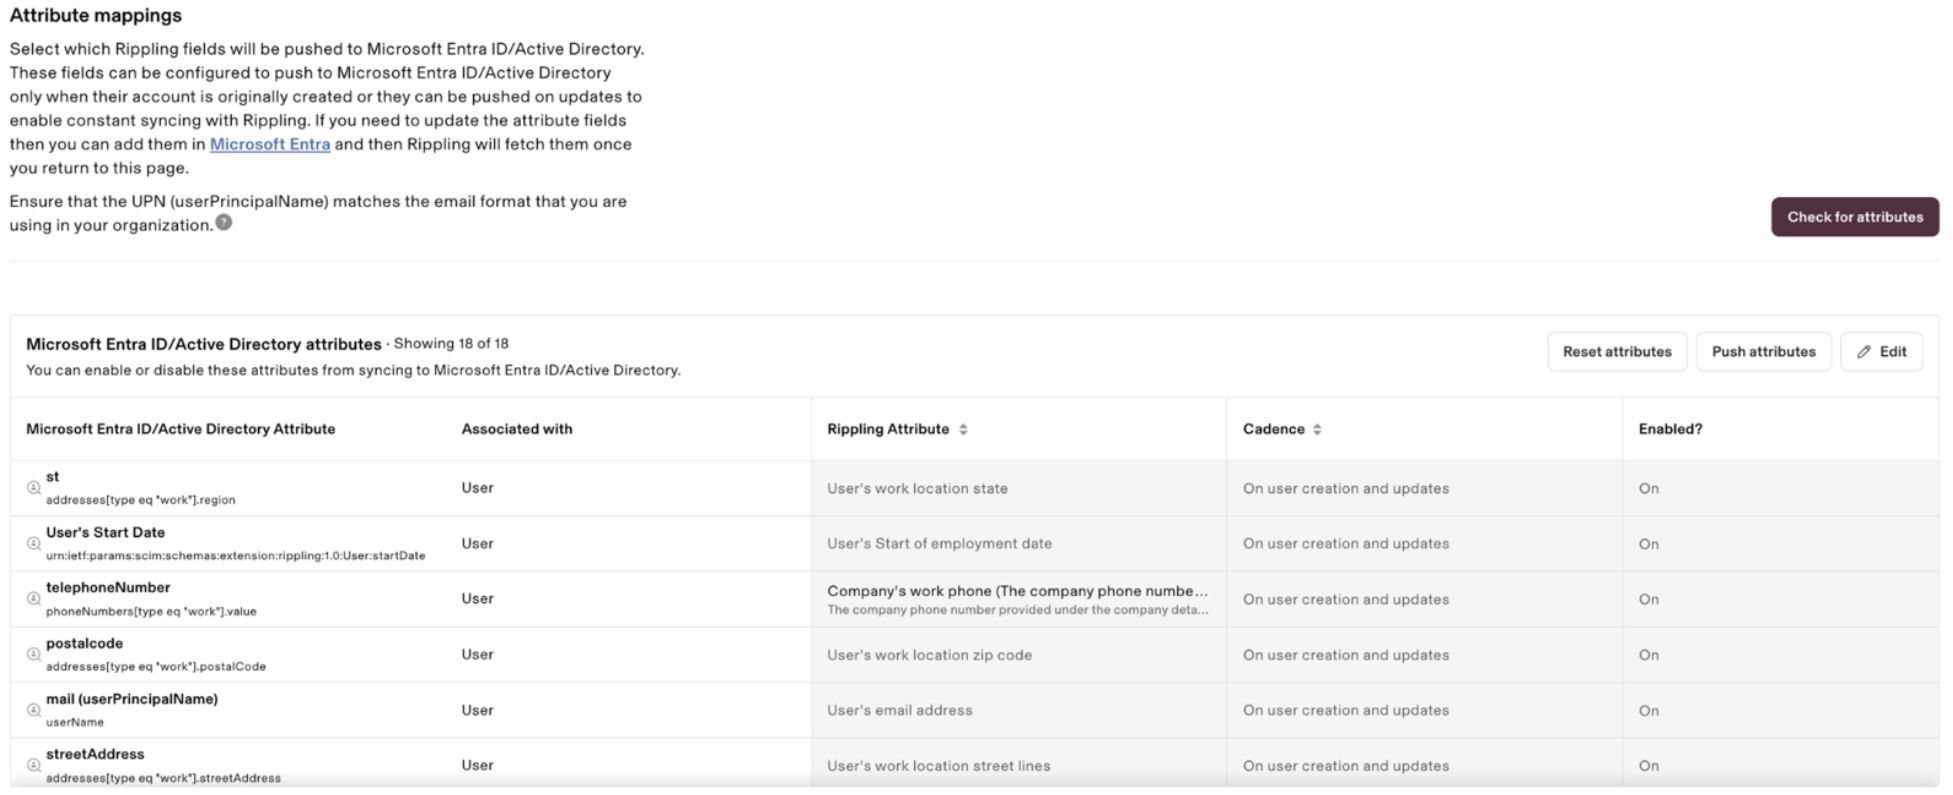
Step 2 – Configure attribute mapping
The app integration has a default mapping of Rippling user fields to Active Directory attributes. The IT admin can customize this attribute mapping and select which user fields from Rippling flow downstream to on-premises Active Directory. To use Microsoft Entra ID Governance Lifecycle Workflows with this integration, ensure that the fields user start date and termination date are present in the attribute mapping.
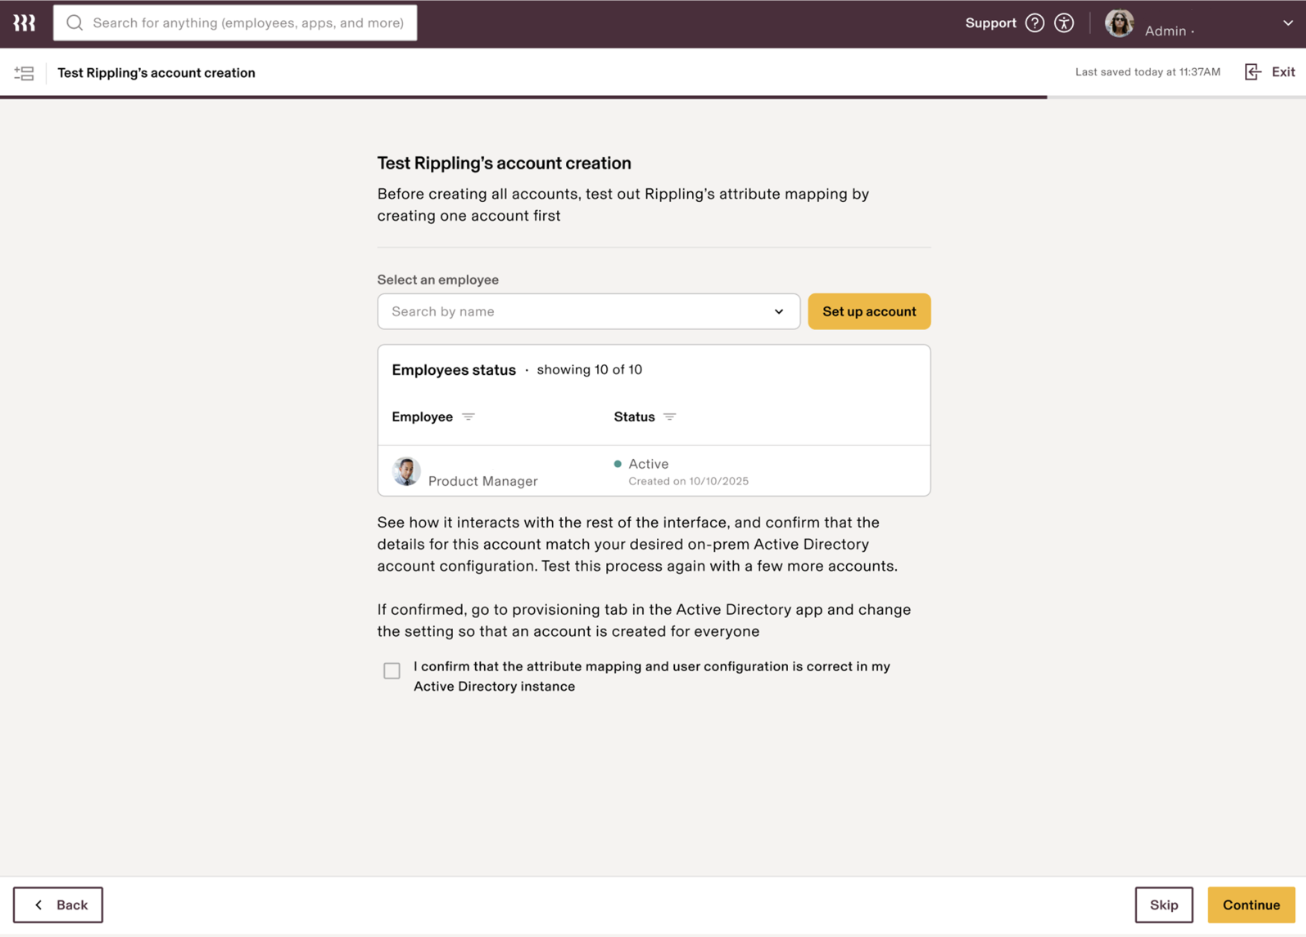
Step 3 – Test account provisioning
In this step, the IT admin can test the attribute mapping and verify account creation or update using a test user profile.
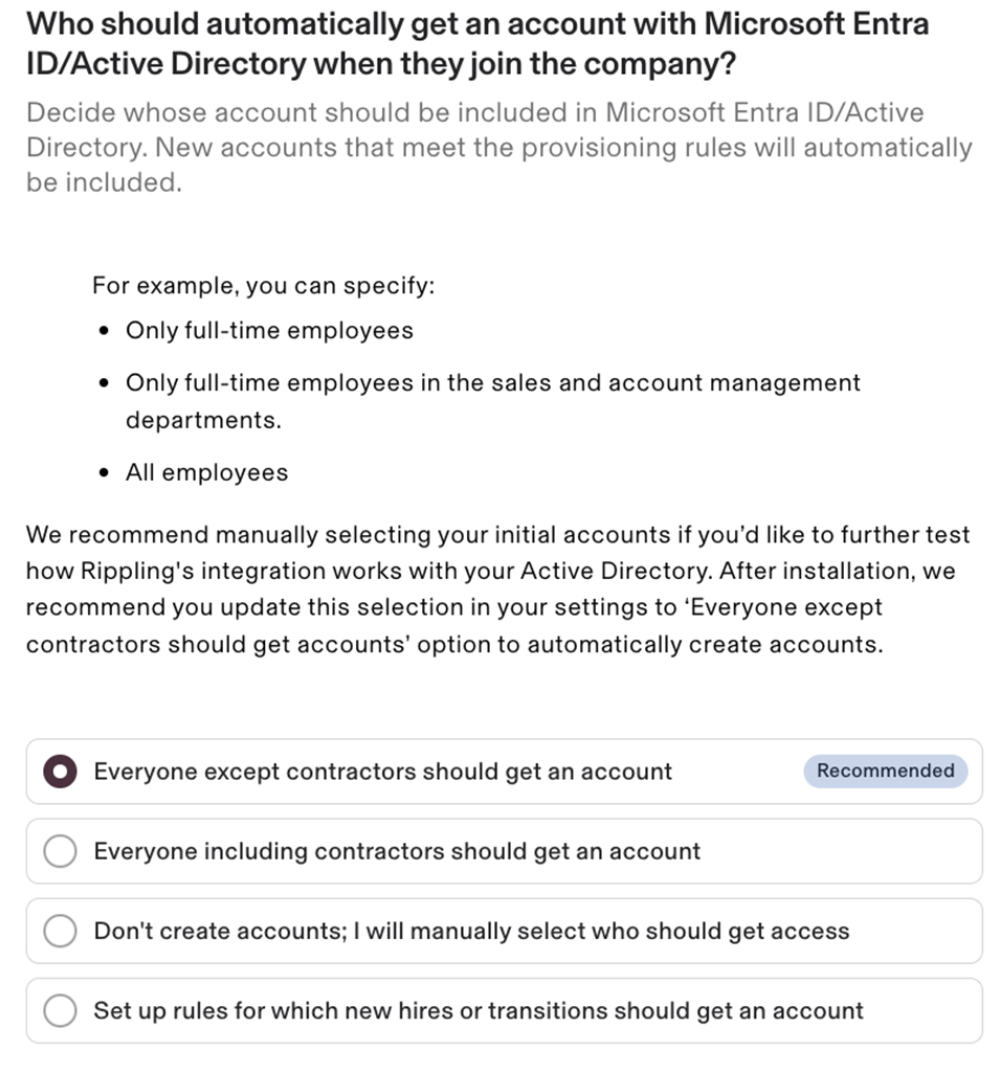
Step 4 – Configure account access rules
In this step, the IT admin configures account provisioning rules for Active Directory. Using the options in this step, the IT admin can enforce business policies around account creation and revocation.
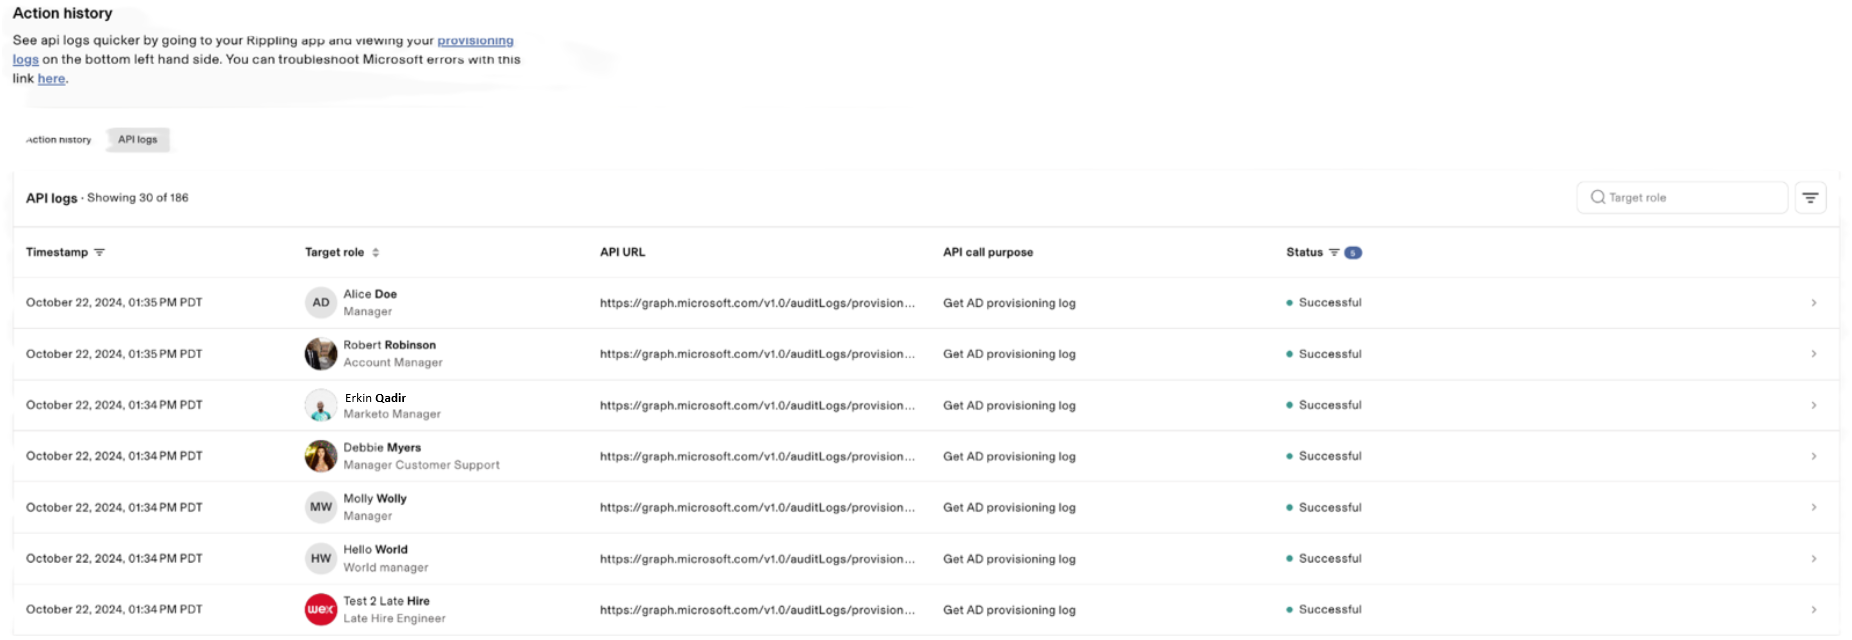
Step 5 – Monitor provisioning
In this step, the IT admin can monitor the actions performed by Rippling and review the API calls from the Action history tab. The data shown here corresponds to information retrieved from Microsoft Entra ID provisioning logs.
Using the above steps, once employee data from Rippling is available in Microsoft Entra ID, the IT admin can configure Microsoft Entra ID Governance Lifecycle Workflows to automate the Joiner-Mover-Leaver business processes.


