Send events from API Management to Event Grid
APPLIES TO: Consumption | Developer | Basic | Standard | Premium
API Management integrates with Azure Event Grid so that you can send event notifications to other services and trigger downstream processes. Event Grid is a fully managed event routing service that uses a publish-subscribe model. Event Grid has built-in support for Azure services like Azure Functions and Azure Logic Apps, and can deliver event alerts to non-Azure services using webhooks.
For example, using integration with Event Grid, you can build an application that updates a database, creates a billing account, and sends an email notification each time a user is added to your API Management instance.
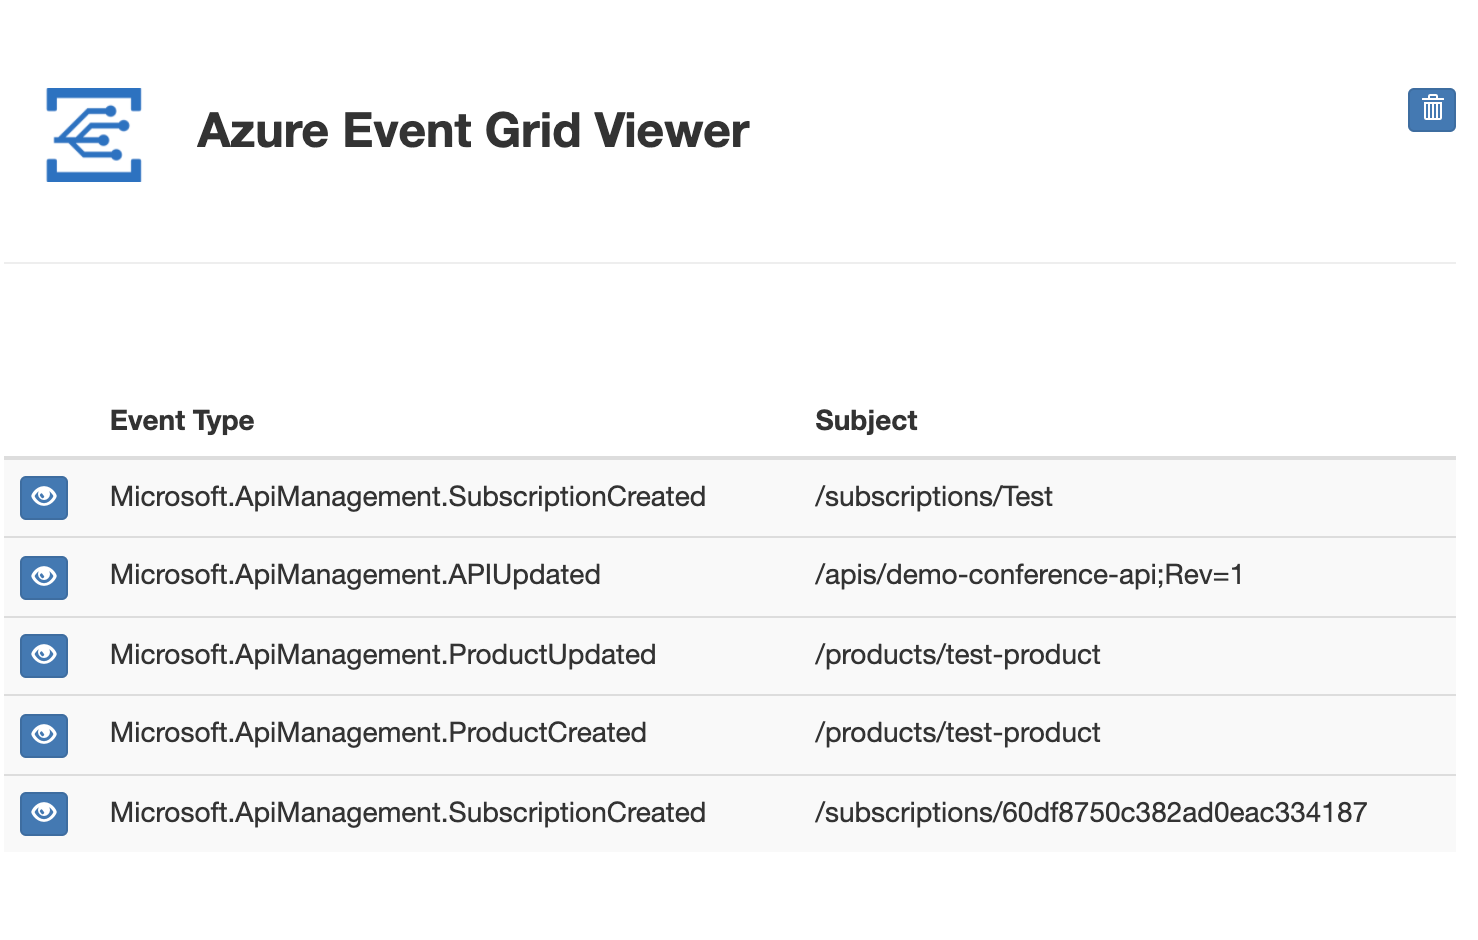
In this article, you subscribe to Event Grid events in your API Management instance, trigger events, and send the events to an endpoint that processes the data. To keep it simple, you send events to a sample web app that collects and displays the messages:
Prerequisites
Use the Bash environment in Azure Cloud Shell. For more information, see Quickstart for Bash in Azure Cloud Shell.
If you prefer to run CLI reference commands locally, install the Azure CLI. If you're running on Windows or macOS, consider running Azure CLI in a Docker container. For more information, see How to run the Azure CLI in a Docker container.
If you're using a local installation, sign in to the Azure CLI by using the az login command. To finish the authentication process, follow the steps displayed in your terminal. For other sign-in options, see Sign in with the Azure CLI.
When you're prompted, install the Azure CLI extension on first use. For more information about extensions, see Use extensions with the Azure CLI.
Run az version to find the version and dependent libraries that are installed. To upgrade to the latest version, run az upgrade.
- If you don't already have an API Management service, complete the following quickstart: Create an Azure API Management instance
- Enable a system-assigned managed identity in your API Management instance.
- Create a resource group if you don't have one in which to deploy the sample endpoint.
Create an event endpoint
In this section, you use a Resource Manager template to deploy a pre-built sample web application to Azure App Service. Later, you subscribe to your API Management instance's Event Grid events and specify this app as the endpoint to which the events are sent.
To deploy the sample app, you can use the Azure CLI, Azure PowerShell, or the Azure portal. The following example uses the az deployment group create command in the Azure CLI.
Set
RESOURCE_GROUP_NAMEto the name of an existing resource groupSet
SITE_NAMEto a unique name for your web appThe site name must be unique within Azure because it forms part of the fully qualified domain name (FQDN) of the web app. In a later section, you navigate to the app's FQDN in a web browser to view the events.
RESOURCE_GROUP_NAME=<your-resource-group-name>
SITE_NAME=<your-site-name>

az deployment group create \
    --resource-group $RESOURCE_GROUP_NAME \
    --template-uri "https://raw.githubusercontent.com/Azure-Samples/azure-event-grid-viewer/master/azuredeploy.json" \
    --parameters siteName=$SITE_NAME hostingPlanName=$SITE_NAME-plan
Once the deployment has succeeded (it might take a few minutes), open a browser and navigate to your web app to make sure it's running:
https://<your-site-name>.azurewebsites.net
You should see the sample app rendered with no event messages displayed.
Register the Event Grid resource provider
Unless you've used Event Grid before, you'll need to register the Event Grid resource provider. If you’ve used Event Grid before, skip to the next section.
In the Azure portal, do the following steps:
On the left menu, select Subscriptions.
Select the subscription you want to use for Event Grid from the subscription list.
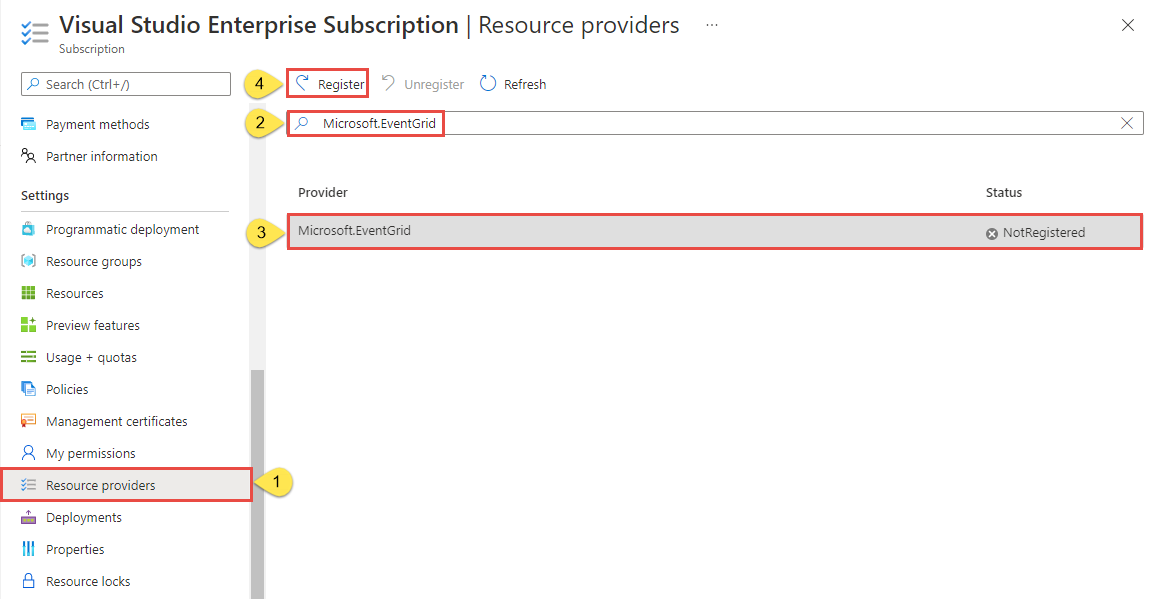
On the Subscription page, select Resource providers under Settings on the left menu.
Search for Microsoft.EventGrid, and confirm that the Status is Not Registered.
Select Microsoft.EventGrid in the provider list.
Select Register on the command bar.
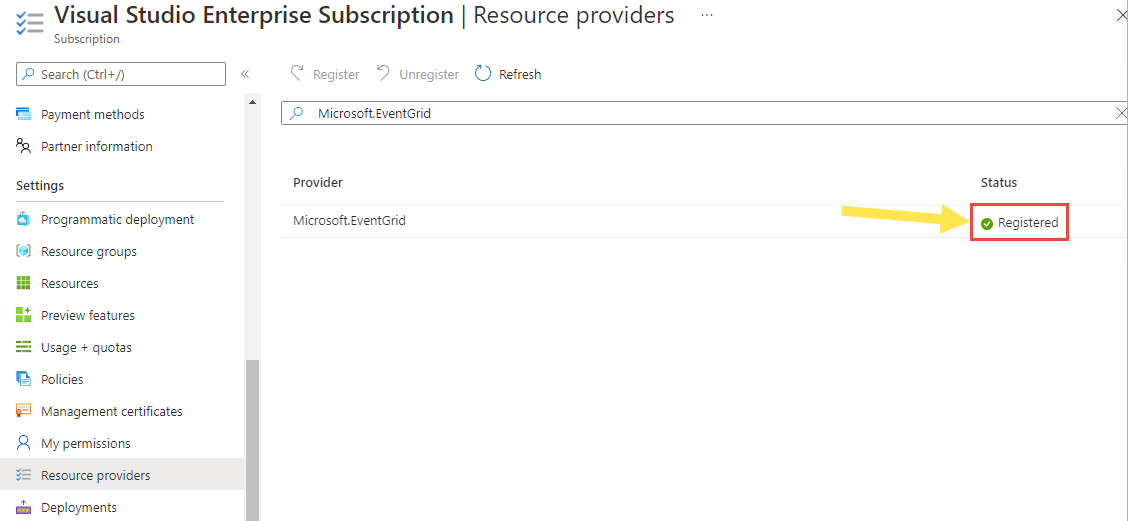
Refresh to make sure the status of Microsoft.EventGrid is changed to Registered.
Subscribe to API Management events
In Event Grid, you subscribe to a topic to tell it which events you want to track, and where to send them. Here, you create a subscription to events in your API Management instance.
In the Azure portal, navigate to your API Management instance.
Select Events > + Event Subscription.
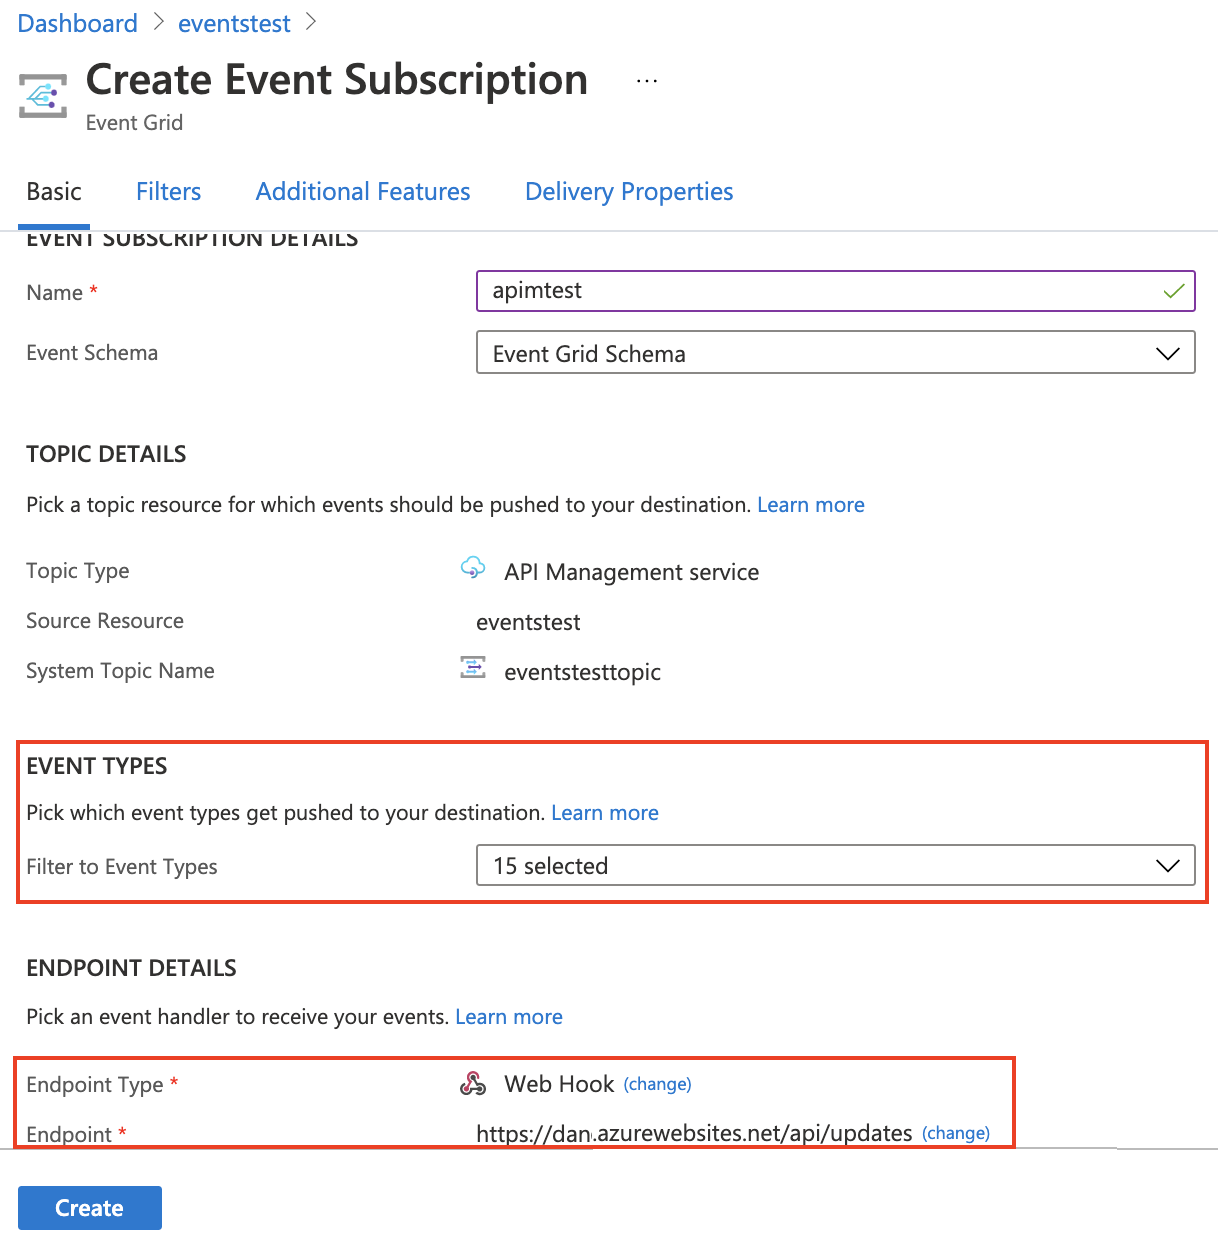
On the Basic tab:
- Enter a descriptive Name for the event subscription.
- In Event Types, select one or more API Management event types to send to Event Grid. For the example in this article, select at least Microsoft.APIManagement.ProductCreated
- In Endpoint Details, select the Web Hook event type, click Select an endpoint, and enter your web app URL followed by
api/updates. Example:https://myapp.azurewebsites.net/api/updates. - Select Confirm selection.
Leave the settings on the remaining tabs at their default values, and then select Create.
Trigger and view events
Now that the sample app is up and running and you've subscribed to your API Management instance with Event Grid, you're ready to generate events.
As an example, create a product in your API Management instance. If your event subscription includes the Microsoft.APIManagement.ProductCreated event, creating the product triggers an event that is pushed to your web app endpoint.
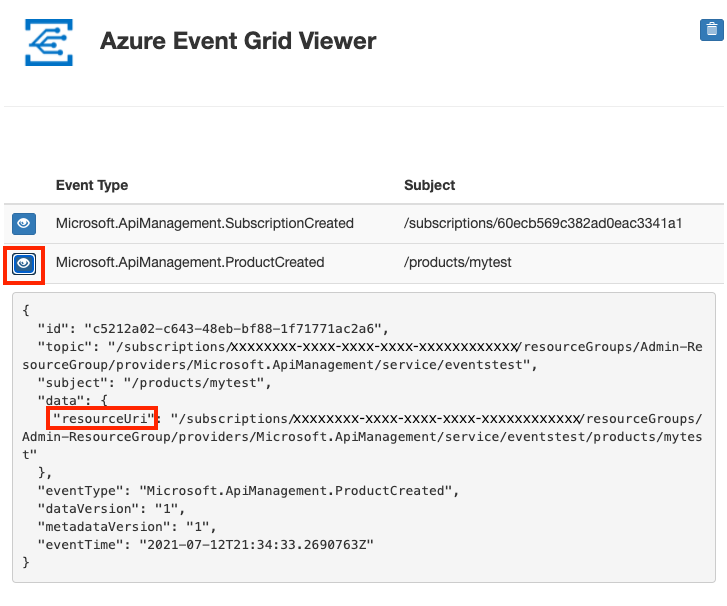
Navigate to your Event Grid Viewer web app, and you should see the ProductCreated event. Select the button next to the event to show the details.
Event Grid event schema
API Management event data includes the resourceUri, which identifies the API Management resource that triggered the event. For details about the API Management event message schema, see the Event Grid documentation:
Azure Event Grid event schema for API Management
Next steps
- Learn more about subscribing to events.
