Configure secure access with managed identities and virtual networks
This content applies to: ![]() v4.0 (GA)
v4.0 (GA) ![]() v3.1 (GA)
v3.1 (GA) ![]() v3.0 (GA)
v3.0 (GA) ![]() v2.1 (GA)
v2.1 (GA)
This how-to guide walks you through the process of enabling secure connections for your Document Intelligence resource. You can secure the following connections:
Communication between a client application within a Virtual Network (
VNET) and your Document Intelligence Resource.Communication between Document Intelligence Studio and your Document Intelligence resource.F
Communication between your Document Intelligence resource and a storage account (needed when training a custom model).
You're setting up your environment to secure the resources:
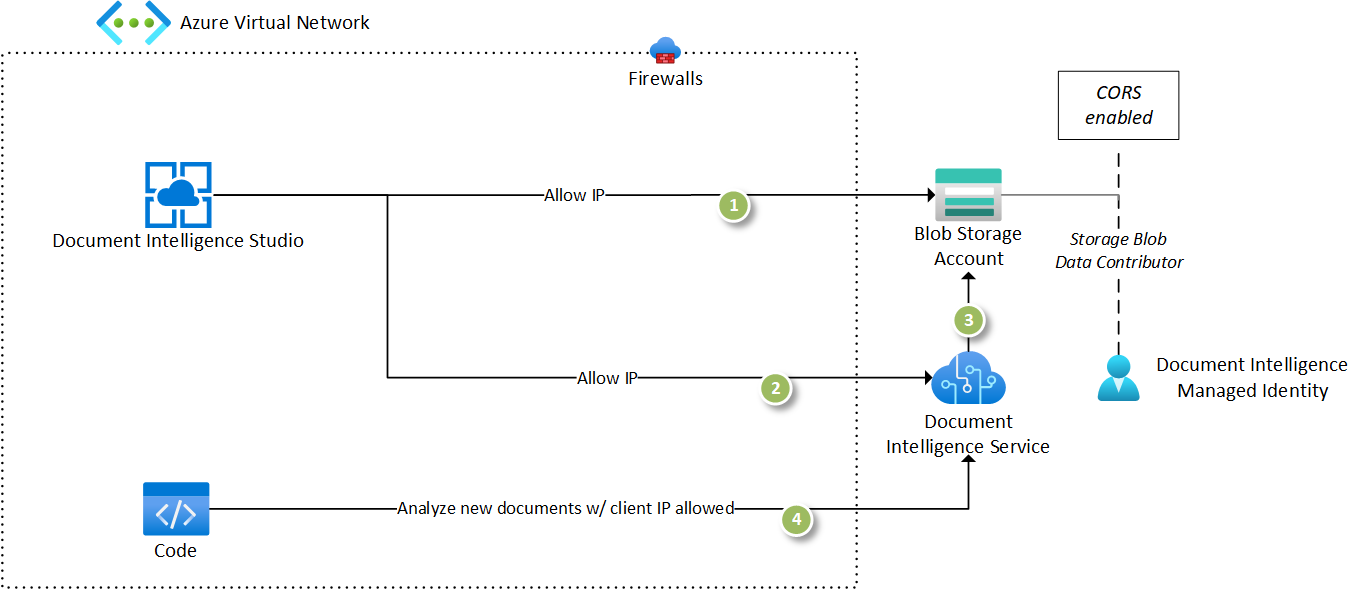
Prerequisites
To get started, you need:
An active Azure account—if you don't have one, you can create a free account.
A Document Intelligence or Azure AI services resource in the Azure portal. For detailed steps, see Create an Azure AI services resource.
An Azure blob storage account in the same region as your Document Intelligence resource. Create containers to store and organize your blob data within your storage account.
An Azure virtual network in the same region as your Document Intelligence resource. Create a virtual network to deploy your application resources to train models and analyze documents.
An Azure data science VM for Windows or Linux/Ubuntu to optionally deploy a data science VM in the virtual network to test the secure connections being established.
Configure resources
Configure each of the resources to ensure that the resources can communicate with each other:
Configure the Document Intelligence Studio to use the newly created Document Intelligence resource by accessing the settings page and selecting the resource.
Ensure and validate that the configuration works by selecting the Read API and analyzing a sample document. If the resource was configured correctly, the request successfully completes.
Add a training dataset to a container in the Storage account you created.
Select the custom model tile to create a custom project. Ensure that you select the same Document Intelligence resource and the storage account you created in the previous step.
Select the container with the training dataset you uploaded in the previous step. Ensure that if the training dataset is within a folder, the folder path is set appropriately.
Ensure that you have the required permissions, the Studio sets the CORS setting required to access the storage account. If you don't have the permissions, you need to make certain that the CORS settings are configured on the Storage account before you can proceed.
Ensure and validate that the Studio is configured to access your training data. If you can see your documents in the labeling experience, all the required connections are established.
You now have a working implementation of all the components needed to build a Document Intelligence solution with the default security model:
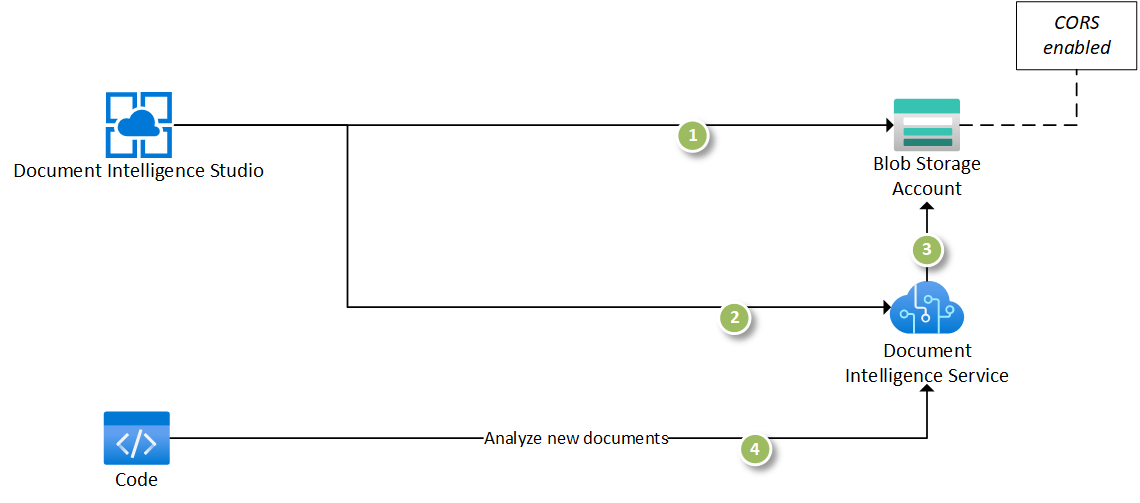
Next, complete the following steps:
Configure managed identity on the Document Intelligence resource.
Secure the storage account to restrict traffic from only specific virtual networks and IP addresses.
Configure the Document Intelligence managed identity to communicate with the storage account.
Disable public access to the Document Intelligence resource and create a private endpoint. Your resource is then only accessible from specific virtual networks and IP addresses.
Add a private endpoint for the storage account in a selected virtual network.
Ensure and validate that you can train models and analyze documents from within the virtual network.
Setup managed identity for Document Intelligence
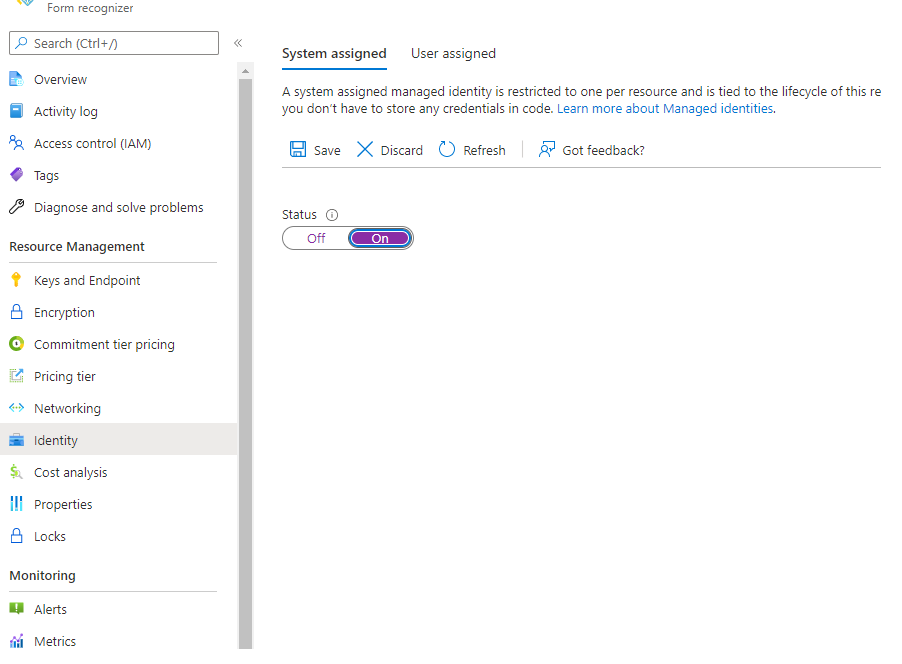
Navigate to the Document Intelligence resource in the Azure portal and select the Identity tab. Toggle the System assigned managed identity to On and save the changes:
Secure the Storage account
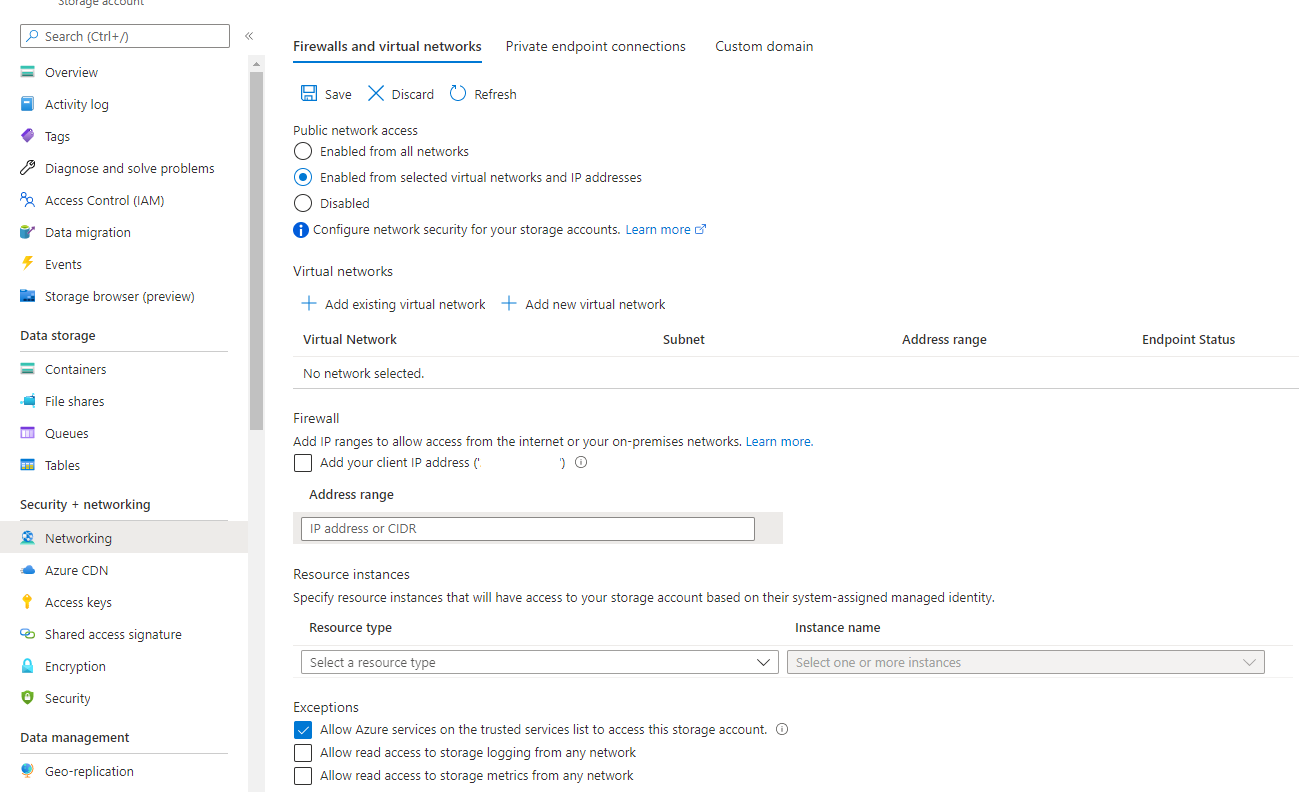
Start configuring secure communications by navigating to the Networking tab on your Storage account in the Azure portal.
Under Firewalls and virtual networks, choose Enabled from selected virtual networks and IP addresses from the Public network access list.
Ensure that Allow Azure services on the trusted services list to access this storage account is selected from the Exceptions list.
Save your changes.
Note
Your storage account won't be accessible from the public internet.
Refreshing the custom model labeling page in the Studio will result in an error message.
Enable access to storage from Document Intelligence
To ensure that the Document Intelligence resource can access the training dataset, you need to add a role assignment for your managed identity.
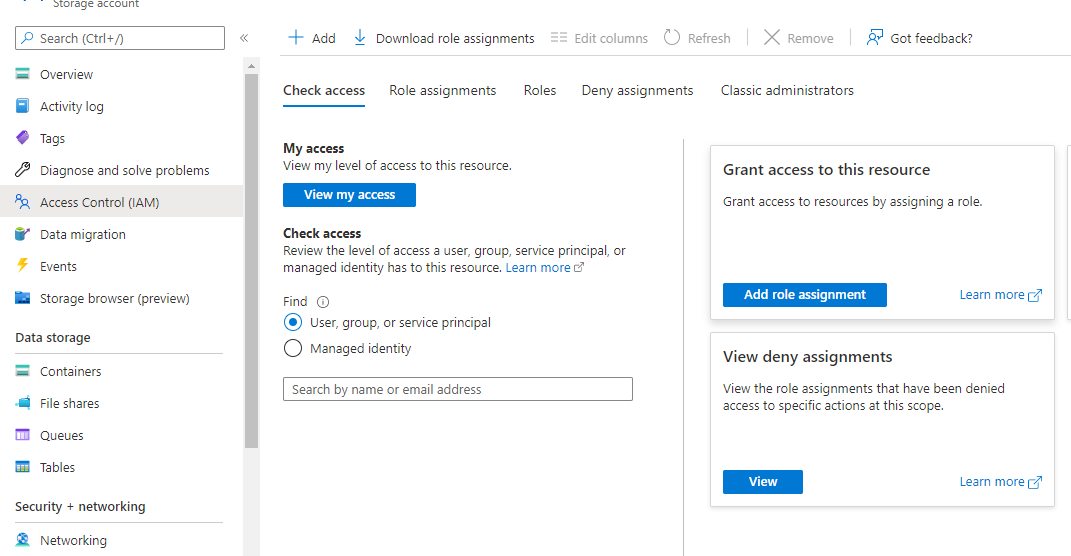
Staying on the storage account window in the Azure portal, navigate to the Access Control (IAM) tab in the left navigation bar.
Select the Add role assignment button.
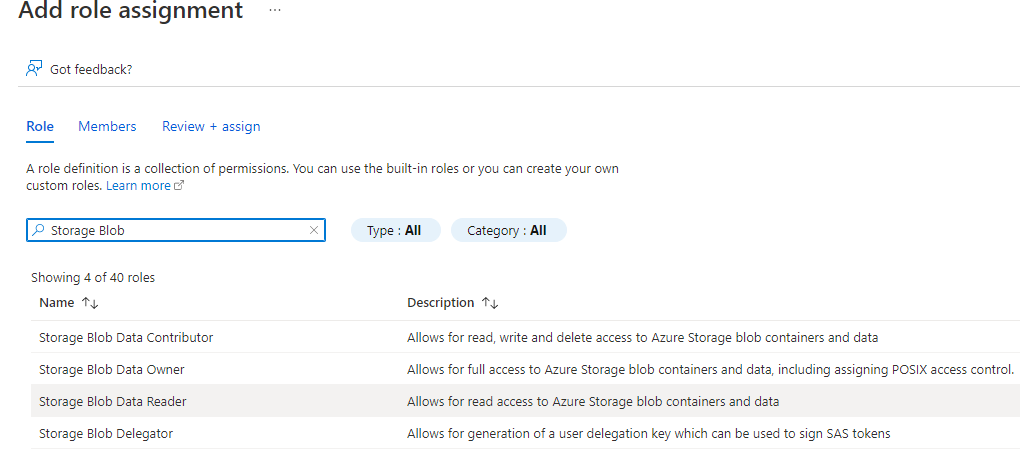
On the Role tab, search for and select the Storage Blob Data Contributor permission and select Next.
On the Members tab, select the Managed identity option and choose + Select members
On the Select managed identities dialog window, select the following options:
Subscription. Select your subscription.
Managed Identity. Select Form Recognizer.
Select. Choose the Document Intelligence resource you enabled with a managed identity.

Close the dialog window.
Finally, select Review + assign to save your changes.
Great! You configured your Document Intelligence resource to use a managed identity to connect to a storage account.
Tip
When you try the Document Intelligence Studio, you'll see the READ API and other prebuilt models don't require storage access to process documents. However, training a custom model requires additional configuration because the Studio can't directly communicate with a storage account. You can enable storage access by selecting Add your client IP address from the Networking tab of the storage account to configure your machine to access the storage account via IP allowlisting.
Configure private endpoints for access from VNETs
Note
The resources are only accessible from the virtual network.
Some Document Intelligence features in the Studio like auto label require the Document Intelligence Studio to have access to your storage account.
Add our Studio IP address, 20.3.165.95, to the firewall allowlist for both Document Intelligence and Storage Account resources. This is Document Intelligence Studio's dedicated IP address and can be safely allowed.
When you connect to resources from a virtual network, adding private endpoints ensures both the storage account, and the Document Intelligence resource are accessible from the virtual network.
Next, configure the virtual network to ensure only resources within the virtual network or traffic router through the network have access to the Document Intelligence resource and the storage account.
Enable your firewalls and virtual networks
In the Azure portal, navigate to your Document Intelligence resource.
Select the Networking tab from the left navigation bar.
Enable the Selected Networking and Private Endpoints option from the Firewalls and virtual networks tab and select save.
Note
If you try accessing any of the Document Intelligence Studio features, you'll see an access denied message. To enable access from the Studio on your machine, select the Add your client IP address checkbox and Save to restore access.
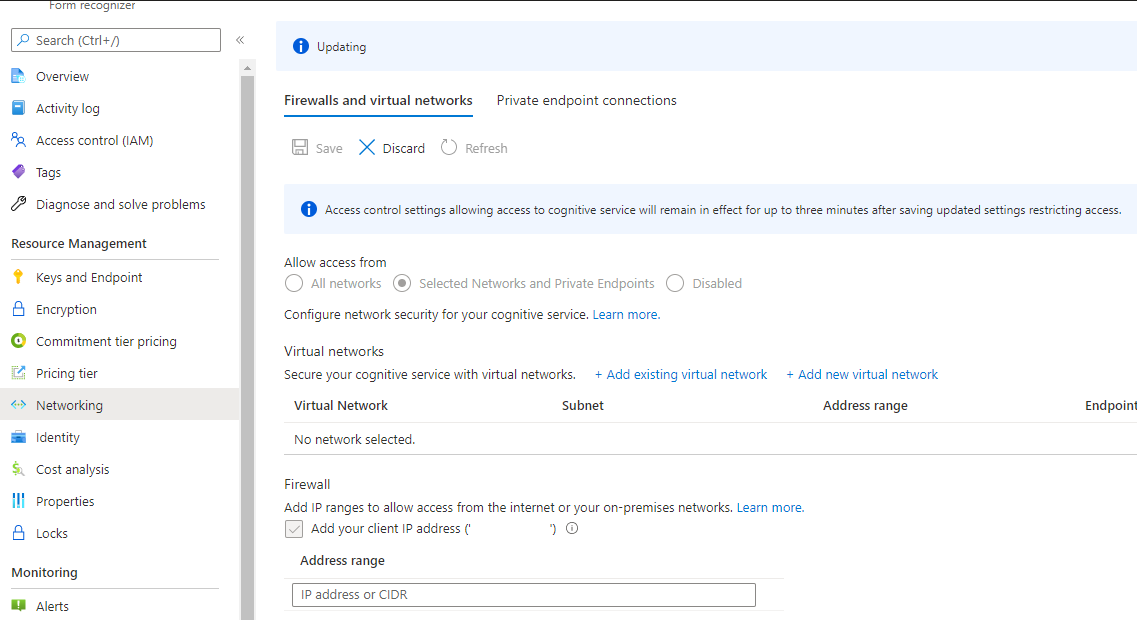
Configure your private endpoint
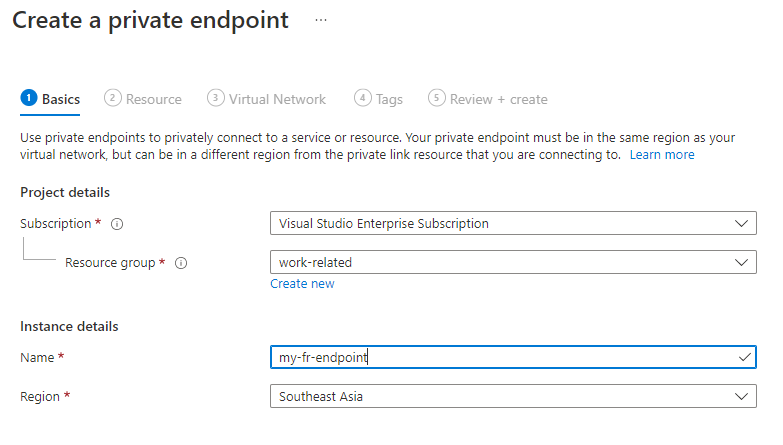
Navigate to the Private endpoint connections tab and select the + Private endpoint. You're navigated to the Create a private endpoint dialog page.
On the Create private endpoint dialog page, select the following options:
Subscription. Select your billing subscription.
Resource group. Select the appropriate resource group.
Name. Enter a name for your private endpoint.
Region. Select the same region as your virtual network.
Select Next: Resource.
Configure your virtual network
On the Resource tab, accept the default values and select Next: Virtual Network.
On the Virtual Network tab, make sure that you select the virtual network that you created.
If you have multiple subnets, select the subnet where you want the private endpoint to connect. Accept the default value to Dynamically allocate IP address.
Select Next: DNS
Accept the default value Yes to integrate with private DNS zone.
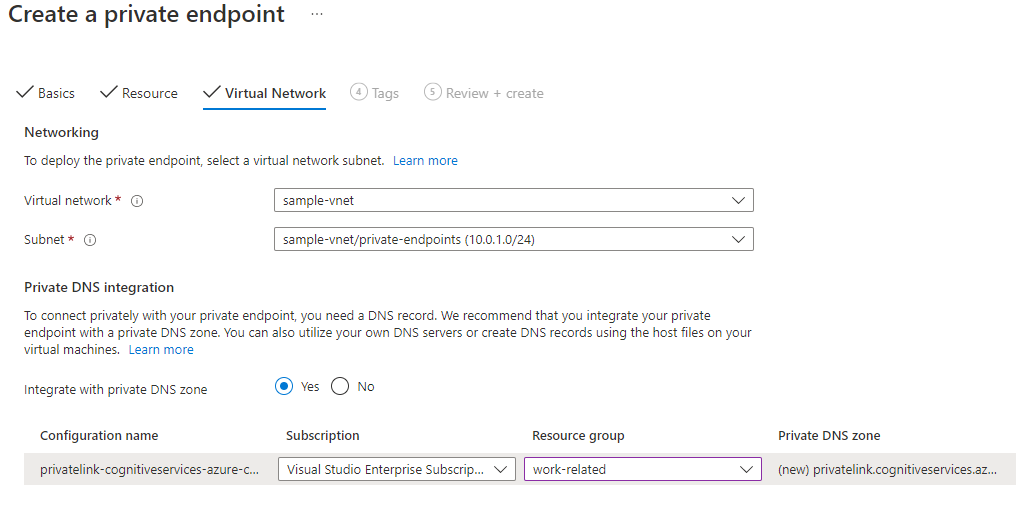
Accept the remaining defaults and select Next: Tags.
Select Next: Review + create .
Well done! Your Document Intelligence resource now is only accessible from the virtual network and any IP addresses in the IP allowlist.
Configure private endpoints for storage
Navigate to your storage account on the Azure portal.
Select the Networking tab from the left navigation menu.
Select the Private endpoint connections tab.
Choose add + Private endpoint.
Provide a name and choose the same region as the virtual network.
Select Next: Resource.
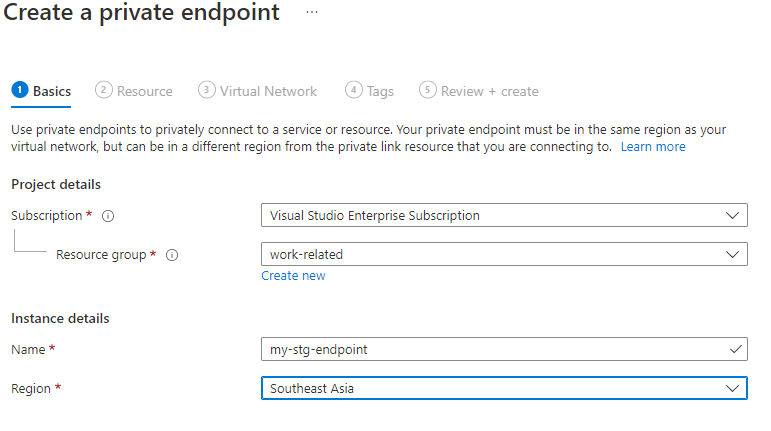
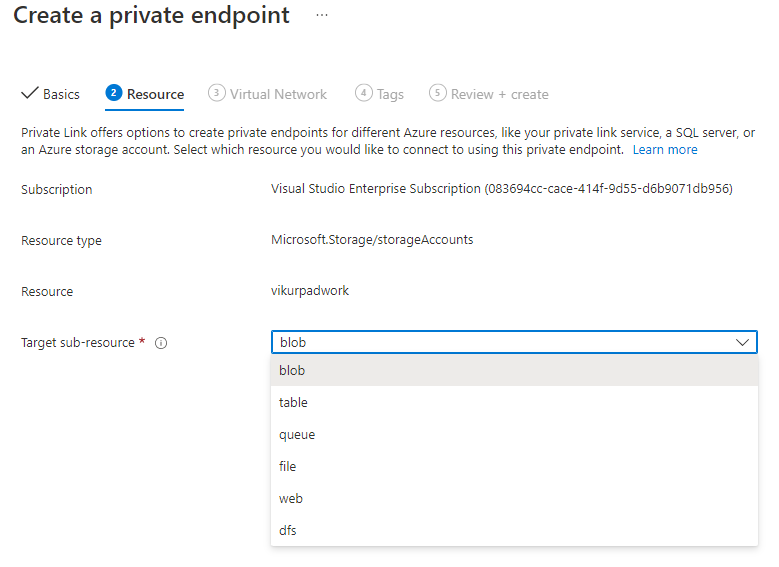
On the resource tab, select blob from the Target sub-resource list.
select Next: Virtual Network.
Select the Virtual network and Subnet. Make sure Enable network policies for all private endpoints in this subnet is selected and the Dynamically allocate IP address is enabled.
Select Next: DNS.
Make sure that Yes is enabled for Integrate with private DNS zone.
Select Next: Tags.
Select Next: Review + create.
Great work! You now have all the connections between the Document Intelligence resource and storage configured to use managed identities.
Note
The resources are only accessible from the virtual network and allowed IPs.
Studio access and analyze requests to your Document Intelligence resource will fail unless the request originates from the virtual network or is routed via the virtual network.
Validate your deployment
To validate your deployment, you can deploy a virtual machine (VM) to the virtual network and connect to the resources.
Configure a Data Science VM in the virtual network.
Remotely connect into the VM from your desktop and launch a browser session that accesses Document Intelligence Studio.
Analyze requests and the training operations should now work successfully.
That's it! You can now configure secure access for your Document Intelligence resource with managed identities and private endpoints.
Common error messages
Failed to access Blob container:

Resolution:
Make sure the client computer can access Document Intelligence resource and storage account, either they are in the same
VNET, or client IP address is allowed in Networking > Firewalls and virtual networks setting page of both Document Intelligence resource and storage account.
AuthorizationFailure:
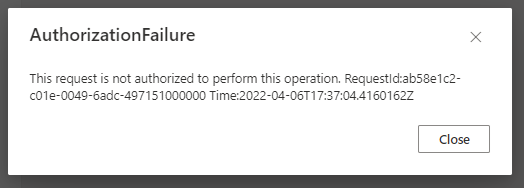
Resolution: Make sure the client computer can access Document Intelligence resource and storage account, either they are in the same
VNET, or client IP address is allowed in Networking > Firewalls and virtual networks setting page of both Document Intelligence resource and storage account.ContentSourceNotAccessible:
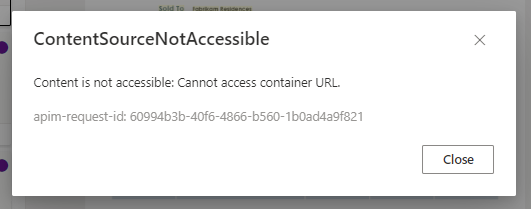
Resolution: Make sure you grant your Document Intelligence managed identity the role of Storage Blob Data Contributor and enabled Trusted services access or Resource instance rules on the networking tab.
AccessDenied:
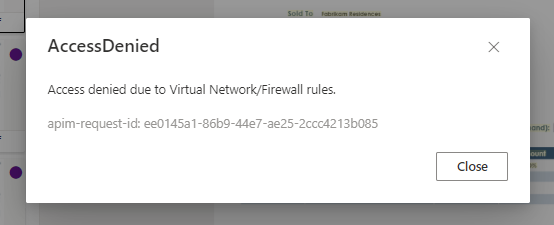
Resolution: Make sure the client computer can access Document Intelligence resource and storage account, either they are in the same
VNET, or client IP address is allowed in Networking > Firewalls and virtual networks setting page of both Document Intelligence resource and storage account.