Use an existing AI Search index with the Azure AI Search tool
Use an existing Azure AI Search index with the agent's Azure AI Search tool.
Note
Azure AI Search indexes must meet the following requirements:
- The index must contain at least one searchable & retrievable text field (type Edm.String)
- The index must contain at least one searchable vector field (type Collection(Edm.Single))
- The index must use a vector profile/integrated vectorization
Search types
Index without semantic configuration
- By default, the Azure AI Search tool runs a hybrid search (keyword + vector) on all text fields.
Index with semantic configuration
- By default, the Azure AI Search tool runs hybrid + semantic search on all text fields.
Usage support
| Azure AI foundry support | Python SDK | C# SDK | JavaScript SDK | REST API | Basic agent setup | Standard agent setup |
|---|---|---|---|---|---|---|
| ✔️ | ✔️ | ✔️ | ✔️ | ✔️ | ✔️ | ✔️ |
Setup: Create an agent that can use an existing Azure AI Search index
Prerequisite: Have an existing Azure AI Search index
A prerequisite of using the Azure AI Search tool is to have an existing Azure AI Search index. If you don't have an existing index, you can create one in the Azure portal using the import and vectorize data wizard.
Create a project connection to the Azure AI Search resource with the index you want to use
Once you have completed the agent setup, you must create a project connection to the Azure AI Search resource that contains the index you want to use.
If you already connected the AI Search resource that contains the index you want to use to your project, skip this step.
Get your Azure AI Search resource connection key and endpoint
Access your Azure AI Search resource.
- In the Azure portal, navigate to the AI Search resource that contains the index you want to use.
Copy the connection endpoint.
- In the Overview tab, copy the URL of your resource. The URL should be in the format
https://<your-resource-name>.search.windows.net/.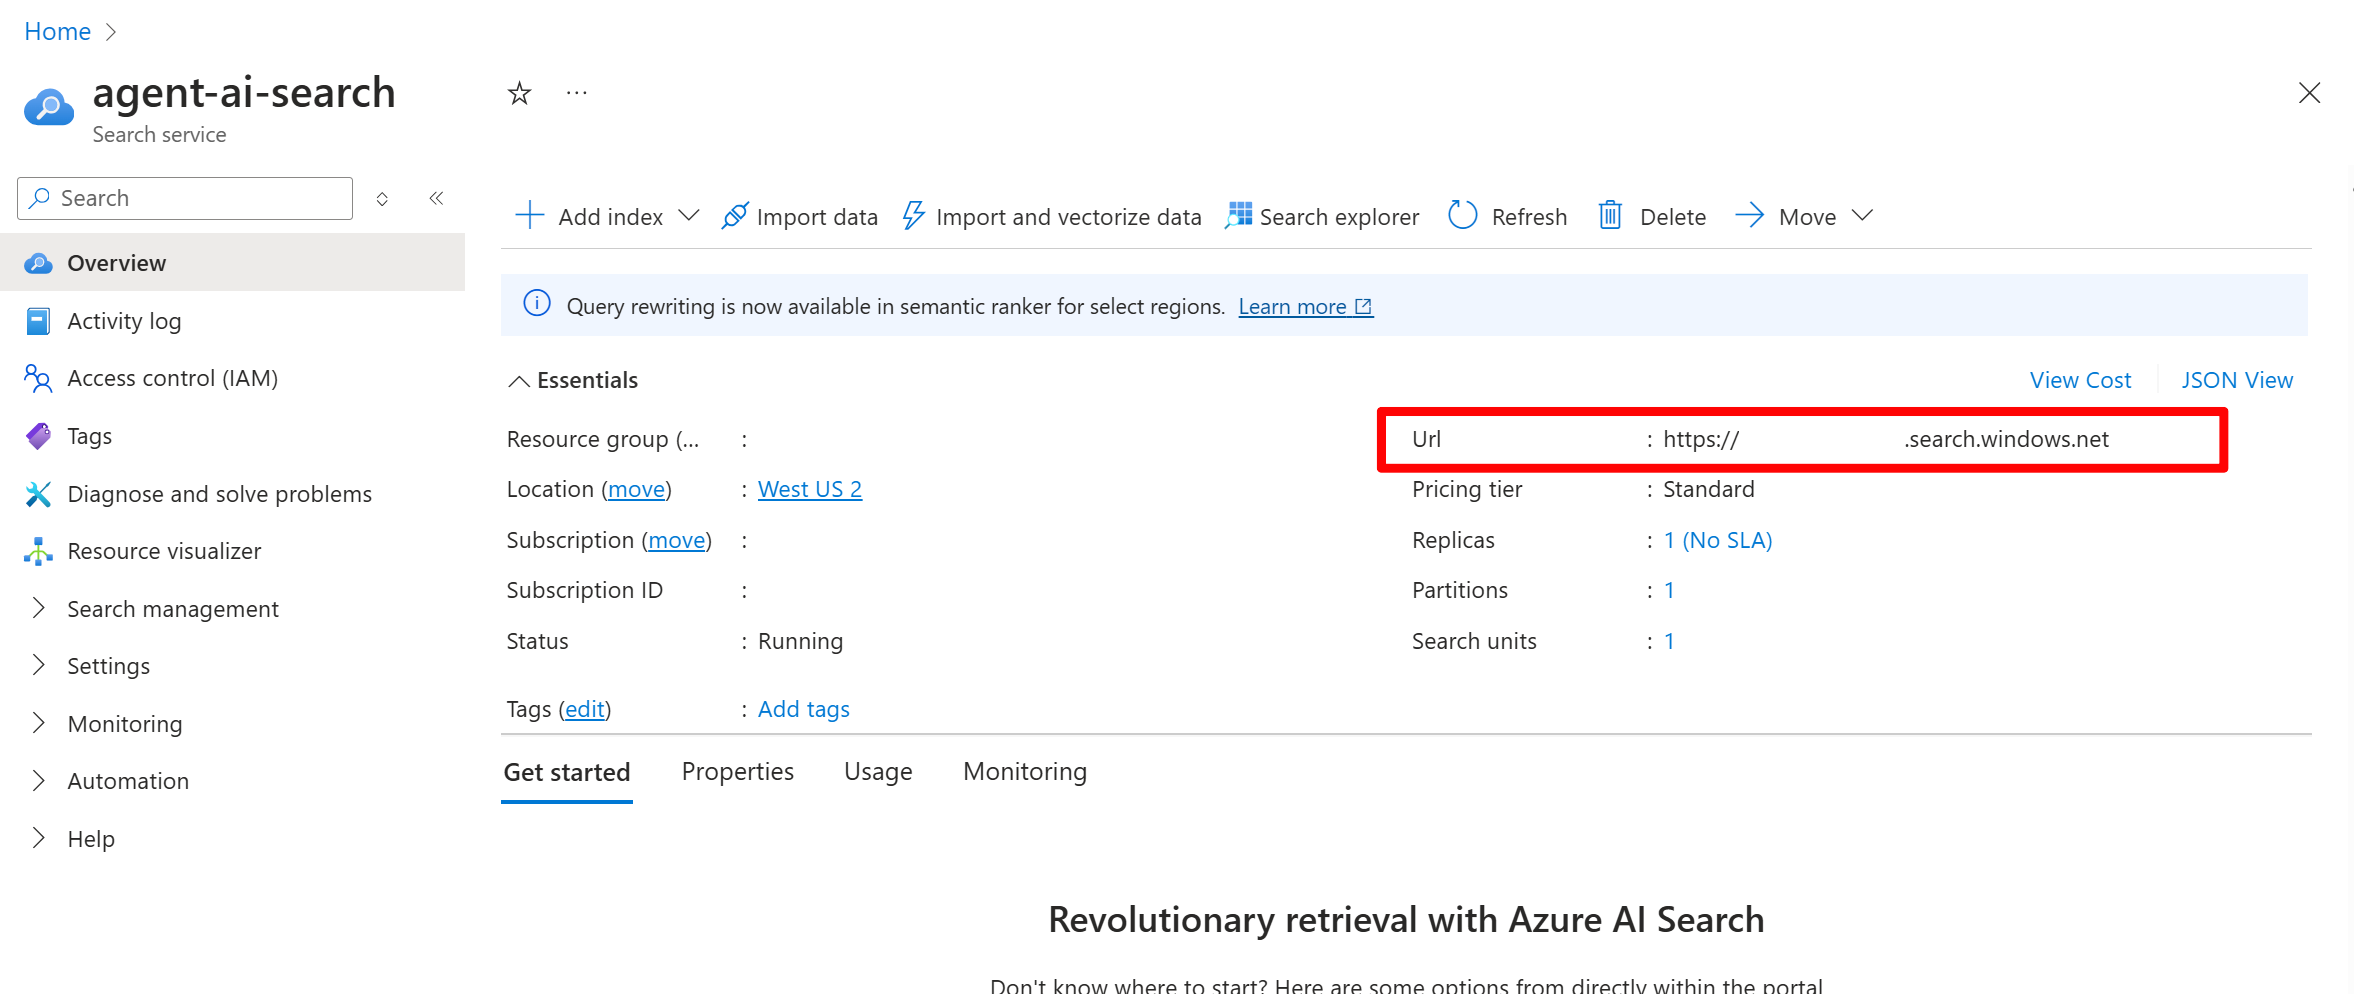
- In the Overview tab, copy the URL of your resource. The URL should be in the format
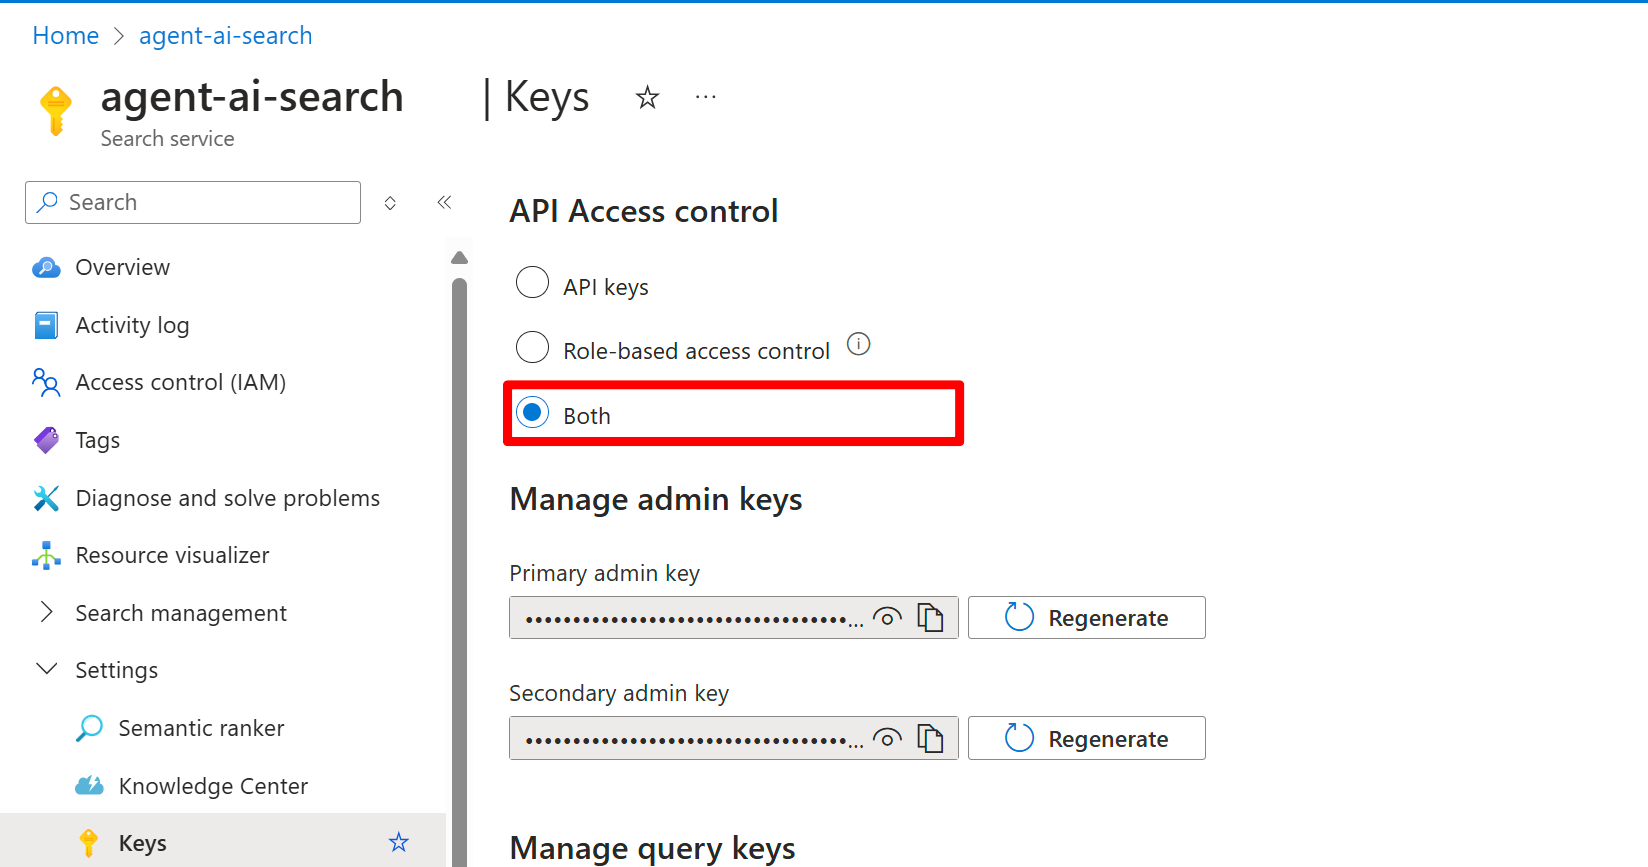
Verify API Access control is set to Both and copy one of the keys under Manage admin keys.
- From the left-hand navigation bar, scroll down to the Settings section and select Keys.
- Under the API Access Control section, ensure the option Both API key and Role-based access control is selected.
- If you want the connection to use API Keys for authentication, copy one of the keys under Manage admin keys.


Create an Azure AI Search project connection
If you use Microsoft Entra ID for the connection authentication type, you need to manually assign the project managed identity the roles Search Index Data Contributor and Search Service Contributor to the Azure AI Search resource.
Create the following connections.yml file
You can use either an API key or credential-less YAML configuration file. Replace the placeholders for name, endpoint and api_key with your Azure AI Search resource values. For more information on the YAML configuration file, see the Azure AI Search connection YAML schema.
API Key example:
name: my_project_acs_connection_keys
type: azure_ai_search
endpoint: https://contoso.search.windows.net/
api_key: XXXXXXXXXXXXXXX
Credential-less
name: my_project_acs_connection_credentialless
type: azure_ai_search
endpoint: https://contoso.search.windows.net/
Then, run the following command:
Replace my_resource and my_project_name with your resource group and project name created in the agent setup.
az ml connection create --file {connection.yml} --resource-group {my_resource_group} --workspace-name {my_project_name}


Now that you have created a project connection to your Azure AI Search resource, you can configure and start using the Azure AI Search tool with the SDK. See the code examples tab to get started.
Add the Azure AI Search tool to an agent
you can add the Azure AI Search tool to an agent programatically using the code examples listed at the top of this article, or the Azure AI Foundry portal. If you want to use the portal:
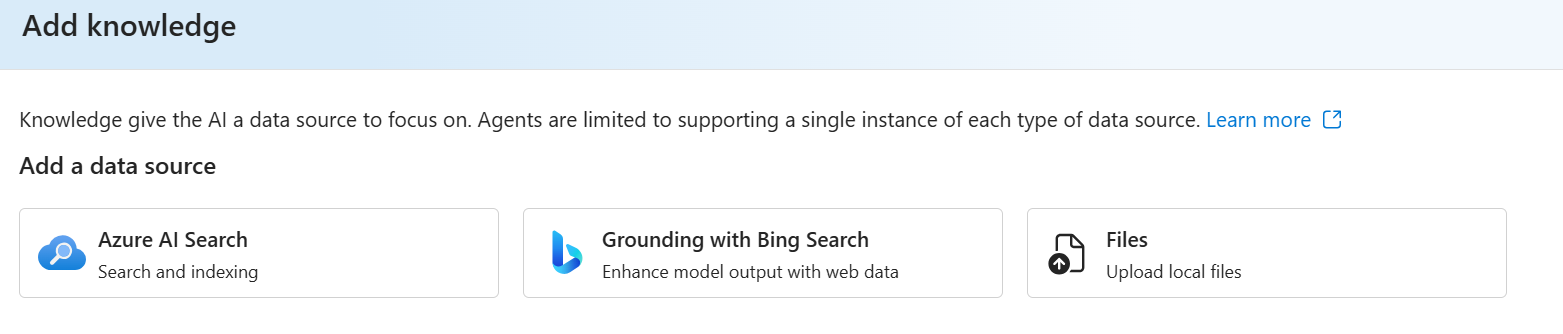
In the Create and debug screen for your agent, scroll down the Setup pane on the right to knowledge. Then select Add.
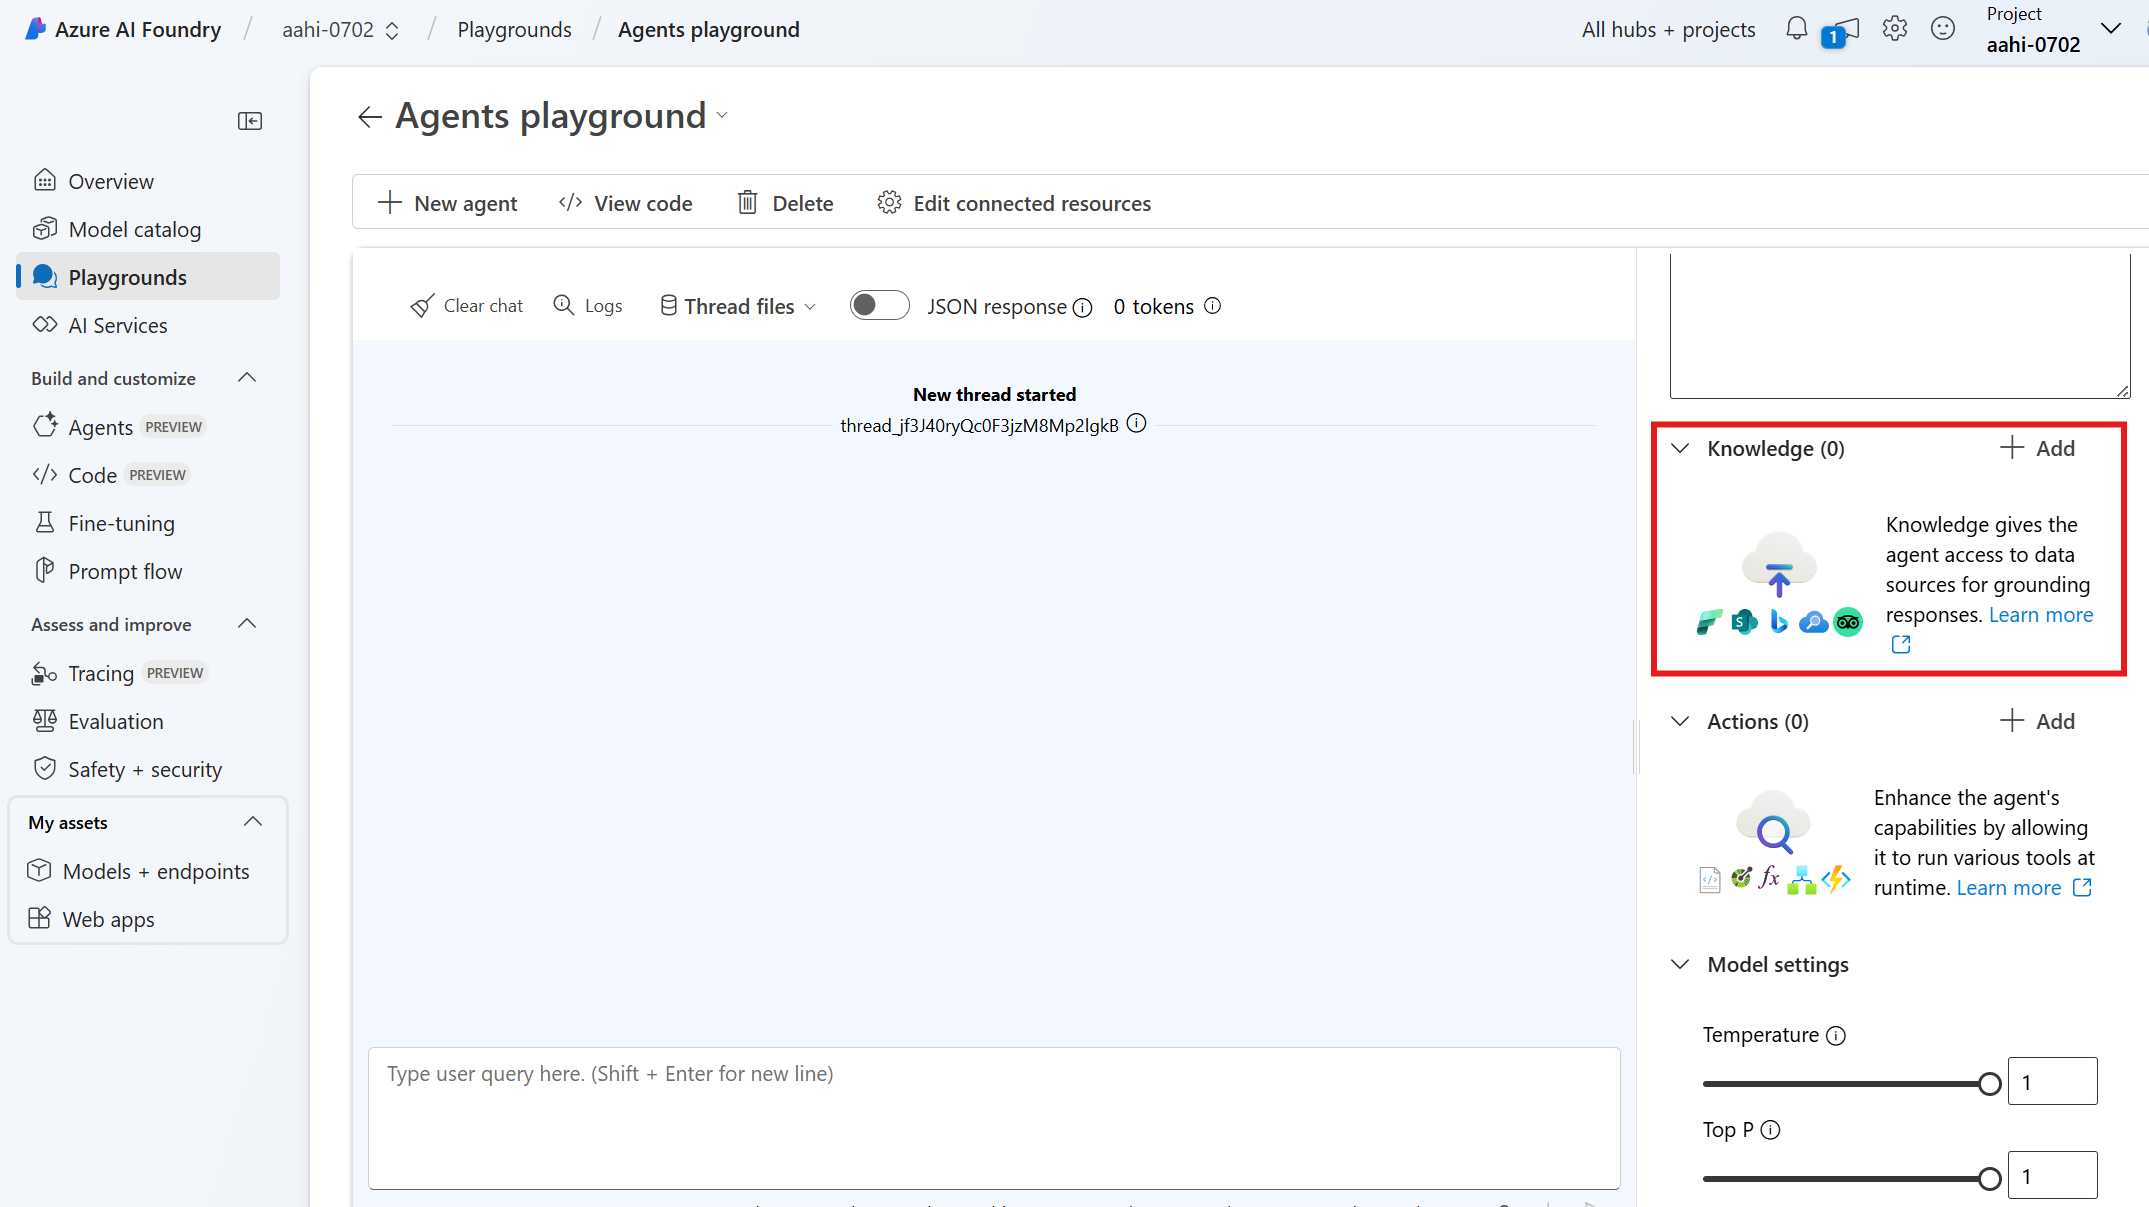
Select Azure AI Search and follow the prompts to add the tool.


Quickstart – Use an existing Azure AI Search index with the Azure AI Search tool
This quickstart shows how to use an existing Azure AI Search index with the Azure AI Search tool.
Prerequisites
Complete the Azure AI Search tool setup.
Step 1: Create an Azure AI Client
First, create an Azure AI Client using the connection string of your project.
import os
from azure.ai.projects import AIProjectClient
from azure.identity import DefaultAzureCredential
from azure.ai.projects.models import AzureAISearchTool

# Create an Azure AI Client from a connection string, copied from your Azure AI Foundry project.
# At the moment, it should be in the format "<HostName>;<AzureSubscriptionId>;<ResourceGroup>;<ProjectName>"
# HostName can be found by navigating to your discovery_url and removing the leading "https://" and trailing "/discovery"
# To find your discovery_url, run the CLI command: az ml workspace show -n {project_name} --resource-group {resource_group_name} --query discovery_url
# Project Connection example: eastus.api.azureml.ms;my-subscription-id;my-resource-group;my-hub-name

connection_string = os.environ["PROJECT_CONNECTION_STRING"]

project_client = AIProjectClient.from_connection_string(
    credential=DefaultAzureCredential(),
    conn_str=connection_string,
)
Step 2: Get the connection ID for the Azure AI Search resource
Get the connection ID of the Azure AI Search connection in the project. You can use the code snippet to print the connection ID of all the Azure AI Search connections in the project.
# AI Search resource connection ID
# This code prints out the connection ID of all the Azure AI Search connections in the project
# If you have more than one AI search connection, make sure to select the correct one that contains the index you want to use.
conn_list = project_client.connections.list()
conn_id = ""
for conn in conn_list:
    if conn.connection_type == "AZURE_AI_SEARCH":
        print(f"Connection ID: {conn.id}")
The second way to get the connection ID is to navigate to the project in the Azure AI Foundry and click on the Connected resources tab and then select your Azure AI Search resource.
 In the URL, you see the wsid=/subscription/your-subscription-id..., this is the connection ID you need to use. Copy everything that comes after wsid=.

Step 3: Configure the Azure AI Search tool
Using the connection ID you got in the previous step, you can now configure the Azure AI Search tool to use your Azure AI Search index.
# TO DO: replace this value with the connection ID of the search index
conn_id =  "/subscriptions/<your-subscription-id>/resourceGroups/<your-resource-group>/providers/Microsoft.MachineLearningServices/workspaces/<your-project-name>/connections/<your-azure-ai-search-connection-name>"

# Initialize agent AI search tool and add the search index connection ID and index name
# TO DO: replace <your-index-name> with the name of the index you want to use
ai_search = AzureAISearchTool(index_connection_id=conn_id, index_name="<your-index-name>")
Step 4: Create an agent with the Azure AI Search tool enabled
Change the model to the one deployed in your project. You can find the model name in the Azure AI Foundry under the Models tab. You can also change the name and instructions of the agent to suit your needs.
agent = project_client.agents.create_agent(
    model="gpt-4o-mini",
    name="my-assistant",
    instructions="You are a helpful assistant",
    tools=ai_search.definitions,
    tool_resources = ai_search.resources,
)
print(f"Created agent, ID: {agent.id}")
Step 5: Ask the agent questions about data in the index
Now that the agent is created, ask it questions about the data in your Azure AI Search index. The example assumes your Azure AI Search index contains information about health care plans.
# Create a thread
thread = project_client.agents.create_thread()
print(f"Created thread, thread ID: {thread.id}")

# Create a message
message = project_client.agents.create_message(
    thread_id=thread.id,
    role="user",
    content="what are my health insurance plan coverage types?",
)
print(f"Created message, message ID: {message.id}")

# Run the agent
run = project_client.agents.create_and_process_run(thread_id=thread.id, assistant_id=agent.id)
print(f"Run finished with status: {run.status}")

if run.status == "failed":
    # Check if you got "Rate limit is exceeded.", then you want to get more quota
    print(f"Run failed: {run.last_error}")

# Get messages from the thread
messages = project_client.agents.list_messages(thread_id=thread.id)
print(f"Messages: {messages}")

assistant_message = ""
for message in messages.data:
    if message["role"] == "assistant":
        assistant_message = message["content"][0]["text"]["value"]

# Get the last message from the sender
print(f"Assistant response: {assistant_message}")