How to manage hardware OATH tokens in Microsoft Entra ID (Preview)
This topic covers how to manage hardware oath tokens in Microsoft Entra ID, including Microsoft Graph APIs that you can use to upload, activate, and assign hardware OATH tokens.
Enable hardware OATH tokens in the Authentication methods policy
You can view and enable hardware OATH tokens in the Authentication methods policy by using Microsoft Graph APIs or the Microsoft Entra admin center.
To view the hardware OATH tokens policy status by using the APIs:
GET https://graph.microsoft.com/beta/policies/authenticationMethodsPolicy/authenticationMethodConfigurations/hardwareOathTo enable hardware OATH tokens policy by using the APIs.
PATCH https://graph.microsoft.com/beta/policies/authenticationMethodsPolicy/authenticationMethodConfigurations/hardwareOathIn the request body, add:
{
  "state": "enabled"
}
To enable hardware OATH tokens in the Microsoft Entra admin center:
Sign in to the Microsoft Entra admin center as at least an Authentication Policy Administrator.
Browse to Protection > Authentication methods > Hardware OATH tokens (Preview).
Select Enable, choose which groups of users to include in the policy, and select Save.

We recommend that you migrate to the Authentication methods policy to manage hardware OATH tokens. If you enable OATH tokens in the legacy MFA policy, browse to the policy in the Microsoft Entra admin center as an Authentication Policy Administrator: Protection > Multifactor authentication > Additional cloud-based multifactor authentication settings. Clear the checkbox for Verification code from mobile app or hardware token.
Scenario: Admin creates, assigns, and activates a hardware OATH token
This scenario covers how to create, assign, and activate a hardware OATH token as an admin, including the necessary API calls and verification steps.
Note
There might be up to a 20-minute delay for the policy propagation. Allow an hour for the policy to update before users can sign in with their hardware OATH token and see it in their Security info.
Let's look at an example where an Authentication Policy Administrator creates a token and assigns it to a user. You can allow assignment without activation.
For the body of the POST in this example, you can find the serialNumber from your device and the secretKey is delivered to you.
POST https://graph.microsoft.com/beta/directory/authenticationMethodDevices/hardwareOathDevices
{
"serialNumber": "GALT11420104",
"manufacturer": "Thales",
"model": "OTP 110 Token",
"secretKey": "C2dE3fH4iJ5kL6mN7oP1qR2sT3uV4w",
"timeIntervalInSeconds": 30,
"assignTo": {"id": "00aa00aa-bb11-cc22-dd33-44ee44ee44ee"}
}
The response includes the token id, and the user id that the token is assigned to:
{
    "@odata.context": "https://graph.microsoft.com/beta/$metadata#directory/authenticationMethodDevices/hardwareOathDevices/$entity",
    "id": "3dee0e53-f50f-43ef-85c0-b44689f2d66d",
    "displayName": null,
    "serialNumber": "GALT11420104",
    "manufacturer": "Thales",
    "model": "OTP 110 Token",
    "secretKey": null,
    "timeIntervalInSeconds": 30,
    "status": "available",
    "lastUsedDateTime": null,
    "hashFunction": "hmacsha1",
    "assignedTo": {
        "id": "00aa00aa-bb11-cc22-dd33-44ee44ee44ee",
        "displayName": "Test User"
    }
}
Here's how the Authentication Policy Administrator can activate the token. Replace the verification code in the Request body with the code from your hardware OATH token.
POST https://graph.microsoft.com/beta/users/00aa00aa-bb11-cc22-dd33-44ee44ee44ee/authentication/hardwareOathMethods/3dee0e53-f50f-43ef-85c0-b44689f2d66d/activate

{
    "verificationCode" : "903809"
}
To validate the token is activated, sign in to Security info as the test user. If you're prompted to approve a sign-in request from Microsoft Authenticator, select Use a verification code.
You can GET to list tokens:
GET https://graph.microsoft.com/beta/directory/authenticationMethodDevices/hardwareOathDevices
This example creates a single token:
POST https://graph.microsoft.com/beta/directory/authenticationMethodDevices/hardwareOathDevices
In the request body, add:
{
"serialNumber": "GALT11420104",
"manufacturer": "Thales",
"model": "OTP 110 Token",
"secretKey": "abcdef2234567abcdef2234567",
"timeIntervalInSeconds": 30,
"hashFunction": "hmacsha1"
}
The response includes the token ID.
#### Response
{
    "@odata.context": "https://graph.microsoft.com/beta/$metadata#directory/authenticationMethodDevices/hardwareOathDevices/$entity",
    "id": "3dee0e53-f50f-43ef-85c0-b44689f2d66d",
    "displayName": null,
    "serialNumber": "GALT11420104",
    "manufacturer": "Thales",
    "model": "OTP 110 Token",
    "secretKey": null,
    "timeIntervalInSeconds": 30,
    "status": "available",
    "lastUsedDateTime": null,
    "hashFunction": "hmacsha1",
    "assignedTo": null
}
Authentication Policy Administrators or an end user can unassign a token:
DELETE https://graph.microsoft.com/beta/users/66aa66aa-bb77-cc88-dd99-00ee00ee00ee/authentication/hardwareoathmethods/6c0272a7-8a5e-490c-bc45-9fe7a42fc4e0
This example shows how to delete a token with token ID 3dee0e53-f50f-43ef-85c0-b44689f2d66d:
DELETE https://graph.microsoft.com/beta/directory/authenticationMethodDevices/hardwareOathDevices/3dee0e53-f50f-43ef-85c0-b44689f2d66d
Scenario: Admin creates and assigns a hardware OATH token that a user activates
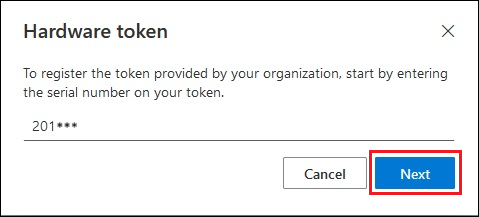
In this scenario, an Authentication Policy Administrator creates and assigns a token, and then a user can activate it on their Security info page, or by using Microsoft Graph Explorer. When you assign a token, you can share steps for the user to sign in to Security info to activate their token. They can choose Add sign-in method > Hardware token. They need to provide the hardware token serial number, which is typically on the back of the device.
POST https://graph.microsoft.com/beta/directory/authenticationMethodDevices/hardwareOathDevices
{
"serialNumber": "GALT11420104",
"manufacturer": "Thales",
"model": "OTP 110 Token",
"secretKey": "C2dE3fH4iJ5kL6mN7oP1qR2sT3uV4w",
"timeIntervalInSeconds": 30,
"assignTo": {"id": "00aa00aa-bb11-cc22-dd33-44ee44ee44ee"}
}
The response includes an id value for each token. An Authentication Administrator can assign the token to a user:
POST https://graph.microsoft.com/beta/users/00aa00aa-bb11-cc22-dd33-44ee44ee44ee/authentication/hardwareOathMethods
{
    "device":
    {
        "id": "6c0272a7-8a5e-490c-bc45-9fe7a42fc4e0"
    }
}
Here are steps a user can follow to self-activate their hardware OATH token in Security info:
Sign in to Security info.
Select Add sign-in method and choose Hardware token.
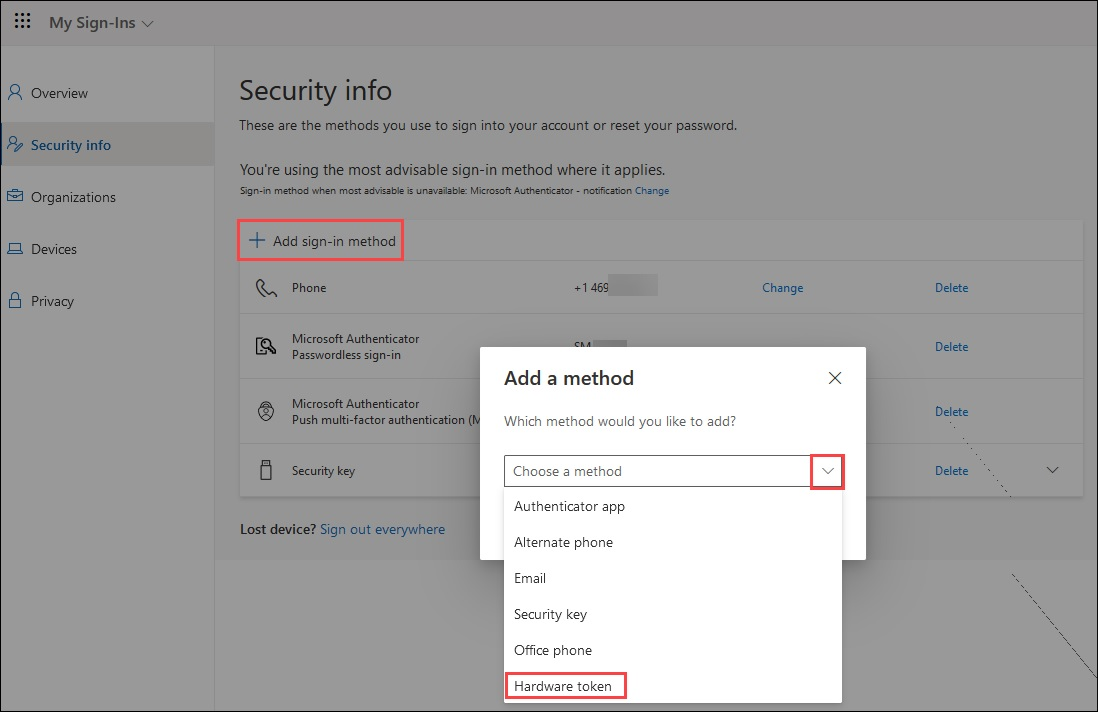
After you select Hardware token, select Add.
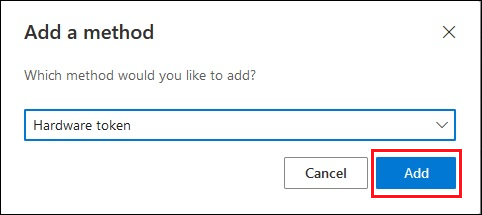
Check the back of the device for the serial number, enter it, and select Next.
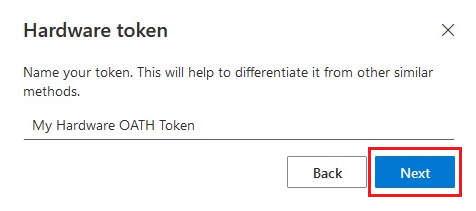
Create a friendly name to help you choose this method to complete multifactor authentication, and select Next.
Supply the random verification code that appears when you tap the button on the device. For a token that refreshes its code every 30 seconds, you need to enter the code and select Next within one minute. For a token that refreshes every 60 seconds, you have two minutes.
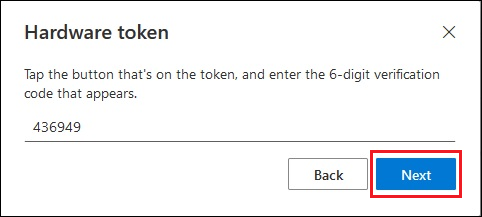
When you see the hardware OATH token is successfully added, select Done.

The hardware OATH token appears in the list of your available authentication methods.
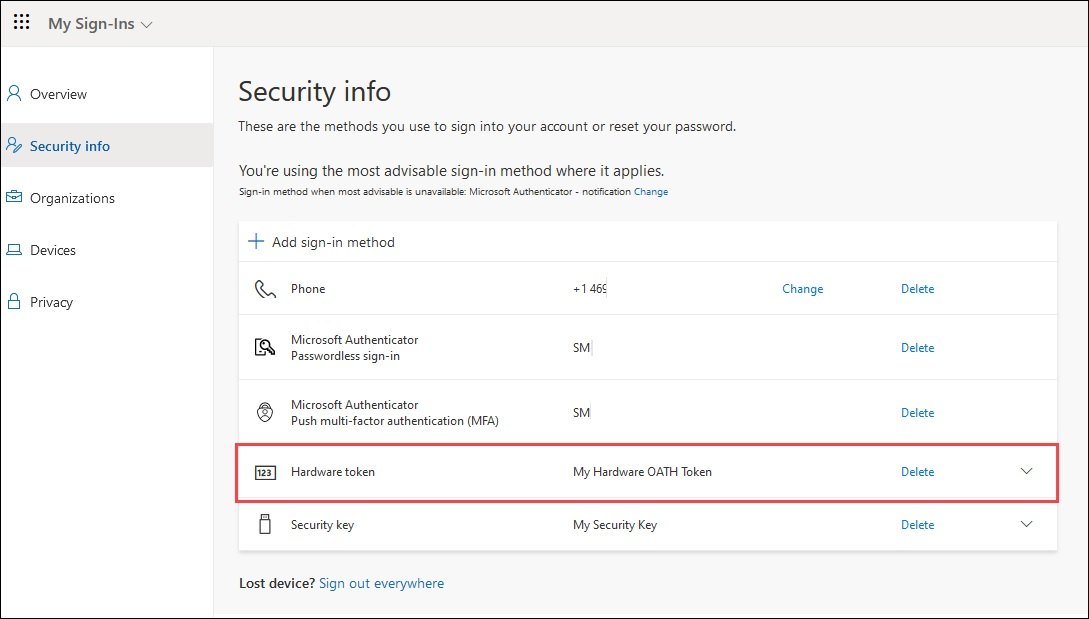
Here are steps users can follow to self-activate their hardware OATH token by using Graph Explorer.
Open Microsoft Graph Explorer, sign in, and consent to the required permissions.
Make sure you have the required permissions. For a user to be able to do the self-service API operations, admin consent is required for
Directory.Read.All,User.Read.All, andUser.ReadWrite.All.Get a list of hardware OATH tokens that are assigned to your account, but not yet activated.
GET https://graph.microsoft.com/beta/me/authentication/hardwareOathMethodsCopy the id of the token device, and add it to the end of the URL followed by /activate. You need to enter the verification code in the request body and submit the POST call before the code changes.
POST https://graph.microsoft.com/beta/me/authentication/hardwareOathMethods/b65fd538-b75e-4c88-bd08-682c9ce98eca/activateRequest body:
{
   "verificationCode": "988659"
}
Scenario: Admin creates multiple hardware OATH tokens in bulk that users self-assign and activate
In this scenario, an Authentication Administrator creates tokens without assignment, and users self-assign and activate the tokens. You can upload new tokens to the tenant in bulk. Users can sign in to Security info to activate their token. They can choose Add sign-in method > Hardware token. They need to provide the hardware token serial number, which is typically on the back of the device.
For greater assurance that the token is only activated by a specific user, you can assign the token to the user, and send the device to them for self-activation.
PATCH https://graph.microsoft.com/beta/directory/authenticationMethodDevices/hardwareOathDevices
{
"@context":"#$delta",
"value": [
    {
        "@contentId": "1",
        "serialNumber": "GALT11420108",
        "manufacturer": "Thales",
        "model": "OTP 110 Token",
        "secretKey": "abcdef2234567abcdef2234567",
        "timeIntervalInSeconds": 30,
        "hashFunction": "hmacsha1"
        },
    {
        "@contentId": "2",
        "serialNumber": "GALT11420112",
        "manufacturer": "Thales",
        "model": "OTP 110 Token",
        "secretKey": "2234567abcdef2234567abcdef",
        "timeIntervalInSeconds": 30,
        "hashFunction": "hmacsha1"
        }
    ]
}
Troubleshooting hardware OATH token issues
This section covers common
User has two tokens with the same serial number
A user might have two instances of the same hardware OATH token registered as authentication methods. This happens if the legacy token isn't removed from OATH tokens (Preview) in the Microsoft Entra admin center after it's uploaded by using Microsoft Graph.
When this happens, both instances of the token are listed as registered for the user:
GET https://graph.microsoft.com/beta/users/{user-upn-or-objectid}/authentication/hardwareOathMethods
Both instances of the token are also listed in OATH tokens (Preview) in the Microsoft Entra admin center:

To identify and remove the legacy token.
List all hardware OATH tokens on the user.
GET https://graph.microsoft.com/beta/users/{user-upn-or-objectid}/authentication/hardwareOathMethodsFind the id of both tokens and copy the serialNumber of the duplicate token.
Identify the legacy token. Only one token is returned in the response of the following command. That token was created by using Microsoft Graph.
GET https://graph.microsoft.com/beta/directory/authenticationMethodDevices/hardwareOathDevices?$filter=serialNumber eq '20033752'Remove the legacy token assignment from the user. Now that you know the id of the new token, you can identify the id of the legacy token from the list returned in step 1. Craft the URL using the legacy token id.
DELETE https://graph.microsoft.com/beta/users/{user-upn-or-objectid}/authentication/hardwareOathMethods/{legacyHardwareOathMethodId}Delete the legacy token by using the legacy token id in this call.
DELETE https://graph.microsoft.com/beta/directory/authenticationMethodDevices/hardwareOathDevices/{legacyHardwareOathMethodId}
Related content
Learn more about OATH tokens.