How to create a Network Virtual Appliance in an Azure Virtual WAN hub
This article shows you how to deploy an Integrated Network Virtual Appliance (NVA) in an Azure Virtual WAN hub.
Background
NVAs deployed in the Virtual WAN hub are typically split into three categories:
- Connectivity appliances: Used to terminate VPN and SD-WAN connections from on-premises. Connectivity appliances use Border Gateway Protocol (BGP) to exchange routes with the Virtual WAN hub.
- Next-Generation Firewall (NGFW) appliances: Used with Routing Intent to provide bump-in-the-wire inspection for traffic traversing the Virtual WAN hub.
- Dual-role connectivity and Firewall appliances: Single device that both connects on-premises devices to Azure and inspects traffic traversing the Virtual WAN hub with Routing Intent.
For the list of NVAs that can be deployed in the Virtual WAN hub and their respective capabilities, see Virtual WAN NVA partners.
Deployment Mechanisms
Network Virtual Appliances can be deployed through a couple of different workflows. Different Network Virtual Appliance partners support different deployment mechanisms. Every Virtual WAN integrated NVA partner supports the Azure Marketplace Managed Application workflow. For information about other deployment methods, reference your NVA provider's documentation.
- Azure Marketplace Managed Application: All Virtual WAN NVA partners use Azure Managed Applications to deploy Integrated NVAs in the Virtual WAN hub. Azure Managed Applications offer you an easy way to deploy NVAs into the Virtual WAN hub via an Azure portal experience that is created by the NVA provider. The Azure portal experience collects critical deployment and configuration parameters needed to deploy and boot-strap the NVA. For more information on Azure Managed Applications, see Managed Application documentation. Reference your provider's documentation on the full deployment workflow via Azure Managed Application.
- NVA orchestrator deployments: Certain NVA partners allow you to deploy NVAs into the Hub directly from the NVA orchestration or management software. NVA deployments from NVA orchestration software typically require you to provide an Azure service principal to the NVA orchestration software. The Azure service principal is used by the NVA orchestration software to interact with Azure APIs to deploy and manage NVAs in the hub. This workflow is specific to the NVA provider's implementation. Reference your provider's documentation for more information.
- Other deployment mechanisms: NVA partners may also offer other mechanisms to deploy NVAs in the hub such as ARM templates and Terraform. Reference your provider's documentation for more information on other supported deployment mechanisms.
Prerequisites
The following tutorial assumes that you have deployed a Virtual WAN resource with at least one Virtual WAN hub. The tutorial also assumes that you are deploying NVAs via Azure Marketplace Managed Application.
Required Permissions
To deploy a Network Virtual Appliance in a Virtual WAN Hub, the user or service principal that creates and manages the NVA must have at minimum the following permissions:
- Microsoft.Network/virtualHubs/read over the Virtual WAN hub in which the NVA is deployed into.
- Microsoft.Network/networkVirtualAppliances/write over the resource group where the NVA is deployed into.
- Microsoft.Network/publicIpAddresses/join over the public IP address resources that are deployed with the Network Virtual Appliance for Internet Inbound use cases.
These permissions need to be granted to the Azure Marketplace Managed Application to ensure deployments succeed. Other permissions may be required based on the implementation of the deployment workflow developed by your NVA partner.
Assigning Permissions to Azure Managed Application
Network Virtual Appliances that are deployed via Azure Marketplace Managed Application are deployed in a special resource group in your Azure tenant called the managed resource group. When you create a Managed Application in your subscription, a corresponding and separate managed resource group is created in your subscription. All Azure resources created by the Managed Application (including the Network Virtual Appliance) are deployed into the managed resource group.
Azure Marketplace owns a first-party service principal that performs the deployment of resources into the managed resource group. This first-party principal has permissions to create resources in the managed resource group, but doesn't have permissions to read, update or create Azure resources outside of the managed resource group.
To ensure that your NVA deployment is performed with the sufficient level of permissions, grant additional permissions to the Azure Marketplace deployment service principal by deploying your Managed Application with a user-assigned managed identity that has permissions over the Virtual WAN hub and public IP address that you want to use with your Network Virtual Appliance. This user-assigned Managed Identity is used only for initial deployment of resources in the managed resource group and is used solely in the context of that Managed Application deployment.
Note
Only user-assigned system identities can be assigned to Azure Managed Applications to deploy Network Virtual Appliances in the Virtual WAN Hub. System-assigned identities are not supported.
- Create a new user-assigned identity. For steps on creating new user-assigned identities, see managed identity documentation. You can also use an existing user-assigned identity.
- Assign permissions to your user-assigned identity to have at minimum the permissions described in the Required Permissions section alongside any permissions your NVA provider requires. You can also give the user-assigned identity a built-in Azure role like Network Contributor that contains a superset of the needed permissions.
Alternatively, you can also create a custom role with the following sample definition and assign the custom role to your user-assigned managed identity.
{
"Name": "Virtual WAN NVA Operator",
  "IsCustom": true,
  "Description": "Can perform deploy and manage NVAs in the Virtual WAN hub.",
  "Actions": [
    "Microsoft.Network/virtualHubs/read",
    "Microsoft.Network/publicIPAddresses/join",
    "Microsoft.Network/networkVirtualAppliances/*",
    "Microsoft.Network/networkVirtualAppliances/inboundSecurityRules/*"
  ],
  "NotActions": [],
  "DataActions": [],
  "NotDataActions": [],
  "AssignableScopes": [
    "/subscriptions/{subscription where Virtual Hub and NVA is deployed}",
    "/subscriptions/{subscription where Public IP used for NVA is deployed}",
  ]
}
Deploying the NVA
The following section describes the steps needed to deploy a Network Virtual Appliance into the Virtual WAN hub using Azure Marketplace Managed Application.
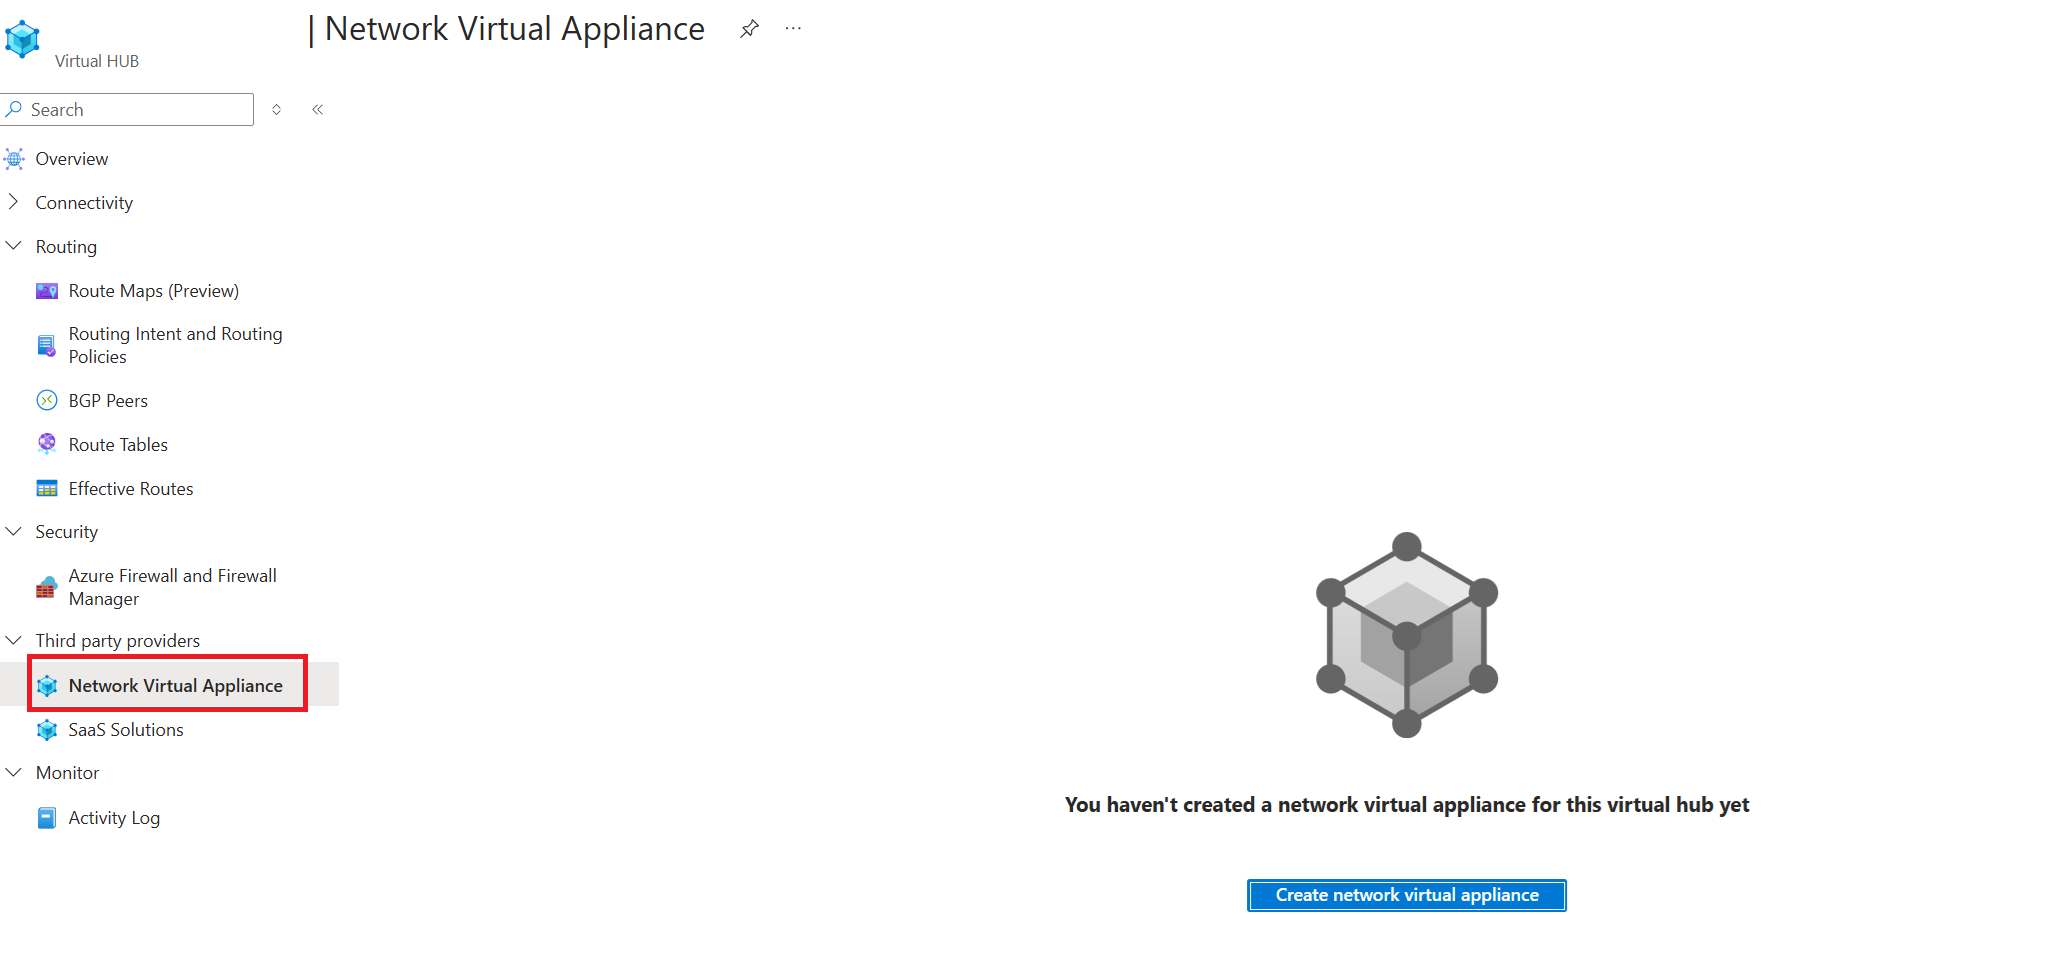
- Navigate to your Virtual WAN hub and select Network Virtual Appliance under Third party providers.
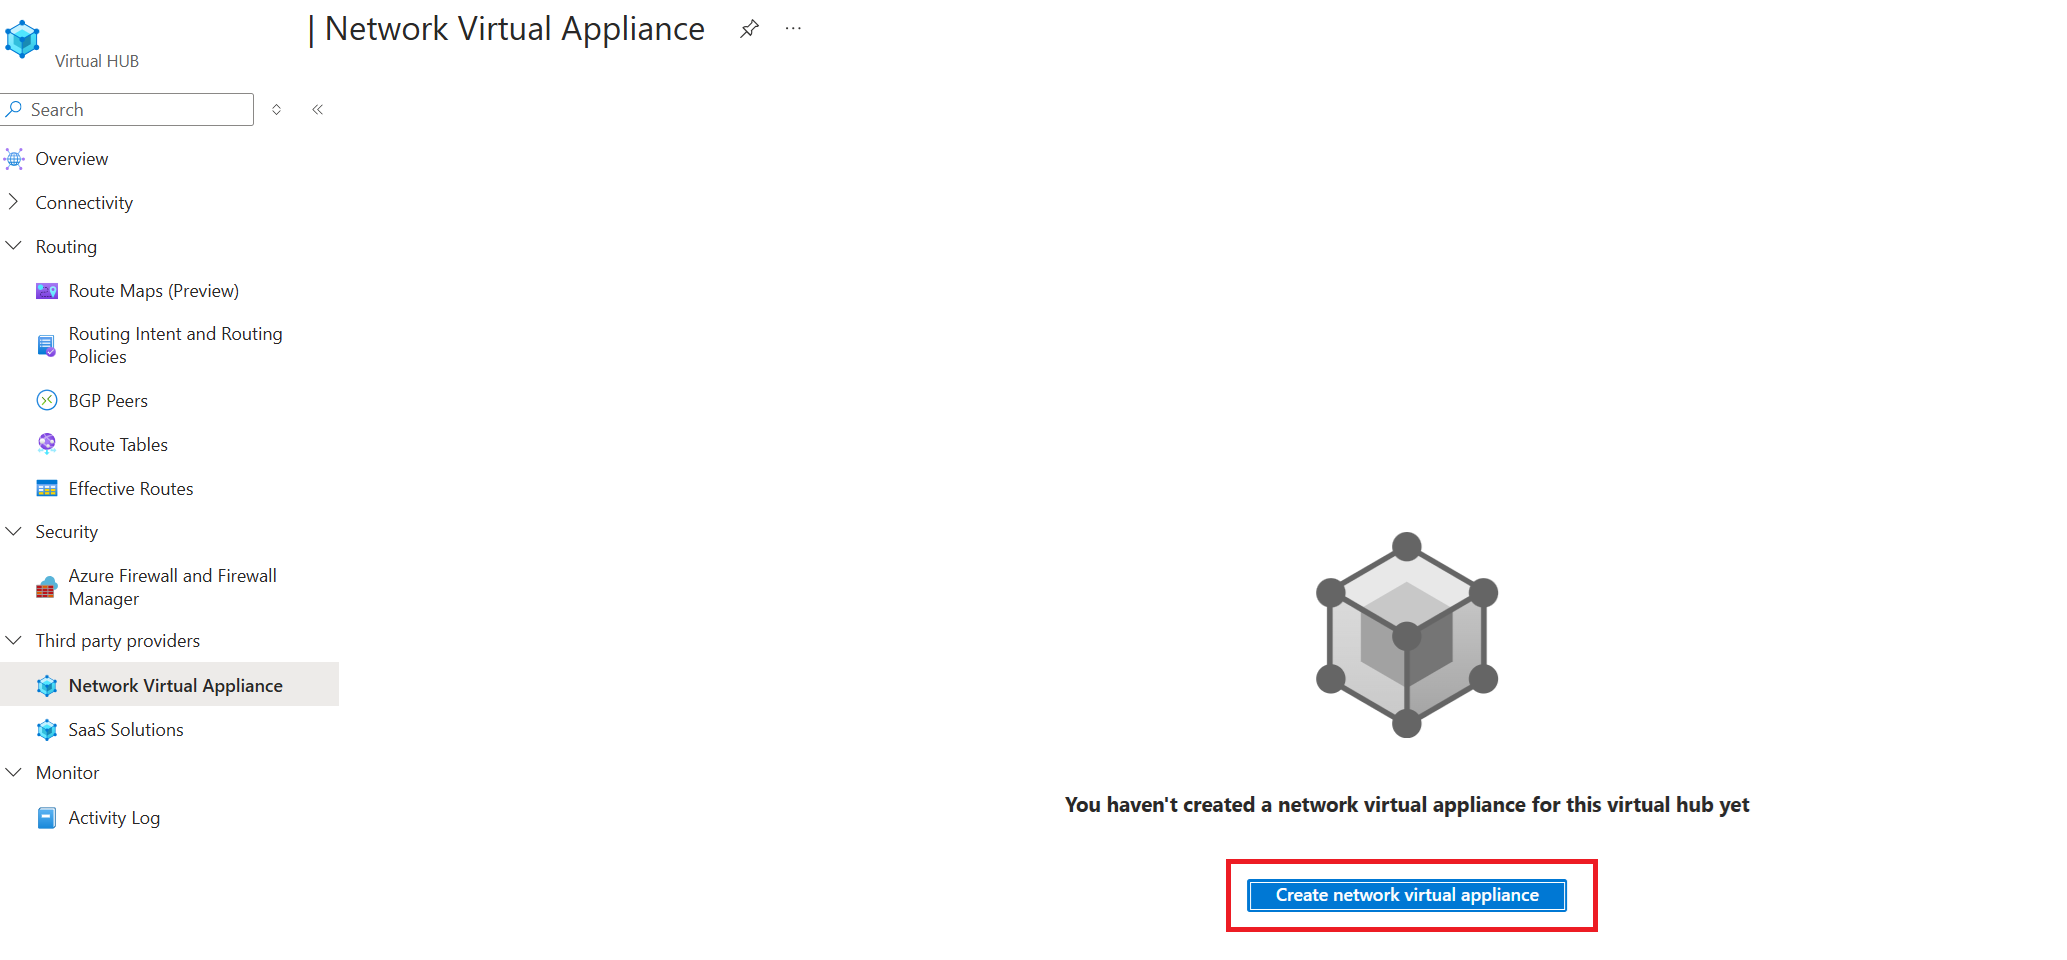
- Select Create network virtual appliance.
- Choose the NVA vendor. In this example, "fortinet-ngfw" is selected and select Create. At this point, you're redirected to the NVA partner's Azure Marketplace managed application.
- Follow the managed application creation experience to deploy your NVA and reference your provider's documentation. Ensure that the user-assigned system identity created in the previous section is selected as part of the managed application creation workflow.
Common Deployment Errors
Permission errors
Note
The error message associated with a LinkedAuthorizationFailed only displays one missing permission. As a result, you may see a different missing permission after you update the permissions assigned to your service principal, managed identity or user.
- If you see an error message with error code LinkedAuthorizationFailed, the user-assigned identity supplied as part of the Managed Application deployment didn't have the proper permissions assigned. The exact permissions that are missing are described in the error message. In the following example, double-check that the user-assigned managed identity has READ permissions over the Virtual WAN hub you're trying to deploy the NVA into.
The client with object id '<>' does not have authorization to perform action 'Microsoft.Network/virtualHubs/read' over scope '/subscriptions/<>/resourceGroups/<>/providers/Microsoft.Network/virtualHubs/<>' or the scope is invalid. If access was recently granted, please refresh your credentials
Next steps
- To learn more about Virtual WAN, see What is Virtual WAN?
- To learn more about NVAs in a Virtual WAN hub, see About Network Virtual Appliance in the Virtual WAN hub.


