Creating a Windows PowerShell CmdLet using the Visual Studio Windows PowerShell Templates
1st grab the Visual Studio Templates from https://channel9.msdn.com/ShowPost.aspx?PostID=256835. There are VB.NET and C# ones. (yes i did say VB.NET)
Now thats downloading i'm going to walk through building, installing and running a Windows PowerShell CmdLet. The steps are simple:
- Download and install Windows PowerShell
- Download and install the Windows SDK for Vista - you will need this to install the assemblies required for Windows PowerShell.
- Download and install the templates I made from the link above. They will save you a bunch of time, they are free and you can update them if you want.
- Create a new Windows PowerShell project in your favorite language (ok, well VB.NET or C# not French or German)
- Add a new CmdLet item to the project
- Implement the ProcessRecord method.
- Compile
- Install the assembly
- Add the CmdLets to PowerShell
- Use them
Sounds a lot, but its really very simple and soon you will be building cmdlets for everything.
Now the templates have downloaded, extract the zip and you should find 2 vsi files - one for VB.NET and the other for C#. Click and install the one you want.

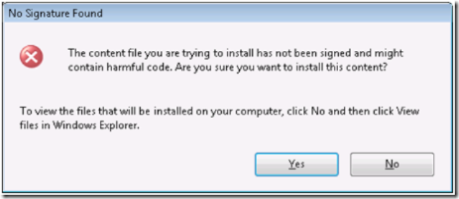
They are not signed, so expect a complaint they are not signed
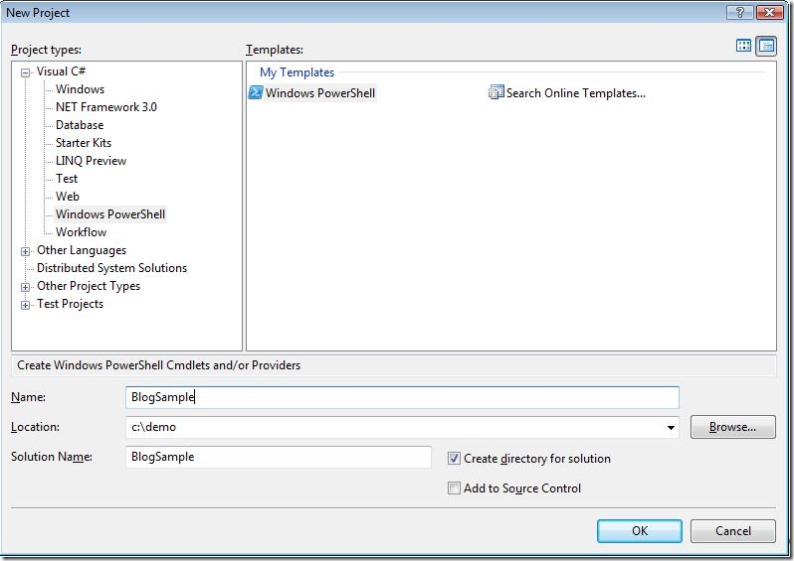
Next load Visual Studio and create a brand new project, select Windows PowerShell as the project template.
The project Contains a PSSnapin file and a reference to the assembly System.Management.Automation - which should be located in the c:\program files\Reference Assemblies\Microsoft\WindowsPowerShell\v1.0 folder. (you need to install the windows SDK for Vista to get these installed)
Right click the PSSnapin file and choose view code. (if you double click the file, visual studio tries to open the designer window and fails - don't worry about this, PSSnapin was never designed to work with the visual designer)
The PSSnapin contains 5 properties which you need to complete. They should be self explanitory - the key one is the Name which is how you will refer to it in PowerShell. Add some nice values for these properties.
The PSSnapin class inherits from PSSnapin which is the base class for creating snapins. Snapins are the deployment unit of Windows PowerShell. You typically add and remove snapins. Snapins contains one or more cmdlets and/or providers.
Next we'll add a a new class for our cmdlet. We can add as many cmdlets to the snapin as needed, in this walkthrough we'll just add one.
Right-click your project and choose, add then New Item. From the list of items choose Windows PowerShell PSCmdlet. This should be the default choice for cmdlets. Name the class GetProc.
The new class should inherit from PSCmdlet, be tagged with a Cmdlet attribute and contain a parameter which is commented out and a ProcessRecord method.
In the attribute, change the name to "Proc". In Powershell the name of the class is irrelevant. The cmdlet gets its name from the attribute. In our case we want our cmdlet to be called Get-Proc, so we use the common verb "Get" and the name "Proc". the attribute tag should look like the following:
[Cmdlet(VerbsCommon.Get, "Proc", SupportsShouldProcess = true)]
Since our cmdlet does not need parameters, we don't need to do anything with it. As a sideline, if you take a look at the parameter code you will see it is simply a tagged property. This means you no longer need to parse the cmdline to work out what parameters have been passed, nor will you have to deal with the pain around args[0]. the Powershell runtime parses the cmdline and populates your properties, before calling the ProcessRecord method.
The ProcessRecord method is typicall where we'll do our cmdlets work. Our cmdlet (if you have not guessed already) will simply enumerate all the Processes running on your machine. Its simple but illustrates the steps to building a powershell cmdlet very well.
To enumerate all the processes, we can use the System.Diagnostics.Process class, and invoke the GetProcesses() method. To write these objects out we can use the WriteObject method. Specifying true at the end tells Windows PowerShell that the object we are writing out is a collection and powershell should write out each object separately:
WriteObject(System.Diagnostics.Process.GetProcesses(), true);
So our class code looks like this:
 using System;
using System.Collections.Generic;
using System.Text;
using System.Management.Automation;
using System.Collections;

namespace BlogSample
{
    [Cmdlet(VerbsCommon.Get, "Proc", SupportsShouldProcess = true)]
    public class GetProc : PSCmdlet
    {

        #region Parameters
        /*
        [Parameter(Position = 0,
            Mandatory = false,
            ValueFromPipelineByPropertyName = true,
            HelpMessage = "Help Text")]
        [ValidateNotNullOrEmpty]
        public string Name
        {

        }
 */
        #endregion

        protected override void ProcessRecord()
        {
            try
            {
                WriteObject(System.Diagnostics.Process.GetProcesses(), true);
            }
            catch (Exception)
            {
            }
        }
    }
}
Now we have all our code, we can build the solution. Do that now.
Next we need to do the installation magic. You may have noticed that PSSnapin was tagged with a RunInstaller attribute. the installer simply registers the snapin with Windows PowerShell. To execute the installer we can use the InstallUtil tool. Open a Visual Studio cmd prompt, navigate to the bin\debug folder of your solution (where your assembly dll is located) and run
InstallUtil yourassemblyname.dll
Next load Windows PowerShell.
Type
Get-PSSnapIn -registered
which should list your snapin along with any other snapins currently registered.
Next enter
Add-PSSnapIn yoursnapinname
this will load your snapin
You should now be able to type
Get-Proc
and see a list of Processes running on your machine.
Hopefully this tutorial will give you a head start in building Windows PowerShell cmdlets. There are lots more things to learn and I've just skimmed the surface here.
THIS POSTING IS PROVIDED "AS IS" WITH NO WARRANTIES, AND CONFERS NO RIGHTS
Comments
Anonymous
February 07, 2007
Hoy en cosas interesantes: Hackers atacan Internet, Administrando los buzones en Exchange 2007, CreandoAnonymous
March 03, 2007
I just tried this out and it worked great. Thanks.Anonymous
March 04, 2007
Here's how you can get a sweet Visual Studio development experience for building and debugging your ownAnonymous
March 04, 2007
Thank you so much for posting this. Very timely :-)Anonymous
March 04, 2007
I am getting a error message while installing Windows PowerShell (CS).vsi. The error message is "String Cannot have zero length"Anonymous
May 09, 2007
While at the Day of .NET, I discovered that I had an issue - my item templates were missing from VisualAnonymous
May 17, 2007
Comme Michael Niehaus l'expliquait il y a quelques temps, il est assez simple d'utiliser la DLL ConfigManagerAnonymous
September 25, 2007
Body: The Problem: I am always using PowerShell to inspect the SharePoint object model when diagnosingAnonymous
March 03, 2008
.NET:NETFoundations-Memorymodel(part2)Quake3Arena.NETPortisDone!lucene使用与优化Build...Anonymous
April 01, 2008
Quick Outline for more detailed items on STSADM, especially with PowerShell goodness TechNet PowerfulAnonymous
March 17, 2009
.csharpcode, .csharpcode pre { font-size: small; color: black; font-family: consolas, "Courier New",

