Activate custom actions (Power Automate flows)
You can activate external systems with a Activator rule by defining custom actions with Power Automate. Custom actions can be useful for:
- Sending notifications using systems other than Teams and email.
- Creating action items in ticketing systems.
- Calling line-of-business apps.
To activate custom actions from your rules, first define a custom action by creating a Power Automate flow. Then, call your custom action from your Activator rule.
Create a custom action
A custom action is a reusable action that you can use in multiple rules within Activator items. Creating a custom action requires familiarity with Power Automate. However, once you create a custom action, other Activator users can use the action in any rule, without requiring any knowledge of Power Automate.
A custom action defines how to call a specific external system from a rule using a flow. It defines a set of input fields to pass from your rules to the flow, so that the flow calls the external system. For example, suppose you want to define a custom action that adds a task to Microsoft To Do. The input field for such an action might be Task name. This custom action would link to a flow that uses a Microsoft To Do connector to create the task on your behalf.
Name your action and add input fields
Open Activator and select a rule to display the Definition pane. Scroll down to Action > Type, and select New custom action.
Then, give your action a name such as Add a To Do task. Define the input fields that you'd like to use later when creating a flow in Power Automate. These strings, such as task name, assignee, etc. can be passed in code to Power Automate. And, back in Activator, you can give these strings a name that shows up in your To Do task -- such as *check package temperature" and "Sally."
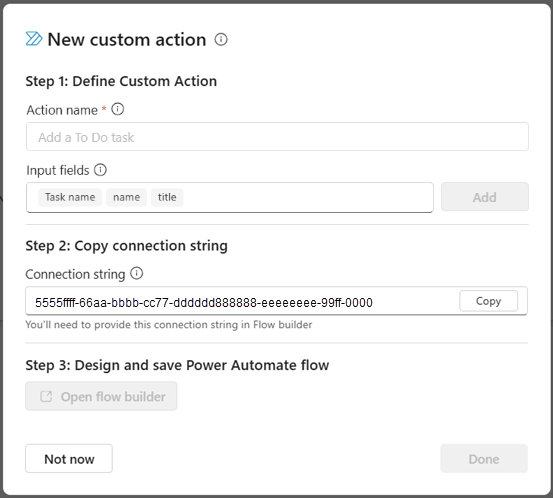
The next step is to define your flow in Power Automate. Select Copy to copy the connection string, then choose Open flow builder. Activator takes you to Power Automate so that you can define the flow.
Define your flow in Power Automate
The flow is prepopulated with an action for Activator.
You must paste the connection string from the previous step into this action. Select the Power Automate tile that displays the Invalid parameters error. Then paste the connection string that you copied in the previous step. This removes the error message and allows you to continue building your flow.

Add a new step to the flow
Select the plus sign (+) to add a new step to the flow.
In this example, we're adding a To Do task, so we search for To Do and choose Add a to-do (V3).
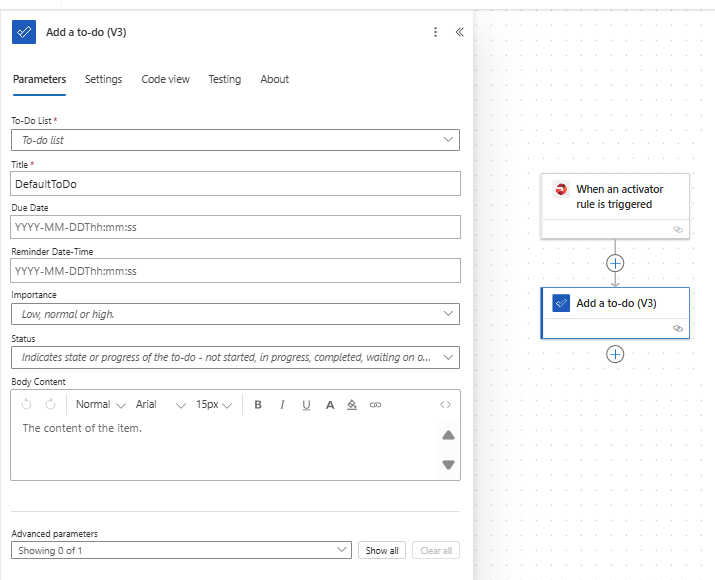
Fill in the necessary fields in the Add a to-do (V3) window. Start by selecting an existing list from the To-do list dropdown or choosing Enter a custom value and giving a new To Do list a name.
Optionally, insert an expression into the input fields. If you select an input field and see an fx icon, that means that the field supports functions and dynamic content. Let's add dynamic content to the Title input field and pass a function in the Body Content input field.
Use dynamic content in your flow
Dynamic content lets you add fields from the Activator event itself. Select the field from the dropdown to dynamically pass it to the flow.
- With your cursor in the Title field, select fx.
- Select the Dynamic content tab.
When you select dynamic content, it's added into the text box. - Add the date and time using Activation time. When you select Add, the expression appears in the Title field. Hover over Activation time to see what information is being passed. By adding a date to the title, you might avoid duplicate names.
- Optionally, remove DefaultToDo placeholder text and replace it with something more meaningful, such as Temperature task.
Pass an input field to your flow
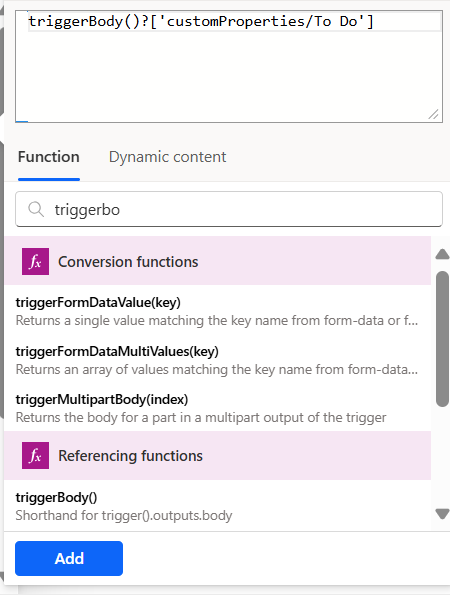
Move your cursor into the Body Content field, select fx.
Search for the triggerBody function or copy and paste this function: triggerBody()?['customProperties]/NAME_OF_INPUT_FIELD']. Replace NAME_OF_INPUT_FIELD with one of the Input fields that you created earlier. In this example, we use task name.
You can use any predefined input field you create in Power Automate functions.
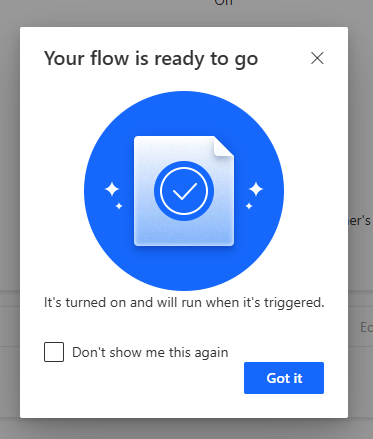
Select Add > Save. It might take a few minutes to save.
Optionally, select Test from the menu bar to force the flow to run.
To learn more about Power Automate, see Power Automate.
Complete your custom action
After you save your flow, return to Activator.
Call your custom action from a rule
Once you create a custom action, it's available for use by all rules and users who have access to the activator item you defined in the custom action. To call your custom action, from a rule, select the rule and choose Action > Type from the Definition pane, and select your custom action from the list.

Select Edit action to see the entry fields for your rule. Fill them out as appropriate for your rule definition:
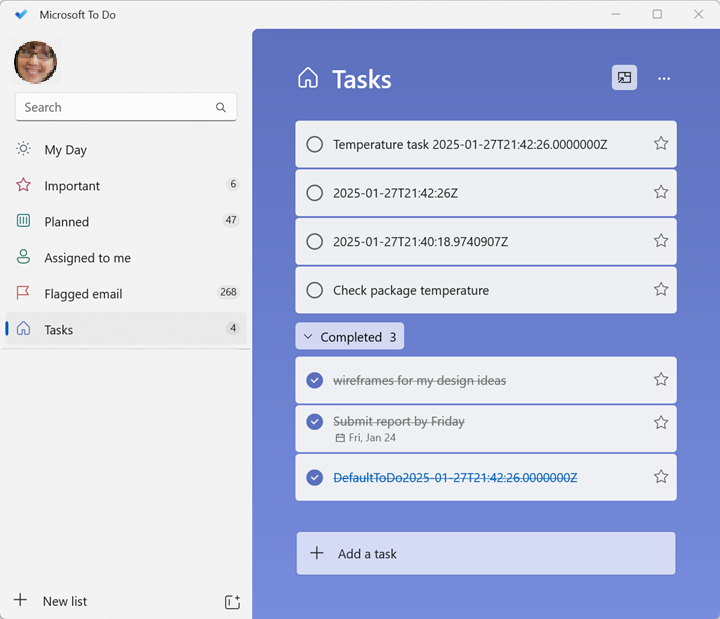
When your rule activates, it calls your flow, sending it the values of the input fields that you defined. Since we asked our flow to update a To Do list, open Microsoft To Do to see the new task.
Related content
- Get started with Activator
- Create Activator rules in design mode
- Activator tutorial using sample data
You can also learn more about Microsoft Fabric: