Deploy a Python FastAPI web app with PostgreSQL in Azure
In this tutorial, you deploy a data-driven Python web app (FastAPI ) to Azure App Service with the Azure Database for PostgreSQL relational database service. Azure App Service supports Python in a Linux server environment. If you want, see the Flask tutorial or the Django tutorial instead.

To complete this tutorial, you'll need:
- An Azure account with an active subscription. If you don't have an Azure account, you can create one for free.
- Knowledge of Python with FastAPI development
- An Azure account with an active subscription. If you don't have an Azure account, you can create one for free.
- Azure Developer CLI installed. You can follow the steps with the Azure Cloud Shell because it already has Azure Developer CLI installed.
- Knowledge of Python with FastAPI development
Skip to the end
With Azure Developer CLI installed, you can skip to the end of the tutorial by running the following commands in an empty working directory:
azd auth login
azd init --template msdocs-fastapi-postgresql-sample-app
azd up
Sample application
A sample Python application using FastAPI framework is provided to help you follow along with this tutorial. To deploy it without running it locally, skip this part.
To run the application locally, make sure you have Python 3.8 or higher and PostgreSQL installed locally. Then, clone the sample repository's starter-no-infra branch and change to the repository root.
git clone -b starter-no-infra https://github.com/Azure-Samples/msdocs-fastapi-postgresql-sample-app
cd msdocs-fastapi-postgresql-sample-app
Create an .env file as shown below using the .env.sample file as a guide. Set the value of DBNAME to the name of an existing database in your local PostgreSQL instance. Set the values of DBHOST, DBUSER, and DBPASS as appropriate for your local PostgreSQL instance.
DBNAME=<database name>
DBHOST=<database-hostname>
DBUSER=<db-user-name>
DBPASS=<db-password>
Create a virtual environment for the app:
py -m venv .venv
.venv\scripts\activate
Install the dependencies:
python3 -m pip install -r src/requirements.txt
Install the app as an editable package:
python3 -m pip install -e src
Run the sample application with the following commands:
# Run database migration
python3 src/fastapi_app/seed_data.py
# Run the app at http://127.0.0.1:8000
python3 -m uvicorn fastapi_app:app --reload --port=8000
1. Create App Service and PostgreSQL
In this step, you create the Azure resources. The steps used in this tutorial create a set of secure-by-default resources that include App Service and Azure Database for PostgreSQL. For the creation process, you specify:
- The Name for the web app. It's the name used as part of the DNS name for your webapp in the form of
https://<app-name>.azurewebsites.net. - The Region to run the app physically in the world.
- The Runtime stack for the app. It's where you select the version of Python to use for your app.
- The Hosting plan for the app. It's the pricing tier that includes the set of features and scaling capacity for your app.
- The Resource Group for the app. A resource group lets you group (in a logical container) all the Azure resources needed for the application.
Sign in to the Azure portal and follow these steps to create your Azure App Service resources.
Step 1: In the Azure portal:
- Enter "web app database" in the search bar at the top of the Azure portal.
- Select the item labeled Web App + Database under the Marketplace heading. You can also navigate to the creation wizard directly.

Step 2: In the Create Web App + Database page, fill out the form as follows.
- Resource Group → Select Create new and use a name of msdocs-python-postgres-tutorial.
- Region → Any Azure region near you.
- Name → msdocs-python-postgres-XYZ where XYZ is any three random characters. This name must be unique across Azure.
- Runtime stack → Python 3.12.
- Database → PostgreSQL - Flexible Server is selected by default as the database engine. The server name and database name are also set by default to appropriate values.
- Hosting plan → Basic. When you're ready, you can scale up to a production pricing tier later.
- Select Review + create.
- After validation completes, select Create.

Step 3: The deployment takes a few minutes to complete. Once deployment completes, select the Go to resource button. You're taken directly to the App Service app, but the following resources are created:
- Resource group → The container for all the created resources.
- App Service plan → Defines the compute resources for App Service. A Linux plan in the Basic tier is created.
- App Service → Represents your app and runs in the App Service plan.
- Virtual network → Integrated with the App Service app and isolates back-end network traffic.
- Azure Database for PostgreSQL flexible server → Accessible only from within the virtual network. A database and a user are created for you on the server.
- Private DNS zone → Enables DNS resolution of the PostgreSQL server in the virtual network.

Step 4: For FastAPI apps, you must enter a startup command so App service can start your app. On the App Service page:
- In the left menu, under Settings, select Configuration.
- In the General settings tab of the Configuration page, enter
src/entrypoint.shin the Startup Command field under Stack settings. - Select Save. When prompted, select Continue. To learn more about app configuration and startup in App Service, see Configure a Linux Python app for Azure App Service.

2. Verify connection settings
The creation wizard generated the connectivity variables for you already as app settings. App settings are one way to keep connection secrets out of your code repository. When you're ready to move your secrets to a more secure location, here's an article on storing in Azure Key Vault.
Step 1: In the App Service page, in the left menu, select Environment variables.

Step 2: In the App settings tab of the Environment variables page, verify that AZURE_POSTGRESQL_CONNECTIONSTRING is present. The connection string will be injected into the runtime environment as an environment variable.

3. Deploy sample code
In this step, you configure GitHub deployment using GitHub Actions. It's just one of many ways to deploy to App Service, but also a great way to have continuous integration in your deployment process. By default, every git push to your GitHub repository will kick off the build and deploy action.
Step 1: In a new browser window:
- Sign in to your GitHub account.
- Navigate to https://github.com/Azure-Samples/msdocs-fastapi-postgresql-sample-app.
- Select Fork.
- Select Create fork.

Step 2: In the GitHub page, open Visual Studio Code in the browser by pressing the . key.

Step 3: In Visual Studio Code in the browser, open src/fastapi/models.py in the explorer. See the environment variables being used in the production environment, including the app settings that you saw in the configuration page.

Step 4: Back in the App Service page, in the left menu, under Deployment, select Deployment Center.

Step 5: In the Deployment Center page:
- In Source, select GitHub. By default, GitHub Actions is selected as the build provider.
- Sign in to your GitHub account and follow the prompt to authorize Azure.
- In Organization, select your account.
- In Repository, select msdocs-fastapi-postgresql-sample-app.
- In Branch, select main.
- Keep the default option selected to Add a workflow.
- Under Authentication type, select User-assigned identity.
- In the top menu, select Save. App Service commits a workflow file into the chosen GitHub repository, in the
.github/workflowsdirectory.

Step 6: In the Deployment Center page:
- Select Logs. A deployment run is already started.
- In the log item for the deployment run, select Build/Deploy Logs.

Step 7: You're taken to your GitHub repository and see that the GitHub action is running. The workflow file defines two separate stages, build and deploy. Wait for the GitHub run to show a status of Complete. It takes about 5 minutes.

Having issues? Check the Troubleshooting guide.
4. Generate database schema
In previous section, you added src/entrypoint.sh as the startup command for your app. entrypoint.sh contains the following line: python3 src/fastapi_app/seed_data.py. This command migrates your database. In the sample app, it only ensures that the correct tables are created in your database. It doesn't populate these tables with any data.
In this section, you'll run this command manually for demonstration purposes. With the PostgreSQL database protected by the virtual network, the easiest way to run the command is in an SSH session with the App Service container.
Step 1: Back in the App Service page, in the left menu,
- Select SSH.
- Select Go.

Step 2: In the SSH terminal, run python3 src/fastapi_app/seed_data.py. If it succeeds, App Service is connecting successfully to the database.
Only changes to files in /home can persist beyond app restarts. Changes outside of /home aren't persisted.

5. Browse to the app
Step 1: In the App Service page:
- From the left menu, select Overview.
- Select the URL of your app. You can also navigate directly to
https://<app-name>.azurewebsites.net.

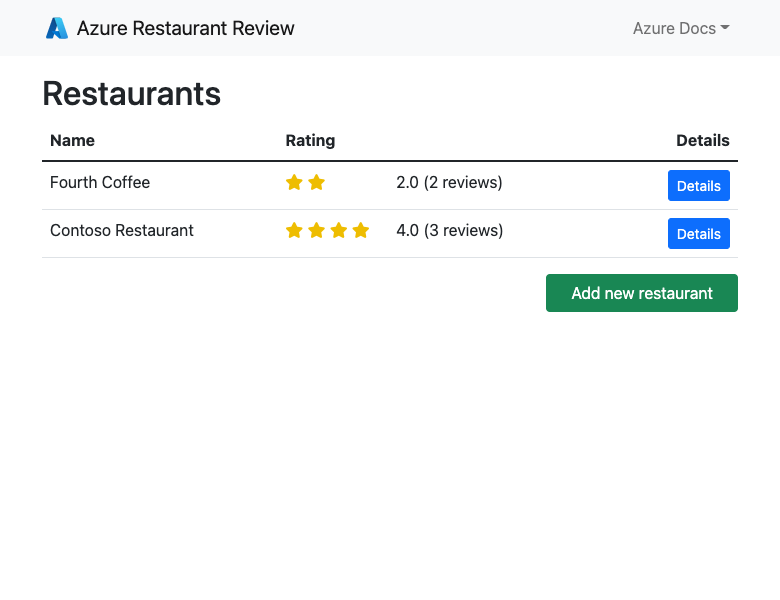
Step 2: Add a few restaurants to the list. Congratulations, you're running a web app in Azure App Service, with secure connectivity to Azure Database for PostgreSQL.

6. Stream diagnostic logs
The sample app uses the Python Standard Library logging module to help you diagnose issues with your application. The sample app includes calls to the logger as shown in the following code.
@app.get("/", response_class=HTMLResponse)
async def index(request: Request, session: Session = Depends(get_db_session)):
    logger.info("root called")
    statement = (
        select(Restaurant, func.avg(Review.rating).label("avg_rating"), func.count(Review.id).label("review_count"))
        .outerjoin(Review, Review.restaurant == Restaurant.id)
        .group_by(Restaurant.id)
    )
Step 1: In the App Service page:
- From the left menu, under Monitoring, select App Service logs.
- Under Application logging, select File System.
- In the top menu, select Save.

Step 2: From the left menu, select Log stream. You see the logs for your app, including platform logs and logs from inside the container.

Events can take several minutes to show up in the diagnostic logs. Learn more about logging in Python apps in the series on setting up Azure Monitor for your Python application.
7. Clean up resources
When you're finished, you can delete all of the resources from your Azure subscription by deleting the resource group.
Step 1: In the search bar at the top of the Azure portal:
- Enter the resource group name.
- Select the resource group.

Step 2: In the resource group page, select Delete resource group.

Step 3:
- Enter the resource group name to confirm your deletion.
- Select Delete.
 :
:
1. Create Azure resources and deploy a sample app
In this step, you create the Azure resources and deploy a sample app to App Service on Linux. The steps used in this tutorial create a set of secure-by-default resources that include App Service and Azure Database for PostgreSQL.
If you haven't already, clone the sample repository's
starter-no-infrabranch in a local terminal.git clone -b starter-no-infra https://github.com/Azure-Samples/msdocs-fastapi-postgresql-sample-app cd msdocs-fastapi-postgresql-sample-appThis cloned branch is your starting point. It contains a simple data-drive FastAPI application.
From the repository root, run
azd init.azd init --template msdocs-fastapi-postgresql-sample-appWhen prompted, give the following answers:
Question Answer The current directory is not empty. Would you like to initialize a project here in '<your-directory>'? Y What would you like to do with these files? Keep my existing files unchanged Enter a new environment name Type a unique name. The azd template uses this name as part of the DNS name of your web app in Azure ( <app-name>.azurewebsites.net). Alphanumeric characters and hyphens are allowed.Run the
azd upcommand to provision the necessary Azure resources and deploy the app code. If you aren't already signed-in to Azure, the browser will launch and ask you to sign-in. Theazd upcommand will also prompt you to select the desired subscription and location to deploy to.azd upThe
azd upcommand can take several minutes to complete. It also compiles and deploys your application code. While it's running, the command provides messages about the provisioning and deployment process, including a link to the deployment in Azure. When it finishes, the command also displays a link to the deploy application.This azd template contains files (azure.yaml and the infra directory) that generate a secure-by-default architecture with the following Azure resources:
- Resource group → The container for all the created resources.
- App Service plan → Defines the compute resources for App Service. A Linux plan in the B1 tier is specified.
- App Service → Represents your app and runs in the App Service plan.
- Virtual network → Integrated with the App Service app and isolates back-end network traffic.
- Azure Database for PostgreSQL flexible server → Accessible only from within the virtual network. A database and a user are created for you on the server.
- Private DNS zone → Enables DNS resolution of the PostgreSQL server in the virtual network.
- Log Analytics workspace → Acts as the target container for your app to ship its logs, where you can also query the logs.
When the
azd upcommand completes, note down the values for the Subscription ID (Guid), the App Service, and the Resource Group in the output. You use them in the following sections. Your output will look similar to the following (partial) output:Subscription: Your subscription name (1111111-1111-1111-1111-111111111111) Location: East US You can view detailed progress in the Azure Portal: https://portal.azure.com/#view/HubsExtension/DeploymentDetailsBlade/~/overview/id/%2Fsubscriptions%2F1111111-1111-1111-1111-111111111111%2Fproviders%2FMicrosoft.Resources%2Fdeployments%2Fyourenv-1721867673 (✓) Done: Resource group: yourenv-rg (✓) Done: Virtual Network: yourenv-e2najjk4vewf2-vnet (✓) Done: App Service plan: yourenv-e2najjk4vewf2-service-plan (✓) Done: Log Analytics workspace: yourenv-e2najjk4vewf2-workspace (✓) Done: Application Insights: yourenv-e2najjk4vewf2-appinsights (✓) Done: Portal dashboard: yourenv-e2najjk4vewf2-dashboard (✓) Done: App Service: yourenv-e2najjk4vewf2-app-service (✓) Done: Azure Database for PostgreSQL flexible server: yourenv-e2najjk4vewf2-postgres-server (✓) Done: Cache for Redis: yourenv-e2najjk4vewf2-redisCache (✓) Done: Private Endpoint: cache-privateEndpoint SUCCESS: Your application was provisioned in Azure in 32 minutes. You can view the resources created under the resource group yourenv-rg in Azure Portal: https://portal.azure.com/#@/resource/subscriptions/1111111-1111-1111-1111-111111111111/resourceGroups/yourenv-rg/overview Deploying services (azd deploy) (✓) Done: Deploying service web - Endpoint: https://yourenv-e2najjk4vewf2-app-service.azurewebsites.net/
2. Examine the database connection string
The azd template generates the connectivity variables for you as app settings. App settings are one way to keep connection secrets out of your code repository.
In the
infra/resources.bicepfile, find the app settings and find the setting forAZURE_POSTGRESQL_CONNECTIONSTRING.resource appSettings 'config' = { name: 'appsettings' properties: { SCM_DO_BUILD_DURING_DEPLOYMENT: 'true' AZURE_POSTGRESQL_CONNECTIONSTRING: 'dbname=${pythonAppDatabase.name} host=${postgresServer.name}.postgres.database.azure.com port=5432 sslmode=require user=${postgresServer.properties.administratorLogin} password=${databasePassword}' SECRET_KEY: secretKey AZURE_REDIS_CONNECTIONSTRING: 'rediss://:${redisCache.listKeys().primaryKey}@${redisCache.name}.redis.cache.windows.net:6380/0' } }AZURE_POSTGRESQL_CONNECTIONSTRINGcontains the connection string to the Postgres database in Azure. You need to use it in your code to connect to it. You can find the code that uses this environment variable in src/fastapi/models.py:sql_url = "" if os.getenv("WEBSITE_HOSTNAME"): logger.info("Connecting to Azure PostgreSQL Flexible server based on AZURE_POSTGRESQL_CONNECTIONSTRING...") env_connection_string = os.getenv("AZURE_POSTGRESQL_CONNECTIONSTRING") if env_connection_string is None: logger.info("Missing environment variable AZURE_POSTGRESQL_CONNECTIONSTRING") else: # Parse the connection string details = dict(item.split('=') for item in env_connection_string.split()) # Properly format the URL for SQLAlchemy sql_url = ( f"postgresql://{quote_plus(details['user'])}:{quote_plus(details['password'])}" f"@{details['host']}:{details['port']}/{details['dbname']}?sslmode={details['sslmode']}" ) else: logger.info("Connecting to local PostgreSQL server based on .env file...") load_dotenv() POSTGRES_USERNAME = os.environ.get("DBUSER") POSTGRES_PASSWORD = os.environ.get("DBPASS") POSTGRES_HOST = os.environ.get("DBHOST") POSTGRES_DATABASE = os.environ.get("DBNAME") POSTGRES_PORT = os.environ.get("DBPORT", 5432) sql_url = f"postgresql://{POSTGRES_USERNAME}:{POSTGRES_PASSWORD}@{POSTGRES_HOST}:{POSTGRES_PORT}/{POSTGRES_DATABASE}" engine = create_engine(sql_url)
3. Examine the startup command
Azure App Service requires a startup command to run your FastAPI app. The azd template sets this command for you in your App Service instance.
In the
infra/resources.bicepfile, find the declaration for your web site and then find the setting forappCommandLine. This is the setting for your startup command.resource web 'Microsoft.Web/sites@2022-03-01' = { name: '${prefix}-app-service' location: location tags: union(tags, { 'azd-service-name': 'web' }) kind: 'app,linux' properties: { serverFarmId: appServicePlan.id siteConfig: { alwaysOn: true linuxFxVersion: 'PYTHON|3.11' ftpsState: 'Disabled' appCommandLine: 'src/entrypoint.sh' minTlsVersion: '1.2' } httpsOnly: true } identity: { type: 'SystemAssigned' }The startup command runs the file src/entrypoint.sh. Examine the code in that file to understand the commands that App Service runs to start your app:
#!/bin/bash
set -e
python3 -m pip install --upgrade pip
python3 -m pip install -e src
python3 src/fastapi_app/seed_data.py
python3 -m gunicorn fastapi_app:app -c src/gunicorn.conf.py
To learn more about app configuration and startup in App Service, see Configure a Linux Python app for Azure App Service.
4. Generate database schema
You might have noticed in the previous section that entrypoint.sh contains the following line: python3 src/fastapi_app/seed_data.py. This command migrates your database. In the sample app, it only ensures that the correct tables are created in your database. It doesn't populate these tables with any data.
In this section, you'll run this command manually for demonstration purposes. With the PostgreSQL database protected by the virtual network, the easiest way to run the command is in an SSH session with the App Service container.
Use the value of the App Service that you noted previously in the azd output and the template shown below, to construct the URL for the SSH session and navigate to it in the browser:
https://<app-name>.scm.azurewebsites.net/webssh/hostIn the SSH terminal, run
python3 src/fastapi_app/seed_data.py. If it succeeds, App Service is connecting successfully to the database.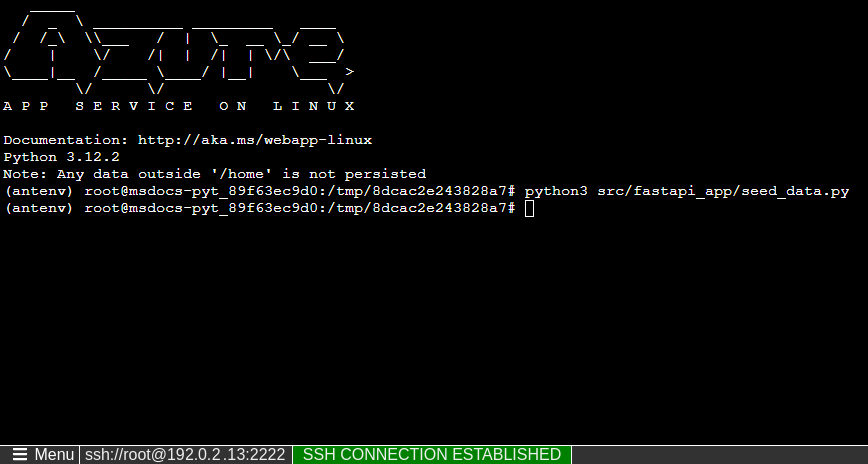
Note
Only changes to files in
/homecan persist beyond app restarts. Changes outside of/homearen't persisted.
5. Browse to the app
In the azd output, find the URL of your app and navigate to it in the browser. The URL looks like this in the AZD output:
 Deploying services (azd deploy)

   (✓) Done: Deploying service web
   - Endpoint: https://<app-name>.azurewebsites.net/
Add a few restaurants to the list.
Congratulations, you're running a web app in Azure App Service, with secure connectivity to Azure Database for PostgreSQL.
6. Stream diagnostic logs
Azure App Service can capture logs to help you diagnose issues with your application. For convenience, the azd template has already enabled logging to the local file system.
The sample app uses the Python Standard Library logging module to output logs. The sample app includes calls to the logger as shown below.
@app.get("/", response_class=HTMLResponse)
async def index(request: Request, session: Session = Depends(get_db_session)):
    logger.info("root called")
    statement = (
        select(Restaurant, func.avg(Review.rating).label("avg_rating"), func.count(Review.id).label("review_count"))
        .outerjoin(Review, Review.restaurant == Restaurant.id)
        .group_by(Restaurant.id)
    )
Use the values of the Subscription ID (Guid), Resource Group, and App Service that you noted previously in the azd output and the template shown below, to construct the URL to stream App Service logs and navigate to it in the browser.
https://portal.azure.com/#@/resource/subscriptions/<subscription-guid>/resourceGroups/<group-name>/providers/Microsoft.Web/sites/<app-name>/logStream
Events can take several minutes to show up in the diagnostic logs. Learn more about logging in Python apps in the series on setting up Azure Monitor for your Python application.
7. Clean up resources
To delete all Azure resources in the current deployment environment, run azd down.
azd down
Troubleshooting
Listed below are issues you might encounter while trying to work through this tutorial and steps to resolve them.
I can't connect to the SSH session
If you can't connect to the SSH session, then the app itself has failed to start. Check the diagnostic logs for details. For example, if you see an error like KeyError: 'AZURE_POSTGRESQL_CONNECTIONSTRING', it might mean that the environment variable is missing (you might have removed the app setting).
I get an error when running database migrations
If you encounter any errors related to connecting to the database, check if the app settings (AZURE_POSTGRESQL_CONNECTIONSTRING) have been changed. Without that connection string, the migrate command can't communicate with the database.
Frequently asked questions
- How much does this setup cost?
- How do I connect to the PostgreSQL server that's secured behind the virtual network with other tools?
- How does local app development work with GitHub Actions?
How much does this setup cost?
Pricing for the created resources is as follows:
- The App Service plan is created in Basic tier and can be scaled up or down. See App Service pricing.
- The PostgreSQL flexible server is created in the lowest burstable tier Standard_B1ms, with the minimum storage size, which can be scaled up or down. See Azure Database for PostgreSQL pricing.
- The virtual network doesn't incur a charge unless you configure extra functionality, such as peering. See Azure Virtual Network pricing.
- The private DNS zone incurs a small charge. See Azure DNS pricing.
How do I connect to the PostgreSQL server that's secured behind the virtual network with other tools?
- For basic access from a command-line tool, you can run
psqlfrom the app's SSH terminal. - To connect from a desktop tool, your machine must be within the virtual network. For example, it could be an Azure VM that's connected to one of the subnets, or a machine in an on-premises network that has a site-to-site VPN connection with the Azure virtual network.
- You can also integrate Azure Cloud Shell with the virtual network.
How does local app development work with GitHub Actions?
Using the autogenerated workflow file from App Service as an example, each git push kicks off a new build and deployment run. From a local clone of the GitHub repository, you make the desired updates and push to GitHub. For example:
git add .
git commit -m "<some-message>"
git push origin main
Next steps
Advance to the next tutorial to learn how to secure your app with a custom domain and certificate.
Learn how App Service runs a Python app: