Advanced tutorial to build API-based message extension
Note
API-based message extensions only support search commands.
Message extensions built using API (API-based) significantly enhance the functionality of your Teams apps by allowing them to interact with external services. API-based message extensions can help streamline workflows by reducing the need to switch between different applications.
You can use API-based message extensions to integrate external services that are commonly used in the business workflow. For example, a business that frequently uses a CRM system for customer management could use a message extension to fetch and display customer data directly from Teams. This app helps save time and improves efficiency by reducing the need to switch between different applications. This feature is supported on all platforms where Teams is available, including desktop, web, and mobile.
Prerequisites
Here's a list of tools you need for building and deploying your apps.
| Install | For using... |
|---|---|
| Microsoft Teams | Microsoft Teams to collaborate with everyone you work with through apps for chat, meetings, or call - all in one place. |
| Microsoft Edge (recommended) or Google Chrome | A browser with developer tools. |
| Visual Studio Code | JavaScript, TypeScript, or SharePoint Framework (SPFx) build environments. Use version 1.55 or later. |
| Microsoft 365 developer account | Access to Teams account with the appropriate permissions to install an app. |
| Azure account | Access to Azure resources. |
| OpenAPI Description (OAD) document | A document that describes the capabilities of your API. For more information, see OpenAPI Description. |
Set up your Teams development tenant
A tenant is like a space, or a container for your organization in Teams, where you chat, share files, and run meetings. This space is also where your upload and test your custom app. Let's verify if you're ready to develop with the tenant.
Check for custom app upload option
After creating the app, you must load your app in Teams without distributing it. This process is known as custom app upload. Sign in to your Microsoft 365 account to view this option.
Note
Custom app upload is necessary for previewing and testing apps in Teams local environment. If it isn't enabled, you can't preview and test your app in Teams local environment.
Do you already have a tenant, and do you have the admin access? Let's check if you really do!
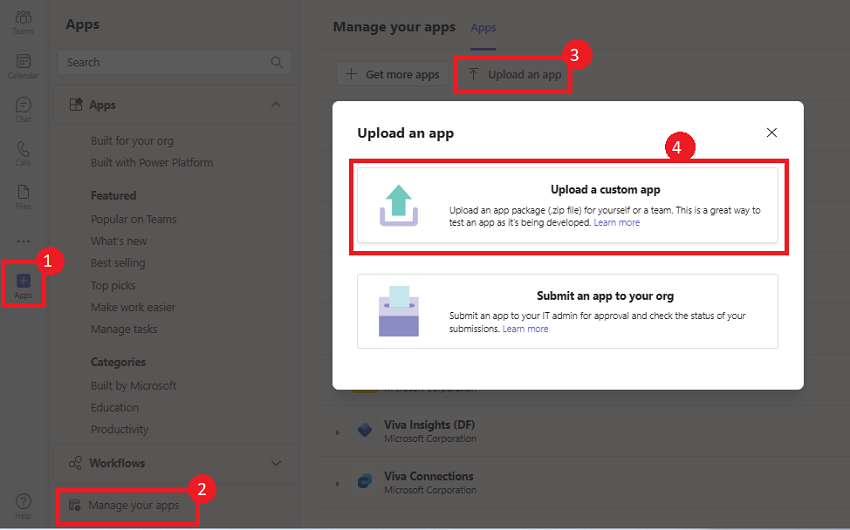
Verify if you can upload a custom app in Teams:
In the Teams client, select the Apps icon.
Select Manage your apps.
Select Upload an app.
Look for the option to Upload a custom app. If you see the option, custom app upload is enabled.
Note
Contact your Teams administrator, if you don't find the option to upload a custom app.
Create a free Teams developer tenant (optional)
If you don't have a Teams developer account, you can get it free. Join the Microsoft 365 developer program!
Go to the Microsoft 365 developer program.
Select Join Now and follow the onscreen instructions.
In the welcome screen, select Set up E5 subscription.
Set up your administrator account. After you finish, the following screen appears.
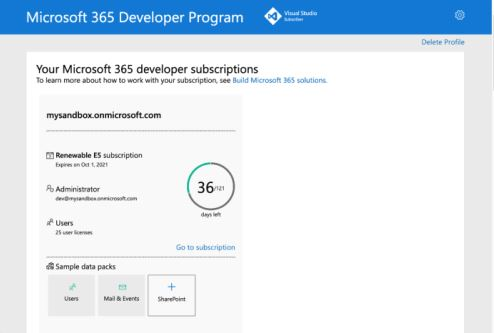
Sign in to Teams using the administrator account you just set up. Verify that you have the Upload a custom app option in Teams.
Get a free Azure account
If you want to host your app or access resources in Azure, you must have an Azure subscription. Create a free account before you begin.
You have all the tools to set up your account. Next, let's set up your development environment and start building! Select the app you want to build first.
Create OpenAPI Description document
OpenAPI Description
OpenAPI Description (OAD) is the industry-standard specification that outlines how OpenAPI files are structured and outlined. It's a language-agnostic, human-readable format for describing APIs. It's easy for both humans and machines to read and write. The schema is machine-readable and represented in either YAML or JSON.
To interact with the APIs, an OpenAPI Description document is necessary. The OpenAPI Description document must meet the following criteria:
- The
authproperty must not be specified. - JSON and YAML are the supported formats.
- OpenAPI Versions 2.0 and 3.0.x are supported.
- Teams doesn't support the oneOf, anyOf, allOf, and not (swagger.io) constructs.
- Constructing arrays for the request isn't supported, however, nested objects within a JSON request body are supported.
- The request body, if present, must be application/Json to ensure compatibility with a wide range of APIs.
- Define an HTTPS protocol server URL for the
servers.urlproperty. - Only single parameter search is supported.
- Only one required parameter without a default value is allowed.
- Only POST and GET HTTP methods are supported.
- The OpenAPI Description document must have an
operationId. - The operation mustn't require Header or Cookie parameters without default values.
- A command must have exactly one parameter.
- Ensure that there are no remote references in the OpenAPI Description document.
- A required parameter with a default value is considered optional.
We used the following OpenAPI Description as an example for this tutorial:
OpenAPI Description
openapi: 3.0.1
info:
  title: OpenTools Plugin
  description: A plugin that allows the user to find the most appropriate AI tools for their use cases, with their pricing information.
  version: 'v1'
servers:
  - url: https://gptplugin.opentools.ai
paths:
  /tools:
    get:
      operationId: searchTools
      summary: Search for AI Tools
      parameters:
        - in: query
          name: search
          required: true
          schema:
            type: string
          description: Used to search for AI tools by their category based on the keywords. For example, a search for "tool to create music" provides a list of tools that can create music.
      responses:
        "200":
          description: OK
          content:
            application/json:
              schema:
                $ref: '#/components/schemas/searchToolsResponse'
        "400":
          description: Search Error
          content:
            application/json:
              schema:
                $ref: '#/components/schemas/searchToolsError'
components:
  schemas:
    searchToolsResponse:
      required:
        - search
      type: object
      properties:
        tools:
          type: array
          items:
            type: object
            properties:
              name:
                type: string
                description: The name of the tool.
              opentools_url:
                type: string
                description: The URL to access the tool.
              main_summary:
                type: string
                description: A summary of what the tool is.
              pricing_summary:
                type: string
                description: A summary of the pricing of the tool.
              categories:
                type: array
                items:
                  type: string
                description: The categories assigned to the tool.
              platforms:
                type: array
                items:
                  type: string
                description: The platforms that this tool is available on.
          description: The list of AI tools.
    searchToolsError:
      type: object
      properties:
        message:
          type: string
          description: Message of the error.
Note
Ensure that the required: true property is available for only one parameter. If there are more than one required parameters, you can update the required property to required: false for the other parameters.
You can validate if the OpenAPI Description document is valid. To verify, follow these steps:
Go to Swagger/OpenAPI validator and validate the OpenAPI Description document.
Save the OpenAPI Description document.
Go to Swagger Editor.
In the left pane, paste the OpenAPI Description in the editor.
In the right pane, select GET.
Select Try it out.
Enter the values for the search parameter as Tool to create music.
Select Execute. The swagger editor displays a response with a list of products.
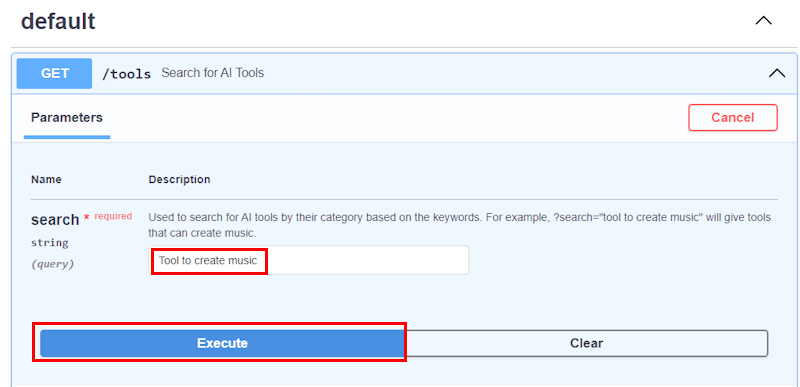
Go to Server response > Response Body.
Under
products, copy the first product from the list and save it for future reference.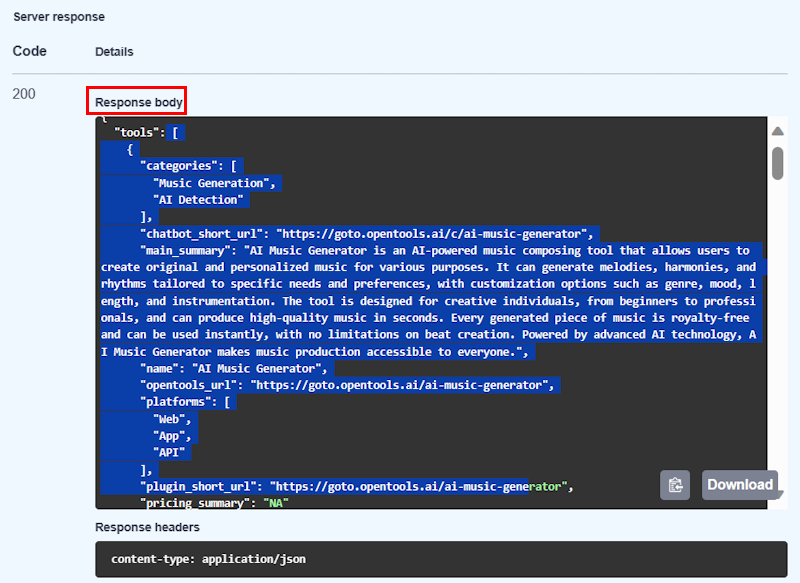
Create response rendering template
An OpenAPI Description document requires a response rendering template for the app to respond to the GET or POST requests. The response rendering template consists of an Adaptive Card template, Preview card template, and metadata.
Adaptive Card template
To create an Adaptive Card template, follow these steps:
Go to ChatGPT and ask the following query in the message compose area:
 Create an Adaptive Card Template that binds to the following response:
     "categories": [
         "Music Generation",
         "AI Detection"
     ],
     "chatbot_short_url": "https://goto.opentools.ai/c/ai-music-generator",
     "main_summary": "AI Music Generator is an AI-powered music composing tool that allows users to create original and personalized music for various purposes. It can generate melodies, harmonies, and rhythms tailored to specific needs and preferences, with customization options such as genre, mood, length, and instrumentation. The tool is designed for creative individuals, from beginners to professionals, and can produce high-quality music in seconds. Every generated piece of music is royalty-free and can be used instantly, with no limitations on beat creation. With advanced AI technology, AI Music Generator makes music production accessible to everyone.",
     "name": "AI Music Generator",
     "opentools_url": "https://goto.opentools.ai/ai-music-generator",
     "platforms": [
         "Web",
         "App",
         "API"
     ]
Select Send message.
ChatGPT generates a response with an Adaptive Card template that binds to the sample data. Save the Adaptive Card template for future reference.
Following is an example of the Adaptive Card template:
Adaptive Card template
{
"$schema": "http://adaptivecards.io/schemas/adaptive-card.json",
"type": "AdaptiveCard",
"version": "1.4",
"body": [
    {
    "type": "TextBlock",
    "text": "AI Music Generator",
    "weight": "Bolder",
    "size": "Large"
    },
    {
    "type": "TextBlock",
    "text": "Categories",
    "size": "Medium"
    },
    {
    "type": "TextBlock",
    "text": "Music Generation, AI Detection",
    "wrap": true
    },
    {
    "type": "TextBlock",
    "text": "Description",
    "size": "Medium"
    },
    {
    "type": "TextBlock",
    "text": "AI Music Generator is an AI-powered music composing tool that allows users to create original and personalized music for various purposes. It can generate melodies, harmonies, and rhythms tailored to specific needs and preferences, with customization options such as genre, mood, length, and instrumentation. The tool is designed for creative individuals, from beginners to professionals, and can produce high-quality music in seconds. Every generated piece of music is royalty-free and can be used instantly, with no limitations on beat creation. AI Music Generator is powered by advanced AI technology, and it makes music production accessible to everyone.",
    "wrap": true
    },
    {
    "type": "TextBlock",
    "text": "Platform",
    "size": "Medium"
    },
    {
    "type": "TextBlock",
    "text": "Web, App, API",
    "wrap": true
    }
],
"actions": [
    {
    "type": "Action.OpenUrl",
    "title": "Learn More",
    "url": "https://goto.opentools.ai/ai-music-generator"
    },
    {
    "type": "Action.OpenUrl",
    "title": "Try It",
    "url": "https://goto.opentools.ai/c/ai-music-generator"
    }
]
}
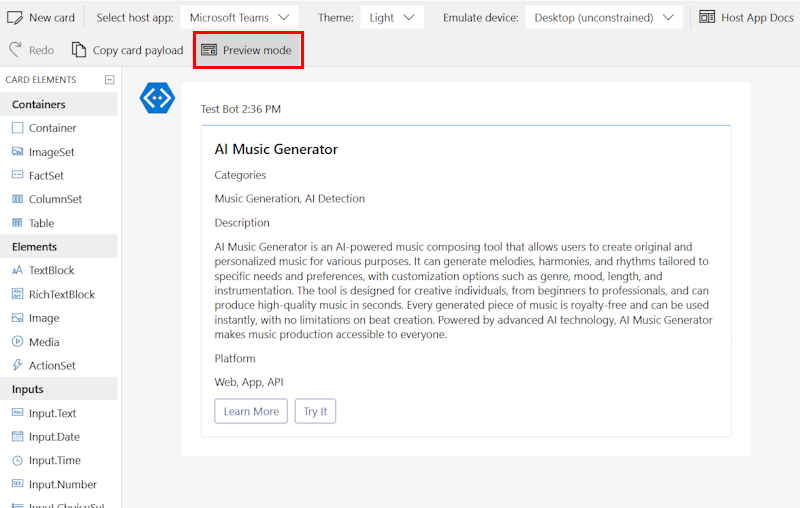
To verify if the Adaptive Card generated binds to the sample data, follow these steps:
Go to Adaptive Card Designer.
Go to Select host app, and then select Microsoft Teams from the dropdown.
Go to CARD PAYLOAD EDITOR and paste the Adaptive Card template code.
Go to SAMPLE DATA EDITOR and paste the GET API response that you saved earlier.

Select Preview mode. The Adaptive Card designer displays an Adaptive Card with the data that binds the response to the template.
Create a preview card template
The preview card template can contain a title, subtitle and image properties. If the API response doesn't have an image, you can remove the image property.
Following is an example of a preview card template:
Preview card template
   "previewCardTemplate": {
        "title": "${if(name, name, 'N/A')}",
        "subtitle": "$${if(price, price, 'N/A')}",
    }
Create an if condition for the title and subtitle, where:
- If name exists, the bot uses the name.
- If name doesn't exist, the bot uses NA.
For example, "title": "Name: ${if(name, name, 'N/A')}".
Save the preview card template for future reference.
Response rendering template
The response rendering template must conform to the schema hosted at https://developer.microsoft.com/json-schemas/teams/vDevPreview/MicrosoftTeams.ResponseRenderingTemplate.schema.json.
To create a response rendering template, follow these steps:
Create a JSON file and add the following code to the file:
{
  "version": "1.0.0",
  "$schema": "<URL_REFERENCE_TO_SCHEMA>",
  "jsonPath": "",
  "responseLayout": "",
  "responseCardTemplate": {
 },
 "previewCardTemplate": {
     }
 }
Update the properties in the response rendering template as follows:
"version":"1.0.0""$schema":"http://adaptivecards.io/schemas/adaptive-card.json""jsonPath":"tools"jsonPathis the path to one or more results in the response JSON response. Add thejsonPathto the relevant data/array from the product list in the API response. In this case, thejsonPathis tools. For more information on how to determiner the JSON path, see Querying JSON with JSON path."responseLayout":"list"responseLayoutspecifies the layout of the attachments. Used for responses of type result. Supported types are list and grid. If the response body contains an object with multiple elements like text, title, and image, then the response layout must be set tolist. If the API response contains only images or thumbnails, then the response layout must be set togrid."responseCardTemplate": Paste the Adaptive Card template code that you saved earlier.responseCardTemplateis an Adaptive Card template to map the JSON response to an Adaptive Card."previewCardTemplate": Paste the preview card template code that you saved earlier.previewCardTemplateis a preview card template is used to show a preview of results in the message extension flyout.
Save the response rendering template in the same folder you saved the OpenAPI Description document.
The following code is an example of a Response rendering template:
Response rendering template
{
        "version": "devPreview",
        "jsonPath": "tools",
        "responseLayout": "list",
        "responseCardTemplate": {
    "$schema": "http://adaptivecards.io/schemas/adaptive-card.json",
    "type": "AdaptiveCard",
    "version": "1.4",
    "body": [
        {
        "type": "TextBlock",
        "text": "AI Music Generator",
        "weight": "Bolder",
        "size": "Large"
        },
        {
        "type": "TextBlock",
        "text": "Categories",
        "size": "Medium"
        },
        {
        "type": "TextBlock",
        "text": "Music Generation, AI Detection",
        "wrap": true
        },
        {
        "type": "TextBlock",
        "text": "Description",
        "size": "Medium"
        },
        {
        "type": "TextBlock",
        "text": "AI Music Generator is an AI-powered music composing tool that allows users to create original and personalized music for various purposes. It can generate melodies, harmonies, and rhythms tailored to specific needs and preferences, with customization options such as genre, mood, length, and instrumentation. The tool is designed for creative individuals, from beginners to professionals, and can produce high-quality music in seconds. Every generated piece of music is royalty-free and can be used instantly, with no limitations on beat creation. With advanced AI technology, AI Music Generator makes music production accessible to everyone.",
        "wrap": true
        },
        {
        "type": "TextBlock",
        "text": "Platform",
        "size": "Medium"
        },
        {
        "type": "TextBlock",
        "text": "Web, App, API",
        "wrap": true
        }
    ],
    "actions": [
        {
        "type": "Action.OpenUrl",
        "title": "Learn More",
        "url": "https://goto.opentools.ai/ai-music-generator"
        },
        {
        "type": "Action.OpenUrl",
        "title": "Try It",
        "url": "https://goto.opentools.ai/c/ai-music-generator"
        }
    ]
    },
    "previewCardTemplate": {
        "title": "${if(name, name, 'N/A')}",
        "subtitle": "$${if(price, price, 'N/A')}",
    }
    }
Create app manifest
Now, you need to create an app manifest (previously called Teams app manifest). The app manifest describes how your app integrates into the Microsoft Teams product.
Create a Teams app manifest
To create the manifest, follow these steps:
Create a new JSON file. Your app manifest must conform to the schema defined in the public developer preview app manifest schema.
Add the following code to the JSON file:
App manifest
{
 "$schema": "https://developer.microsoft.com/json-schemas/teams/vDevPreview/MicrosoftTeams.schema.json",
 "manifestVersion": "devPreview",
 "version": "1.0.3",
 "id": "<<YOUR-MICROSOFT-APP-ID>>",
 "packageName": "com.microsoft.teams.extension",
 "developer": {
     "name": "Teams App, Inc.",
     "websiteUrl": "https://www.example.com",
     "privacyUrl": "https://www.example.com/termofuse",
     "termsOfUseUrl": "https://www.example.com/privacy"
 },
 "icons": {
     "color": "color.png",
     "outline": "outline.png"
 },
 "name": {
     "short": "Search ME API",
     "full": "Search ME API full"
 },
 "description": {
     "short": "product app for testing API Message Extensions",
     "full": "product app for testing API Message Extensions"
 },
 "accentColor": "#FFFFFF",
 "composeExtensions": [
     {
         "composeExtensionType": "",
         "apiSpecificationFile": "",
         "commands": [
             {
                 "context": [
                     "compose"
                 ],
                 "type": "query",
                 "title": "API for fetching Klarna.",
                 "id": "",
                 "parameters": [
                     {
                         "name": "",
                         "title": "",
                         "description": ""
                     }
                 ],
                 "description": "",
                 "apiResponseRenderingTemplateFile": ""
             }
         ]
     }
 ],
 "permissions": [
     "identity",
     "messageTeamMembers"
 ],
 "validDomains": []
}
Update the app manifest properties as follows:
- Replace
<<YOUR-MICROSOFT-APP-ID>>with bot's Microsoft App ID. - Update the value for
composeExtensionTypetoapiBased. - Update the value for
apiSpecificationFileto the path of your OpenAPI Description file. - Update the value for
commands.idtosearchTools. - Update the value for
commands.titletoSearch for AI Tools. - Update the value for
commands.descriptiontoSearch for AI Tools. - Update the value for
parameters.nametosearch. If there are no parameters, then the values must be query parameters orproperties.nameif referencing a property in the request body schema. - Update the
apiResponseRenderingTemplateFileto the path of your response rendering template file. - Update the value for
validDomainsto theservice URLendpoint defined in the OpenAPI Description file.
- Replace
Save the Teams app manifest in the same folder you saved the OpenAPI Description document and the response rendering template.
- You need a color image and outline image. These images should be included in the folder and referenced in your Teams app manifest.
- Zip up the contents of the folder. The zip file must include the following files:
- OpenAPI Description document
- Response rendering template
- App manifest
- Color icon
- Outline icon
Upload a custom app to Teams
Sign into Teams test environment to test your app in Teams. To upload a custom app in Teams, follow these steps:
Go to Microsoft Teams and sign in using your test tenant credentials.
Go to Apps > Manage your app > Upload an app.
Select Upload a customized app.
Select the zip file created and select Open.
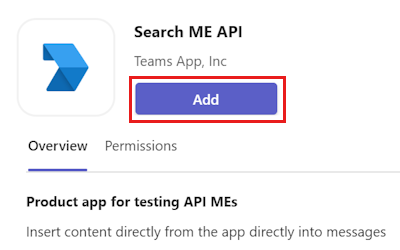
Select Add.
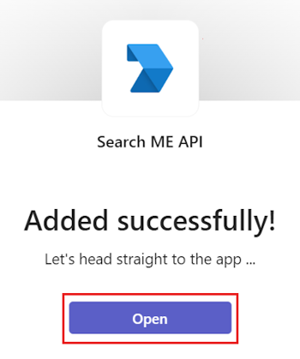
Select Open.
Go to a chat, then select + from the message compose area, and search for your app.
Select the app and make a search query.
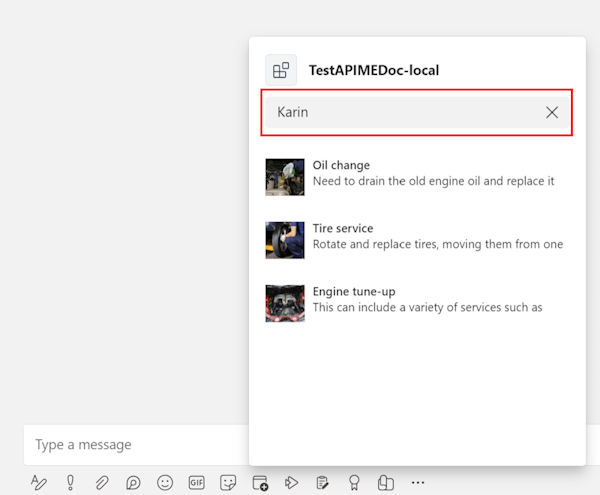
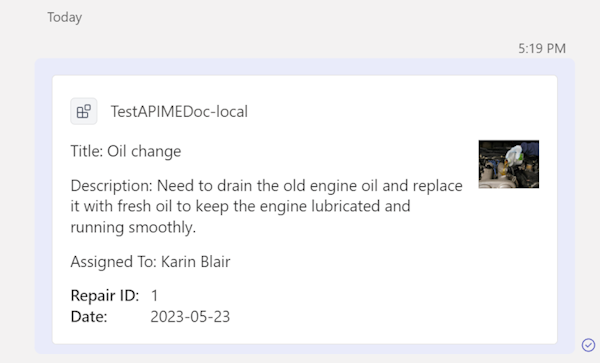
The app responds with an Adaptive Card in the chat window.
Select Send.
Congratulations!
You did it! You learned to create a API-based message extension using OpenAPI Description document.
Have an issue with this section? If so, please give us some feedback so we can improve this section.
Platform Docs