Tutorial: Walkthrough Microsoft Intune admin center
Microsoft Intune provides the cloud infrastructure, the cloud-based mobile device management (MDM), cloud-based mobile application management (MAM), and cloud-based PC management for your organization. Intune helps you ensure that your company's devices, apps, and data meet your company's security requirements. You have the control to set which requirements need to be checked and what happens when those requirements aren't met. The Microsoft Intune admin center is where you can find the Microsoft Intune service, as well as other device management related settings. Understanding the features available in Intune will help you accomplish various Mobile Device Management (MDM) and Mobile Application Management (MAM) tasks.
Note
Microsoft Intune is a single, integrated endpoint management platform for managing all your endpoints. The Microsoft Intune admin center integrates Microsoft Configuration Manager and Microsoft Intune.
In this tutorial, you will:
- Tour the Microsoft Intune admin center
- Customize your view of the Microsoft Intune admin center
If you don't have an Intune subscription, sign up for a free trial account.
Prerequisites
Before setting up Microsoft Intune, review the following requirements:
Sign up for a Microsoft Intune free trial
Trying out Intune is free for 30 days. If you already have a work or school account, sign in with that account and add Intune to your subscription. Otherwise, you can sign up for a free trial account to use Intune for your organization.
Important
You can't combine an existing work or school account after you sign up for a new account.
Tour Microsoft Intune in the Microsoft Intune admin center
Follow the steps below to better understand Intune in the Microsoft Intune admin center. Once you complete the tour, you'll have a better understanding of some of the major areas of Intune.
Open a browser and sign in to the Microsoft Intune admin center. If you are new to Intune, use your free trial subscription.
When you open the Microsoft Intune admin center, the service is displayed in a pane of your browser. Some of the first workloads you may use in Intune include Devices, Apps, Users, and Groups. A workload is simply a sub-area of a service. When you select the workload, it opens that pane as a full page. Other panes slide out from the right side of the pane when they open, and close to reveal the previous pane.
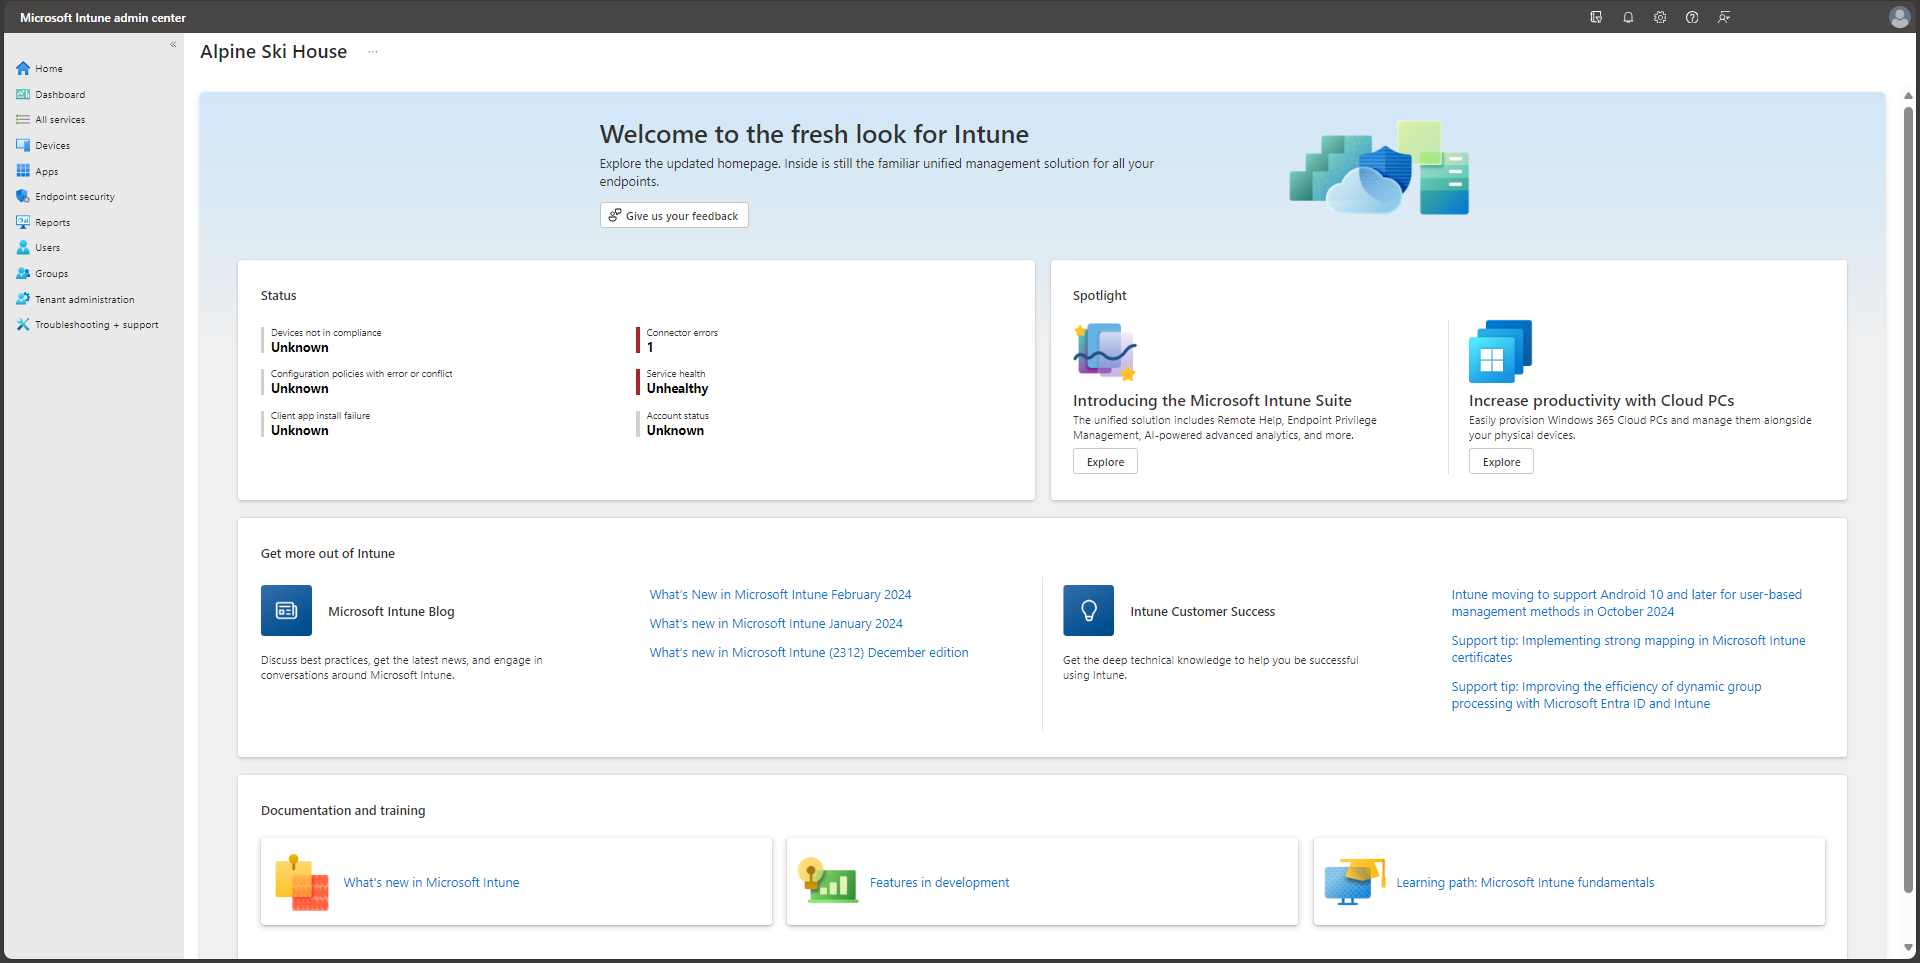
By default, when you open the Microsoft Intune admin center, you'll see the Home page pane. This pane provides an overall visual snapshot of tenant status and compliance status, as well as other helpful related links.
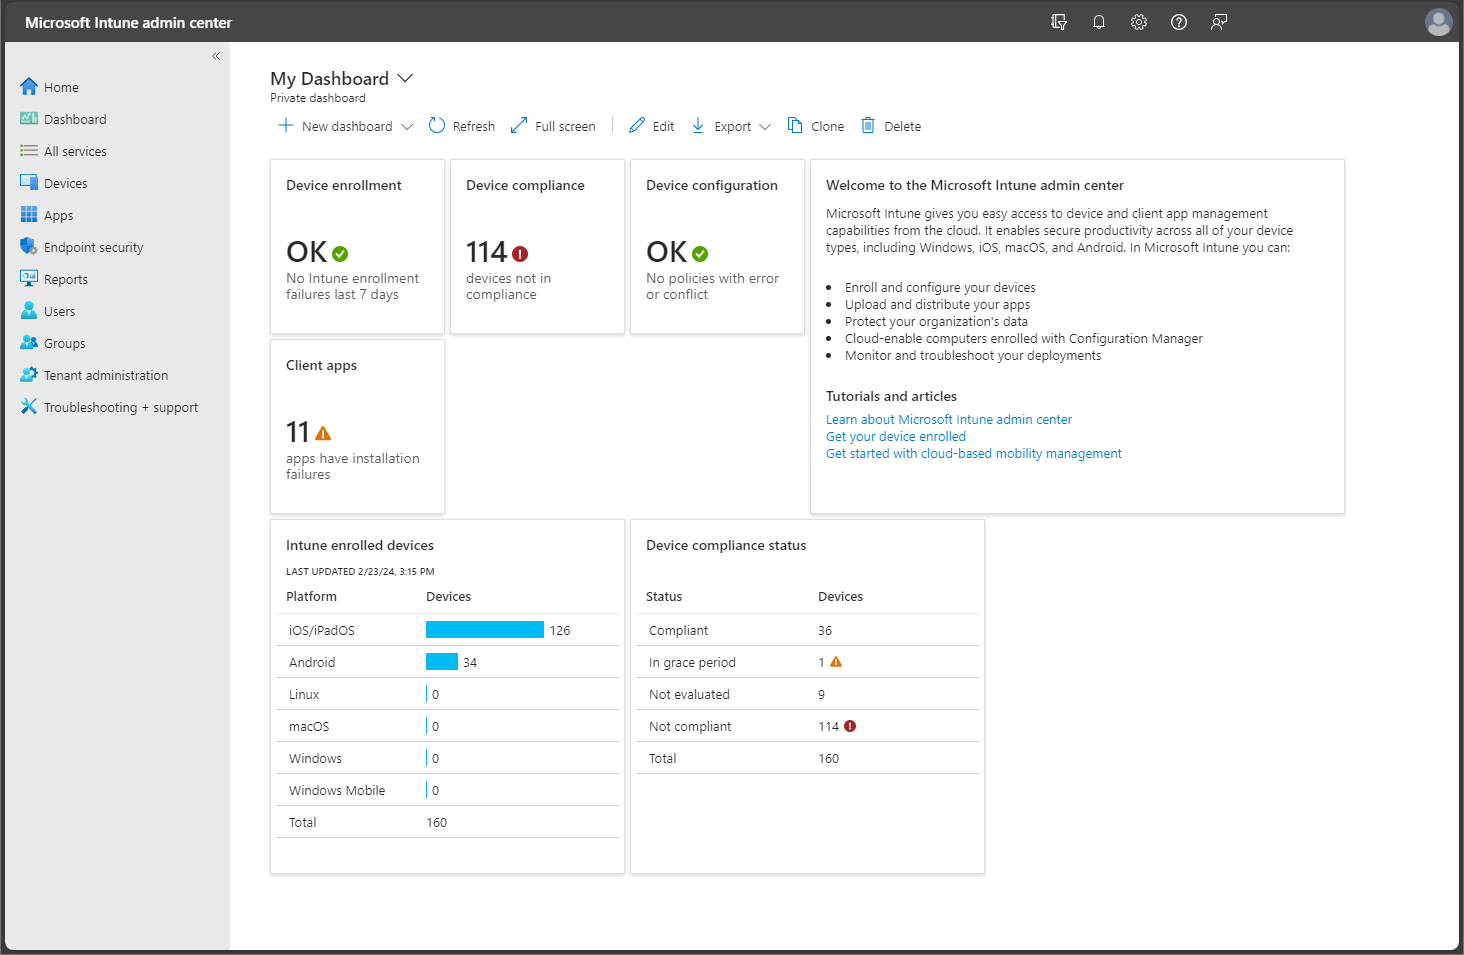
From the navigation pane, select Dashboard to display overall details about the devices and apps for your Intune tenant. If you are starting with a new Intune tenant, you won't have any enrolled devices or added apps yet.
Intune lets you manage your workforce's devices and apps, including how they access your company data. To use this mobile device management (MDM) service, the devices must first be enrolled in Intune. When a device is enrolled, it is issued an MDM certificate. This certificate is used to communicate with the Intune service.
There are several methods to enroll your workforce's devices into Intune. Each method depends on the device's ownership (personal or corporate), device type (iOS/iPadOS, Windows, Android), and management requirements (resets, affinity, locking). However, before you can enable device enrollment, you must set up your Intune infrastructure. In particular, device enrollment requires that you set your MDM authority. For more information about getting your Intune environment (tenant) ready, see Set up Intune. Once you have your Intune tenant ready, you can enroll devices. For more information about device enrollment, see What is device enrollment?
From the navigation pane, select Devices to display details about the enrolled devices in your Intune tenant.
Tip
If you have previously used Intune in the Azure portal, you found the above details in the Azure portal by signing in to Intune and selecting Devices.
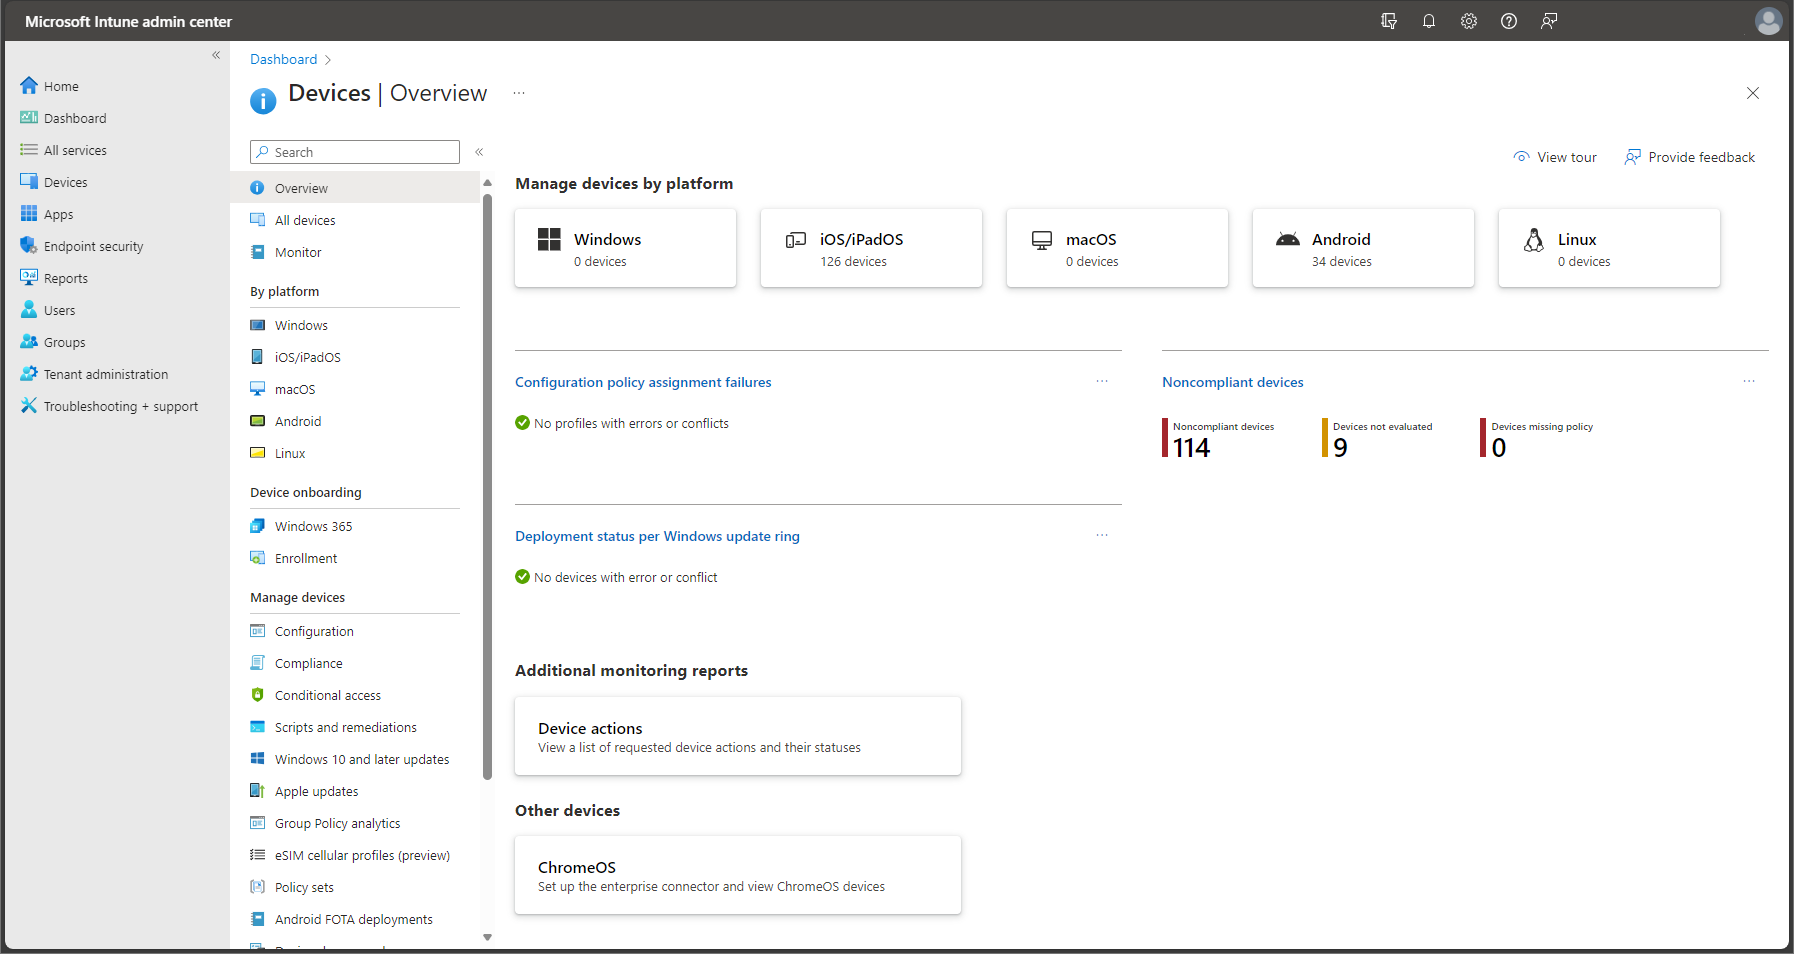
The Devices - Overview pane provides device details, such as the following information:
- Manage devices by platform - You can quickly see the number of devices that are managed for each platform. Selecting a platform allows you to see additional details.
- Configuration policy assignment failures - You can check wither you have any profiles with errors or conflicts.
- Noncompliant devices - You can see a count of noncompliant devices for your tenant.
- Deployment status per Windows update ring - You can see if there are any Windows device with update errors or conflicts.
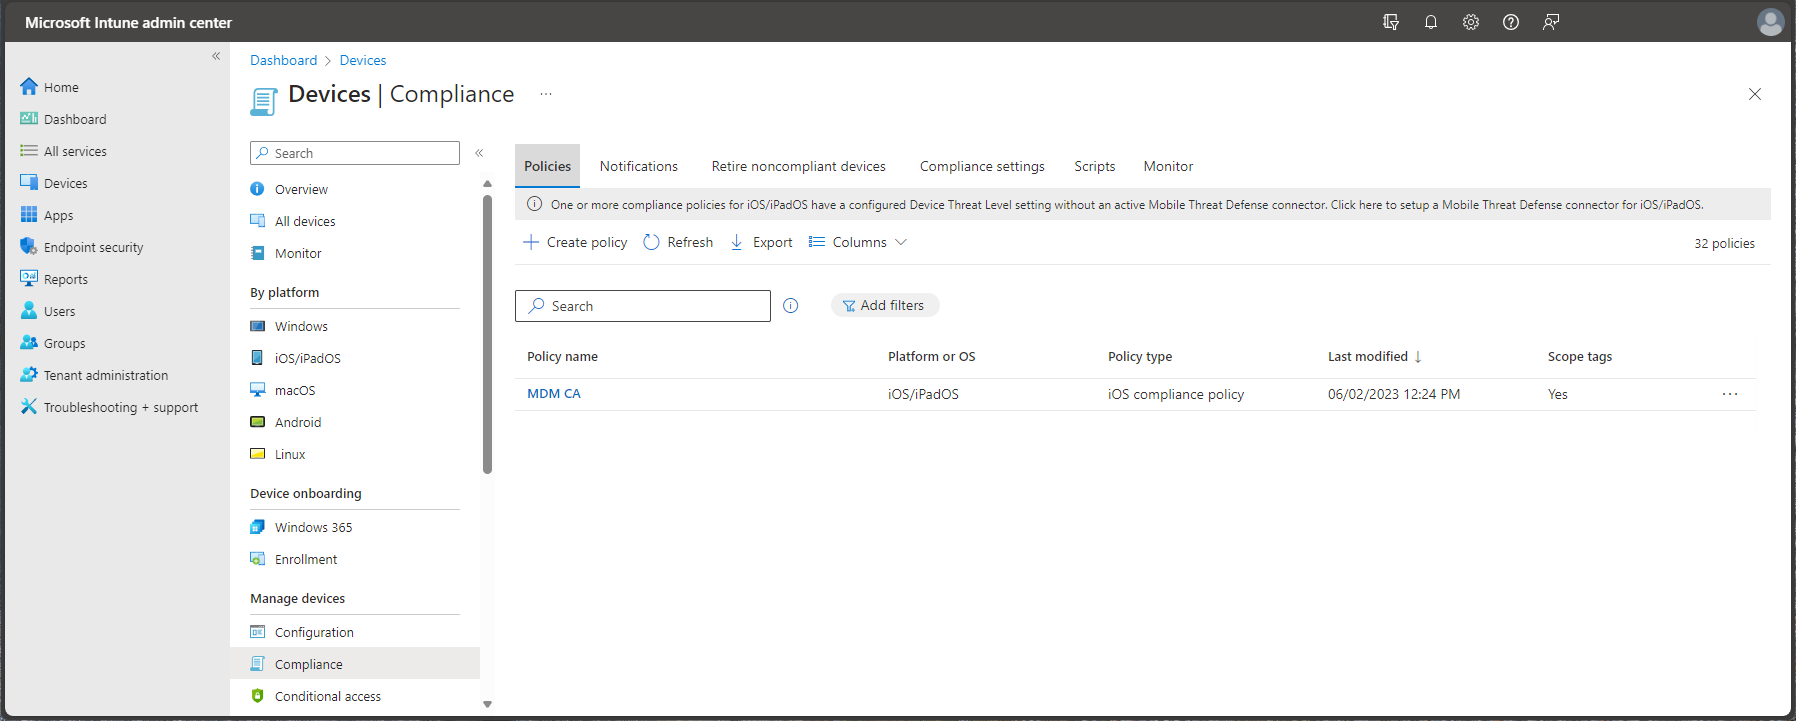
From the Devices - Overview pane, select Compliance to display details about compliance for devices managed by Intune. You will see details similar to the following image.
Tip
If you have previously used Intune in the Azure portal, you found the above details in the Azure portal by signing in to Intune and selecting Device Compliance.
Compliance requirements are essentially rules, such as requiring a device PIN, or requiring device encryption. Device compliance policies define the rules and settings that a device must follow to be considered compliant. To use device compliance, you must have:
- An Intune and a Microsoft Entra ID P1 or P2 subscription
- Devices running a supported platform
- Devices must be enrolled in Intune
- Devices that are enrolled to either one user or no primary user.
For more information, see Get started with device compliance policies in Intune.
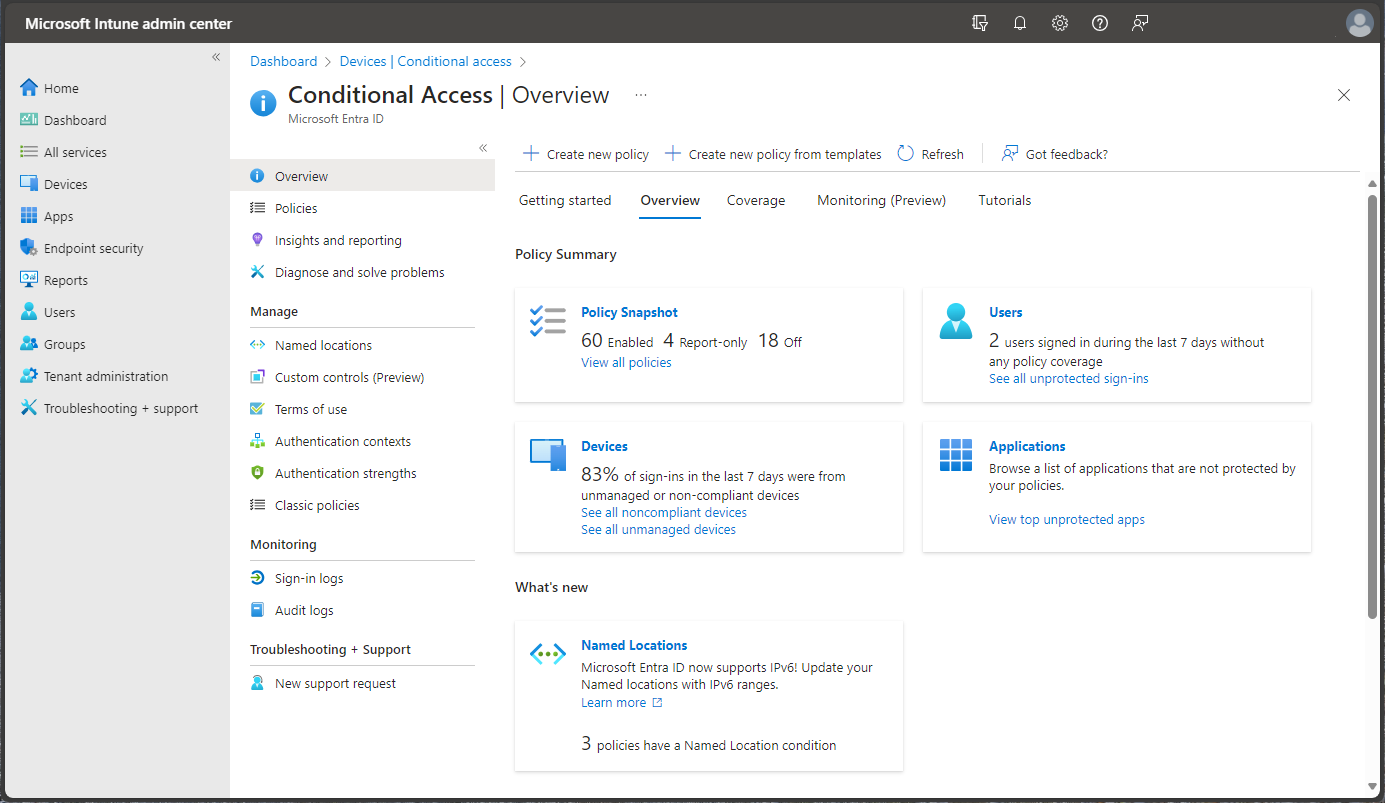
From the Devices - Overview pane, select Conditional Access to display details about access policies.
Tip
If you have previously used Intune in the Azure portal, you found the above details in the Azure portal by signing in to Intune and selecting Conditional Access.
Conditional Access refers to ways you can control the devices and apps that are allowed to connect to your email and company resources. To learn about device-based and app-based Conditional Access, and find common scenarios for using Conditional Access with Intune, see What's Conditional Access?
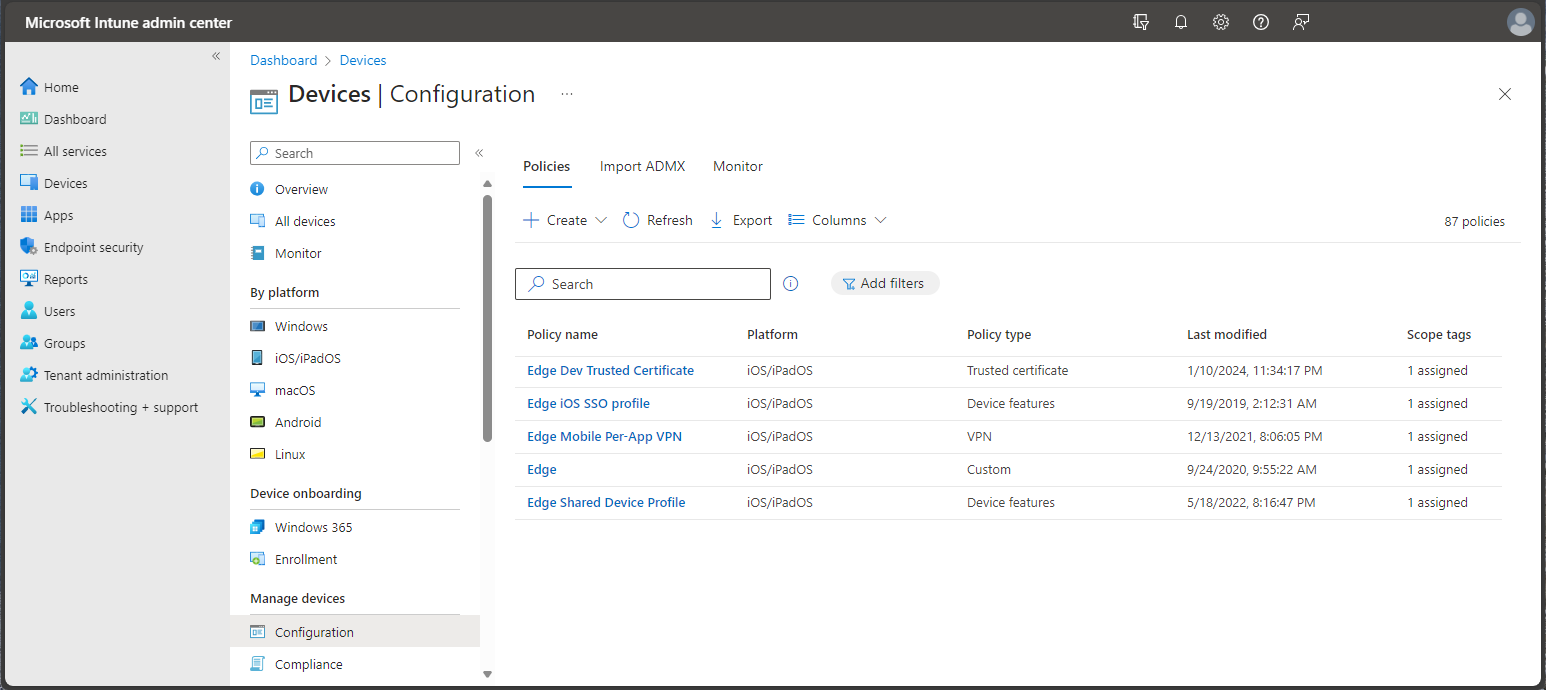
From the navigation pane, select Devices > Manage devices > Configuration to display details about device profiles in Intune.
Tip
If you have previously used Intune in the Azure portal, you found the above details in the Azure portal by signing in to Intune and selecting Device configuration.
Intune includes settings and features that you can enable or disable on different devices within your organization. These settings and features are added to "configuration profiles". You can create profiles for different devices and different platforms, including iOS/iPadOS, Android, macOS, and Windows. Then, you can use Intune to apply the profile to devices in your organization.
For more information about device configuration, see Apply features settings on your devices using device profiles in Microsoft Intune.
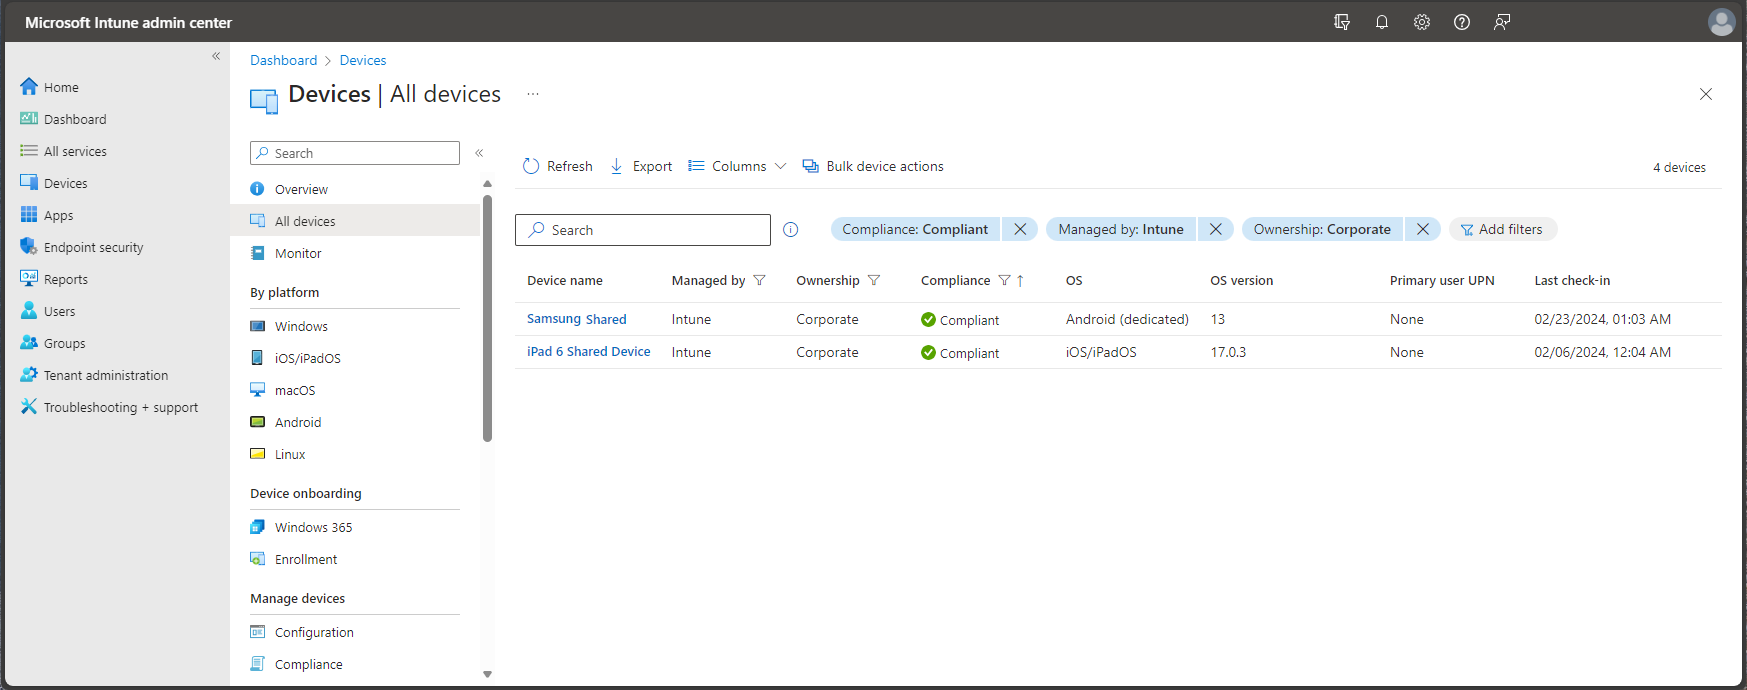
From the navigation pane, select Devices > All devices to display details about your Intune tenant's enrolled devices. If you are starting with a new Intune enlistment, you will not have any enrolled devices yet.
This list of devices show key details about compliance, OS version, and last check-in date.
Tip
If you have previously used Intune in the Azure portal, you found the above details in the Azure portal by signing in to Intune and selecting Devices > All devices.
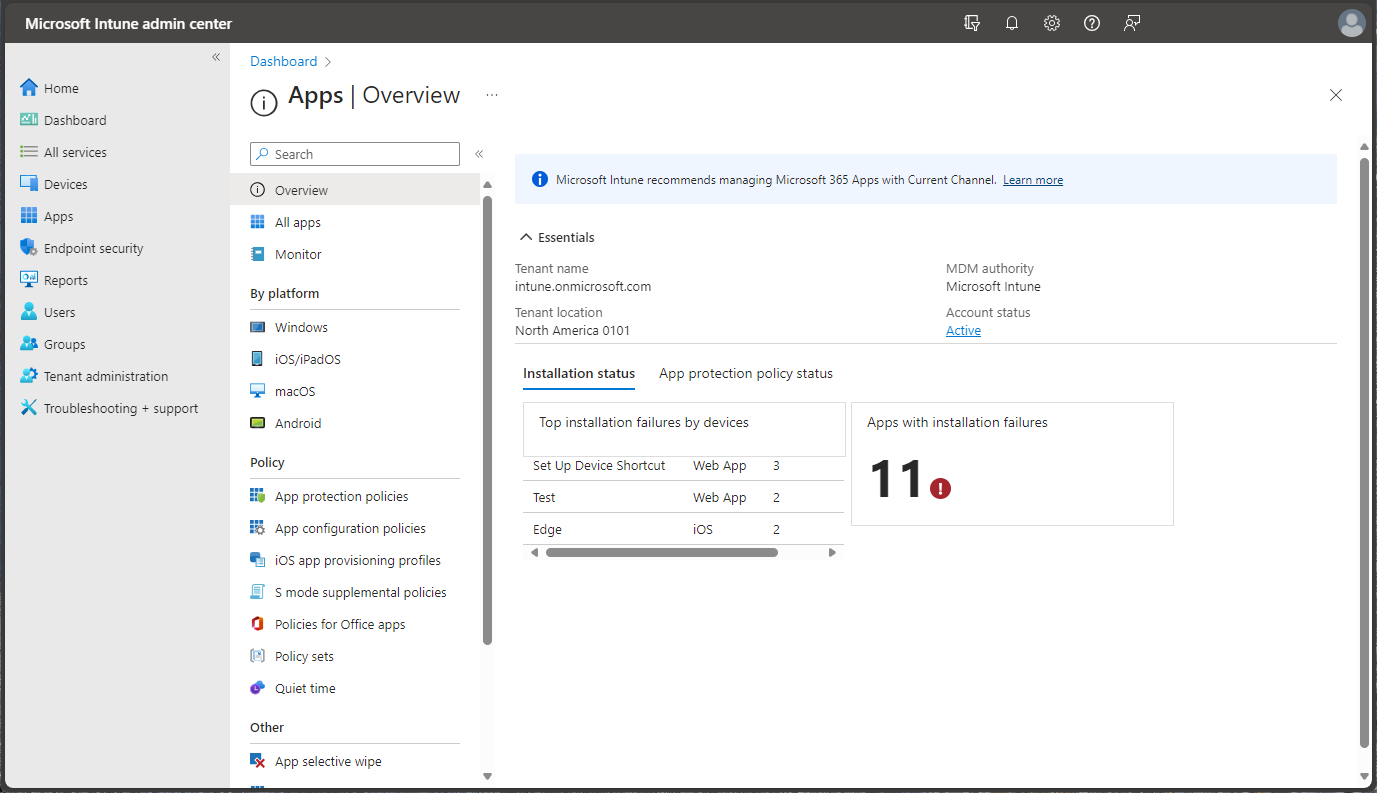
From the navigation pane, select Apps to display an overview of app status. This pane provides app installation status based on the following tabs:
Tip
If you have previously used Intune in the Azure portal, you found the above details in the Azure portal by signing in to Intune and selecting Client apps.
The Apps - Overview pane has two tabs that allow you to view a summary of the following statuses:
- Installation status - View the top installation failures by device, as well as the apps with installation failures.
- App protection policy status - Find details about assigned users to app protection policies, as well as flagged users.
As an IT admin, you can use Microsoft Intune to manage the client apps that your company's workforce uses. This functionality is in addition to managing devices and protecting data. One of an admin's priorities is to ensure that end users have access to the apps they need to do their work. Additionally, you might want to assign and manage apps on devices that are not enrolled with Intune. Intune offers a range of capabilities to help you get the apps you need on the devices you want.
Note
The Apps - Overview pane also provides tenant status and account details.
For more information about adding and assigning apps, see Add apps to Microsoft Intune and Assign apps to groups with Microsoft Intune.
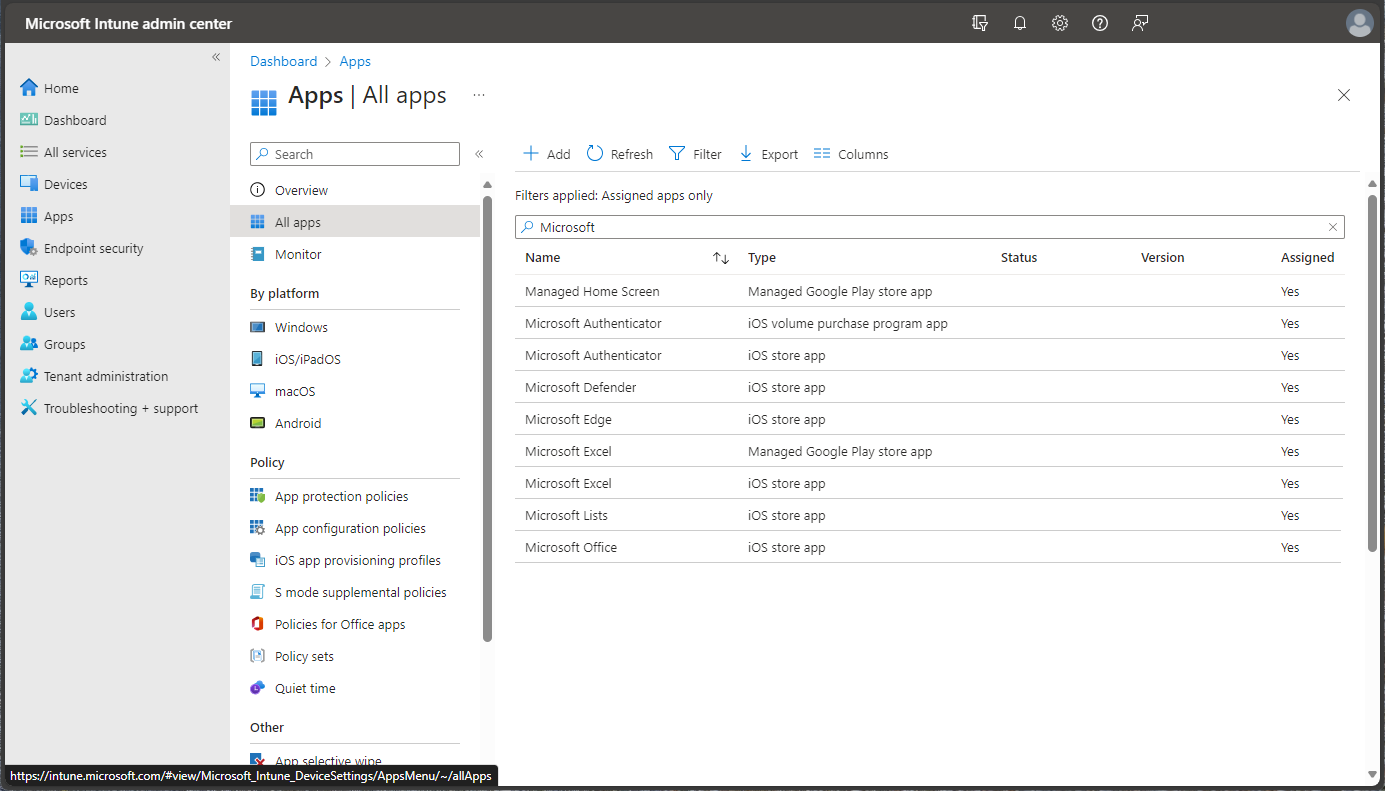
From the Apps - Overview pane, select All apps to see a list of apps that have been added to Intune.
Tip
If you have previously used Intune in the Azure portal, you found the above details in the Azure portal by signing in to Intune and selecting Client apps > Apps.
You can add a variety of different app type based on platform to Intune. Once an app has been added, you can assign it to groups of users.
For more information, see Add apps to Microsoft Intune.
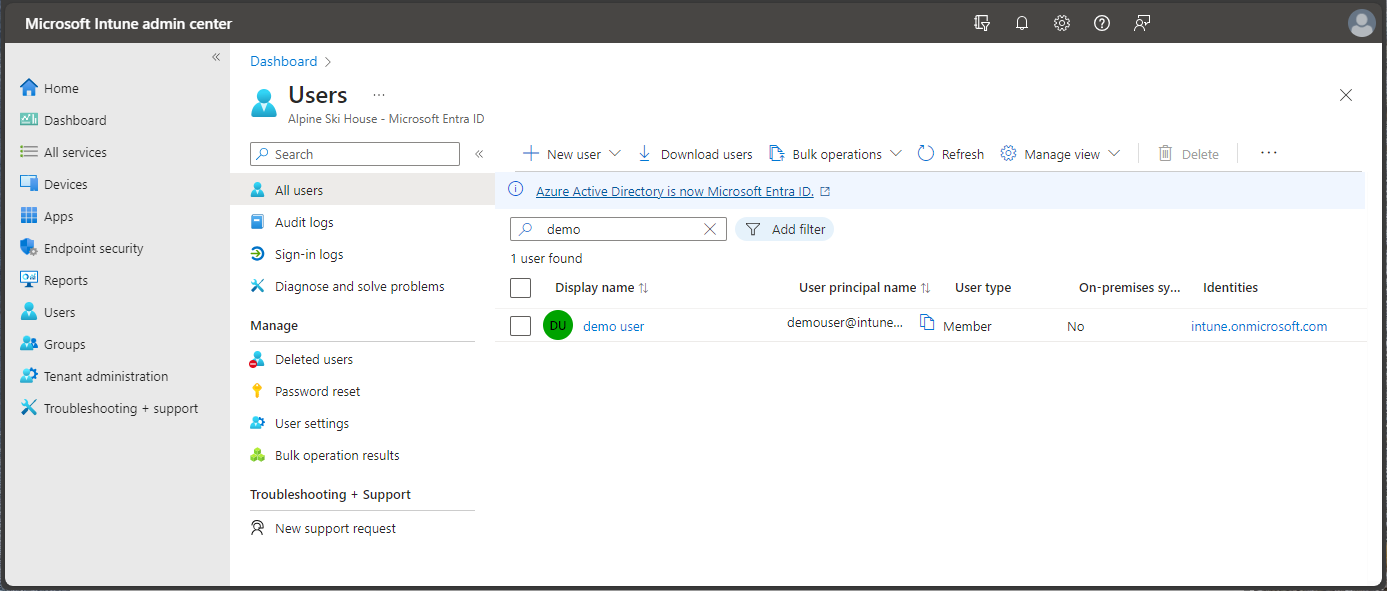
From the navigation pane, select Users to display details about the users that you have included in Intune. These users are members of your organization that have devices and apps associated with your Intune tenant.
Tip
If you have previously used Intune in the Azure portal, you found the above details in the Azure portal by signing in to Intune and selecting Users.
You can add users directly to Intune or synchronize users from your on-premises Active Directory. Once added, users can enroll devices and access company resources. You can also give users additional permissions to access Intune. For more information, see Add users and grant administrative permission to Intune.
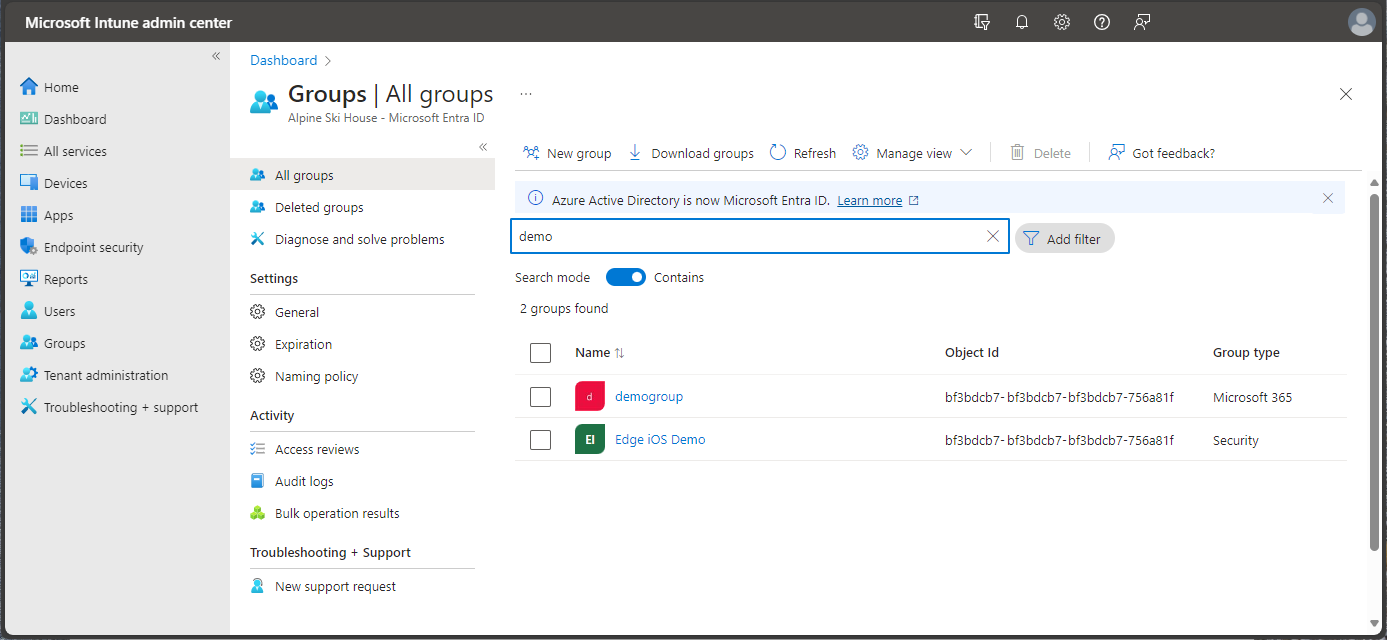
From the navigation pane, select Groups to display details about the Microsoft Entra groups included in Intune. As an Intune admin, you use groups to manage devices and users.
Tip
If you have previously used Intune in the Azure portal, you found the above details in the Azure portal by signing in to Intune and selecting Groups.
You can set up groups to suit your organizational needs. Create groups to organize users or devices by geographic location, department, or hardware characteristics. Use groups to manage tasks at scale. For example, you can set policies for many users or deploy apps to a set of devices. For more information about groups, see Add groups to organize users and devices.
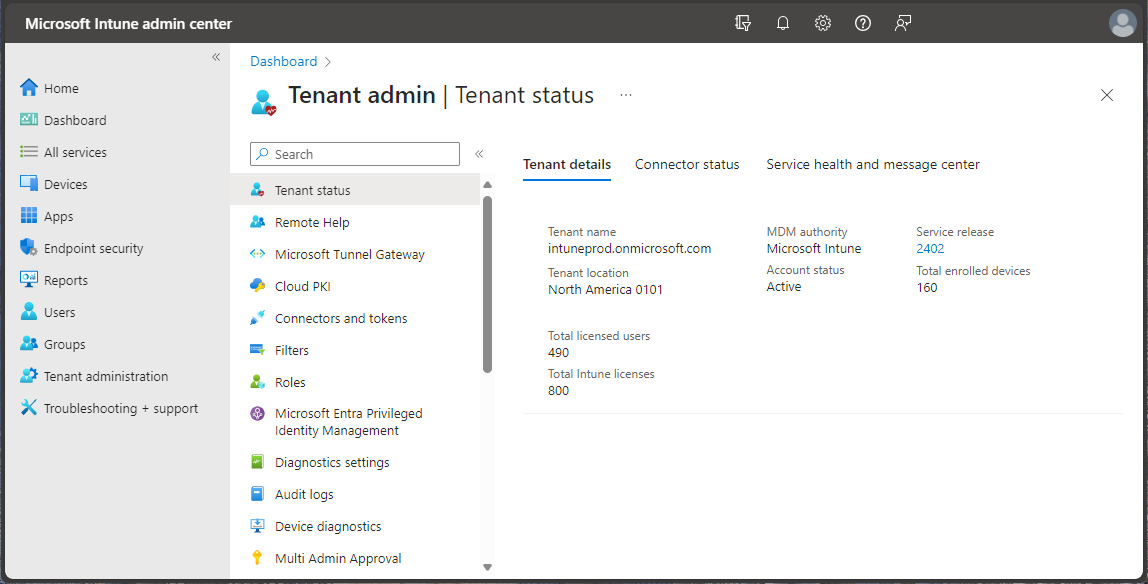
From the navigation pane, select Tenant administration to display details about your Intune tenant.
Tip
If you have previously used Intune in the Azure portal, you found the above details in the Azure portal by signing in to Intune and selecting Tenant status.
The Tenant admin - Tenant status pane provides tabs for Tenant details, Connector status, and Service health and message center. If there are any issues with your tenant or Intune itself, you will find details available from this pane.
For more information, see Intune Tenant Status.
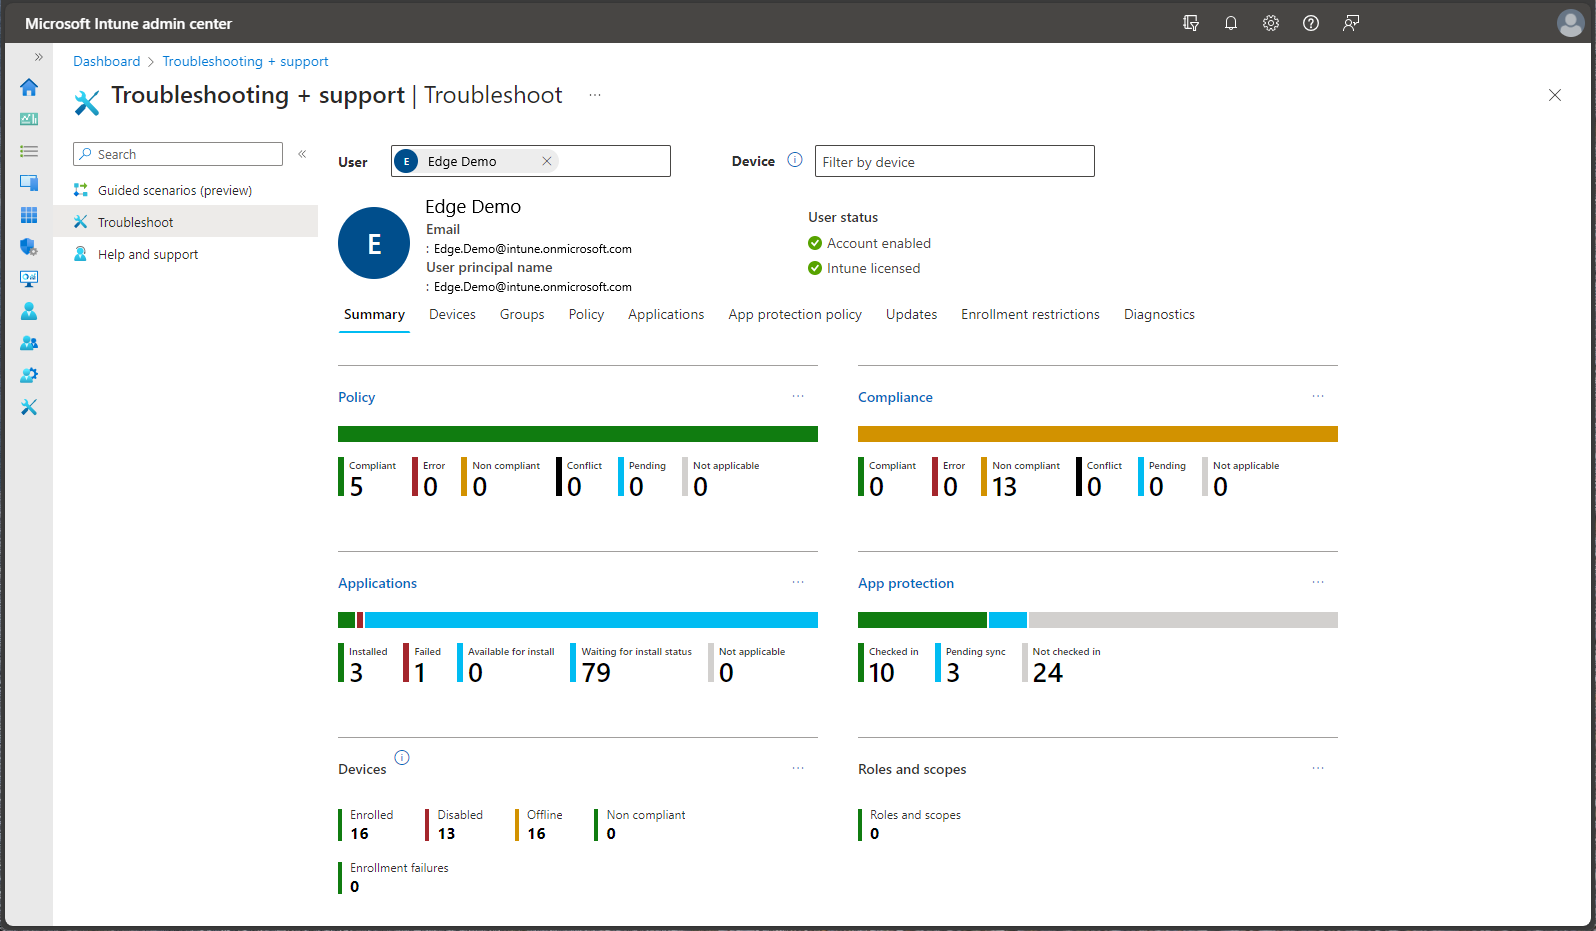
From the navigation pane, select Troubleshooting + support > Troubleshoot to check status details on a specific user or devices.
Tip
If you have previously used Intune in the Azure portal, you found the above details in the Azure portal by signing in to Intune and selecting Troubleshoot.
The Troubleshooting pane provides tabs as well. You can view troubleshooting information by selecting the following tabs:
- Summary
- Devices
- Groups
- Policy
- Applications
- App protection policy
- Updates
- Enrollment restrictions
- Diagnostics
For more information about troubleshooting within Intune, see Use the troubleshooting portal to help users at your company.
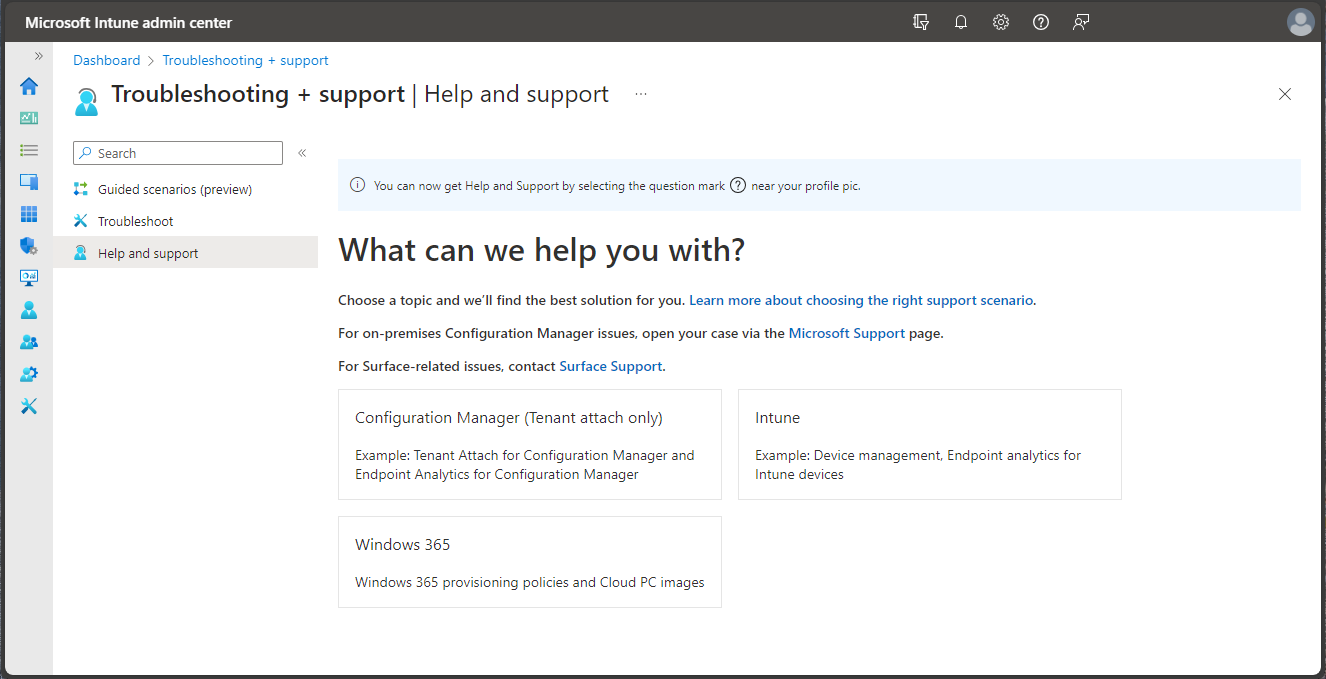
From the navigation pane, select Troubleshooting + support > Help and support to request help.
Tip
If you have previously used Intune in the Azure portal, you found the above details in the Azure portal by signing in to Intune and selecting Help and support.
As an IT admin, you can use the Help and Support option to search and view solutions, as well as file an on-line support ticket for Intune.
To create a support ticket, your account must be assigned as an administrator role in Microsoft Entra ID. Administrator roles that can be used to create support tickets include, Service support administrator, Intune administrator, and Global administrator. Microsoft recommends granting the Service support administrator role to your administrators to create Intune support tickets, which is the lowest possible administrator rights needed to create support tickets. For more information, see an Types of administrators.
For more information, see How to get support in Microsoft Intune.
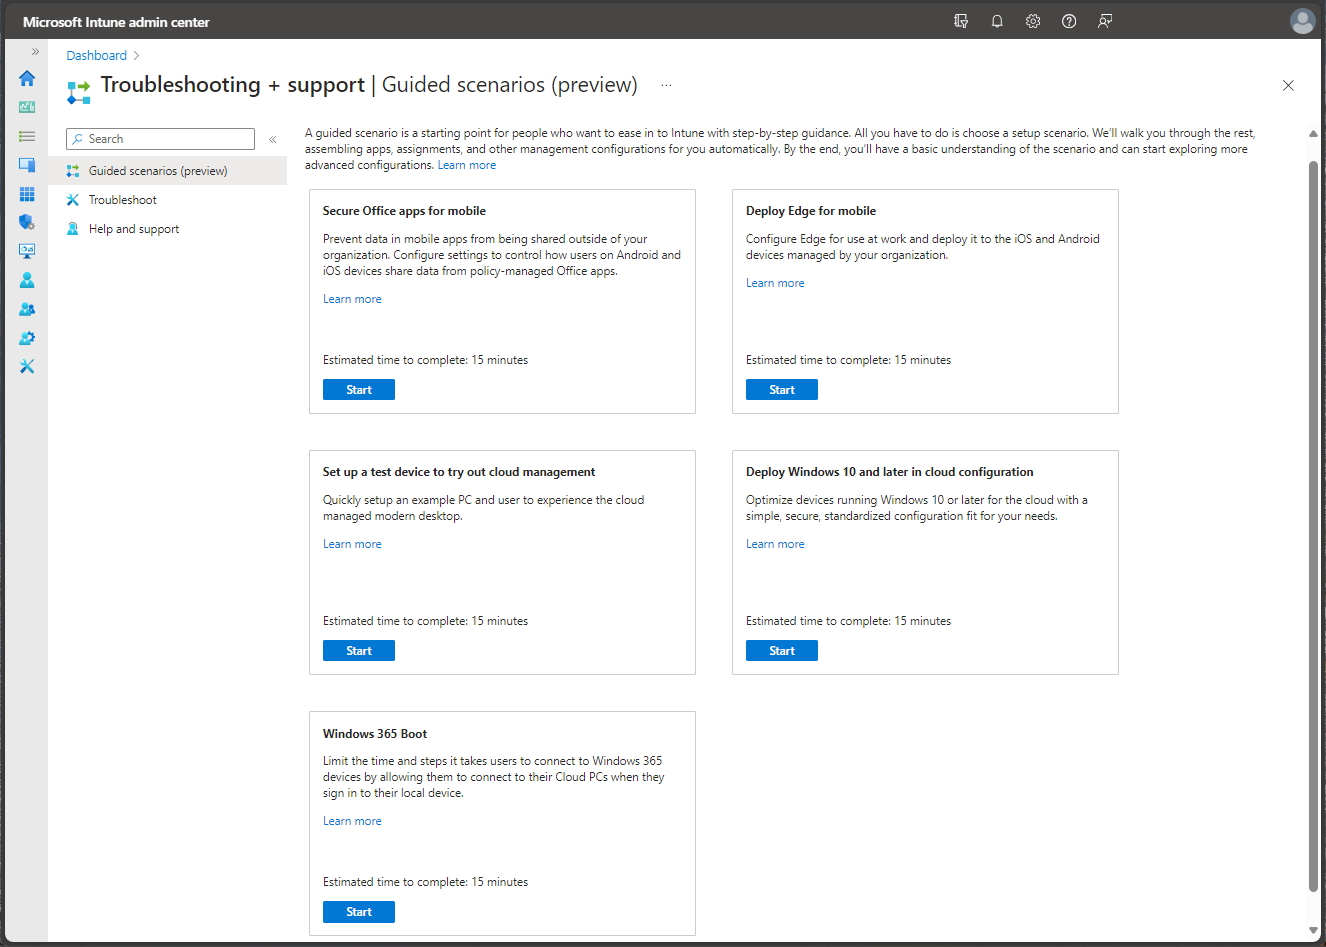
From the navigation pane, select Troubleshooting + support > Guided scenarios to display available Intune guided scenarios.
A guided scenario is a customized series of steps centered around one end-to-end use-case. Common scenarios are based on the role an admin, user, or device plays in your organization. These roles typically require a collection of carefully orchestrated profiles, settings, applications, and security controls to provide the best user experience and security.
If you are not familiar with all the steps and resources needed to implement a particular Intune scenario, guided scenarios may be used as your starting point.
For more information about guided scenarios, see Guided scenarios overview.
Configure the Microsoft Intune admin center
Microsoft Intune admin center allows you to customize and configure the view of the portal.
Change the Dashboard
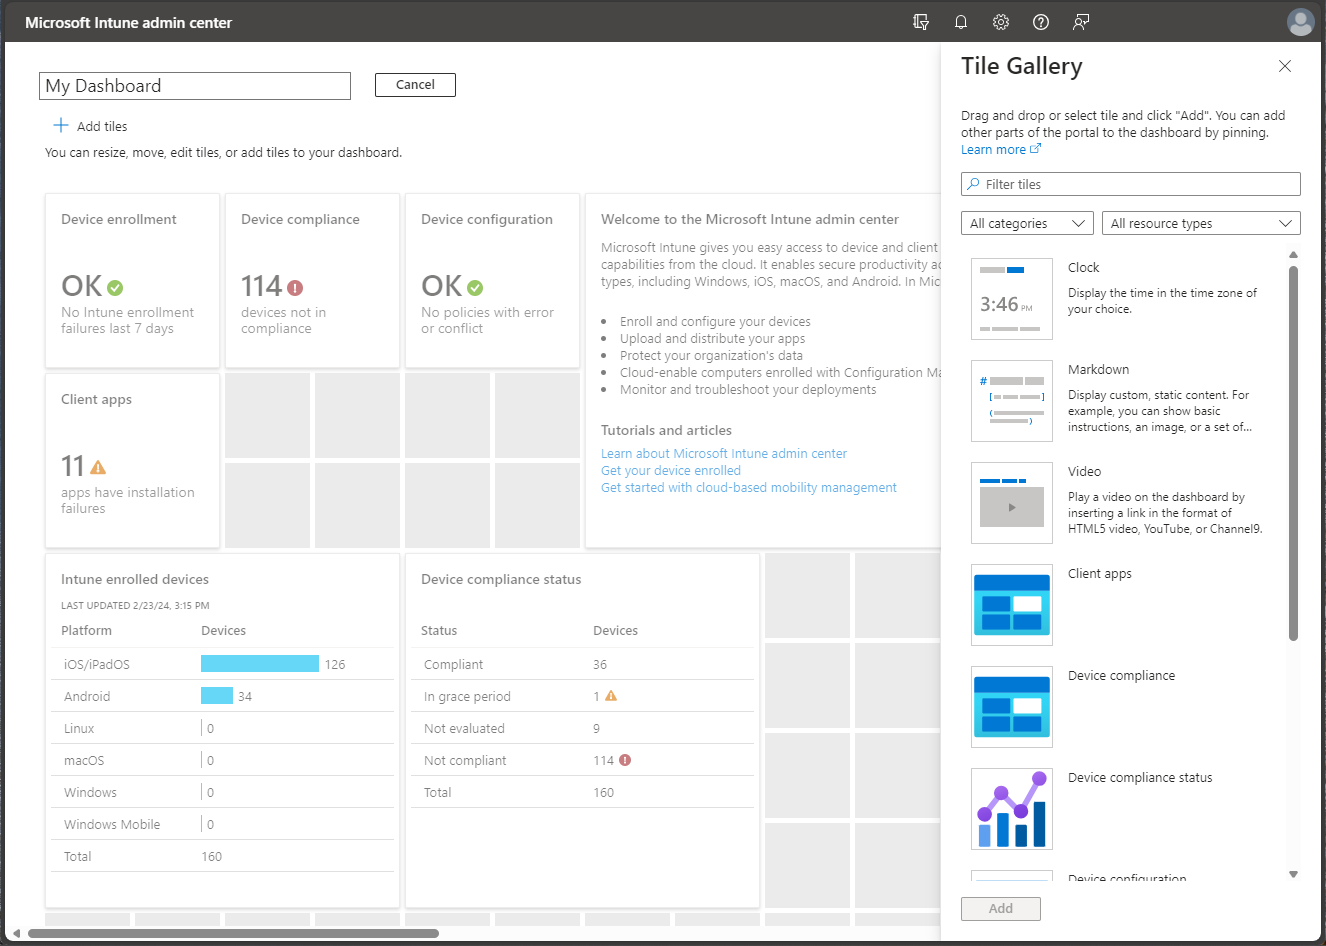
The Dashboard displays overall details about the devices and client apps in your Intune tenant. Dashboards provide a way for you to create a focused and organized view in the Microsoft Intune admin center. Use dashboards as a workspace where you can quickly launch tasks for day-to-day operations and monitor resources. Build custom dashboards based on projects, tasks, or user roles, for example. The Microsoft Intune admin center provides a default dashboard as a starting point. You can edit the default dashboard, create and customize additional dashboards, and publish and share dashboards to make them available to other users.
To modify your current dashboard, select Edit. If you don't want to change your default dashboard, you can also create a New dashboard. Creating a new dashboard gives you an empty, private dashboard with the Tile Gallery, which lets you add or rearrange tiles. You can find tiles by category or resource type. You can also search for particular tiles. Select My Dashboard to select any of your existing custom dashboards.
Change the Portal settings
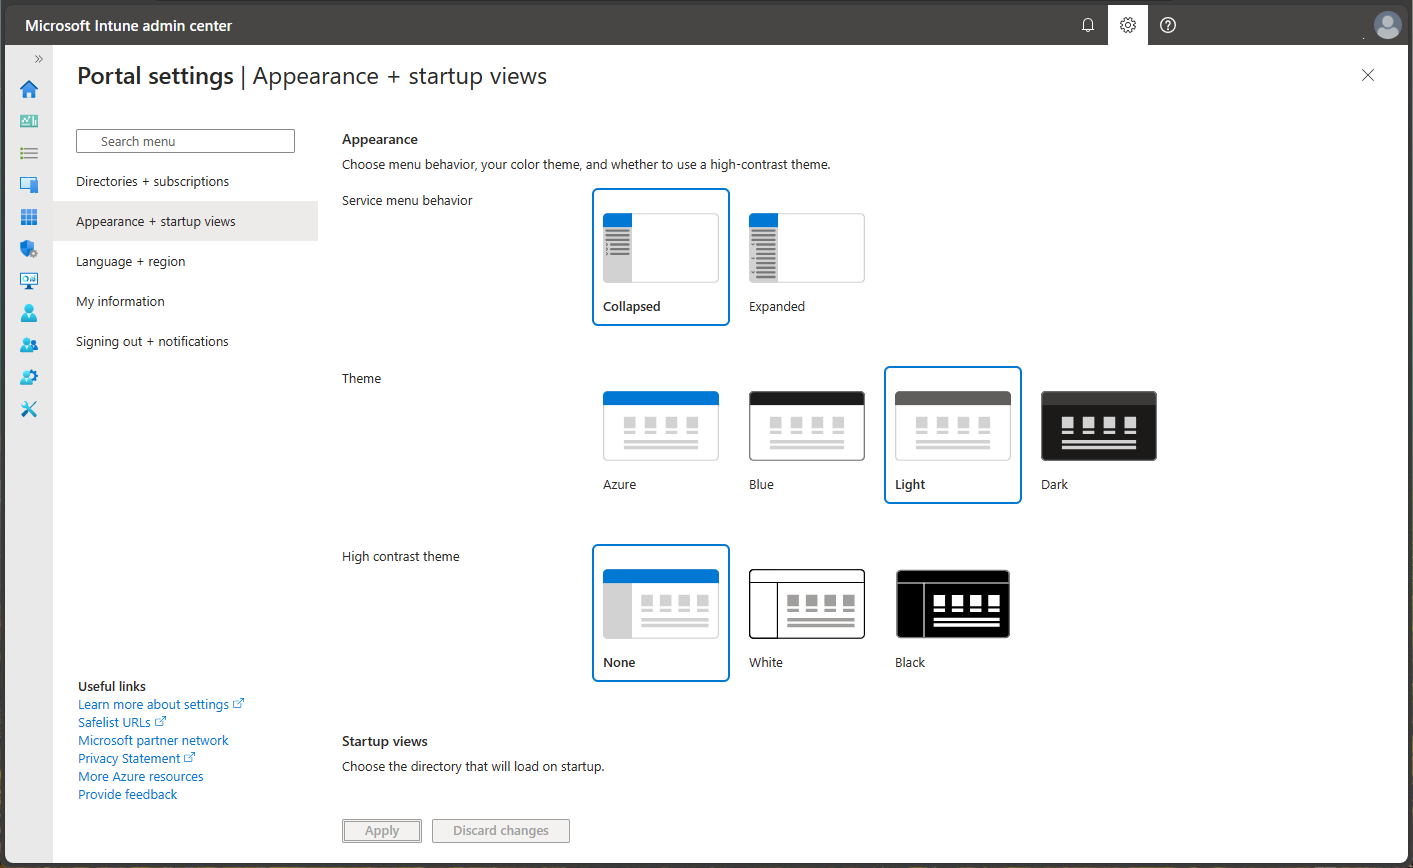
The Microsoft Intune portal settings can be modified. On the Microsoft Intune admin center heading bar, select the Settings gear icon at the top right, between to the notifications and support icons. You can customize the Microsoft Intune admin center by selecting and modifying the following areas:
- Directories + subscriptions
- Appearance + startup views
- Language + region
- My information
- Signing out + notifications
Next steps
To get running quickly on Microsoft Intune, step through the Intune Quickstarts by first setting up a free Intune account.
