Connect Microsoft Sentinel to Amazon Web Services to ingest AWS WAF logs
Use the Amazon Web Services (AWS) S3-based Web Application Firewall (WAF) connector to ingest AWS WAF logs, collected in AWS S3 buckets, to Microsoft Sentinel. AWS WAF logs are detailed records of the web traffic analyzed by the AWS WAF against web access control lists (ACLs). These records contain information such as the time AWS WAF received the request, the specifics of the request, and the action taken by the rule that the request matched. These logs and this analysis are essential for maintaining the security and performance of web applications.
This connector features the debut of a new AWS CloudFormation-based onboarding script, to streamline the creation of the AWS resources used by the connector.
Important
The Amazon Web Services S3 WAF data connector is currently in preview. The Azure Preview Supplemental Terms include additional legal terms that apply to Azure features that are in beta, preview, or otherwise not yet released into general availability.
-
Microsoft Sentinel is generally available within Microsoft's unified security operations platform in the Microsoft Defender portal. For preview, Microsoft Sentinel is available in the Defender portal without Microsoft Defender XDR or an E5 license. For more information, see Microsoft Sentinel in the Microsoft Defender portal.
Overview
The Amazon Web Services S3 WAF data connector serves the following use cases:
Security monitoring and threat detection: Analyze AWS WAF logs to help identify and respond to security threats such as SQL injection and cross-site scripting (XSS) attacks. By ingesting these logs into Microsoft Sentinel, you can use its advanced analytics and threat intelligence to detect and investigate malicious activities.
Compliance and auditing: AWS WAF logs provide detailed records of web ACL traffic, which can be crucial for compliance reporting and auditing purposes. The connector ensures that these logs are available within Sentinel for easy access and analysis.
This article explains how to configure the Amazon Web Services S3 WAF connector. The process of setting it up has two parts: the AWS side and the Microsoft Sentinel side. Each side's process produces information used by the other side. This two-way authentication creates secure communication.
Prerequisites
You must have write permission on the Microsoft Sentinel workspace.
Install the Amazon Web Services solution from the Content Hub in Microsoft Sentinel. If you have version 3.0.2 of the solution (or earlier) already installed, update the solution in the content hub to ensure you have the latest version that includes this connector. For more information, see Discover and manage Microsoft Sentinel out-of-the-box content.
Enable and configure the Amazon Web Services S3 WAF connector
The process of enabling and configuring the connector consists of the following tasks:
In your AWS environment:
The Amazon Web Services S3 WAF connector page in Microsoft Sentinel contains downloadable AWS CloudFormation stack templates that automate the following AWS tasks:
Configure your AWS service(s) to send logs to an S3 bucket.
Create a Simple Queue Service (SQS) queue to provide notification.
Create a web identity provider to authenticate users to AWS through OpenID Connect (OIDC).
Create an assumed role to grant permissions to users authenticated by the OIDC web identity provider to access your AWS resources.
Attach the appropriate IAM permissions policies to grant the assumed role access to the appropriate resources (S3 bucket, SQS).
In Microsoft Sentinel:
- Configure the Amazon Web Services S3 WAF Connector in the Microsoft Sentinel portal by adding log collectors that poll the queue and retrieve log data from the S3 bucket. See the instructions below.
Set up the AWS environment
To simplify the onboarding process, the Amazon Web Services S3 WAF connector page in Microsoft Sentinel contains downloadable templates for you to use with the AWS CloudFormation service. The CloudFormation service uses these templates to automatically create resource stacks in AWS. These stacks include the resources themselves as described in this article, as well as credentials, permissions, and policies.
Prepare the template files
To run the script to set up the AWS environment, use the following steps:
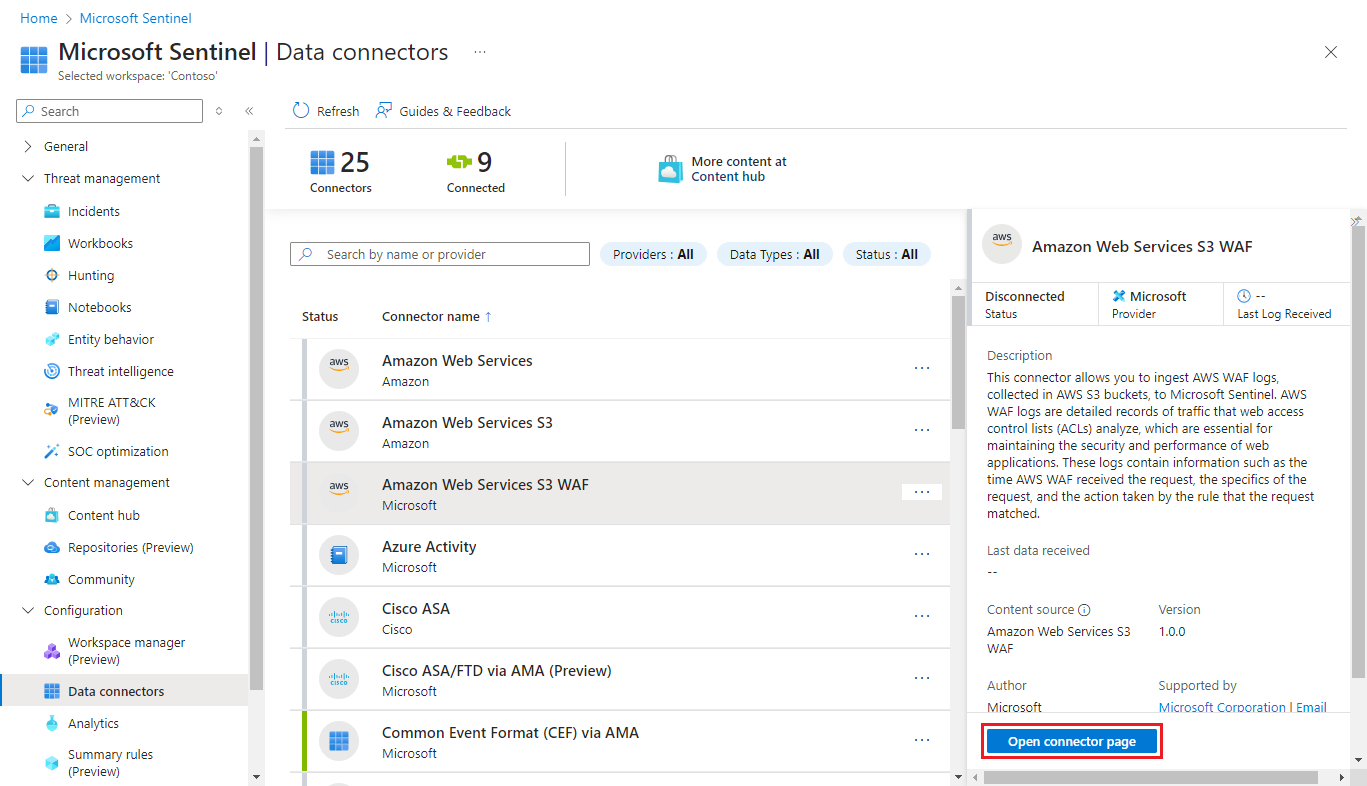
In the Azure portal, from the Microsoft Sentinel navigation menu, expand Configuration and select Data connectors.
In the Defender portal, from the quick launch menu, expand Microsoft Sentinel > Configuration and select Data connectors.
Select Amazon Web Services S3 WAF from the list of data connectors.
If you don't see the connector, install the Amazon Web Services solution from the Content hub under Content management in Microsoft Sentinel, or update the solution to the latest version.
In the details pane for the connector, select Open connector page.

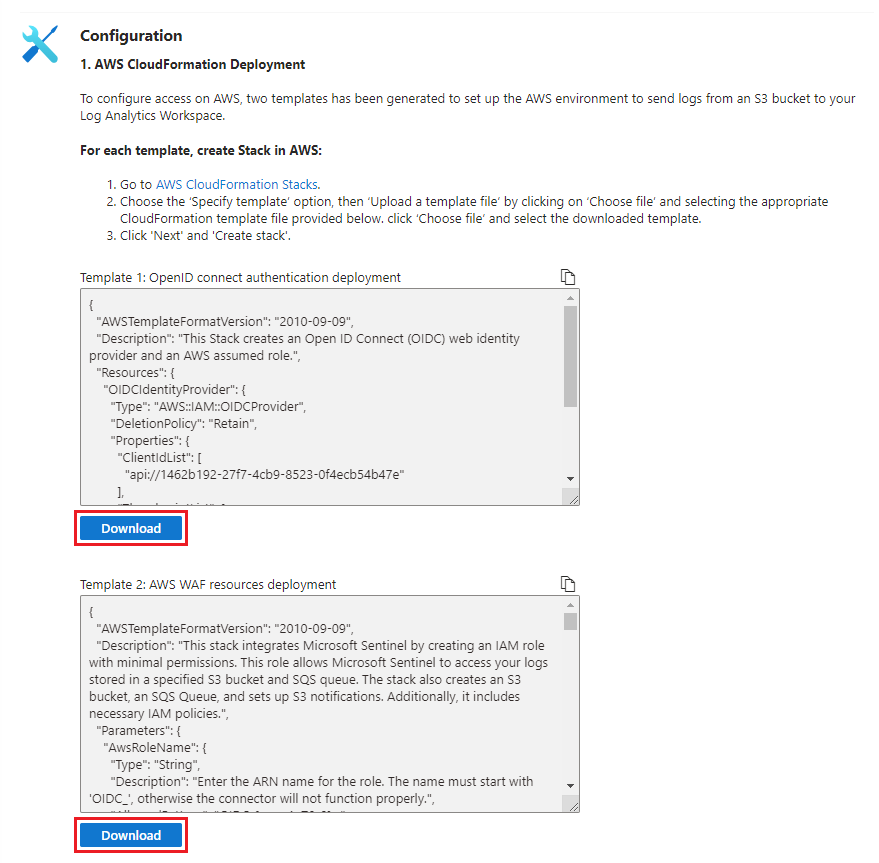
In the Configuration section, under 1. AWS CloudFormation Deployment, select the AWS CloudFormation Stacks link. This opens the AWS console in a new browser tab.
Return to the tab of the portal where you have Microsoft Sentinel open. Select Download under Template 1: OpenID Connect authentication deployment to download the template that creates the OIDC web identity provider. The template is downloaded as a JSON file to your designated downloads folder.
Note
If you have the older AWS S3 connector, and therefore you already have an OIDC web identity provider, you can skip this step.
Select Download under Template 2: AWS WAF resources deployment to download the template that creates the other AWS resources. The template is downloaded as a JSON file to your designated downloads folder.

Create AWS CloudFormation stacks
Return to the AWS Console browser tab, which is open to the AWS CloudFormation page for creating a stack.
If you're not already logged in to AWS, log in now, and you are redirected to the AWS CloudFormation page.
Create the OIDC web identity provider
Follow the instructions on the AWS Console page for creating a new stack.
(If you already have the OIDC web identity provider from the previous version of the AWS S3 connector, skip this step and proceed to Create the remaining AWS resources.)
Specify a template and upload a template file.
Select Choose file and locate the "Template 1_ OpenID connect authentication deployment.json" file you downloaded.
Choose a name for the stack.
Advance through the rest of the process and create the stack.
Create the remaining AWS resources
Return to the AWS CloudFormation stacks page and create a new stack.
Select Choose file and locate the "Template 2_ AWS WAF resources deployment.json" file you downloaded.
Choose a name for the stack.
Where prompted, enter your Microsoft Sentinel Workspace ID. To find your Workspace ID:
In the Azure portal, in the Microsoft Sentinel navigation menu, expand Configuration and select Settings. Select the Workspace settings tab, and find the Workspace ID on the Log Analytics workspace page.
In the Defender portal, in the quick launch menu, expand System and select Settings. Select Microsoft Sentinel, then select Log Analytics settings under Settings for
[WORKSPACE_NAME]. Find the Workspace ID on the Log Analytics workspace page, which opens in a new browser tab.
Advance through the rest of the process and create the stack.
Add log collectors
When the resource stacks are all created, return to the browser tab open to the data connector page in Microsoft Sentinel, and begin the second part of the configuration process.
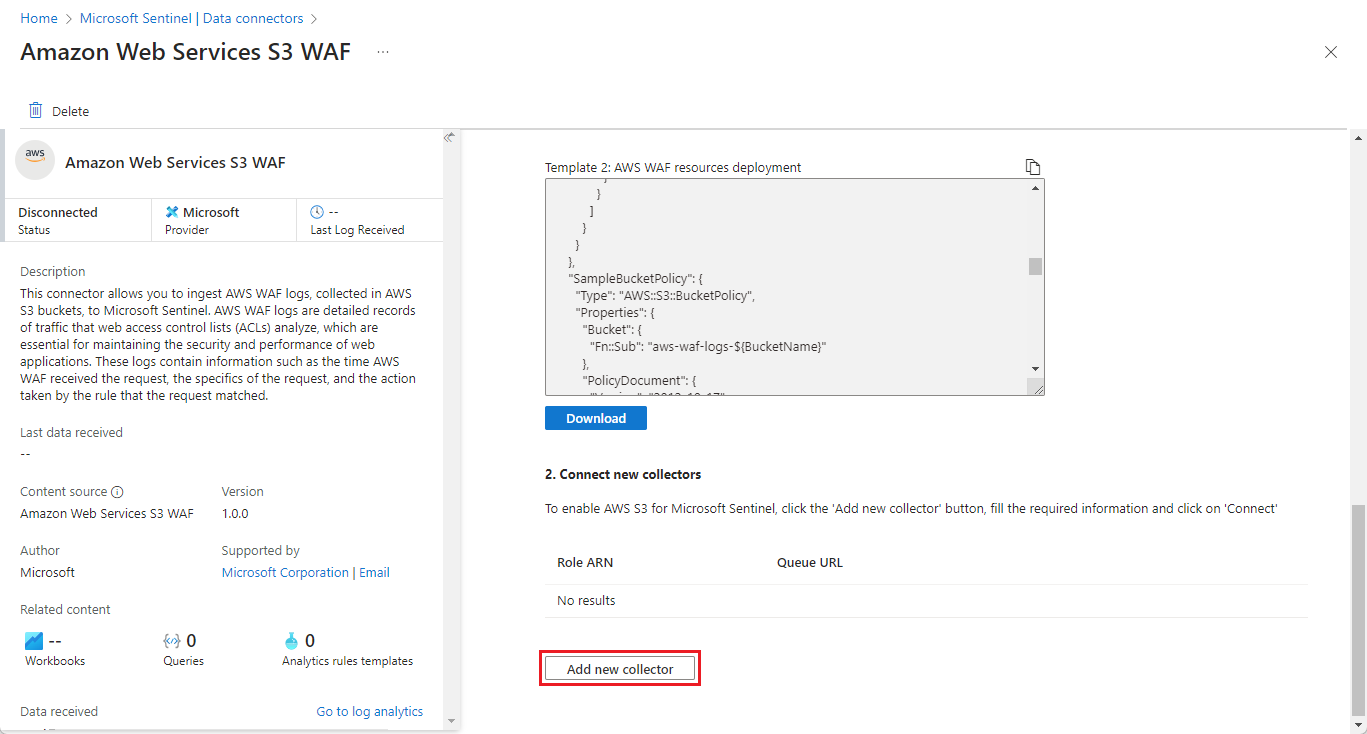
In the Configuration section, under 2. Connect new collectors, select Add new collector.
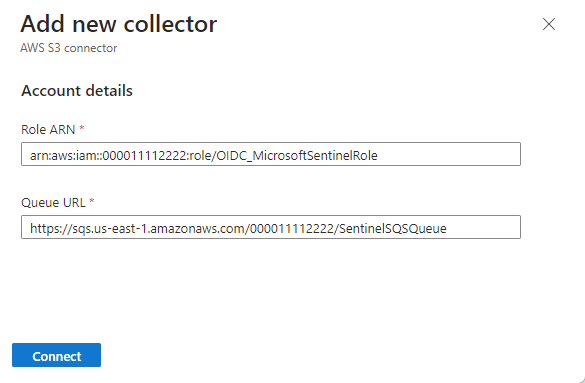
Input the role ARN of the IAM role that was created. The default name for the role is OIDC_MicrosoftSentinelRole, so the role ARN would be
arn:aws:iam::{AWS_ACCOUNT_ID}:role/OIDC_MicrosoftSentinelRole.Input the name of the SQS queue that was created. The default name for this queue is SentinelSQSQueue, so the URL would be
https://sqs.{AWS_REGION}.amazonaws.com/{AWS_ACCOUNT_ID}/SentinelSQSQueue.Select Connect to add the collector. This creates a data collection rule for the Azure Monitor Agent to retrieve the logs and ingest them into the dedicated AWSWAF table in your Log Analytics workspace.

Manual setup
Now that the automatic setup process is more reliable, there aren't many good reasons to resort to manual setup. If you must, though, see the Manual setup instructions in the Amazon Web Services S3 Connector documentation.
Test and monitor the connector
After the connector is set up, go to the Logs page (or the Advanced hunting page in the Defender portal) and run the following query. If you get any results, the connector is working properly.
AWSWAF
| take 10
If you haven't already done so, we recommend that you implement data connector health monitoring so that you can know when connectors are not receiving data or any other issues with connectors. For more information, see Monitor the health of your data connectors.
