Configure Azure Load Testing for high-scale load
In this article, you learn how to configure your load test for high-scale with Azure Load Testing. Azure Load Testing abstracts the complexity of provisioning the infrastructure for simulating high-scale traffic. To scale out a load test, you can configure the number of parallel test engine instances. To achieve an optimal load distribution, you can monitor the test instance health metrics in the Azure Load Testing dashboard.
Prerequisites
An Azure account with an active subscription. If you don't have an Azure subscription, create a free account before you begin.
An existing Azure load testing resource. To create an Azure load testing resource, see the quickstart Create and run a load test.
Configure load parameters for a load test
To simulate user traffic for your application, you can configure the load pattern and the number of virtual users you want to simulate load for. By running the load test across many parallel test engine instances, Azure Load Testing can scale out the number of virtual users that simulate traffic to your application. The load pattern determines how the load is distributed over the duration of the load test. Examples of load patterns are linear, stepped, or spike load.
Depending on the type of load test, URL-based, JMeter-based or Locust-based, you have different options to configure the target load and the load pattern. The following table lists the differences between the test types.
| Test type | Number of virtual users | Load pattern |
|---|---|---|
| URL-based (basic) | Specify the target number of virtual users in the load test configuration. | Linear load pattern, based on the ramp-up time and number of virtual users. |
| URL-based (advanced) | Specify the number of test engines and the number of virtual users per instance in the load test configuration. | Configure the load pattern (linear, step, spike). |
| JMeter-based | Specify the number of virtual users per instance in the test script. Specify the number of test engines in the load test configuration. | Configure the load pattern in the test script. |
| Locust-based | Specify the total number of users in the load test configuration, the locust configuration file, or the test script. Specify the number of test engines in the load test configuration. | Configure the load pattern in the test script. |
Configure load parameters for URL-based tests
To specify the load parameters for a URL-based load test:
In the Azure portal, go to your Azure Load Testing resource.
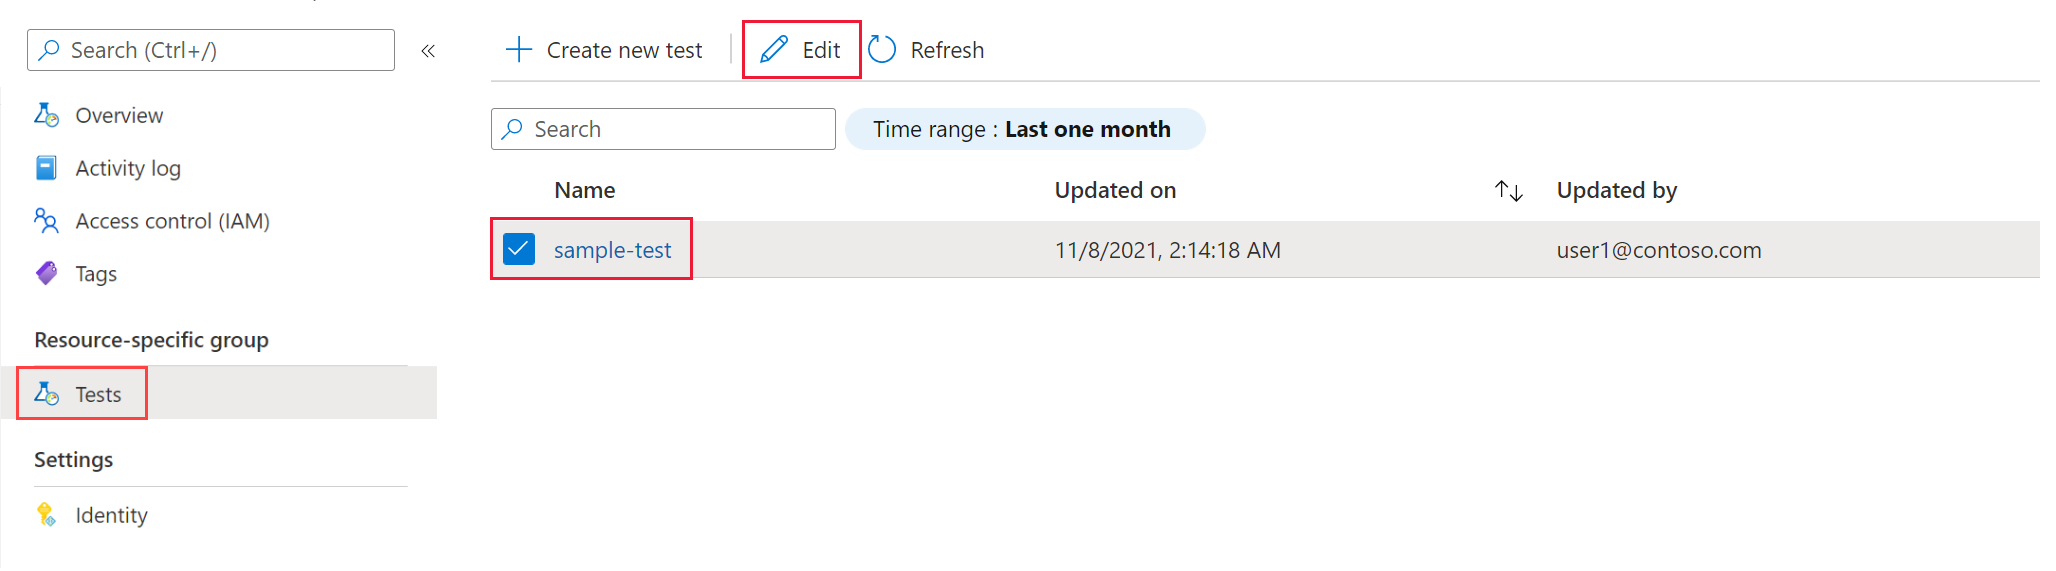
In the left navigation, select Tests to view all tests.
In the list, select your load test, and then select Edit.
Alternately, you can also edit the test configuration from the test details page. To do so, select Configure, and then select Test.
On the Basics page, make sure to select Enable advanced settings.
On the Edit test page, select the Load tab.
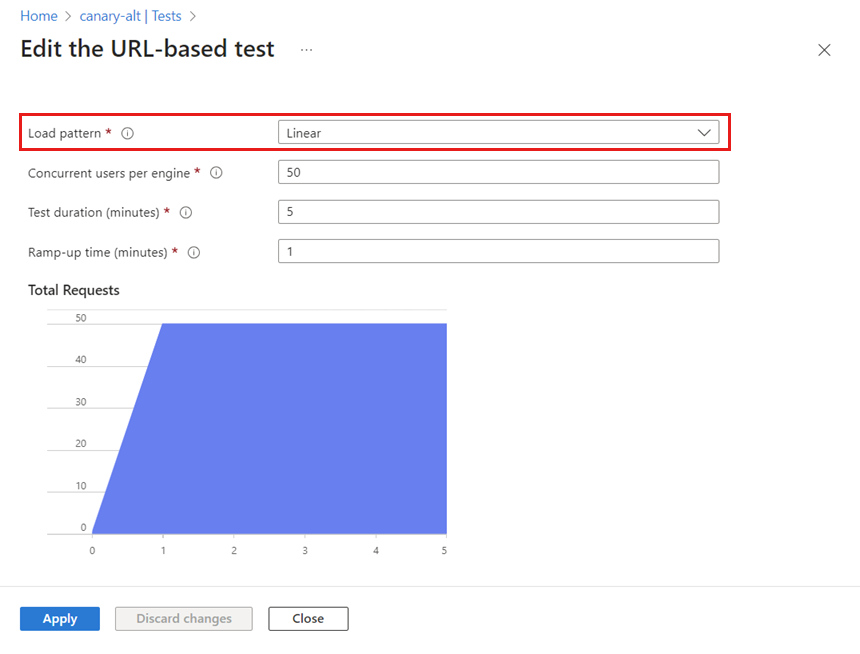
For URL-based tests, you can configure the number of parallel test engine instances and the load pattern.
Use the Engine instances slider control to update the number of parallel test engine instances. Alternately, enter the target value in the input box.
Select the Load pattern value from the list.
For each pattern, fill the corresponding configuration settings. The chart gives a visual representation of the load pattern and its configuration parameters.


Configure load parameters for JMeter-based tests
To specify the load parameters for a JMeter-based load test:
In the Azure portal, go to your Azure Load Testing resource.
In the left navigation, select Tests to view all tests.
In the list, select your load test, and then select Edit.
Alternately, you can also edit the test configuration from the test details page. To do so, select Configure, and then select Test.
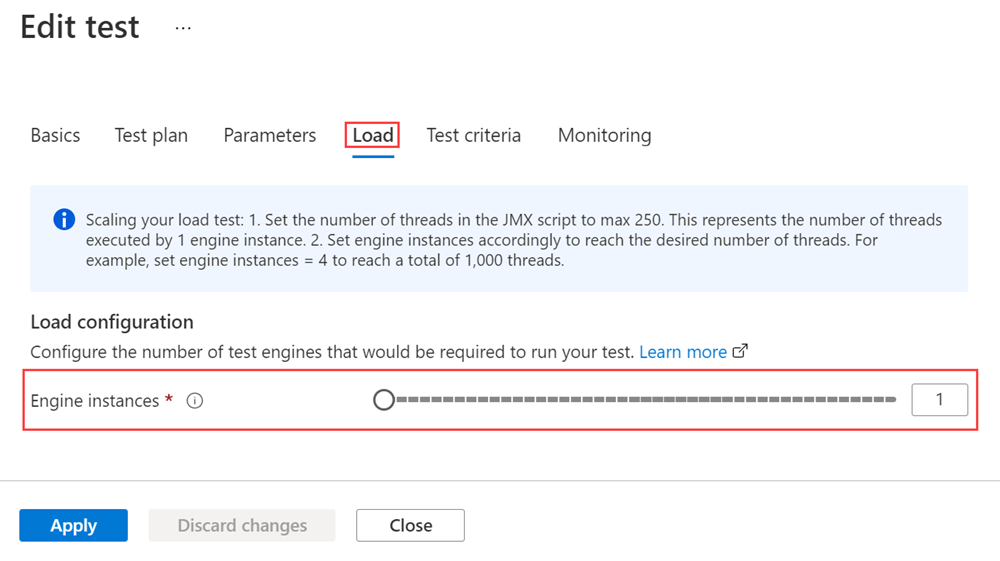
On the Edit test page, select the Load tab. Use the Engine instances slider control to update the number of test engine instances, or enter the value directly in the input box.
Select Apply to modify the test and use the new configuration when you rerun it.
Configure load parameters for Locust-based tests
To specify the load parameters for a Locust-based load test:
In the Azure portal, go to your Azure Load Testing resource.
In the left navigation, select Tests to view all tests.
In the list, select your load test, and then select Edit.
Alternately, you can also edit the test configuration from the test details page. To do so, select Configure, and then select Test.
On the Edit test page, select the Load tab. Enter the values for the overall users required and overall spawn rate in the respective input boxes. The engine instance count required to generate this load automatically populates. If your test script is complex and resource intensive, use the Engine instances slider control to update the number of test engine instances, or enter the value directly in the input box.
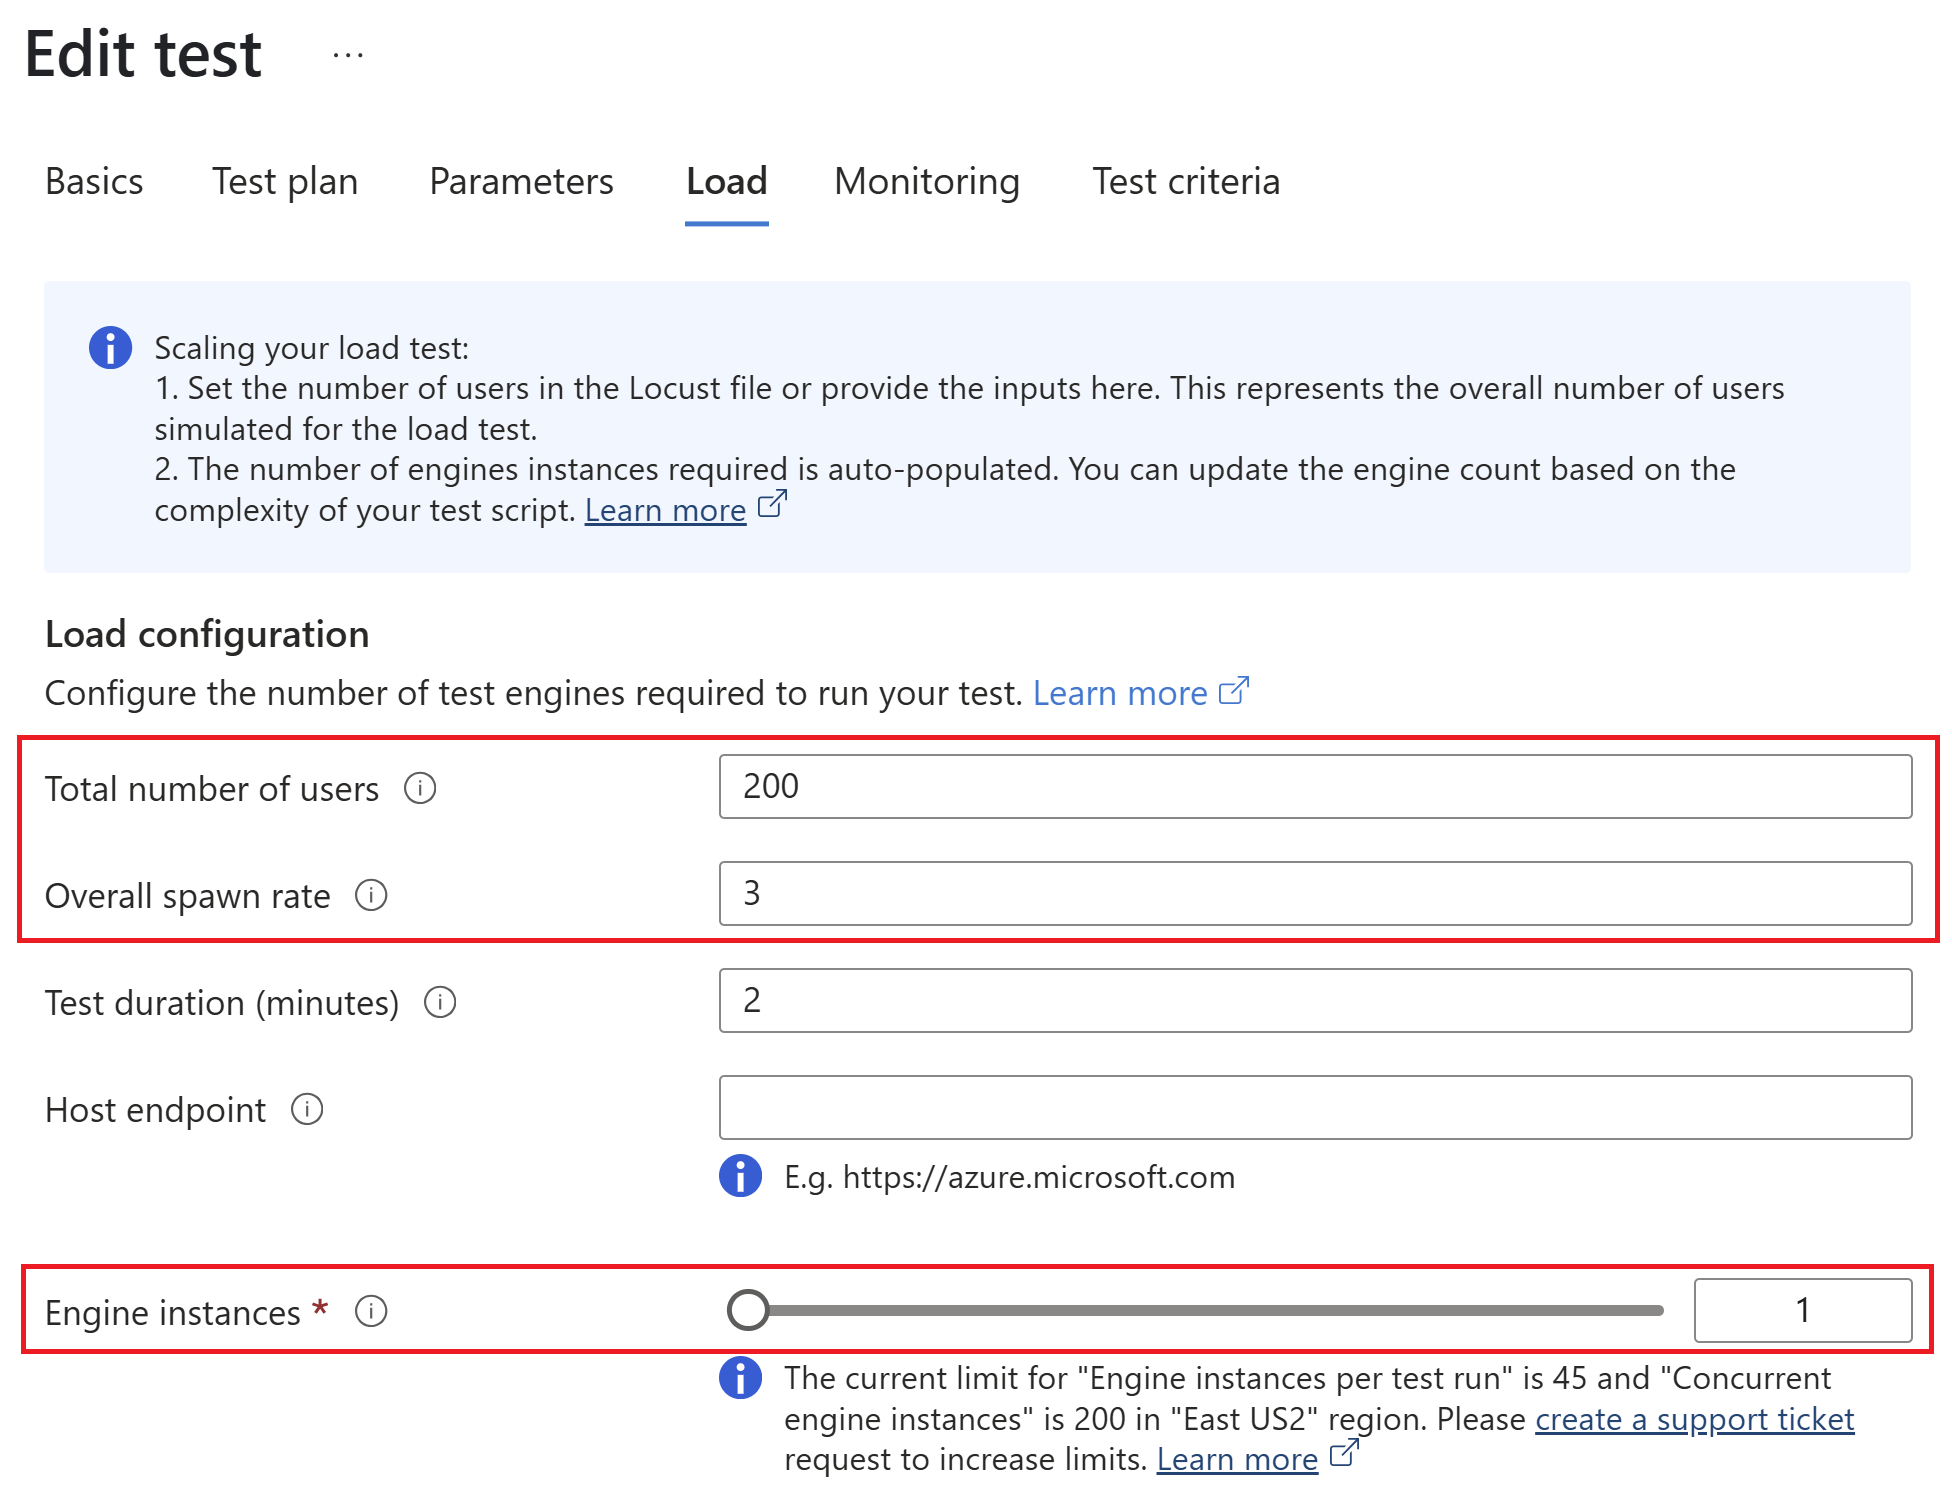

Alternatively, you can configure the number of users and spawn rate in the test script or Locust configuration file and provide the number of engine instances required.
- Select Apply to modify the test and use the new configuration when you rerun it.
