Create and manage data recipients for Delta Sharing (Databricks-to-Databricks sharing)
This article explains how to create and manage recipients in Delta Sharing, when those recipients are on a Databricks workspace that is enabled for Unity Catalog.
A recipient is the named object that represents the identity of a user or group of users in the real world who consume shared data. The way you create recipients differs depending on whether or not your recipient has access to a Databricks workspace that is enabled for Unity Catalog:
- For recipients with access to a Databricks workspace that is enabled for Unity Catalog, you can create a recipient object with a secure connection managed entirely by Databricks. This sharing mode is called Databricks-to-Databricks sharing, and it is documented in this article.
- For recipients without access to a Databricks workspace that is enabled for Unity Catalog, you must use open sharing, with a secure connection that you manage using token-based authentication (either bearer tokens or OAuth federation). For information about creating open sharing recipients, see Use Open ID Connect (OIDC) federation to enable authentication to Delta Sharing shares (open sharing) and Create a recipient object for non-Databricks users using bearer tokens (open sharing).
For more information about these two sharing modes and when to choose which, see Open sharing versus Databricks-to-Databricks sharing.
Requirements
To create a recipient:
- You must be a metastore admin or have the
CREATE_RECIPIENTprivilege for the Unity Catalog metastore where the data you want to share is registered. - You must create the recipient using an Azure Databricks workspace that has that Unity Catalog metastore attached.
- If you use a Databricks notebook to create the recipient, your compute must use Databricks Runtime 11.3 LTS or above and either standard or dedicated access mode (formerly shared and single user access modes).
For other recipient management operations (such as view, delete, update, and grant recipient access to a share) see the permissions requirements listed in the operation-specific sections of this article.
Create a recipient object for users who have access to Databricks (Databricks-to-Databricks sharing)
If your data recipient has access to a Databricks workspace that has been enabled for Unity Catalog, you can create a recipient object with an authentication type of DATABRICKS.
A recipient object with the authentication type of DATABRICKS represents a data recipient on a particular Unity Catalog metastore, identified in the recipient object definition by a sharing identifier string consisting of the metastore’s cloud, region, and UUID. The data shared with this recipient can be accessed only on that metastore.
Step 1: Request the recipient’s sharing identifier
Ask a recipient user to send you the sharing identifier for the Unity Catalog metastore that is attached to the workspaces where the recipient user or group of users will work with the shared data.
The sharing identifier is a string consisting of the metastore’s cloud, region, and UUID (the unique identifier for the metastore), in the format <cloud>:<region>:<uuid>.
For example, in the following screenshot, the complete sharing identifier string is aws:us-west-2:19a84bee-54bc-43a2-87de-023d0ec16016.
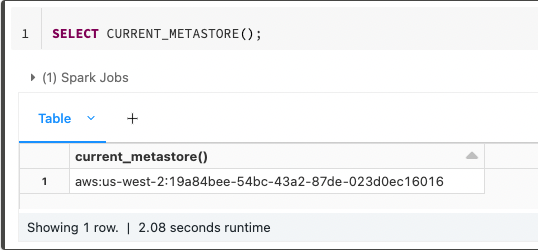
The recipient can find the identifier using Catalog Explorer, the Databricks Unity Catalog CLI, or the default SQL function CURRENT_METASTORE in a Databricks notebook or Databricks SQL query that runs on a Unity-Catalog-capable compute in the workspace they intend to use.
Catalog Explorer
To get the sharing identifier using Catalog Explorer:
In your Azure Databricks workspace, click
 Catalog.
At the top of the Catalog pane, click the
 gear icon and select Delta Sharing.
Alternatively, from the Quick access page, click the Delta Sharing > button.
On the Shared with me tab, click your Databricks sharing organization name in the upper right, and select Copy sharing identifier.
SQL
Run the following command in a notebook or the Databricks SQL query editor:
SELECT CURRENT_METASTORE();
CLI
Run the following command using the Databricks CLI. The sharing identifier is returned as the global_metastore_id.
databricks metastores summary
You can help the recipient by sending your contact the information contained in this step, or you can point them to Get access in the Databricks-to-Databricks model.
Step 2: Create the recipient
To create a recipient for Databricks-to-Databricks sharing, you can use Catalog Explorer, the Databricks Unity Catalog CLI, or the CREATE RECIPIENT SQL command in an Azure Databricks notebook or the Databricks SQL query editor.
Permissions required: Metastore admin or user with the CREATE_RECIPIENT privilege for the Unity Catalog metastore where the data you want to share is registered.
Catalog Explorer
In your Azure Databricks workspace, click
Catalog.At the top of the Catalog pane, click the
gear icon and select Delta Sharing.Alternatively, from the Quick access page, click the Delta Sharing > button.
On the Shared by me tab, click New recipient.
Enter the Recipient name.
For Recipient type, select Databricks.
Enter the recipient's Sharing identifier.
Use the entire sharing identifier string in the format
<cloud>:<region>:<uuid>. For example,aws:us-west-2:19a84bee-54bc-43a2-87de-023d0ec16016.(Optional) Enter a comment.
Click Create.
(Optional) Create custom Recipient properties.
On the recipient Overview tab, click the
 edit icon next to Recipient properties. Then add a property name (Key) and Value. For details, see Manage recipient properties.
SQL
Run the following command in a notebook or the Databricks SQL query editor:
CREATE RECIPIENT [IF NOT EXISTS] <recipient-name>
USING ID '<sharing-identifier>'
[COMMENT "<comment>"];
Use the entire sharing identifier string in the format <cloud>:<region>:<uuid>. For example, aws:eu-west-1:g0c979c8-3e68-4cdf-94af-d05c120ed1ef.
You can also add custom properties for the recipient. For details, see Manage recipient properties.
CLI
Run the following command using the Databricks CLI. Replace the placeholder values:
<recipient-name>: The name of the recipient.<sharing-identifier>: The entire sharing identifier string in the format<cloud>:<region>:<uuid>. For example,aws:eu-west-1:g0c979c8-3e68-4cdf-94af-d05c120ed1ef.<authentication-type>: Set toDATABRICKSwhen a sharing identifier string in the format<cloud>:<region>:<uuid>is provided for<sharing-identifier>.
databricks recipients create <recipient-name> <authentication-type> --sharing-code <sharing-identifier>
You can also add custom properties for the recipient. For details, see Manage recipient properties.
The recipient is created with the authentication_type of DATABRICKS.
Grant the recipient access to a share
Once you’ve created the recipient and created shares, you can grant the recipient access to those shares.
To grant share access to recipients, you can use Catalog Explorer, the Databricks Unity Catalog CLI, or the GRANT ON SHARE SQL command in an Azure Databricks notebook or the Databricks SQL query editor.
Permissions required: One of the following:
- Metastore admin.
- Delegated permissions or ownership on both the share and the recipient objects ((
USE SHARE+SET SHARE PERMISSION) or share owner) AND (USE RECIPIENTor recipient owner).
For instructions, see Manage access to Delta Sharing data shares (for providers).
View recipients
To view a list of recipients, you can use Catalog Explorer, the Databricks Unity Catalog CLI, or the SHOW RECIPIENTS SQL command in an Azure Databricks notebook or the Databricks SQL query editor.
Permissions required: You must be a metastore admin or have the USE RECIPIENT privilege to view all recipients in the metastore. Other users have access only to the recipients that they own.
Catalog Explorer
In your Azure Databricks workspace, click
Catalog.At the top of the Catalog pane, click the
gear icon and select Delta Sharing.Alternatively, from the Quick access page, click the Delta Sharing > button.
On the Shared by me tab, click Recipients.
SQL
Run the following command in a notebook or the Databricks SQL query editor. Optionally, replace <pattern> with a LIKE predicate.
SHOW RECIPIENTS [LIKE <pattern>];
CLI
Run the following command using the Databricks CLI.
databricks recipients list
View recipient details
To view details about a recipient, you can use Catalog Explorer, the Databricks Unity Catalog CLI, or the DESCRIBE RECIPIENT SQL command in an Azure Databricks notebook or the Databricks SQL query editor.
Permissions required: Metastore admin, user with the USE RECIPIENT privilege, or the recipient object owner.
Details include:
- The recipient’s creator, creation timestamp, comments, and authentication type (
TOKENorDATABRICKS). - If the recipient uses open sharing: the token lifetime, activation link, activation status (whether the credential has been downloaded), and IP access lists, if assigned.
- If the recipient uses Databricks-to-Databricks sharing: the cloud, region, and metastore ID of the recipient’s Unity Catalog metastore, as well as activation status.
- Recipient properties, including custom properties. See Manage recipient properties.
Catalog Explorer
In your Azure Databricks workspace, click
Catalog.At the top of the Catalog pane, click the
gear icon and select Delta Sharing.Alternatively, from the Quick access page, click the Delta Sharing > button.
On the Shared by me tab, click Recipients, and select the recipient.
SQL
Run the following command in a notebook or the Databricks SQL query editor.
DESCRIBE RECIPIENT <recipient-name>;
CLI
Run the following command using the Databricks CLI.
databricks recipients get <recipient-name>
View a recipient’s share permissions
To view the list of shares that a recipient has been granted access to, you can use Catalog Explorer, the Databricks CLI, or the SHOW GRANTS TO RECIPIENT SQL command in an Azure Databricks notebook or the Databricks SQL query editor.
Permissions required: Metastore admin, user with the USE RECIPIENT privilege, or the recipient object owner.
Catalog Explorer
In your Azure Databricks workspace, click
Catalog.At the top of the Catalog pane, click the
gear icon and select Delta Sharing.Alternatively, from the Quick access page, click the Delta Sharing > button.
On the Shared by me tab, click Recipients, and select the recipient.
Go to the Shares tab to view the list of shares shared with the recipient.
SQL
Run the following command in a notebook or the Databricks SQL query editor.
SHOW GRANTS TO RECIPIENT <recipient-name>;
CLI
Run the following command using the Databricks CLI.
databricks recipients share-permissions <recipient-name>
Update a recipient
To update a recipient, you can use Catalog Explorer, the Databricks Unity Catalog CLI, or the ALTER RECIPIENT SQL command in an Azure Databricks notebook or the Databricks SQL query editor.
Properties you can update include recipient name, owner, comment, and custom properties.
Permissions required: You must be a metastore admin or owner of the recipient object to update the owner. You must be a metastore admin (or user with the CREATE_RECIPIENT privilege) and the owner to update the name. You must be the owner to update the comment or custom properties.
Catalog Explorer
In your Azure Databricks workspace, click
Catalog.At the top of the Catalog pane, click the
gear icon and select Delta Sharing.Alternatively, from the Quick access page, click the Delta Sharing > button.
On the Shared by me tab, click Recipients, and select the recipient.
On the recipient details page:
Update the owner.
Edit or add a comment.
Rename the recipient.
Click the
 kebab menu and select Rename.
Edit, remove, or add custom Recipient properties.
Click the
edit icon next to Recipient properties. Then add a property name (Key) and Value. For details, see Manage recipient properties.Token-authenticated recipients only:
- View and copy the Authentication link. See Get the activation link
- Under Token Management, rotate or update the bearer token. See Manage recipient tokens.
OIDC federated recipients only:
- Under OIDC federation policies, click Add policies. See LINK.
- View and copy Recipient endpoint and Recipient MTLS endpoint.
SQL
Run one or more of the following commands in a notebook or the Databricks SQL query editor.
ALTER RECIPIENT <recipient-name> RENAME TO <new-recipient-name>;

ALTER RECIPIENT <recipient-name> OWNER TO <new-owner>;

COMMENT ON RECIPIENT <recipient-name> IS "<new-comment>";

ALTER RECIPIENT <recipient-name> SET PROPERTIES ( <property-key>  =  property_value [, ...] )

ALTER RECIPIENT <recipient-name> UNSET PROPERTIES ( <property-key> [, ...] )
For more information about properties, see Manage recipient properties.
CLI
Create a JSON file that includes an update to the recipient name, comment, owner, IP access list, or custom properties.
{
  "name": "new-recipient-name",
  "owner": "someone-else@example.com",
  "comment": "something new",
  "ip_access_list": {
    "allowed_ip_addresses": ["8.8.8.8", "8.8.8.4/10"]
  },
  "property": {
    "country": "us",
    "id": "001"
  }
}
Then run the following command using the Databricks CLI. Replace <recipient-name> with the current recipient name and replace update-recipient-settings.json with the filename of the JSON file.
databricks recipients update --json-file update-recipient-settings.json
For more information about properties, see Manage recipient properties.
(Optional) Restrict recipient access using access lists
You can limit recipient access to a restricted set of IP addresses when you configure the recipient object. See Restrict Delta Sharing recipient access using IP access lists (open sharing).
Manage recipient properties
Recipient objects include predefined properties that you can use to refine data sharing access. For example, you can use them to do the following:
- Share different table partitions with different recipients, enabling you to use the same shares with multiple recipients while maintaining data boundaries between them.
- Share dynamic views that limit recipient access to table data at the row or column level based on recipient properties.
You can also create custom properties.
The predefined properties start with databricks. and include the following:
databricks.accountId: The Azure Databricks account that a data recipient belongs to (Databricks-to-Databricks sharing only).databricks.metastoreId: The Unity Catalog metastore that a data recipient belongs to (Databricks-to-Databricks sharing only).databricks.name: The name of the data recipient.
Custom properties that might be of value could include, for example, country. For example, if you attach the custom property 'country' = 'us' to a recipient, you can partition table data by country and share only rows that have US data with the recipients that have that property assigned. You can also share a dynamic view that restricts row or column access based on recipient properties. For more detailed examples, see Use recipient properties to do partition filtering and Add dynamic views to a share to filter rows and columns.
Requirements
Recipient properties are supported in Databricks Runtime 12.2 and above.
Add properties when you create or update a recipient
You can add properties when you create a recipient or update them for an existing recipient. You can use Catalog Explorer, the Databricks Unity Catalog CLI, or SQL commands in an Azure Databricks notebook or the Databricks SQL query editor.
Permissions required: Metastore admin or user with the CREATE RECIPIENT privilege for the Unity Catalog metastore.
Catalog Explorer
When you create or update a recipient using Catalog Explorer, add or update custom properties by doing the following:
Go to the Recipient details page.
If you are creating a new recipient, you land on this page after you click Create. If you are updating an existing recipient, go to this page by clicking the
gear icon > Delta Sharing > Shared by me > Recipients and selecting the recipient.Click Edit properties > +Add property.
Enter a property name (Key) and Value.
For example, if you want to filter shared data by country and share only US data with this recipient, you can create a key named “country” with a value of “US.”
Click Save.
SQL
To add a custom property when you create a recipient, run the following command in a notebook or the Databricks SQL query editor:
CREATE RECIPIENT [IF NOT EXISTS] <recipient-name>
[USING ID '<sharing-identifier>'] /* Skip this if you are using open sharing */
[COMMENT "<comment>"]
PROPERTIES ( '<property-key>' = '<property-value>' [, ...] );
<property-key> can be a string literal or identifier. <property-value> must be a string literal.
For example:
CREATE RECIPIENT acme PROPERTIES ('country' = 'us', 'partner_id' = '001');
To add, edit, or delete custom properties for an existing recipient, run one of the following:
ALTER RECIPIENT <recipient-name> SET PROPERTIES ( '<property-key>' = '<property-value>' [, ...] );

ALTER RECIPIENT <recipient-name> UNSET PROPERTIES ( '<property-key>' );
CLI
To add custom properties when you create a recipient, run the following command using the Databricks CLI. Replace the placeholder values:
<recipient-name>: The name of the recipient.<property-key>can be a string literal or identifier.<property-value>must be a string literal.
databricks recipients create \
--json='{
  "name": "<recipient-name>",
  "properties_kvpairs": {
    "properties": {
      "<property-key>": "<property-value>",
    }
  }
}'
For example:
databricks recipients create \
--json='{
  "name": "<recipient-name>",
  "properties_kvpairs": {
    "properties": {
      "country": "us",
      "partner_id":"001"
    }
  }
}'
To add or edit custom properties for an existing recipient, use update instead of create:
databricks recipients update \
--json='{
  "name": "<recipient-name>",
  "properties_kvpairs": {
    "properties": {
      "country": "us",
      "partner_id":"001"
    }
  }
}'
View recipient properties
To view recipient properties, follow the instructions in View recipient details.
Delete a recipient
To delete a recipient, you can use Catalog Explorer, the Databricks Unity Catalog CLI, or the DROP RECIPIENT SQL command in an Azure Databricks notebook or the Databricks SQL query editor. You must be the recipient object owner to delete the recipient.
When you delete a recipient, the users represented by the recipient can no longer access the shared data. Tokens that recipients use in an open sharing scenario are invalidated.
Permissions required: Recipient object owner.
Catalog Explorer
In your Azure Databricks workspace, click
Catalog.At the top of the Catalog pane, click the
gear icon and select Delta Sharing.Alternatively, from the Quick access page, click the Delta Sharing > button.
On the Shared by me tab, click Recipients, and select the recipient.
On the Recipients tab, find and select the recipient.
Click the
kebab menu and select Delete.On the confirmation dialog, click Delete.
SQL
Run the following command in a notebook or the Databricks SQL query editor.
DROP RECIPIENT [IF EXISTS] <recipient-name>;
CLI
Run the following command using the Databricks CLI.
databricks recipients delete <recipient-name>