Connect hybrid machines to Azure from Windows Admin Center
You can enable Azure Arc-enabled servers for one or more Windows machines in your environment by performing a set of steps manually. Or you can use Windows Admin Center to deploy the Connected Machine agent and register your on-premises servers without having to perform any steps outside of this tool.
Automatic connection for SQL Server
When you connect a Windows or Linux server to Azure Arc that also has Microsoft SQL Server installed, the SQL Server instances will automatically be connected to Azure Arc as well. SQL Server enabled by Azure Arc provides a detailed inventory and additional management capabilities for your SQL Server instances and databases. As part of the connection process, an extension is deployed to your Azure Arc-enabled server and new roles will be applied to your SQL Server and databases. If you don't want to automatically connect your SQL Servers to Azure Arc, you can opt out by adding a tag to the Windows or Linux server with the name ArcSQLServerExtensionDeployment and value Disabled when it's connected to Azure Arc.
For more information, see Manage automatic connection for SQL Server enabled by Azure Arc.
Prerequisites
Azure Arc-enabled servers - Review the prerequisites and verify that your subscription, your Azure account, and resources meet the requirements.
Windows Admin Center - Review the requirements to prepare your environment to deploy and configure Azure integration.
An Azure subscription. If you don't have one, create a free account before you begin.
The target Windows servers that you want to manage must have Internet connectivity to access Azure.
Security
This deployment method requires that you have administrator rights on the target Windows machine or server to install and configure the agent. You also need to be a member of the Gateway users role.
Deploy
Perform the following steps to configure the Windows server with Azure Arc-enabled servers.
Sign in to Windows Admin Center.
From the connection list on the Overview page, in the list of connected Windows servers, select a server from the list to connect to it.
From the left-hand pane, select Azure hybrid services.
On the Azure hybrid services page, select Discover Azure services.
On the Discover Azure services page, under Leverage Azure policies and solutions to manage your servers with Azure Arc, select Set up.
On the Settings\Azure Arc for servers page, if prompted authenticate to Azure and then select Get started.
On the Connect server to Azure page, provide the following:
- In the Azure subscription drop-down list, select the Azure subscription.
- For Resource group, either select New to create a new resource group, or under the Resource group drop-down list, select an existing resource group to register and manage the machine from.
- In the Region drop-down list, select the Azure region to store the servers metadata.
- If the machine or server is communicating through a proxy server to connect to the internet, select the option Use proxy server. Using this configuration, the agent communicates through the proxy server using the HTTP protocol. Specify the proxy server IP address or the name, and port number that the machine will use to communicate with the proxy server.
Select Set up to proceed with configuring the Windows server with Azure Arc-enabled servers.
The Windows server connects to Azure, downloads the Connected Machine agent, installs it, and registers with Azure Arc-enabled servers. To track the progress, select Notifications in the menu.
To confirm installation of the Connected Machine Agent, in Windows Admin Center select Events from the left-hand pane to review MsiInstaller events in the Application Event Log.
Verify the connection with Azure Arc
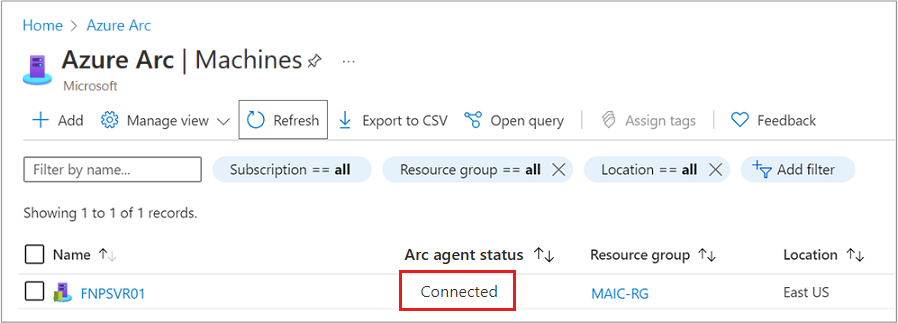
After you install the agent and configure it to connect to Azure Arc-enabled servers, go to the Azure portal to verify that the server connected successfully. View your machine in the Azure portal.

Next steps
Troubleshooting information can be found in the Troubleshoot Connected Machine agent guide.
Review the Planning and deployment guide to plan for deploying Azure Arc-enabled servers at any scale and implement centralized management and monitoring.
Learn how to manage your machine using Azure Policy, for such things as VM guest configuration, verifying the machine is reporting to the expected Log Analytics workspace, enable monitoring with VM insights, and much more.