Set up a split-screen station
You can set up a split-screen station so two users can simultaneously use the system.
Any monitor that has a resolution of minimum 1200 x720, when connected to a station that supports the split-screen feature, can be split into two stations. After a station is split, the desktop that the monitor had displayed moves to the left half of the screen, and a new station is displayed on the right half of the screen. To finish creating the new station, you will need to map a keyboard, mouse, and USB hub to the station. After a station is split, a user can log on to the left station while another user logs on to the right station.
Split-screen stations have several benefits:
You can reduce cost and space by accommodating more users on a MultiPoint Services system.
Two users can collaborate together, side by side, on a project.
A MultiPoint Dashboard user can demonstrate a procedure on one station while a student follows along on the other station.
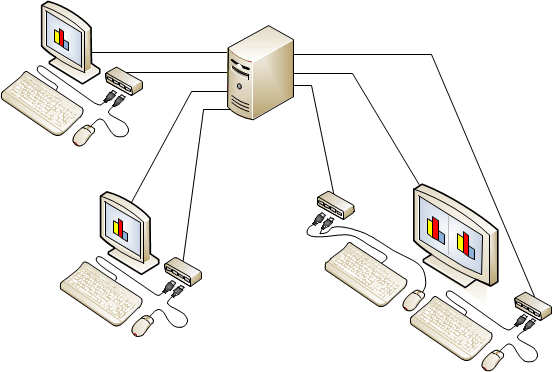
The following illustration shows a MultiPoint Services system with a split screen station (on the right).

Requirements for a split screen station
To create a split-screen station, the monitor and station must meet these requirements:
The monitor must have a resolution of 1200 x720 or higher.
If you are using a USB-over-Ethernet zero client, check with your hardware vendor to find out whether split-screen stations are supported. Many USB-over-Ethernet zero client devices have limitations that prevent their configuration as split-screen stations.
Setting up a split-screen station
Use the following procedures to add a second hub for a split-screen station and then split the station in MultiPoint Services. The final procedure explains how to return a split-screen station to a single station.
Note
When you split a station, the active session on the station is suspended. The user must log on to the station again to resume work after the split occurs.
To add a second hub with keyboard and mouse:
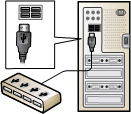
Connect a USB hub to an open USB port on the computer, as shown in the following illustration.

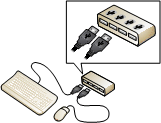
Connect a keyboard and mouse to the USB hub.

Connect any additional peripherals, such as headphones to the USB hub.
If you are using an externally powered hub, connect the power cable of the hub to a power outlet.
To split a station:
In the MultiPoint Manager, click the Stations tab.
Under Station, click the name of the station you want to split.
Under Selected Item Tasks, click Split station.
The original screen moves to the left half of the monitor, and a new station's screen is created on the right half of the same monitor.
Create the new station by pressing the specified letter on the newly added keyboard as indicated when the Create a MultiPoint Server Station screen appears on the right half of the monitor.
After a station is split, one user can log on to the left station while another user logs on to the right station.
To return a split station to a single station:
In the MultiPoint Manager, click the Stations tab.
Under Station, click the name of the station you want to unsplit.
Under Selected Item Tasks, click Unsplit station.