Use your model
Let's learn how to use y=our Document processing model in both Power Automate and Power Apps.
Quick test
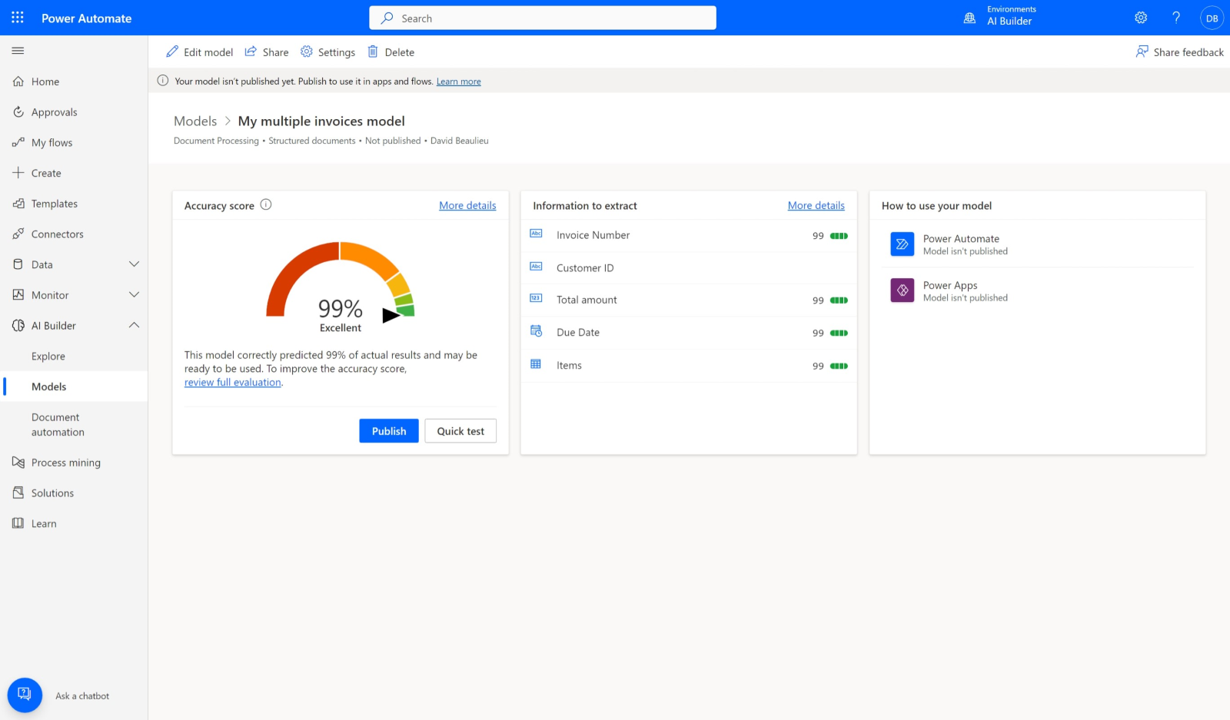
After your model completes training, you can view important details about your newly trained model on a details page.
To see your model in action, select Quick test.
Drag and drop or upload an image from your device to test. From the previous unit's sample data, use the files from the Test folders that we didn’t use for training (either from AI Builder Document processing Sample Data\Adatum\Test or AI Builder Document processing Sample Data\Contoso\Test).
You can now view the detected fields that you chose and the associated confidence scores for retrieving the individual fields compared to the trained model.
Publish your model
Your model can't be used until you publish it. If you're satisfied with your model, select Publish to make it available for use.
Use your model in Power Automate
Now that your model is published, you can use your Document processing model to process documents using Power Automate. A special AI Builder action can be used to ingest documents from emails, document libraries, and other sources, and output the processed data.
Select Use model.
Select Build intelligent automations and select one of the triggers proposed. For this module, we use the Microsoft 365 Outlook work account.
Make sure that you're signed into the required connections and then select Continue to confirm the creation of the flow.
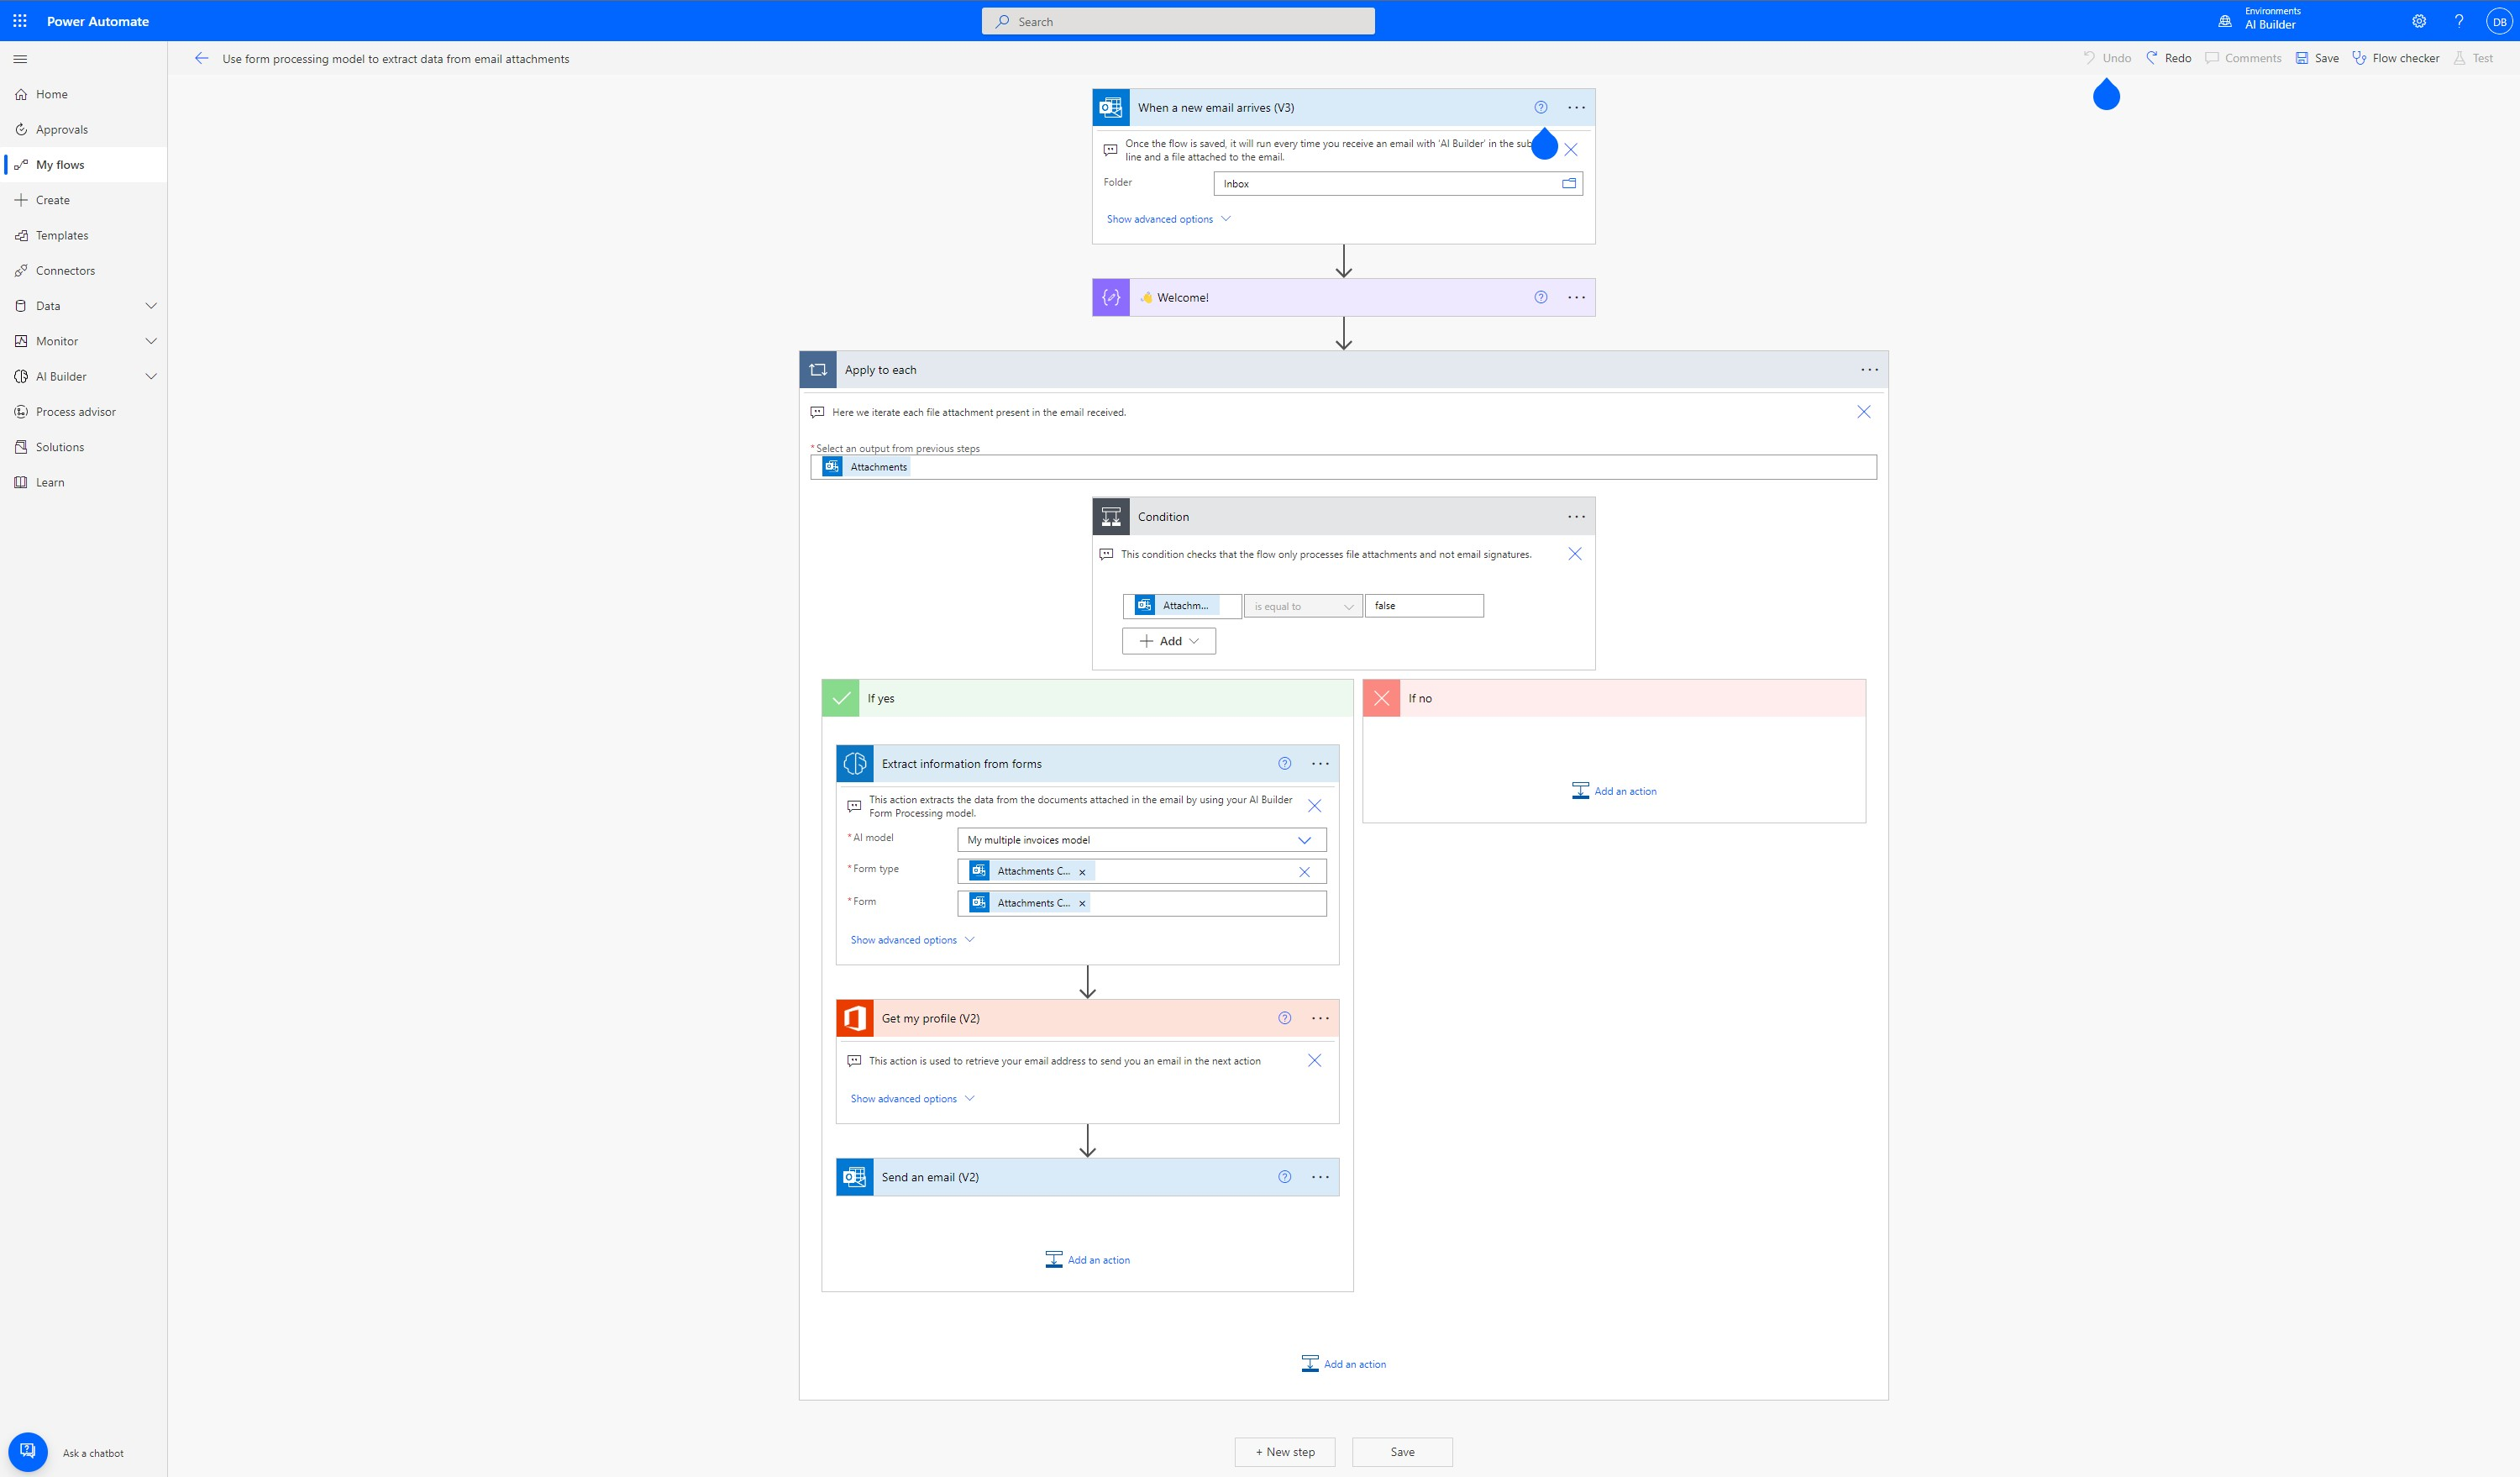
The flow is already configured to run when you receive an email with an attachment and the email subject is: AI Builder. Let's take a look. Notice in this flow that there are compose steps in it with some explanation of what's going on at each step. Also notice that the flow can handle multiple attachments.
The AI Builder step Extract information from forms is in the center of the flow. This is the step tied to your new model, which pulls the information from your attachments.
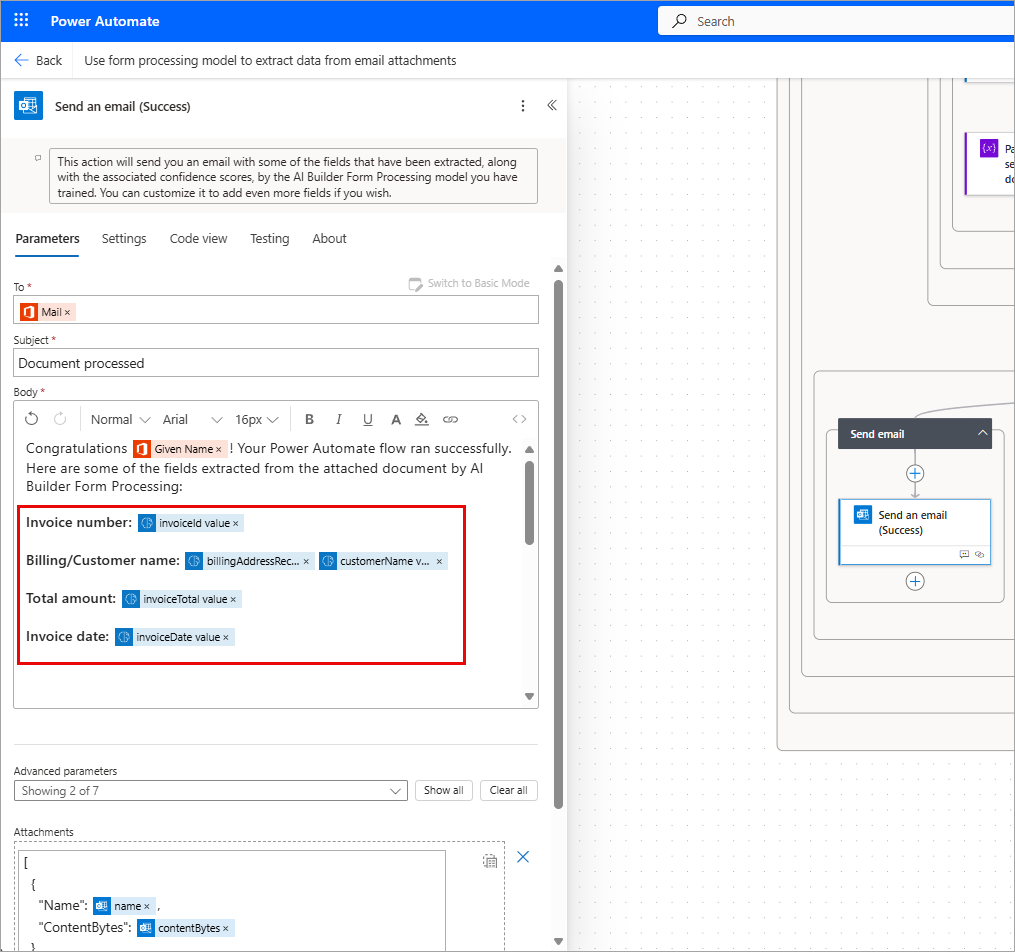
Let's change this automatically generated flow to show us some of the information that we trained it to extract. Expand the final Send an email (Success) step under the Send success email Switch. Delete the line in the Body that includes Total...(Confidence score:...)
Add this content into the message body:
Invoice number: [insert the dynamic content for invoiceID value]
Billing/Customer name: [insert the dynamic content for billingAddressRecipient value/customerName value]
Total amount: [insert the dynamic content for invoiceTotal value]
Invoice date: [Insert the dynamic content for invoiceDate value]
We add two dynamic content values for Billing/Customer name because one collection identified "billing" content and the other identified "customer" content, but the information is essentially the same, and only one output exists per document. Ideally, when you have a situation like this you would use a "coalesce" function, but our focus here is just to see our output.
When complete, your Send an email (Success) Body should resemble the following:
Select Save on the top right to test the flow.
Select Test.
Select Manually and then select Test.
Now send yourself an email with the subject AI Builder and attach the document you used for testing previously.
After a few moments, you'll see the flow running. The flow extracts the data from the attachment and sends you back an email with the results.
Congratulations! You've built and customized an intelligent automation flow. You can continue to customize the flow to your needs to perform any other action you might want, such as saving your data to a data table or responding to a customer.
Use your model in Power Apps
Now that your model is published, you can also use your Document processing model in a canvas app. A special component is available for you to add that analyzes any image and extracts the text based on your trained Document processing mode.
From the Power Automate home page, select AI Hub, and select your model under Recently Created.
Select Use model.
Select Build intelligent apps to begin the canvas app creation experience.
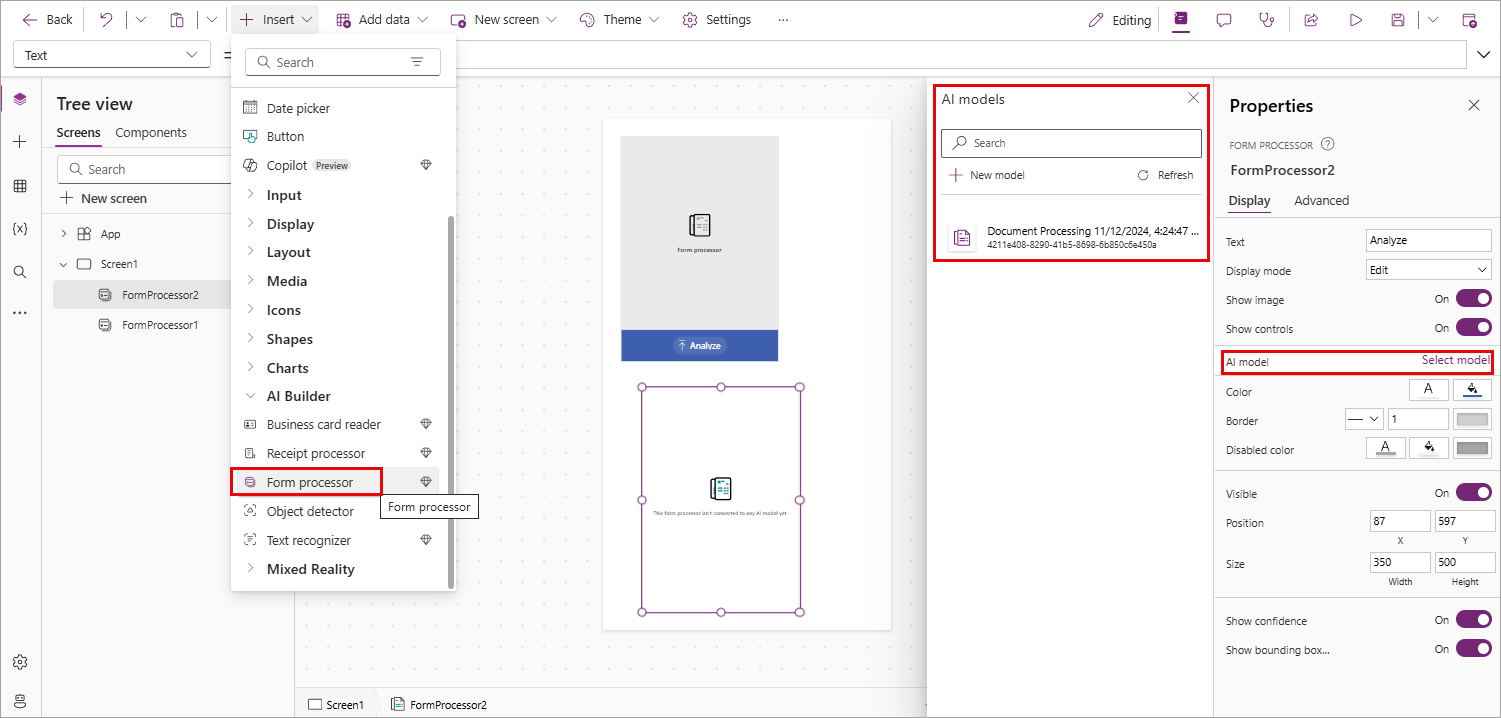
Within your canvas app, a Form processor component is automatically added and linked to your published Document processing model.
Note
If you want to add additional AI models to the app, select Insert and then select Form processor to add a Form processor component. Next, select the AI model property from the right hand properties panel. A list of AI models appears to select. Only published models appear in the drop-down list.
If you added an extra Form Processor control to your app, go ahead and delete it before continuing.
Next, we can select a field from the invoice to display. Select Insert and then add a Text label component. Position the label below your form processor control on the app canvas.
With the label selected, make sure that Text property is selected in the top left hand corner. In the formula bar, write
FormProcessor1.Fields.This code gives you access to the other properties of the model as well. For this exercise, let's choose invoiceId. The formula for your label should now read:FormProcessor1.Fields.invoiceIdNext let's add a gallery so we can see the data from the items table of the invoice. Select Insert and then Vertical Gallery. Resize and position the gallery so that it's below your label.
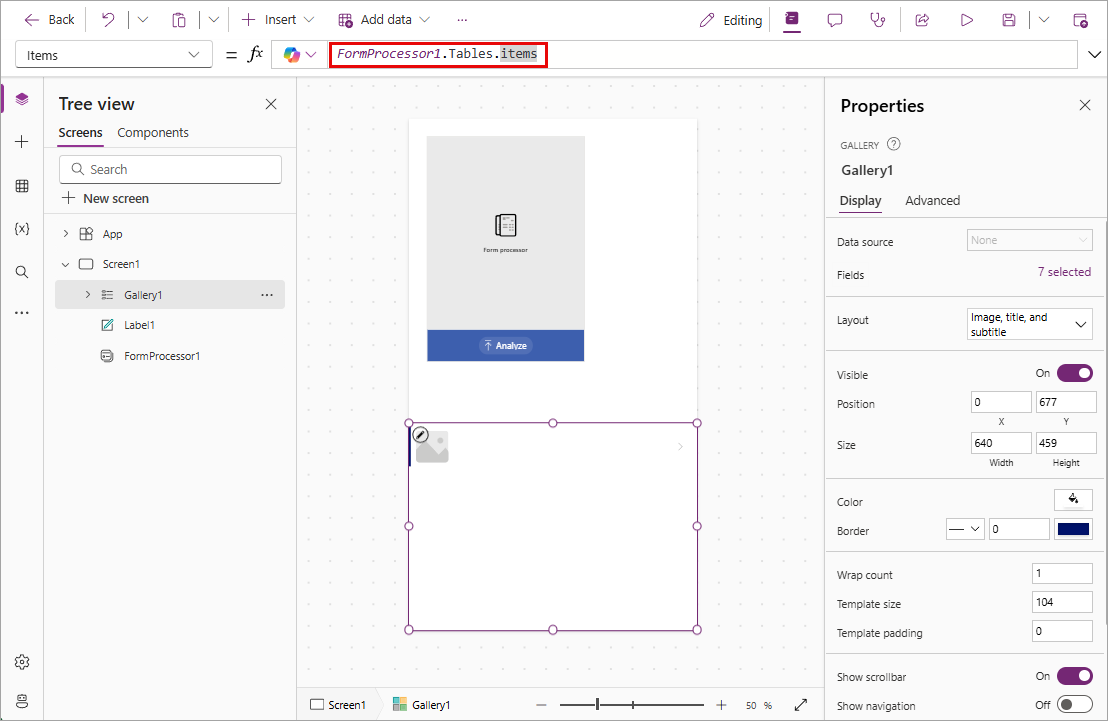
In the Items property of the gallery, write:
FormProcessor1.Tables.itemsPut the app in preview mode by selecting the play icon in the upper right of the command bar.
Select the Analyze button and then select a PDF that you used to test previously.
A preview of your document is shown in the Form Processor control. You also see the Invoice Number and the items from the invoice displayed in the gallery.
Now you've seen the capability of using an AI Builder model inside of a Power Automate flow and a Power Apps app. AI Builder models are very powerful tools with extraordinary potential!
