Migrate to the new Kubernetes based Managed Virtual Network IR
Microsoft Purview added new version of Managed Virtual Network support mid-November 2023. All the newly created resources will be using the new offering. If you're using the earlier version (which you can check), you can update to the latest version of the managed virtual network.
There are several advantages of using the new version of Managed Virtual Network:
- Generally available in all Microsoft Purview supported regions.
- Expanded data source support, including Databricks, Snowflake, Fabric, and all the sources that are supported by the default Azure integration runtime.
- Better scan performance.
- Interactive operations from Purview portal are always available (test connection, browse source during scan setup, etc.)
Important
There is a pricing change to use a managed virtual network with Microsoft Purview. For more information about the capabilities of managed virtual networks and for pricing details, see the managed virtual network article.
To upgrade, you need to create a new Managed Virtual Network IR and switch your scans to this new IR. Here's an overview of what you'll need to do to migrate. All specific steps are listed after:
- Ensure you meet prerequisites
- Create a new Managed Virtual Network IR
- Create managed private endpoints for data sources
- Link your existing scans to the new managed virtual network IR
- Delete the old managed virtual network V1
Deployment steps
Prerequisites
Before deploying a Managed virtual network and Managed Virtual Network Integration Runtime for a Microsoft Purview account, ensure you meet the following prerequisites:
- From Microsoft Purview roles, you need Data Source Administrator permission on any collection in your Microsoft Purview account.
- From Azure RBAC roles, you must be contributor on the Microsoft Purview account and data source to approve private links.
Create Managed Virtual Network Integration Runtime
Open the Microsoft Purview governance portal by:
- Browsing directly to https://web.purview.azure.com and selecting your Microsoft Purview account.
- Opening the Azure portal, searching for and selecting the Microsoft Purview account. Selecting the the Microsoft Purview governance portal button.
Navigate to the Data Map -> Integration runtimes.
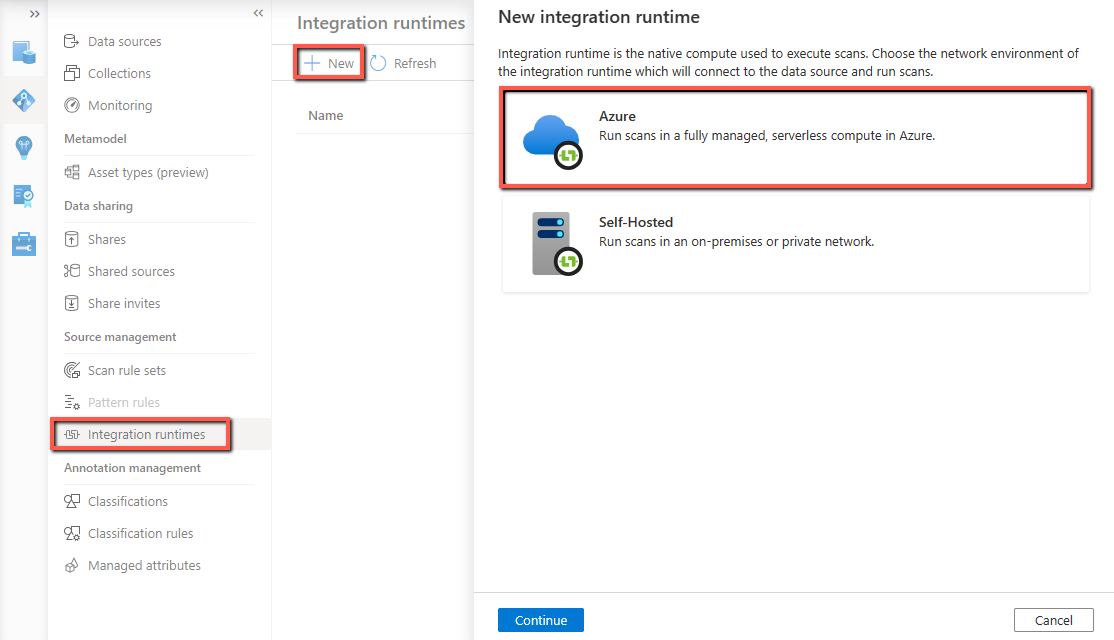
From Integration runtimes page, select + New icon, to create a new runtime. Select Azure and then select Continue.
Provide a name for your Managed Virtual Network Integration Runtime, select a region, and give your managed virtual network a name.
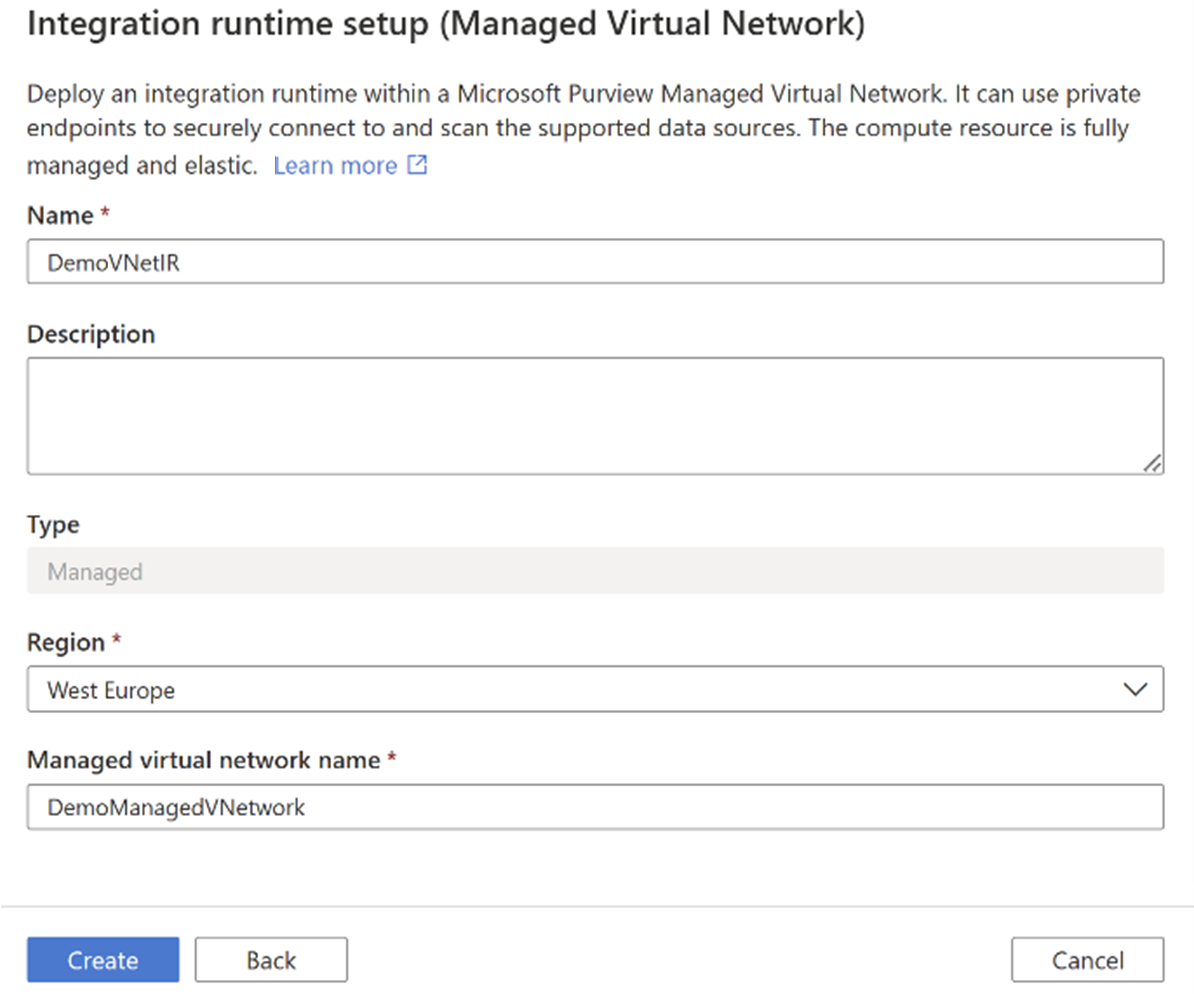
Select Create.
Deploying the Managed Virtual Network Integration Runtime triggers multiple workflows in the Microsoft Purview governance portal for creating managed private endpoints for Microsoft Purview and its managed Storage Account. Select each workflow to approve the private endpoint for the corresponding Azure resource.
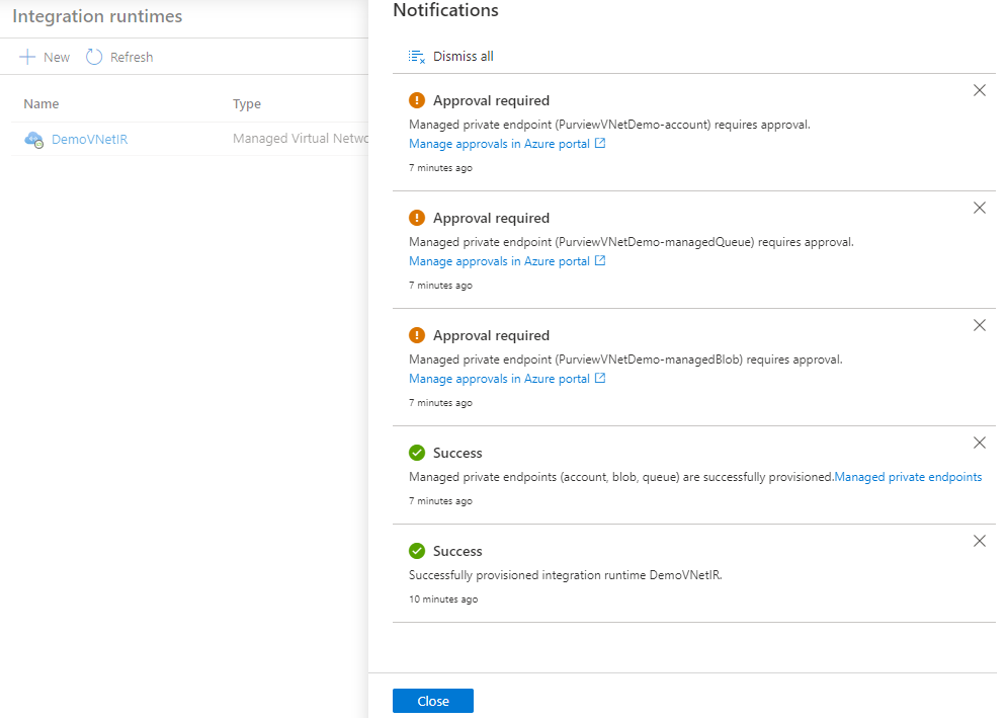
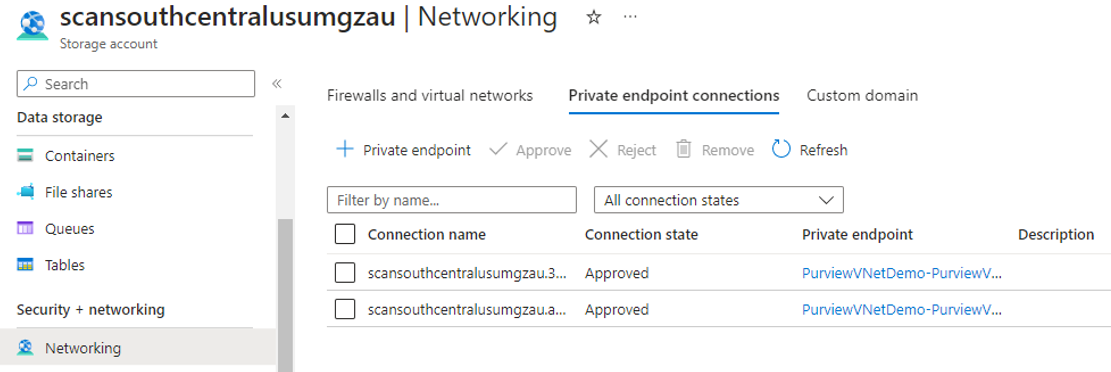
In Azure portal, from your Microsoft Purview account resource window, approve the managed private endpoint. From managed storage account page approve the managed private endpoints for blob and queue services:
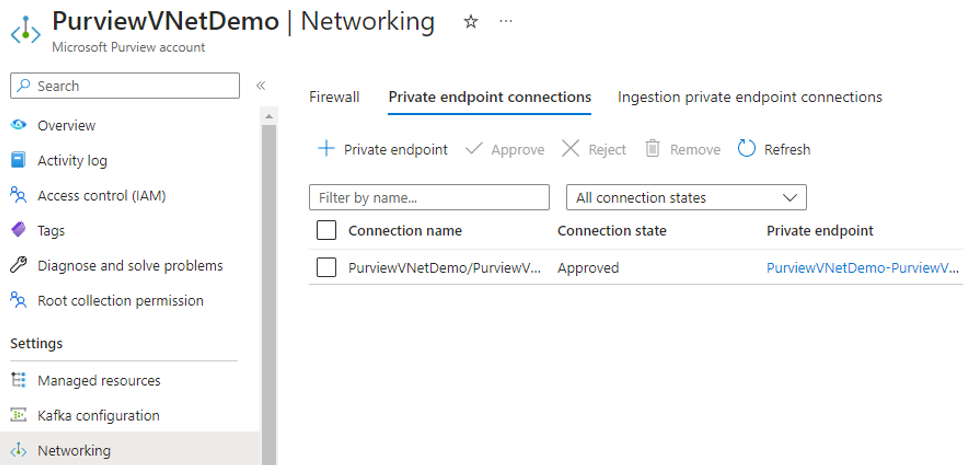
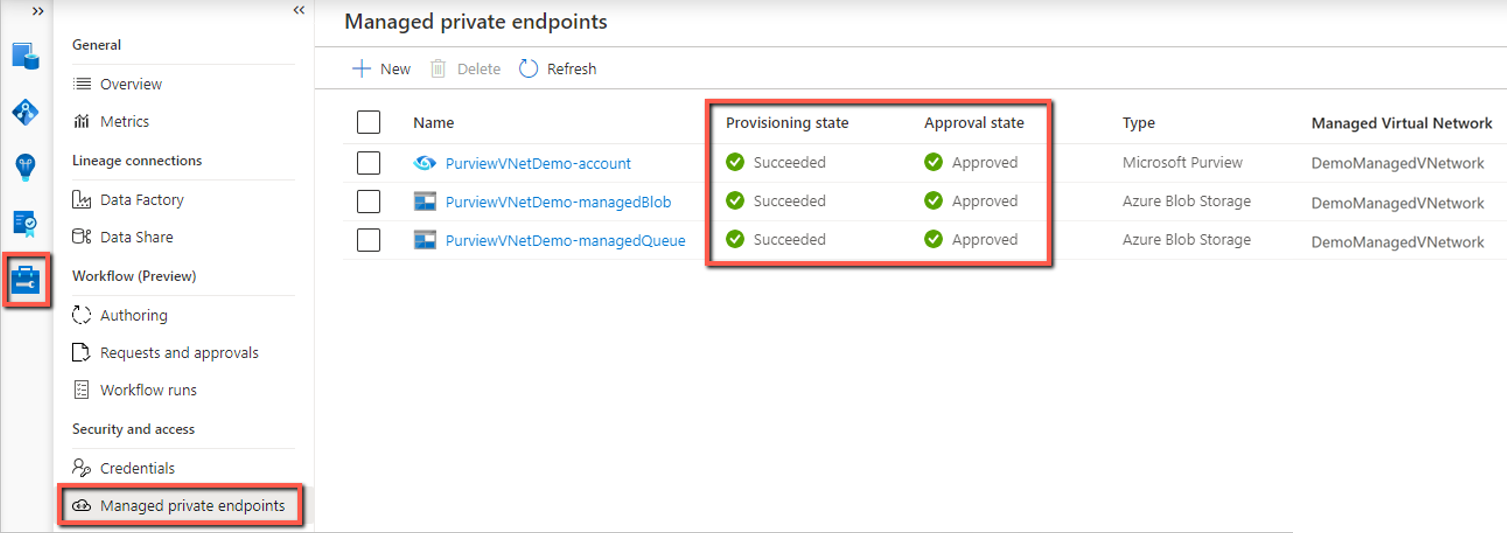
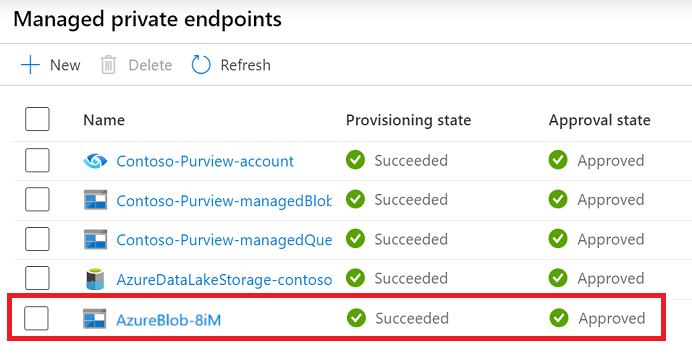
From Management, select Managed private endpoint to validate if all managed private endpoints are successfully deployed and approved.
Go to the Integration runtimes page, you'll see the IR status shown up as “Initializing” upon creation. Wait until it turns into “Running” state to use in scan. It usually takes several minutes.

Tip
You can create multiple managed virtual networks in different regions in your Microsoft Purview account to securely access resources across regions.
Create managed private endpoints for data sources
You can use managed private endpoints to connect your data sources to ensure data security during transmission.
Tip
If your data source allows public access and you want to connect via public network, you can skip this step. Scan runs can be executed as long as the integration runtime can connect to your data source.
To deploy and approve a managed private endpoint for a data source, follow these steps selecting data source of your choice from the list:
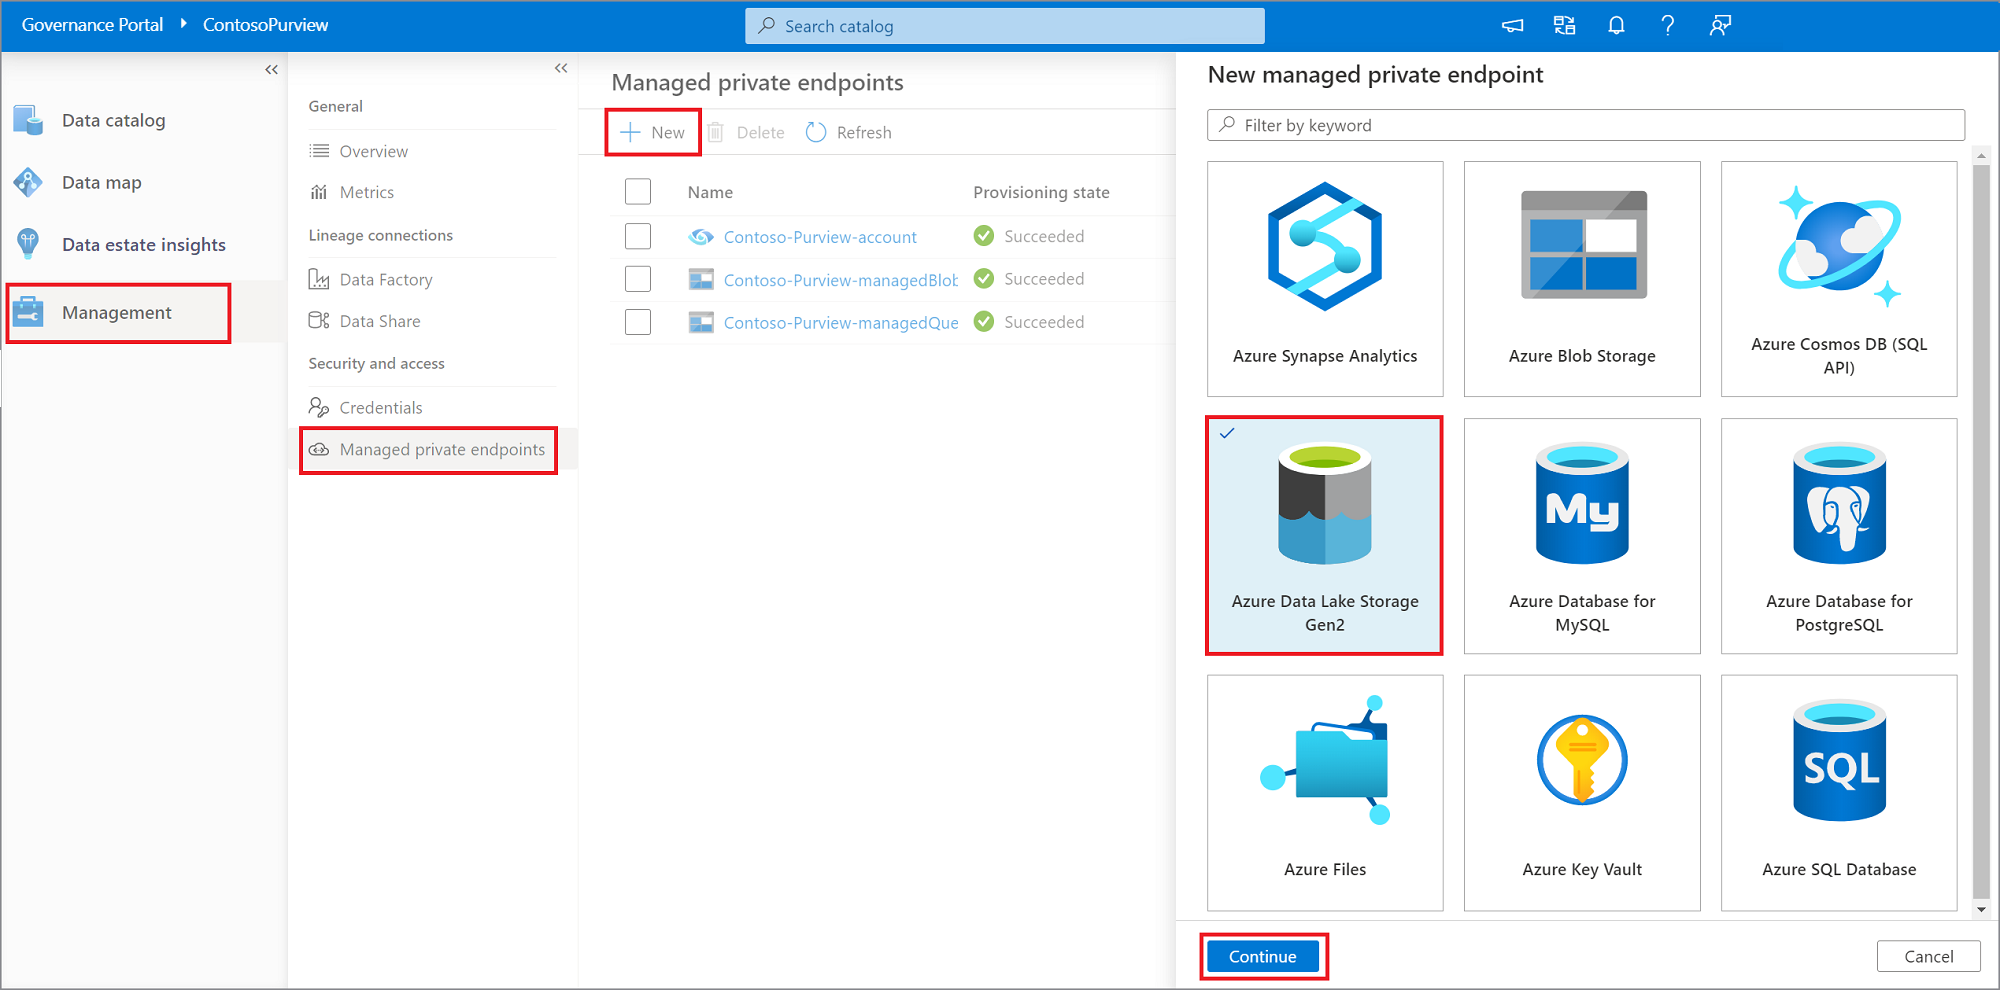
Navigate to Management, and select Managed private endpoints.
Select + New.
From the list of supported data sources, select the type that corresponds to the data source you're planning to scan using Managed Virtual Network Integration Runtime.
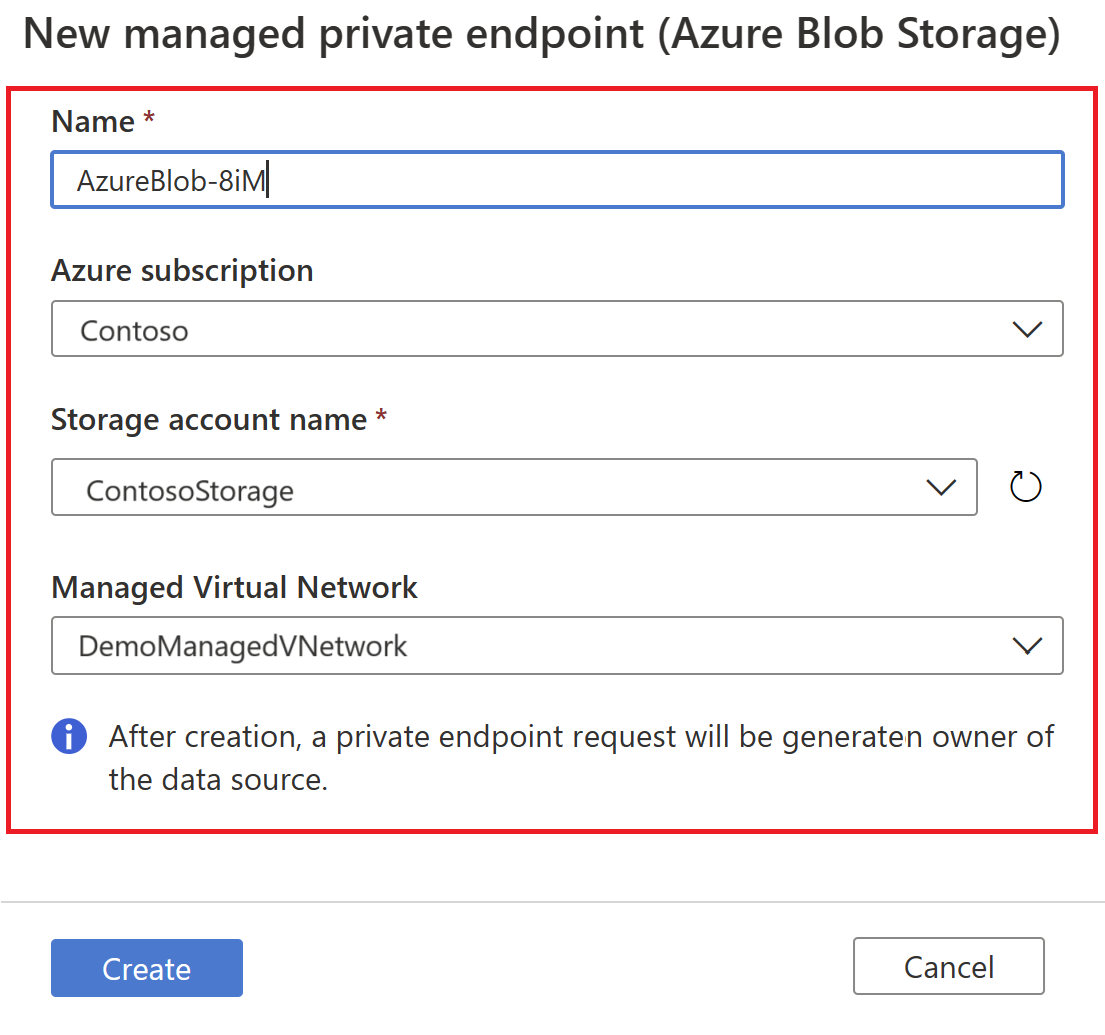
Provide a name for the managed private endpoint, select the Azure subscription, data source, and Managed Virtual Network from the drop-down lists. Select Create.
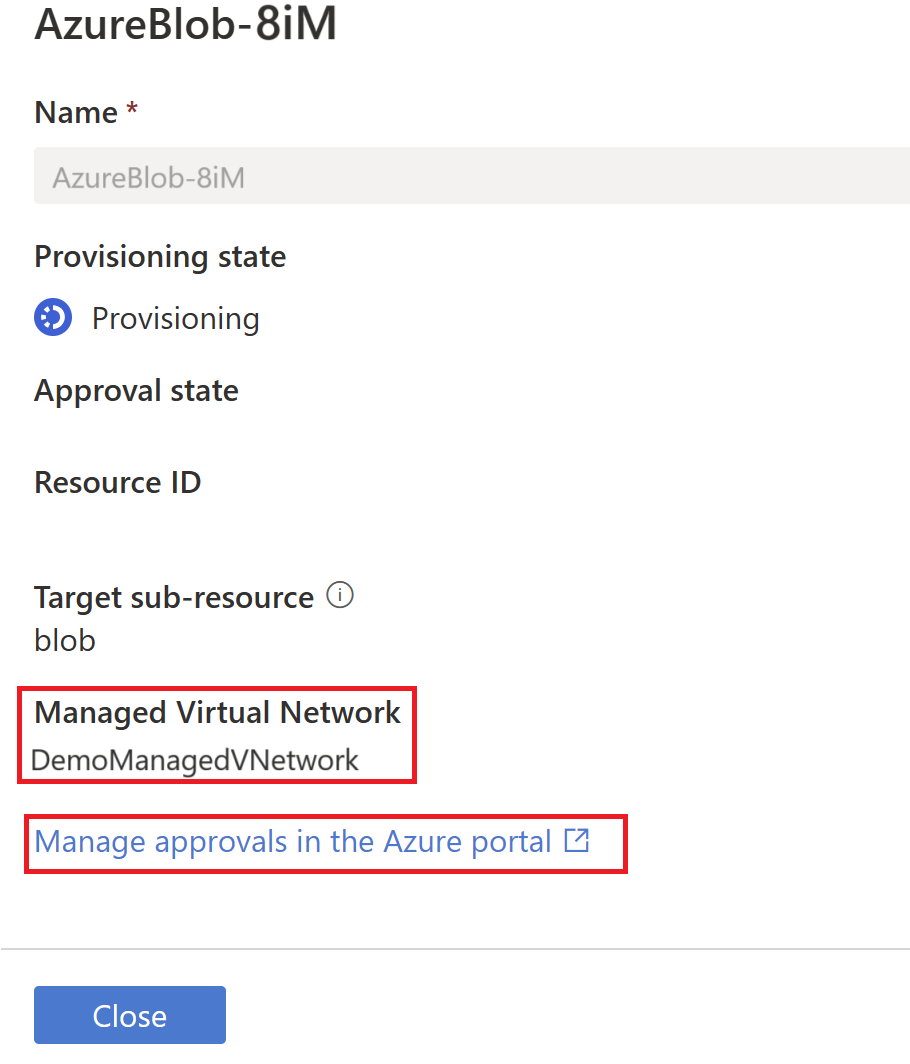
From the list of managed private endpoints, select the newly created managed private endpoint for your data source and then select on Manage approvals in the Azure portal, to approve the private endpoint in Azure portal.
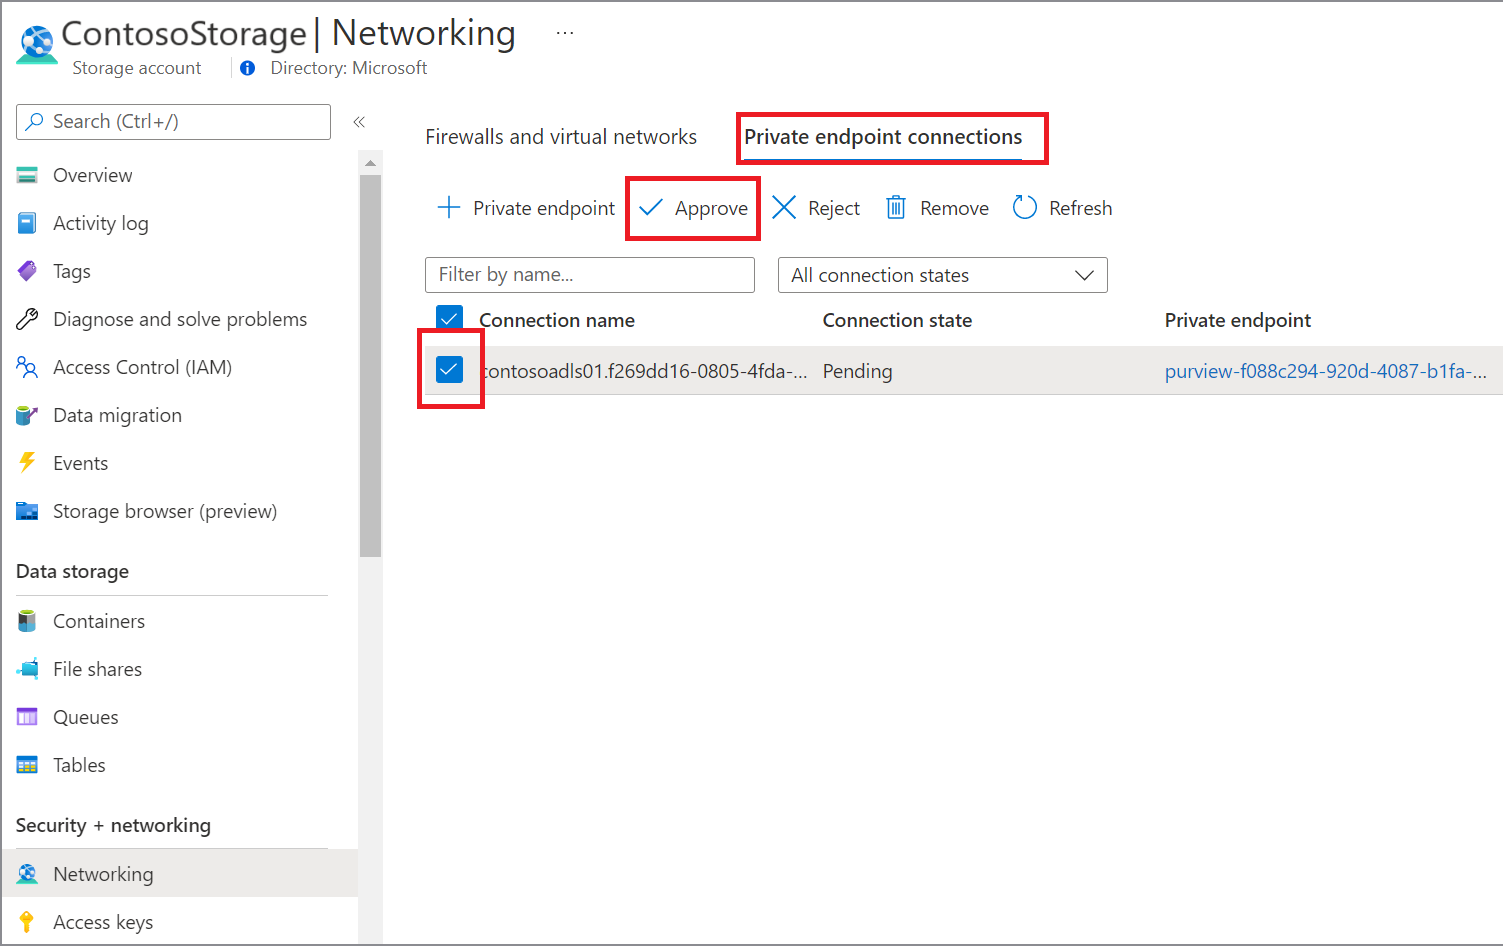
By selecting the link, you're redirected to Azure portal. Under the private endpoints connection, select the newly created private endpoint and select Approve.

Inside the Microsoft Purview governance portal, the managed private endpoint must be shown as approved as well.
Link your existing scans to the new managed virtual network IR
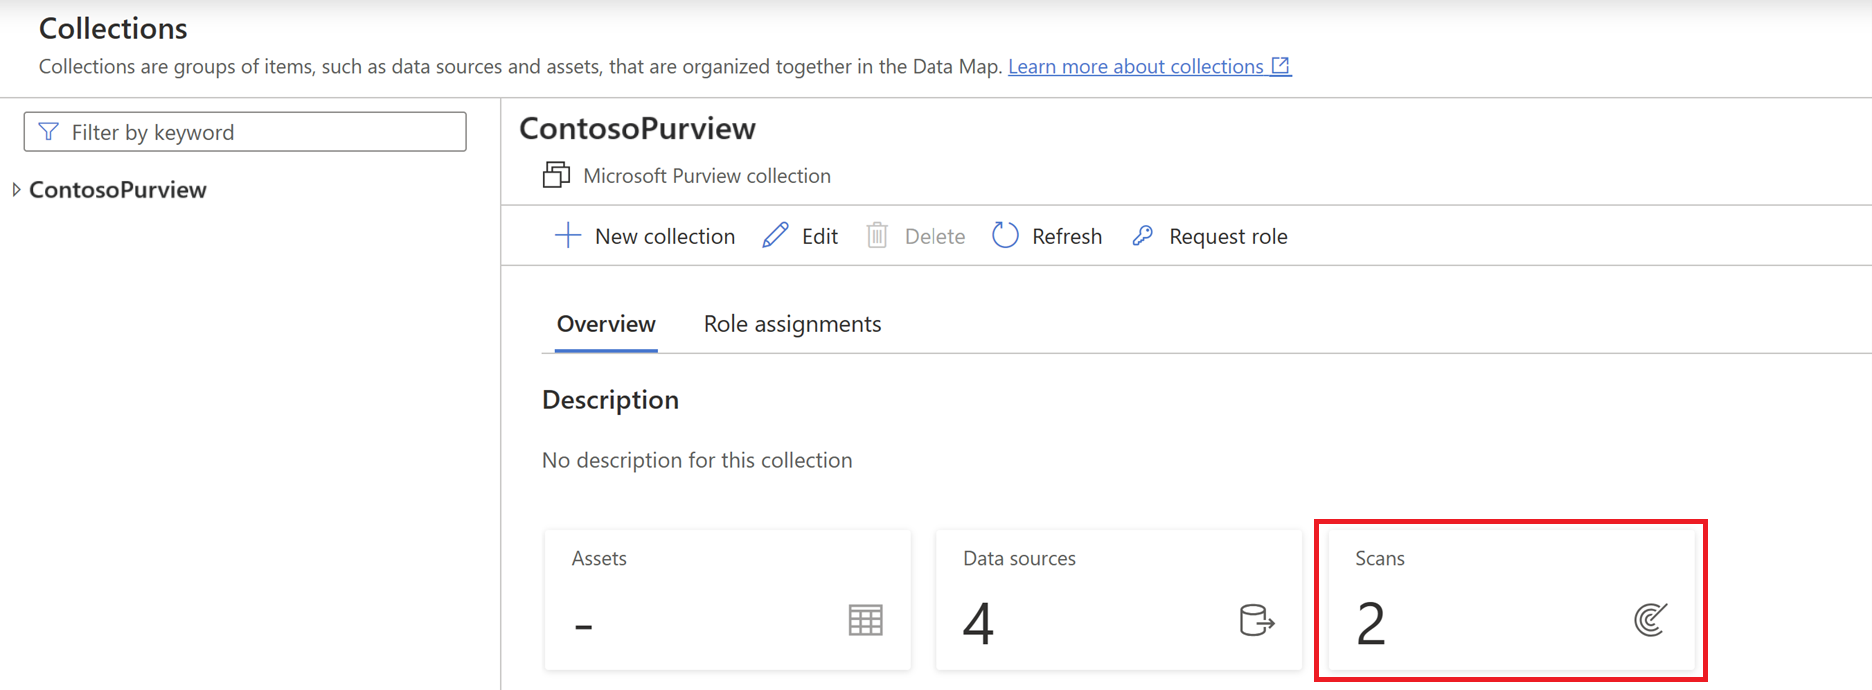
Inside Microsoft Purview, navigate to Data Map->Collections.

Select to your collections with scans and select the Scans button.
Select your scan name to see details.

Select Edit scan and choose your new Managed Virtual Network IR from the drop-down.

Save your changes and edit any other scans.
Delete the old managed virtual network V1
You can look for your old Managed Virtual Network IRs under Integration Runtimes and delete them.
