Debug your Teams app locally
Microsoft Teams Toolkit helps you to debug and preview your Microsoft Teams app locally. During the debug process, Teams Toolkit automatically starts app services, launches debuggers, and uploads Teams app. You can preview your Teams app in Teams web client locally after debugging.
Debug your Teams app locally for Visual Studio Code
Teams Toolkit in Microsoft Visual Studio Code gives you the features to automate debugging of your Teams app locally. Visual Studio Code allows you to debug tab, bot, and message extension. You need to set up Teams Toolkit before you debug your app.
Note
Your old Teams Toolkit project gets upgraded to use new tasks, for more information, see tasks doc.
Set up your Teams Toolkit for debugging
The following steps help you set up your Teams Toolkit before you initiate the debug process:
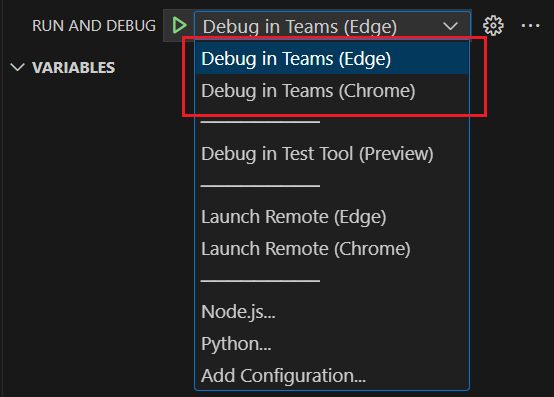
Select Debug in Teams (Edge) or Debug in Teams (Chrome) from the RUN AND DEBUG ▷ dropdown.
Select Run > Start Debugging (F5).

Select Create a Microsoft 365 Testing Tenant to Microsoft 365 account.

Tip
You can select Create a Microsoft 365 Testing Tenant to learn about Microsoft 365 Developer Program. Your default web browser opens to let you sign in to your Microsoft 365 account with your credentials.
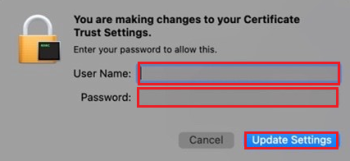
Select Install to install the development certificate for localhost.

Tip
You can select Learn More to know about the development certificate.
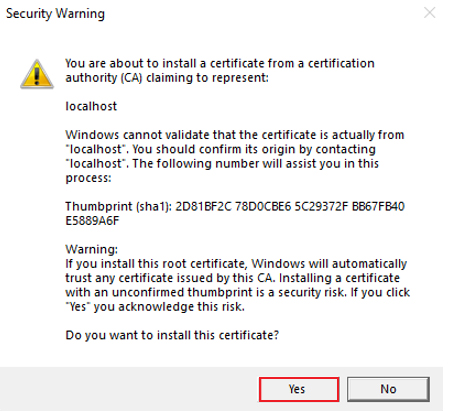
Select Yes in the Security Warning dialog.
Toolkit launches a new Microsoft Edge or Chrome browser instance based on your selection and opens a web page to load Teams client.
Debug your app
After the initial setup process, Teams Toolkit starts the following processes:
Starts app services
Runs tasks as defined in .vscode/tasks.json. By default, the task name is "Start application". If your project contains more than one component, there'll be more dependent tasks.
// .vscode/tasks.json
{
    "label": "Start application",
    "dependsOn": [
        "Start Frontend", // Tab
        "Start Backend", // Azure Functions
        "Start Bot" // Bot or message extensions
    ]
}
The following image displays task names in the OUTPUT and TERMINAL tabs of the Visual Studio Code while running tab, bot or message extension, and Azure Functions.
Start local tunnel
Use dev tunnel as a local tunnel service to make your local bot message endpoint public.
Dev tunnel
To manually migrate your local tunnel task from a v4 project, update the following code in the .vscode/tasks.json file:
{
      "label": "Start local tunnel",
      "type": "teamsfx",
      "command": "debug-start-local-tunnel",
      "args": {
          "type": "dev-tunnel",
          "ports": [
              {
                  "portNumber": 3978,
                  "protocol": "http",
                  "access": "public",
                  "writeToEnvironmentFile": {
                      "endpoint": "BOT_ENDPOINT",
                      "domain": "BOT_DOMAIN"
                  }
              }
        ],
          "env": "local"
      },
      "isBackground": true,
      "problemMatcher": "$teamsfx-local-tunnel-watch"
    },
To use another port for local bot service, change the portNumber in the .vscode/tasks.json file and also change the portNumber in the index.js or index.ts file.
The following table lists the required arguments:
| Arguments | Type | Required | Description |
|---|---|---|---|
type |
string | required | The type of tunnel service to use. This argument must be set to dev-tunnel. |
env |
string | optional | The environment name. Teams Toolkit writes the environment variables defined in output to .env.<env> file. |
ports |
array | required | An array of port configurations, each specifying the local port number, protocol, and access control settings. |
The ports argument must be an array of objects, with each object specifying the configuration for a particular port. Each object must contain the following fields:
| Port | Type | Required | Description |
|---|---|---|---|
portNumber |
number | required | The local port number of the tunnel. |
protocol |
string | required | The protocol of the tunnel. |
access |
string | optional | The access control setting for the tunnel. This value can be set to private or public. If not specified, the default value is private. |
writeToEnvironmentFile |
object | optional | The key of tunnel endpoint and tunnel domain environment variables that are written to .env file. |
The writeToEnvironmentFile object contains two fields:
| WriteToEnvironmentFile | Type | Required | Description |
|---|---|---|---|
endpoint |
string | optional | The key of tunnel endpoint environment variable. |
domain |
string | optional | The key of tunnel domain environment variable. |
When writeToEnvironmentFile is included, the specified environment variables are written to the .env file. When the field is omitted, no environment variables are written to the file.
Launches debug configurations
Launches the debug configurations as defined in .vscode/launch.json.

The following table lists the debug configuration names and types for project with tab, bot or message extension app, and Azure Functions:
| Component | Debug configuration name | Debug configuration type |
|---|---|---|
| Tab | Attach to Frontend (Edge) or Attach to Frontend (Chrome) | msedge or chrome |
| Bot or message extensions | Attach to Bot | node |
| Azure Functions | Attach to Backend | node |
The following table lists the debug configuration names and types for project with bot app, Azure Functions, and without tab app:
| Component | Debug configuration name | Debug configuration type |
|---|---|---|
| Bot or message extension | Launch Bot (Edge) or Launch Bot (Chrome) | msedge or chrome |
| Bot or message extension | Attach to Bot | node |
| Azure Functions | Attach to Backend | node |
Uploads the Teams app
The configuration Attach to Frontend or Launch App launches Microsoft Edge or Chrome browser instance to load Teams client in web page. After the Teams client is loaded, upload Teams app that is controlled by the uploading URL defined in the launch configurations Microsoft Teams.
When Teams client opens in the web browser, perform the following steps:
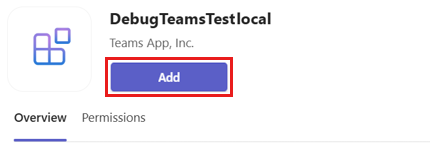
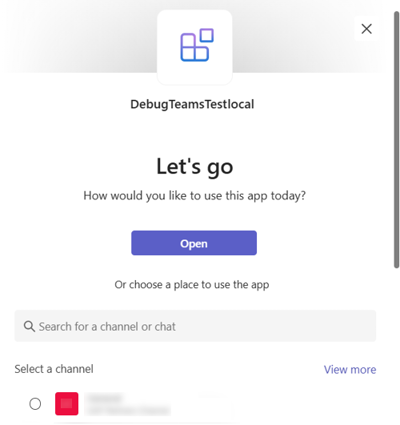
Select Add to upload the app in Teams.
Select Open to open the app in personal scope.
Alternatively, you can either search and select the required scope or select a channel or chat from the list, and move through the dialog to select Go.
Your app is added to Teams!
Next step
See also
Platform Docs
