Tutorial: Sign in users and acquire a token for Microsoft Graph in a Node.js & Express web app
In this tutorial, you build a web app that signs-in users and acquires access tokens for calling Microsoft Graph. The web app you build uses the Microsoft Authentication Library (MSAL) for Node.
Follow the steps in this tutorial to:
- Register the application in the Azure portal
- Create an Express web app project
- Install the authentication library packages
- Add app registration details
- Add code for user login
- Test the app
For more information, see the sample code that shows how to use MSAL Node to sign in, sign out and acquire an access token for a protected resource such as Microsoft Graph.
Prerequisites
- Node.js
- Visual Studio Code or another code editor
Register the application
First, complete the steps in Register an application with the Microsoft identity platform to register your app.
Use the following settings for your app registration:
- Name:
ExpressWebApp(suggested) - Supported account types: Accounts in this organizational directory only
- Platform type: Web
- Redirect URI:
http://localhost:3000/auth/redirect - Client secret:
*********(record this value for use in a later step - it's shown only once)
Create the project
Use the Express application generator tool to create an application skeleton.
- First, install the express-generator package:
npm install -g express-generator
- Then, create an application skeleton as follows:
    express --view=hbs /ExpressWebApp && cd /ExpressWebApp
    npm install
You now have a simple Express web app. The file and folder structure of your project should look similar to the following folder structure:
ExpressWebApp/
├── bin/
|    └── wwww
├── public/
|    ├── images/
|    ├── javascript/
|    └── stylesheets/
|        └── style.css
├── routes/
|    ├── index.js
|    └── users.js
├── views/
|    ├── error.hbs
|    ├── index.hbs
|    └── layout.hbs
├── app.js
└── package.json
Install the auth library
Locate the root of your project directory in a terminal and install the MSAL Node package via npm.
npm install --save @azure/msal-node
Install other dependencies
The web app sample in this tutorial uses the express-session package for session management, dotenv package for reading environment parameters during development, and axios for making network calls to the Microsoft Graph API. Install these via npm:
npm install --save express-session dotenv axios
Add app registration details
- Create an .env.dev file in the root of your project folder. Then add the following code:
CLOUD_INSTANCE="Enter_the_Cloud_Instance_Id_Here" # cloud instance string should end with a trailing slash
TENANT_ID="Enter_the_Tenant_Info_Here"
CLIENT_ID="Enter_the_Application_Id_Here"
CLIENT_SECRET="Enter_the_Client_Secret_Here"

REDIRECT_URI="http://localhost:3000/auth/redirect"
POST_LOGOUT_REDIRECT_URI="http://localhost:3000"

GRAPH_API_ENDPOINT="Enter_the_Graph_Endpoint_Here" # graph api endpoint string should end with a trailing slash

EXPRESS_SESSION_SECRET="Enter_the_Express_Session_Secret_Here"
Fill in these details with the values you obtain from Azure app registration portal:
Enter_the_Cloud_Instance_Id_Here: The Azure cloud instance in which your application is registered.- For the main (or global) Azure cloud, enter
https://login.microsoftonline.com/(include the trailing forward-slash). - For national clouds (for example, China), you can find appropriate values in National clouds.
- For the main (or global) Azure cloud, enter
Enter_the_Tenant_Info_hereshould be one of the following parameters:- If your application supports accounts in this organizational directory, replace this value with the Tenant ID or Tenant name. For example,
contoso.microsoft.com. - If your application supports accounts in any organizational directory, replace this value with
organizations. - If your application supports accounts in any organizational directory and personal Microsoft accounts, replace this value with
common. - To restrict support to personal Microsoft accounts only, replace this value with
consumers.
- If your application supports accounts in this organizational directory, replace this value with the Tenant ID or Tenant name. For example,
Enter_the_Application_Id_Here: The Application (client) ID of the application you registered.Enter_the_Client_secret: Replace this value with the client secret you created earlier. To generate a new key, use Certificates & secrets in the app registration settings in the Azure portal.
Warning
Any plaintext secret in source code poses an increased security risk. This article uses a plaintext client secret for simplicity only. Use certificate credentials instead of client secrets in your confidential client applications, especially those apps you intend to deploy to production.
Enter_the_Graph_Endpoint_Here: The Microsoft Graph API cloud instance that your app will call. For the main (global) Microsoft Graph API service, enterhttps://graph.microsoft.com/(include the trailing forward-slash).Enter_the_Express_Session_Secret_Herethe secret used to sign the Express session cookie. Choose a random string of characters to replace this string with, such as your client secret.
- Next, create a file named authConfig.js in the root of your project for reading in these parameters. Once created, add the following code there:
/*
 * Copyright (c) Microsoft Corporation. All rights reserved.
 * Licensed under the MIT License.
 */

require('dotenv').config({ path: '.env.dev' });

/**
 * Configuration object to be passed to MSAL instance on creation.
 * For a full list of MSAL Node configuration parameters, visit:
 * https://github.com/AzureAD/microsoft-authentication-library-for-js/blob/dev/lib/msal-node/docs/configuration.md
 */
const msalConfig = {
    auth: {
        clientId: process.env.CLIENT_ID, // 'Application (client) ID' of app registration in Azure portal - this value is a GUID
        authority: process.env.CLOUD_INSTANCE + process.env.TENANT_ID, // Full directory URL, in the form of https://login.microsoftonline.com/<tenant>
        clientSecret: process.env.CLIENT_SECRET // Client secret generated from the app registration in Azure portal
    },
    system: {
        loggerOptions: {
            loggerCallback(loglevel, message, containsPii) {
                console.log(message);
            },
            piiLoggingEnabled: false,
            logLevel: 3,
        }
    }
}

const REDIRECT_URI = process.env.REDIRECT_URI;
const POST_LOGOUT_REDIRECT_URI = process.env.POST_LOGOUT_REDIRECT_URI;
const GRAPH_ME_ENDPOINT = process.env.GRAPH_API_ENDPOINT + "v1.0/me";

module.exports = {
    msalConfig,
    REDIRECT_URI,
    POST_LOGOUT_REDIRECT_URI,
    GRAPH_ME_ENDPOINT
};
Add code for user sign-in and token acquisition
- Create a new folder named auth, and add a new file named AuthProvider.js under it. This will contain the AuthProvider class, which encapsulates the necessary authentication logic using MSAL Node. Add the following code there:
const msal = require('@azure/msal-node');
const axios = require('axios');

const { msalConfig } = require('../authConfig');

class AuthProvider {
    msalConfig;
    cryptoProvider;

    constructor(msalConfig) {
        this.msalConfig = msalConfig
        this.cryptoProvider = new msal.CryptoProvider();
    };

    login(options = {}) {
        return async (req, res, next) => {

            /**
             * MSAL Node library allows you to pass your custom state as state parameter in the Request object.
             * The state parameter can also be used to encode information of the app's state before redirect.
             * You can pass the user's state in the app, such as the page or view they were on, as input to this parameter.
             */
            const state = this.cryptoProvider.base64Encode(
                JSON.stringify({
                    successRedirect: options.successRedirect || '/',
                })
            );

            const authCodeUrlRequestParams = {
                state: state,

                /**
                 * By default, MSAL Node will add OIDC scopes to the auth code url request. For more information, visit:
                 * https://docs.microsoft.com/azure/active-directory/develop/v2-permissions-and-consent#openid-connect-scopes
                 */
                scopes: options.scopes || [],
                redirectUri: options.redirectUri,
            };

            const authCodeRequestParams = {
                state: state,

                /**
                 * By default, MSAL Node will add OIDC scopes to the auth code request. For more information, visit:
                 * https://docs.microsoft.com/azure/active-directory/develop/v2-permissions-and-consent#openid-connect-scopes
                 */
                scopes: options.scopes || [],
                redirectUri: options.redirectUri,
            };

            /**
             * If the current msal configuration does not have cloudDiscoveryMetadata or authorityMetadata, we will
             * make a request to the relevant endpoints to retrieve the metadata. This allows MSAL to avoid making
             * metadata discovery calls, thereby improving performance of token acquisition process. For more, see:
             * https://github.com/AzureAD/microsoft-authentication-library-for-js/blob/dev/lib/msal-node/docs/performance.md
             */
            if (!this.msalConfig.auth.cloudDiscoveryMetadata || !this.msalConfig.auth.authorityMetadata) {

                const [cloudDiscoveryMetadata, authorityMetadata] = await Promise.all([
                    this.getCloudDiscoveryMetadata(this.msalConfig.auth.authority),
                    this.getAuthorityMetadata(this.msalConfig.auth.authority)
                ]);

                this.msalConfig.auth.cloudDiscoveryMetadata = JSON.stringify(cloudDiscoveryMetadata);
                this.msalConfig.auth.authorityMetadata = JSON.stringify(authorityMetadata);
            }

            const msalInstance = this.getMsalInstance(this.msalConfig);

            // trigger the first leg of auth code flow
            return this.redirectToAuthCodeUrl(
                authCodeUrlRequestParams,
                authCodeRequestParams,
                msalInstance
            )(req, res, next);
        };
    }

    acquireToken(options = {}) {
        return async (req, res, next) => {
            try {
                const msalInstance = this.getMsalInstance(this.msalConfig);

                /**
                 * If a token cache exists in the session, deserialize it and set it as the
                 * cache for the new MSAL CCA instance. For more, see:
                 * https://github.com/AzureAD/microsoft-authentication-library-for-js/blob/dev/lib/msal-node/docs/caching.md
                 */
                if (req.session.tokenCache) {
                    msalInstance.getTokenCache().deserialize(req.session.tokenCache);
                }

                const tokenResponse = await msalInstance.acquireTokenSilent({
                    account: req.session.account,
                    scopes: options.scopes || [],
                });

                /**
                 * On successful token acquisition, write the updated token
                 * cache back to the session. For more, see:
                 * https://github.com/AzureAD/microsoft-authentication-library-for-js/blob/dev/lib/msal-node/docs/caching.md
                 */
                req.session.tokenCache = msalInstance.getTokenCache().serialize();
                req.session.accessToken = tokenResponse.accessToken;
                req.session.idToken = tokenResponse.idToken;
                req.session.account = tokenResponse.account;

                res.redirect(options.successRedirect);
            } catch (error) {
                if (error instanceof msal.InteractionRequiredAuthError) {
                    return this.login({
                        scopes: options.scopes || [],
                        redirectUri: options.redirectUri,
                        successRedirect: options.successRedirect || '/',
                    })(req, res, next);
                }

                next(error);
            }
        };
    }

    handleRedirect(options = {}) {
        return async (req, res, next) => {
            if (!req.body || !req.body.state) {
                return next(new Error('Error: response not found'));
            }

            const authCodeRequest = {
                ...req.session.authCodeRequest,
                code: req.body.code,
                codeVerifier: req.session.pkceCodes.verifier,
            };

            try {
                const msalInstance = this.getMsalInstance(this.msalConfig);

                if (req.session.tokenCache) {
                    msalInstance.getTokenCache().deserialize(req.session.tokenCache);
                }

                const tokenResponse = await msalInstance.acquireTokenByCode(authCodeRequest, req.body);

                req.session.tokenCache = msalInstance.getTokenCache().serialize();
                req.session.idToken = tokenResponse.idToken;
                req.session.account = tokenResponse.account;
                req.session.isAuthenticated = true;

                const state = JSON.parse(this.cryptoProvider.base64Decode(req.body.state));
                res.redirect(state.successRedirect);
            } catch (error) {
                next(error);
            }
        }
    }

    logout(options = {}) {
        return (req, res, next) => {

            /**
             * Construct a logout URI and redirect the user to end the
             * session with Azure AD. For more information, visit:
             * https://docs.microsoft.com/azure/active-directory/develop/v2-protocols-oidc#send-a-sign-out-request
             */
            let logoutUri = `${this.msalConfig.auth.authority}/oauth2/v2.0/`;

            if (options.postLogoutRedirectUri) {
                logoutUri += `logout?post_logout_redirect_uri=${options.postLogoutRedirectUri}`;
            }

            req.session.destroy(() => {
                res.redirect(logoutUri);
            });
        }
    }

    /**
     * Instantiates a new MSAL ConfidentialClientApplication object
     * @param msalConfig: MSAL Node Configuration object
     * @returns
     */
    getMsalInstance(msalConfig) {
        return new msal.ConfidentialClientApplication(msalConfig);
    }


    /**
     * Prepares the auth code request parameters and initiates the first leg of auth code flow
     * @param req: Express request object
     * @param res: Express response object
     * @param next: Express next function
     * @param authCodeUrlRequestParams: parameters for requesting an auth code url
     * @param authCodeRequestParams: parameters for requesting tokens using auth code
     */
    redirectToAuthCodeUrl(authCodeUrlRequestParams, authCodeRequestParams, msalInstance) {
        return async (req, res, next) => {
            // Generate PKCE Codes before starting the authorization flow
            const { verifier, challenge } = await this.cryptoProvider.generatePkceCodes();

            // Set generated PKCE codes and method as session vars
            req.session.pkceCodes = {
                challengeMethod: 'S256',
                verifier: verifier,
                challenge: challenge,
            };

            /**
             * By manipulating the request objects below before each request, we can obtain
             * auth artifacts with desired claims. For more information, visit:
             * https://azuread.github.io/microsoft-authentication-library-for-js/ref/modules/_azure_msal_node.html#authorizationurlrequest
             * https://azuread.github.io/microsoft-authentication-library-for-js/ref/modules/_azure_msal_node.html#authorizationcoderequest
             **/
            req.session.authCodeUrlRequest = {
                ...authCodeUrlRequestParams,
                responseMode: msal.ResponseMode.FORM_POST, // recommended for confidential clients
                codeChallenge: req.session.pkceCodes.challenge,
                codeChallengeMethod: req.session.pkceCodes.challengeMethod,
            };

            req.session.authCodeRequest = {
                ...authCodeRequestParams,
                code: '',
            };

            try {
                const authCodeUrlResponse = await msalInstance.getAuthCodeUrl(req.session.authCodeUrlRequest);
                res.redirect(authCodeUrlResponse);
            } catch (error) {
                next(error);
            }
        };
    }

    /**
     * Retrieves cloud discovery metadata from the /discovery/instance endpoint
     * @returns
     */
    async getCloudDiscoveryMetadata(authority) {
        const endpoint = 'https://login.microsoftonline.com/common/discovery/instance';

        try {
            const response = await axios.get(endpoint, {
                params: {
                    'api-version': '1.1',
                    'authorization_endpoint': `${authority}/oauth2/v2.0/authorize`
                }
            });

            return await response.data;
        } catch (error) {
            throw error;
        }
    }

    /**
     * Retrieves oidc metadata from the openid endpoint
     * @returns
     */
    async getAuthorityMetadata(authority) {
        const endpoint = `${authority}/v2.0/.well-known/openid-configuration`;

        try {
            const response = await axios.get(endpoint);
            return await response.data;
        } catch (error) {
            console.log(error);
        }
    }
}

const authProvider = new AuthProvider(msalConfig);

module.exports = authProvider;
- Next, create a new file named auth.js under the routes folder and add the following code there:
/*
 * Copyright (c) Microsoft Corporation. All rights reserved.
 * Licensed under the MIT License.
 */

var express = require('express');

const authProvider = require('../auth/AuthProvider');
const { REDIRECT_URI, POST_LOGOUT_REDIRECT_URI } = require('../authConfig');

const router = express.Router();

router.get('/signin', authProvider.login({
    scopes: [],
    redirectUri: REDIRECT_URI,
    successRedirect: '/'
}));

router.get('/acquireToken', authProvider.acquireToken({
    scopes: ['User.Read'],
    redirectUri: REDIRECT_URI,
    successRedirect: '/users/profile'
}));

router.post('/redirect', authProvider.handleRedirect());

router.get('/signout', authProvider.logout({
    postLogoutRedirectUri: POST_LOGOUT_REDIRECT_URI
}));

module.exports = router;
- Update the index.js route by replacing the existing code with the following code snippet:
/*
 * Copyright (c) Microsoft Corporation. All rights reserved.
 * Licensed under the MIT License.
 */

var express = require('express');
var router = express.Router();

router.get('/', function (req, res, next) {
    res.render('index', {
        title: 'MSAL Node & Express Web App',
        isAuthenticated: req.session.isAuthenticated,
        username: req.session.account?.username,
    });
});

module.exports = router;
- Finally, update the users.js route by replacing the existing code with the following code snippet:
/*
 * Copyright (c) Microsoft Corporation. All rights reserved.
 * Licensed under the MIT License.
 */

var express = require('express');
var router = express.Router();

var fetch = require('../fetch');

var { GRAPH_ME_ENDPOINT } = require('../authConfig');

// custom middleware to check auth state
function isAuthenticated(req, res, next) {
    if (!req.session.isAuthenticated) {
        return res.redirect('/auth/signin'); // redirect to sign-in route
    }

    next();
};

router.get('/id',
    isAuthenticated, // check if user is authenticated
    async function (req, res, next) {
        res.render('id', { idTokenClaims: req.session.account.idTokenClaims });
    }
);

router.get('/profile',
    isAuthenticated, // check if user is authenticated
    async function (req, res, next) {
        try {
            const graphResponse = await fetch(GRAPH_ME_ENDPOINT, req.session.accessToken);
            res.render('profile', { profile: graphResponse });
        } catch (error) {
            next(error);
        }
    }
);

module.exports = router;
Add code for calling the Microsoft Graph API
Create a file named fetch.js in the root of your project and add the following code:
/*
 * Copyright (c) Microsoft Corporation. All rights reserved.
 * Licensed under the MIT License.
 */

var axios = require('axios');

/**
 * Attaches a given access token to a MS Graph API call
 * @param endpoint: REST API endpoint to call
 * @param accessToken: raw access token string
 */
async function fetch(endpoint, accessToken) {
    const options = {
        headers: {
            Authorization: `Bearer ${accessToken}`
        }
    };

    console.log(`request made to ${endpoint} at: ` + new Date().toString());

    try {
        const response = await axios.get(endpoint, options);
        return await response.data;
    } catch (error) {
        throw new Error(error);
    }
}

module.exports = fetch;
Add views for displaying data
- In the views folder, update the index.hbs file by replacing the existing code with the following:
<h1>{{title}}</h1>
{{#if isAuthenticated }}
<p>Hi {{username}}!</p>
<a href="/users/id">View ID token claims</a>
<br>
<a href="/auth/acquireToken">Acquire a token to call the Microsoft Graph API</a>
<br>
<a href="/auth/signout">Sign out</a>
{{else}}
<p>Welcome to {{title}}</p>
<a href="/auth/signin">Sign in</a>
{{/if}}
- Still in the same folder, create another file named id.hbs for displaying the contents of user's ID token:
<h1>Azure AD</h1>
<h3>ID Token</h3>
<table>
    <tbody>
        {{#each idTokenClaims}}
        <tr>
            <td>{{@key}}</td>
            <td>{{this}}</td>
        </tr>
        {{/each}}
    </tbody>
</table>
<br>
<a href="https://aka.ms/id-tokens" target="_blank">Learn about claims in this ID token</a>
<br>
<a href="/">Go back</a>
- Finally, create another file named profile.hbs for displaying the result of the call made to Microsoft Graph:
<h1>Microsoft Graph API</h1>
<h3>/me endpoint response</h3>
<table>
    <tbody>
        {{#each profile}}
        <tr>
            <td>{{@key}}</td>
            <td>{{this}}</td>
        </tr>
        {{/each}}
    </tbody>
</table>
<br>
<a href="/">Go back</a>
Register routers and add state management
In the app.js file in the root of the project folder, register the routes you've created earlier and add session support for tracking authentication state using the express-session package. Replace the existing code there with the following code snippet:
/*
 * Copyright (c) Microsoft Corporation. All rights reserved.
 * Licensed under the MIT License.
 */

require('dotenv').config();

var path = require('path');
var express = require('express');
var session = require('express-session');
var createError = require('http-errors');
var cookieParser = require('cookie-parser');
var logger = require('morgan');

var indexRouter = require('./routes/index');
var usersRouter = require('./routes/users');
var authRouter = require('./routes/auth');

// initialize express
var app = express();

/**
 * Using express-session middleware for persistent user session. Be sure to
 * familiarize yourself with available options. Visit: https://www.npmjs.com/package/express-session
 */
 app.use(session({
    secret: process.env.EXPRESS_SESSION_SECRET,
    resave: false,
    saveUninitialized: false,
    cookie: {
        httpOnly: true,
        secure: false, // set this to true on production
    }
}));

// view engine setup
app.set('views', path.join(__dirname, 'views'));
app.set('view engine', 'hbs');

app.use(logger('dev'));
app.use(express.json());
app.use(cookieParser());
app.use(express.urlencoded({ extended: false }));
app.use(express.static(path.join(__dirname, 'public')));

app.use('/', indexRouter);
app.use('/users', usersRouter);
app.use('/auth', authRouter);

// catch 404 and forward to error handler
app.use(function (req, res, next) {
    next(createError(404));
});

// error handler
app.use(function (err, req, res, next) {
    // set locals, only providing error in development
    res.locals.message = err.message;
    res.locals.error = req.app.get('env') === 'development' ? err : {};

    // render the error page
    res.status(err.status || 500);
    res.render('error');
});

module.exports = app;
Test sign in and call Microsoft Graph
You've completed creation of the application and are now ready to test the app's functionality.
- Start the Node.js console app by running the following command from within the root of your project folder:
npm start
- Open a browser window and navigate to
http://localhost:3000. You should see a welcome page:

- Select Sign in link. You should see the Microsoft Entra sign-in screen:
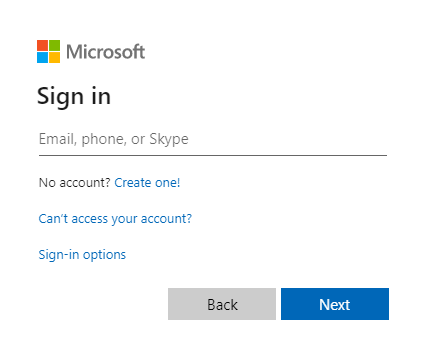
- Once you enter your credentials, you should see a consent screen asking you to approve the permissions for the app.
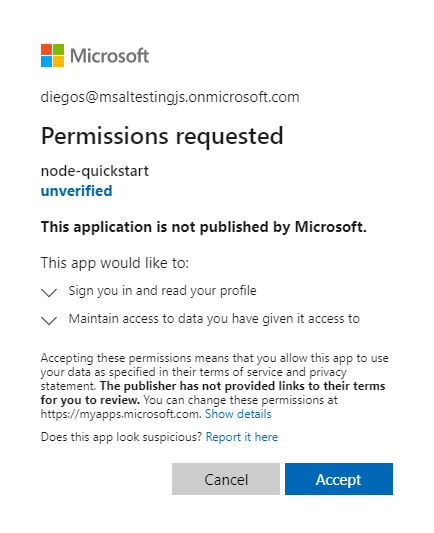
- Once you consent, you should be redirected back to application home page.
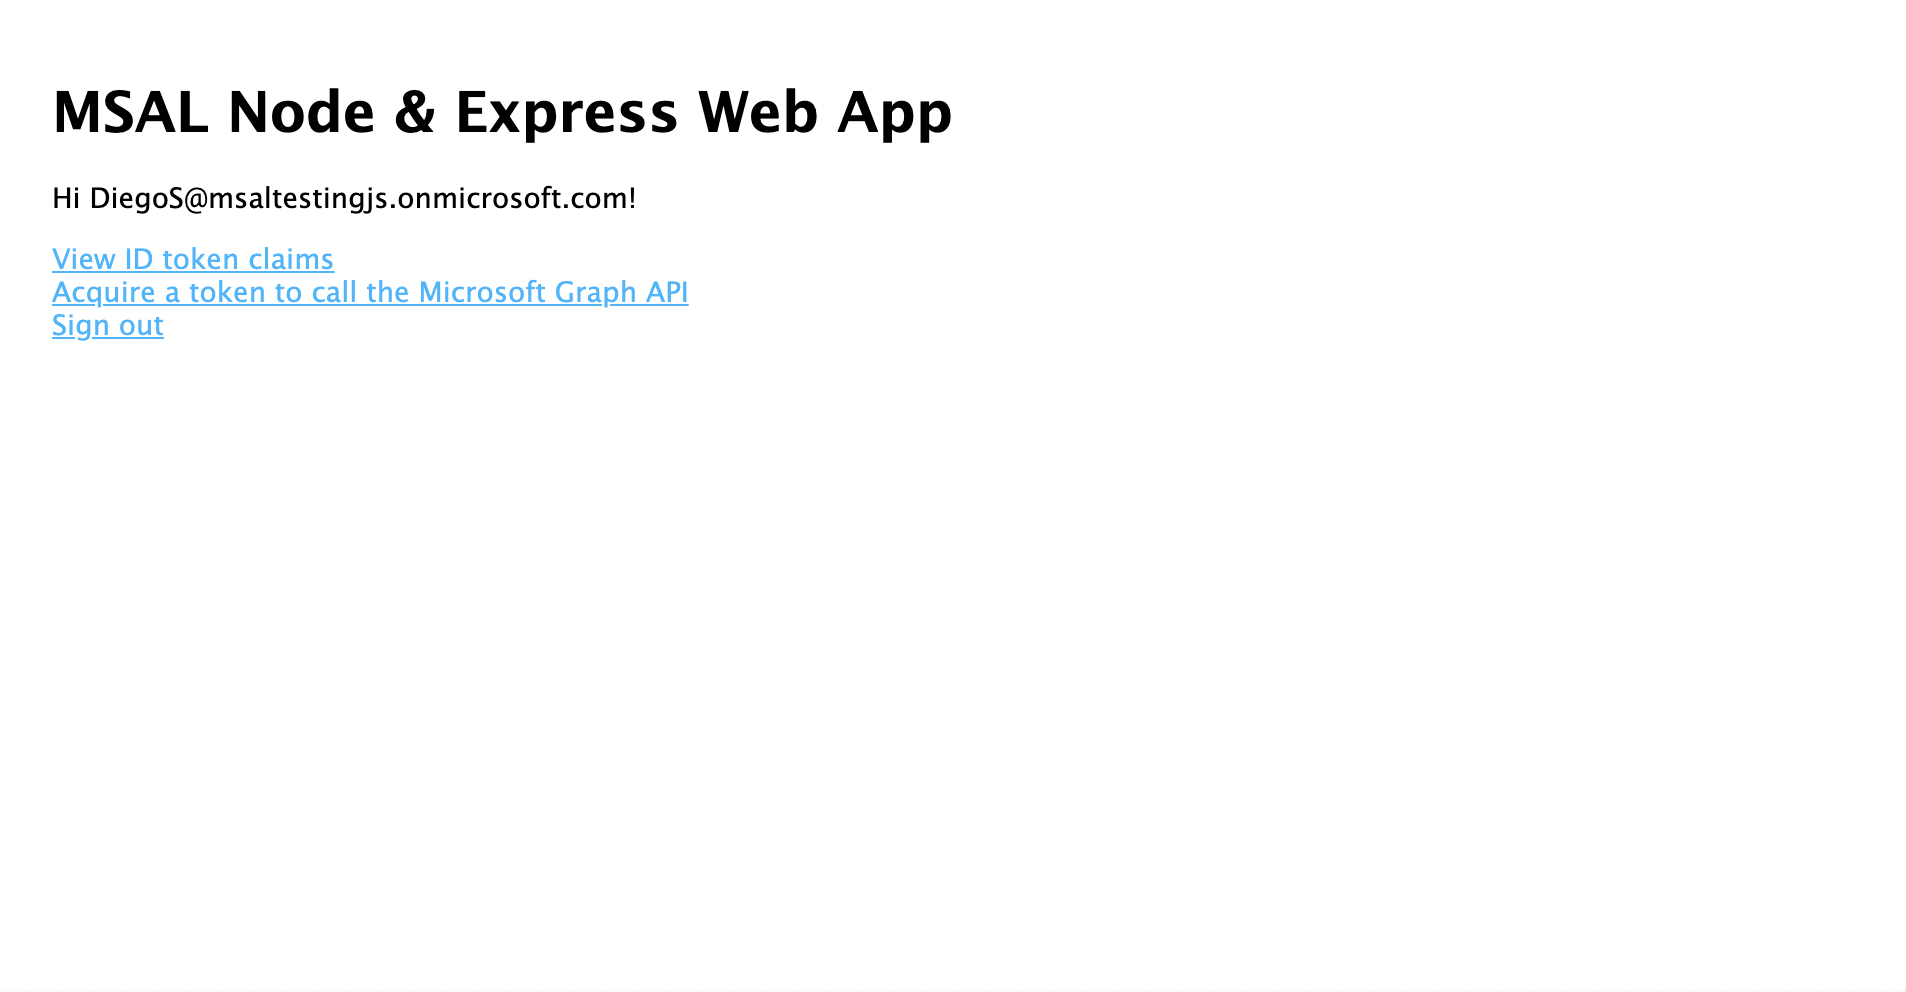
- Select the View ID Token link for displaying the contents of the signed-in user's ID token.
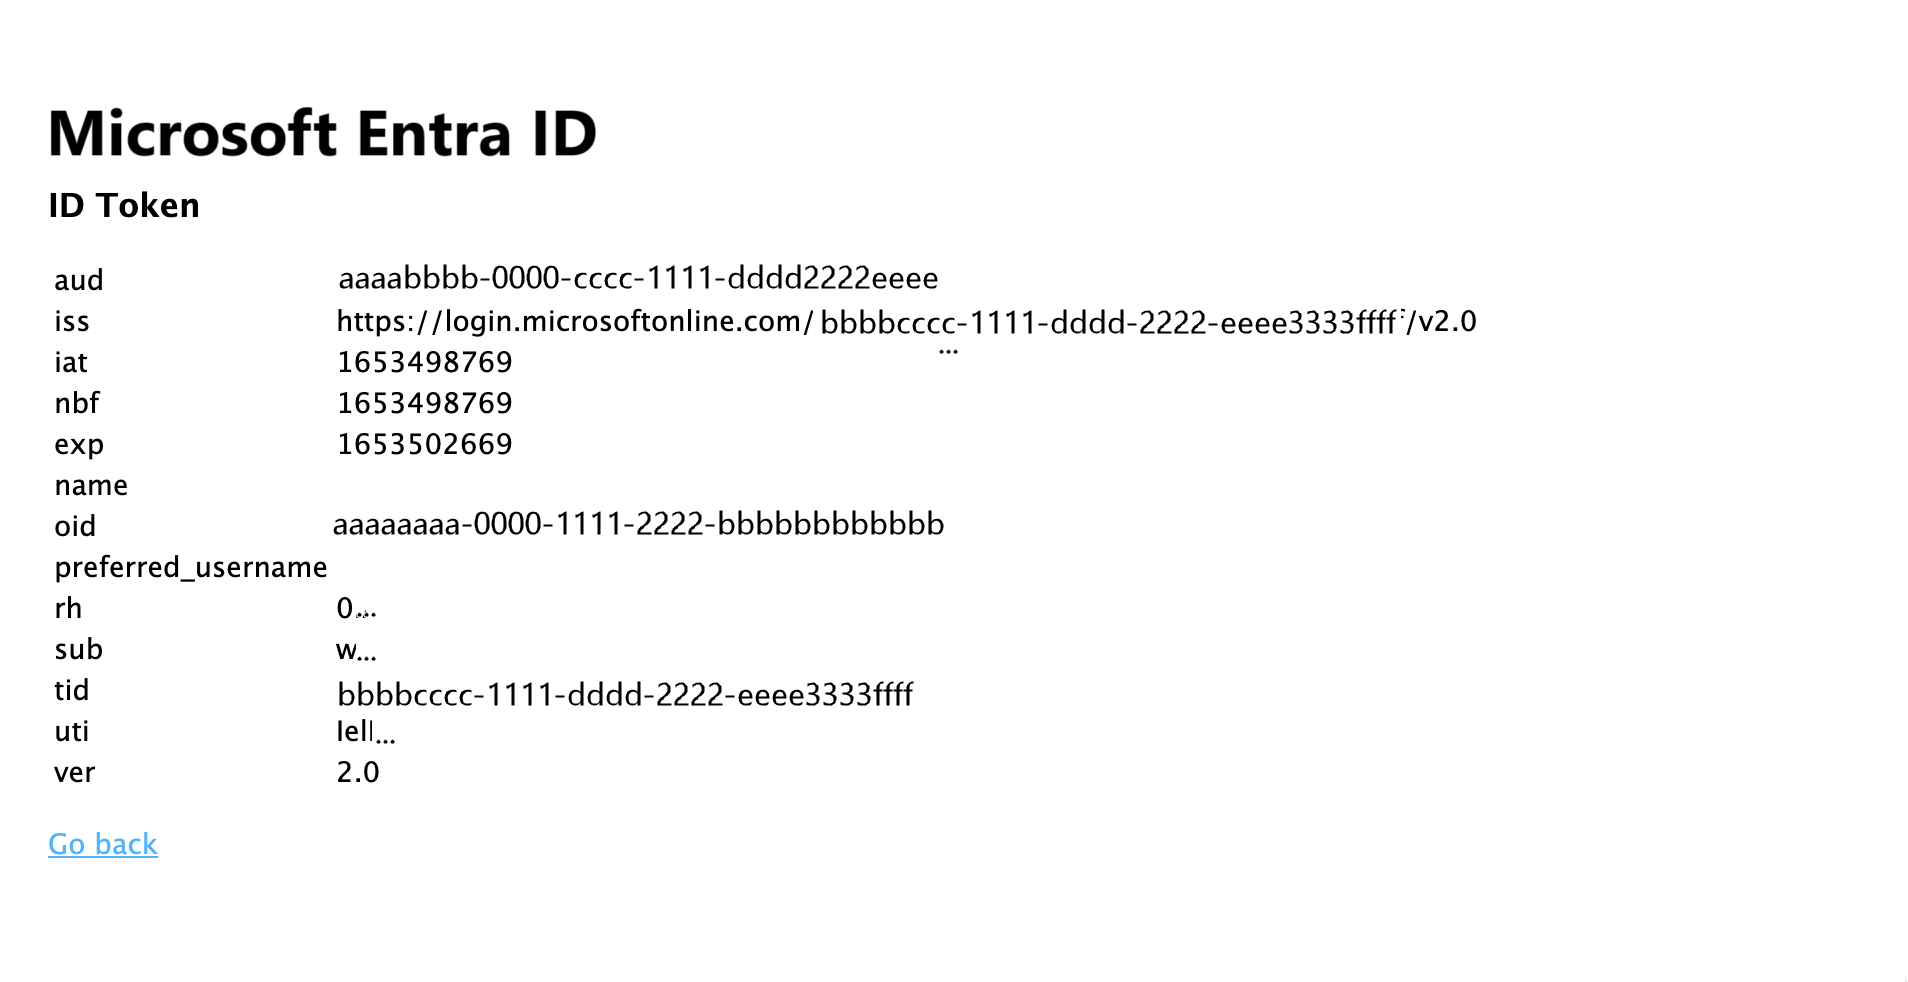
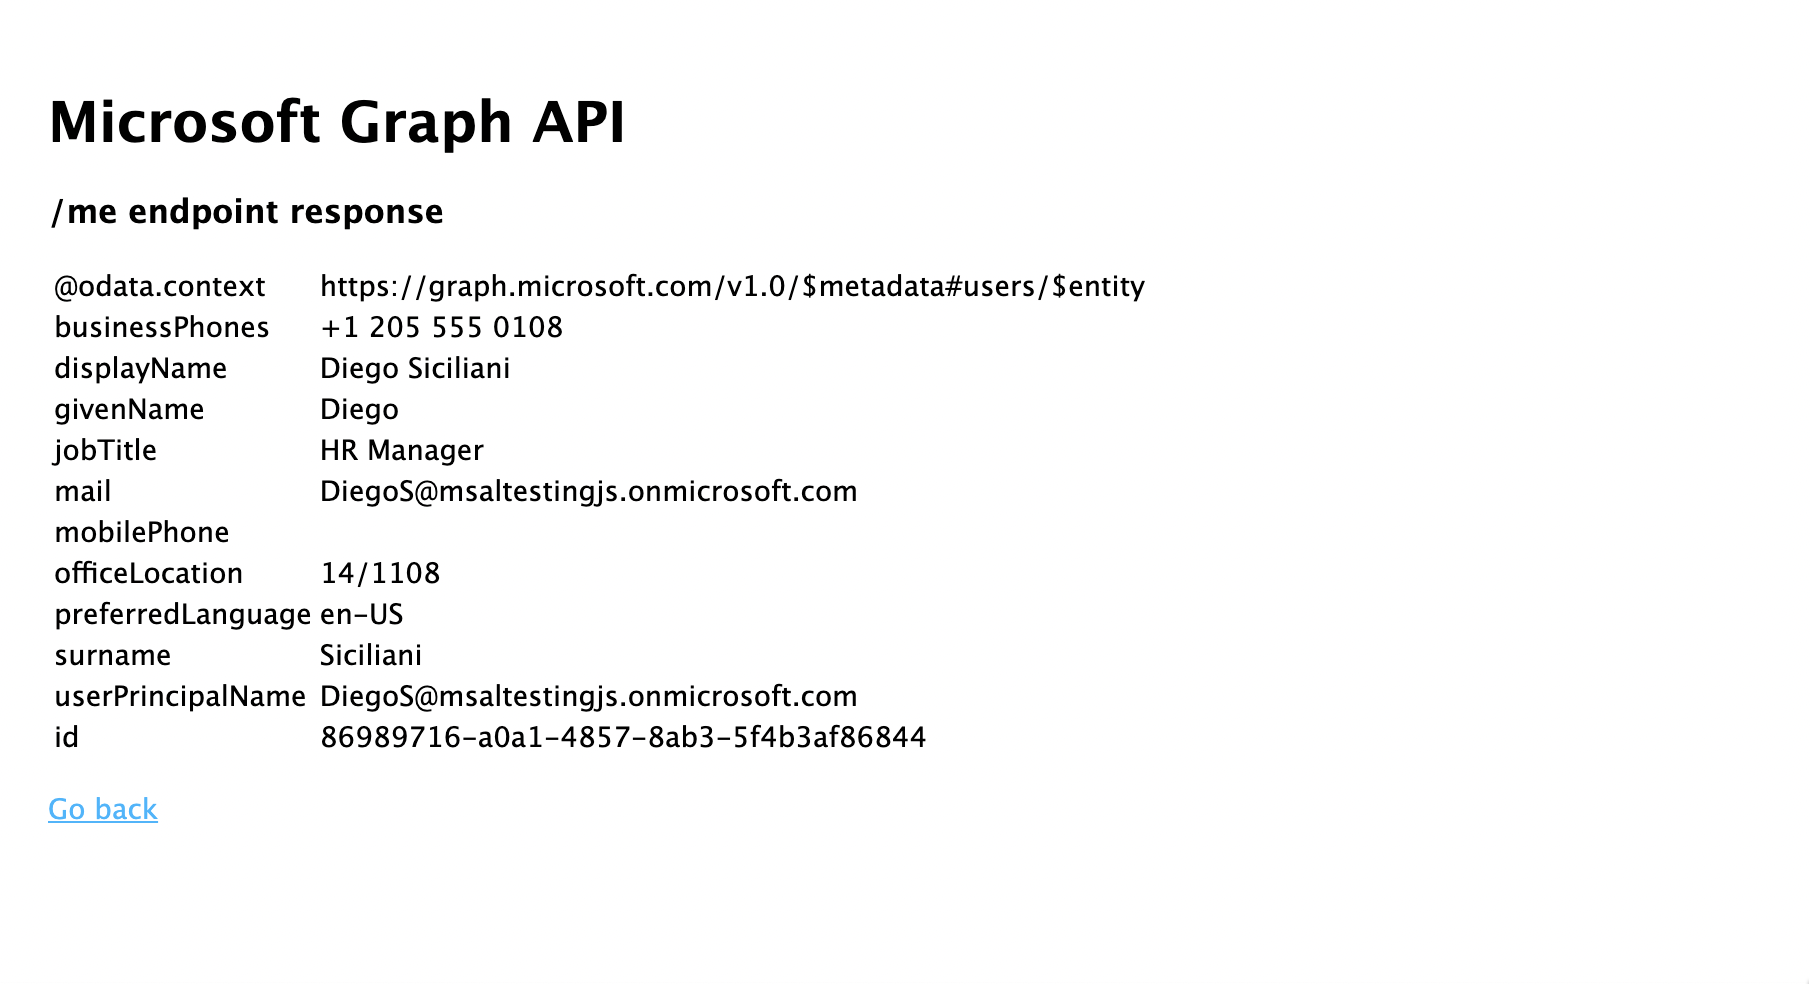
- Go back to the home page, and select the Acquire an access token and call the Microsoft Graph API link. Once you do, you should see the response from Microsoft Graph /me endpoint for the signed-in user.
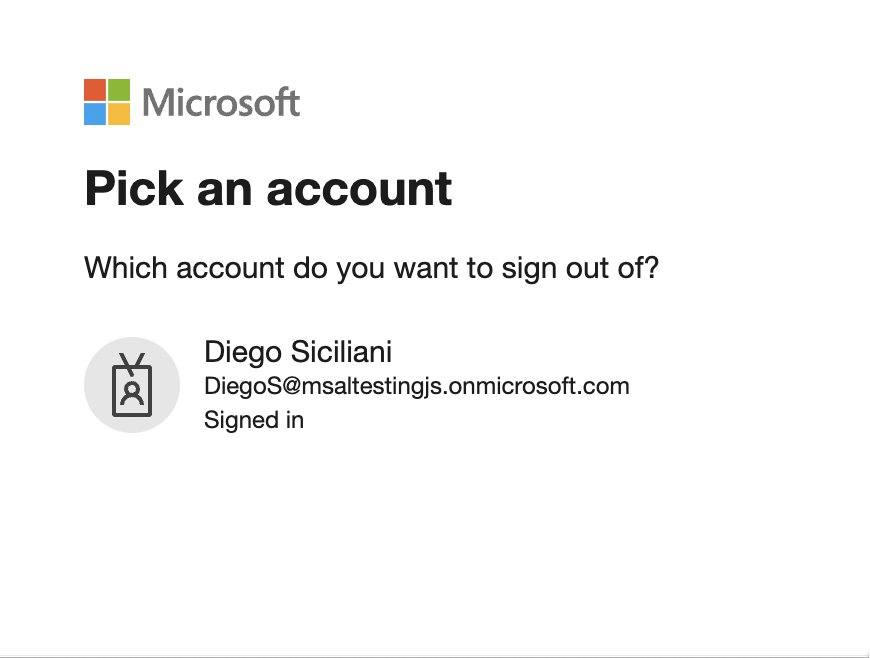
- Go back to the home page, and select the Sign out link. You should see the Microsoft Entra sign-out screen.
How the application works
In this tutorial, you instantiated an MSAL Node ConfidentialClientApplication object by passing it a configuration object (msalConfig) that contains parameters obtained from your Microsoft Entra app registration on Azure portal. The web app you created uses the OpenID Connect protocol to sign-in users and the OAuth 2.0 authorization code flow to obtain access tokens.
Next steps
If you'd like to dive deeper into Node.js & Express web application development on the Microsoft identity platform, see our multi-part scenario series: