Configure virtual health data tables
You can optimize your cloud hosting spend with the virtual health data tables feature in Microsoft Cloud for Healthcare. This feature helps you virtualize your clinical reference data and other healthcare data when using model-driven apps and other engagement solutions. Virtualizing your data eliminates the need for building expensive integrations. It prevents visualizing the same data-intensive tables multiple times across Microsoft and third-party applications such as electronic health record (EHR) systems.
Prerequisites
Virtual health data tables target core functionality in connecting Microsoft Cloud for Healthcare to external FHIR (Fast Healthcare Interoperability Resources) servers. This article assumes you have a FHIR server, and the November 2021 or a higher release of Microsoft Cloud for Healthcare. The article also assumes you've completed the following steps:
- Configure patients to flow into Dataverse using the data integration toolkit.
- Configure Azure Logic App with an HTTP trigger to ingest FHIR data into Dataverse healthcare APIs.
- Set up a managed identity in Azure (client ID and client secret) with permissions to the FHIR server.
- Configure the managed identity in the data integration toolkit.
- Set up the virtual data source attributes (FHIR Server URL, Auth, and Resource).
- Switch the Encounter and Observation data routes to virtual.
For more information about completing these steps, go to Overview of Dataverse healthcare APIs.
Implementation details
The tables that support virtual health data tables are configured to route to Dataverse by default. To switch the data store to virtual and route data requests to the FHIR server, follow these steps in the data integration toolkit:
Configure security roles for admins and virtual table users.
Assign the new Healthcare Virtual Tables Admin security role to the admins configuring the virtual tables. Make sure these admins also have the Sync admin for FHIR Config Administrator role, as explained in Data integration toolkit security roles.
Assign the new Healthcare Virtual Tables User security role to everyone who needs access to the virtual table entities.
Configure connectivity to the FHIR server with the following fields:
- Provider client ID and client secret
- Microsoft healthcare data source
Update data routes for the selected tables. Only the Observation and Encounter related tables are in scope for virtual health data tables. These records have read-only access.
Update FHIR server client ID and client secret
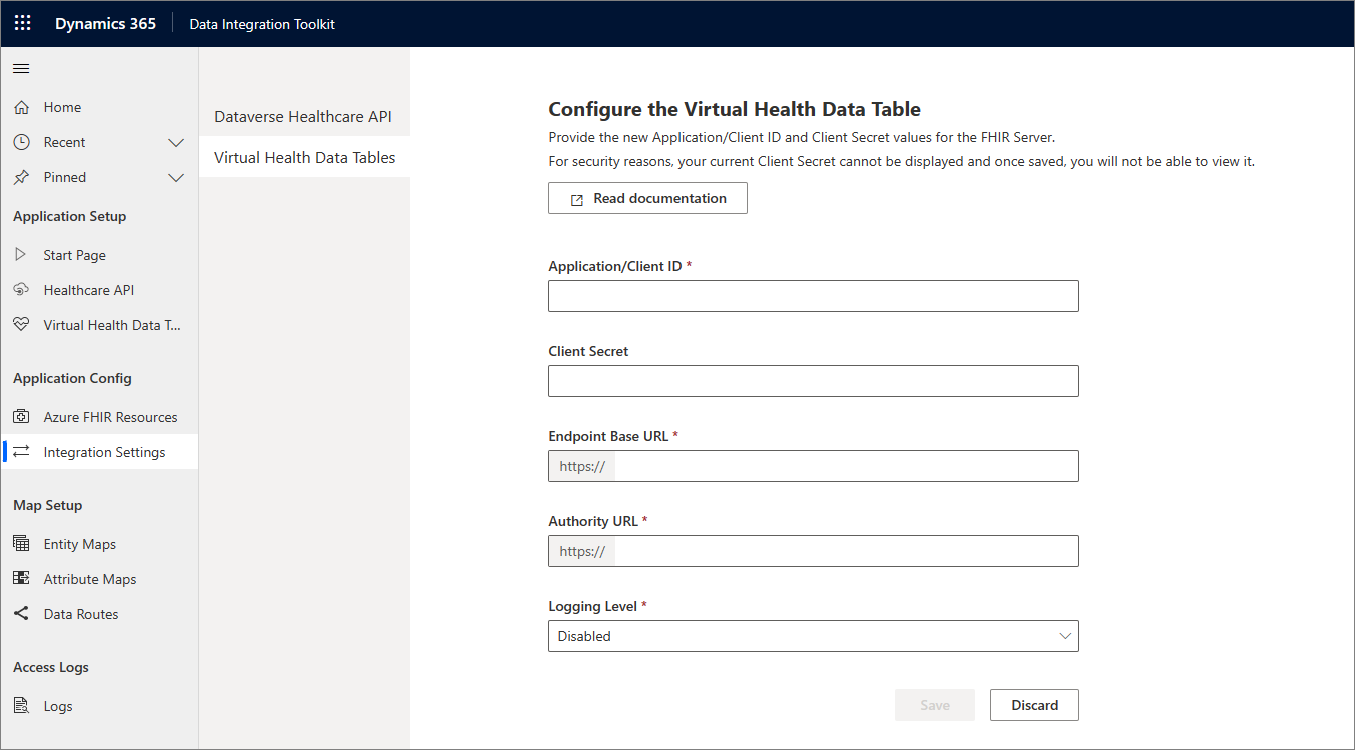
In the data integration toolkit, navigate to Integration settings, and select Virtual Health Data Tables.
Enter the Client ID and Client Secret for the FHIR server in the provided fields.
Enter the Server URL and Authority URL for the target FHIR server.
Select the desired value for Logging Level.
Select Save to commit your changes.
Follow the same steps to update a Client Secret when it expires or is newly generated.
Update data route to Dataverse or virtual
Data routes offer the ability to dynamically change the data provider for virtual tables. To switch the data route for tables from virtual to Dataverse or vice versa, perform the following steps:
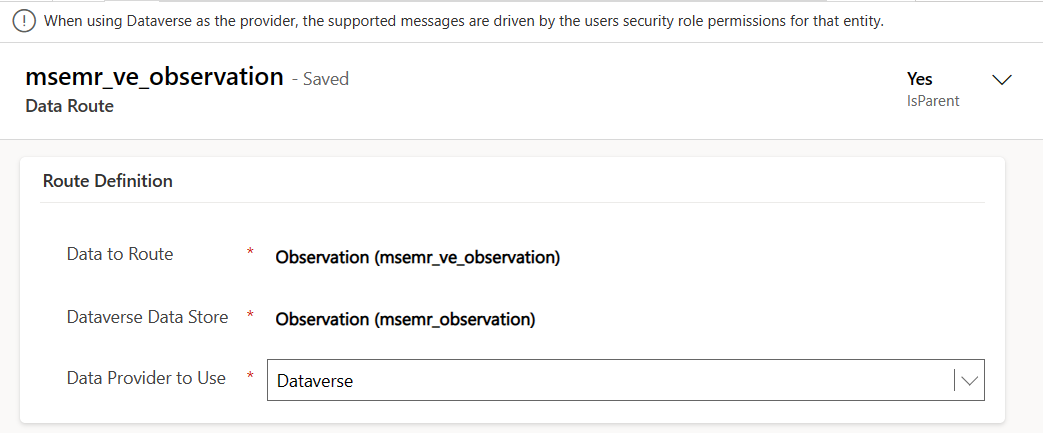
In the data integration toolkit, navigate to Data Routes under Map Setup.
Select one of the available data route records, such as Observation or Encounter, and select Edit.
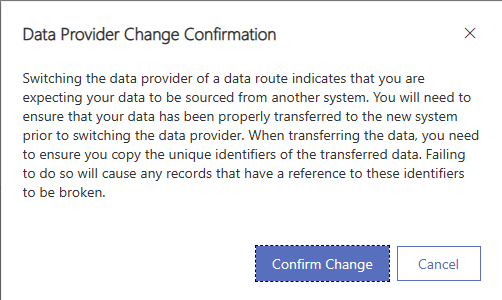
Change the value for the Data Provider to Use field. You receive a message prompt with a confirmation.
After you select Confirm Change on the message, you can select the entity map for this route.
This update also updates each data route for the corresponding expansion tables, and the correct entity map is assigned.
To validate your changes, change the navigation area to Healthcare Data and select the corresponding navigation item under Clinical Data for your selected virtual table. Based on your selection, the data presented in this view should now be sourced from either Dataverse or virtual.
For examples on virtual health data table capabilities, go to Use virtual health data tables.


