Trace generated report results and compare them with baseline values
You can trace the results of Electronic reporting (ER) formats that generate outgoing electronic documents. When trace generation is turned on (by using the Run in debug mode ER user parameter), a new trace record is generated in the ER format execution log every time that an ER report is run. The following details are stored in each trace that is generated:
- All warnings that were generated by validation rules
- All errors that were generated by validation rules
- All generated files that are stored as attachments of the trace record
You can store individual baseline application files for any ER format. Files are considered baseline files when they describe the expected results of reports that are run. If a baseline file is available for an ER format that is run while trace generation is turned on, the trace stores, in addition to the details that were mentioned earlier, the result of the comparison of the generated electronic document with the baseline file. In one click, you can also get the generated electronic document and its baseline file in a single zip file. You can then do detailed comparison by using an external tool such as WinDiff.
You can evaluate the trace to analyze whether the electronic documents that are generated include the expected content. You can do this evaluation in a user acceptance testing (UAT) environment when the code base has been changed (for example, when you migrated to a new instance of the application, installed hotfix packages, or deployed code modifications). In this way, you can make sure that the evaluation doesn't affect the execution of ER reports that are used. For many ER reports, the evaluation can be done in unattended mode.
To learn more about this feature, play the ER Generate reports and compare results (Part 1) and ER Generate reports and compare results (Part 2) task guides, which are part of the 7.5.4.3 Test IT services/solutions (10679) business process and can be downloaded from the Microsoft Download Center. These task guides walk you through the process of configuring the ER framework to use baseline files to evaluate generated electronic documents.
Example: Trace generated report results and compare them with baseline values
This procedure explains how to configure the ER framework to collect information about ER format executions and then evaluate the results of those executions. As part of that evaluation, generated documents are compared with their baseline files. In this example, you will create the required ER configurations for the Litware, Inc. sample company. This procedure is intended for users who have the System administrator or Electronic reporting developer role assigned to them. These steps can be completed by using any data set.
To complete the steps in this example, you must first complete the steps in Create configuration providers and mark them as active.
- Go to Organization administration > Workspaces > Electronic reporting.
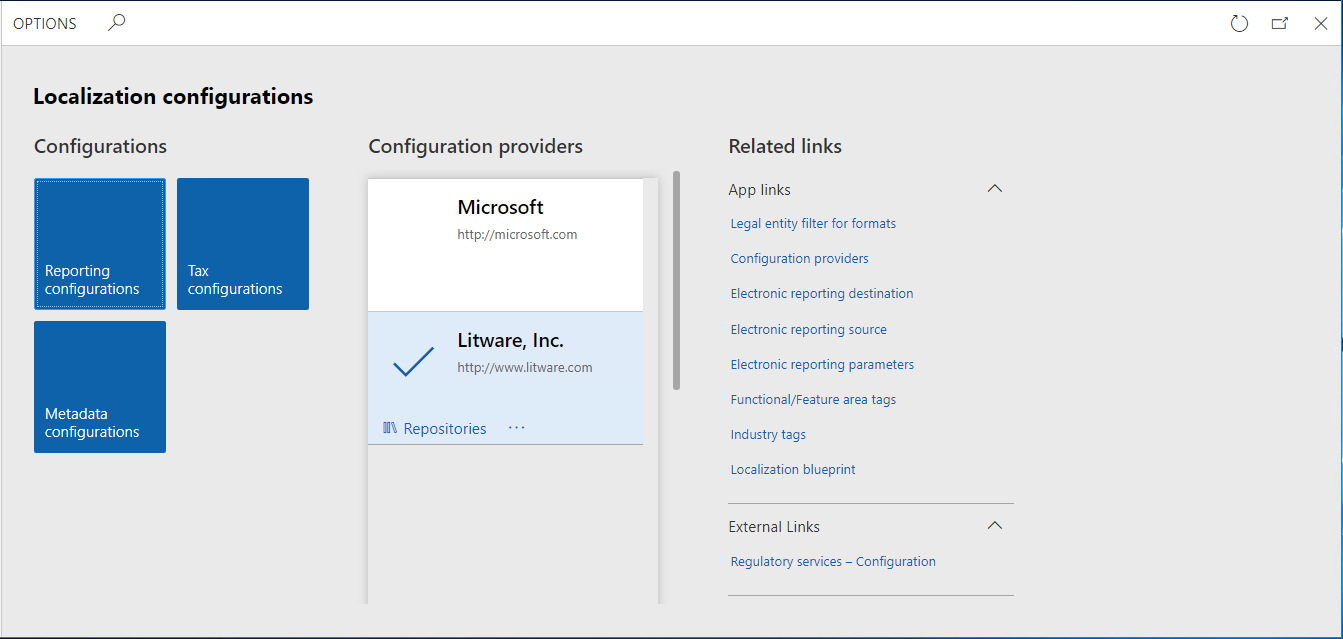
- On the Localization configurations page, in the Configuration providers section, verify that the configuration provider for the Litware, Inc. sample company is listed, and that it's marked as Active. If you don't see this configuration provider, follow the steps in Create configuration providers and mark them as active.
Configure document management parameters
- Go to Organization administration > Document management > Document types, and create a new document type to store baseline files.
- In the Class field, enter Attach file.
- In the Group field, enter File.

Note
A new document type that has the same name must be configured for each data set where you plan to use the ER baseline feature.
Configure ER parameters to start to use the baseline feature
In the Electronic reporting workspace, in the Related links section, select Electronic reporting parameters.
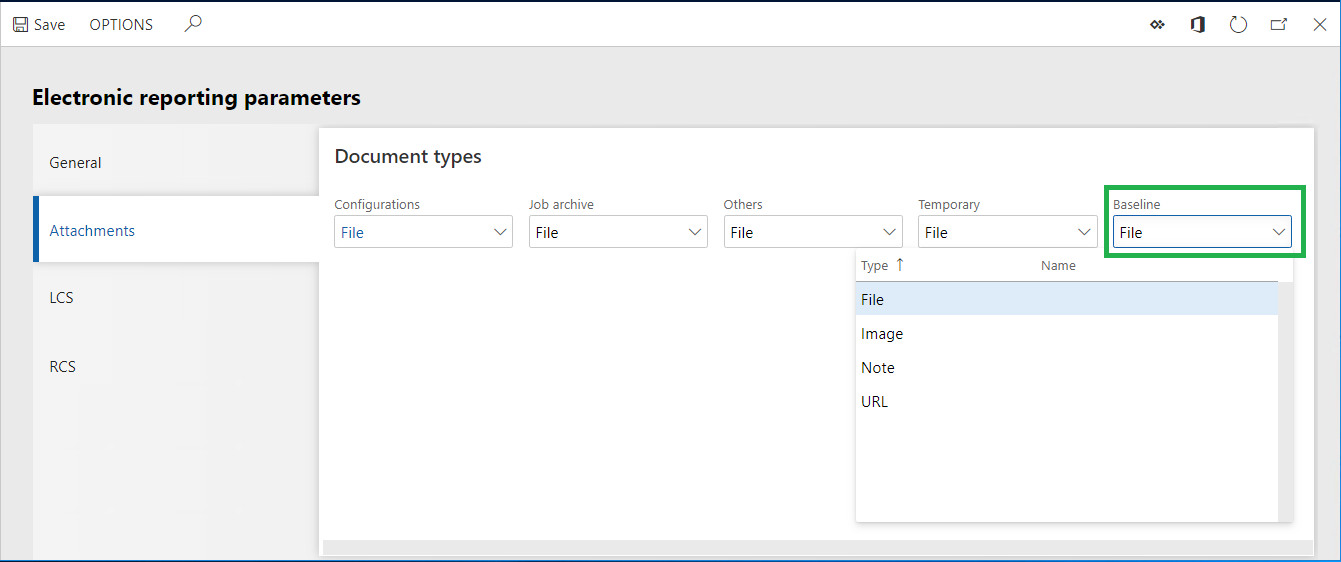
On the Attachments tab, in the Baseline field, enter or select the document type that you just created.
Select Save, and then close the Electronic reporting parameters page.
Add a new ER model configuration
- In the Electronic reporting workspace, in the Configurations section, select the Reporting configurations tile.
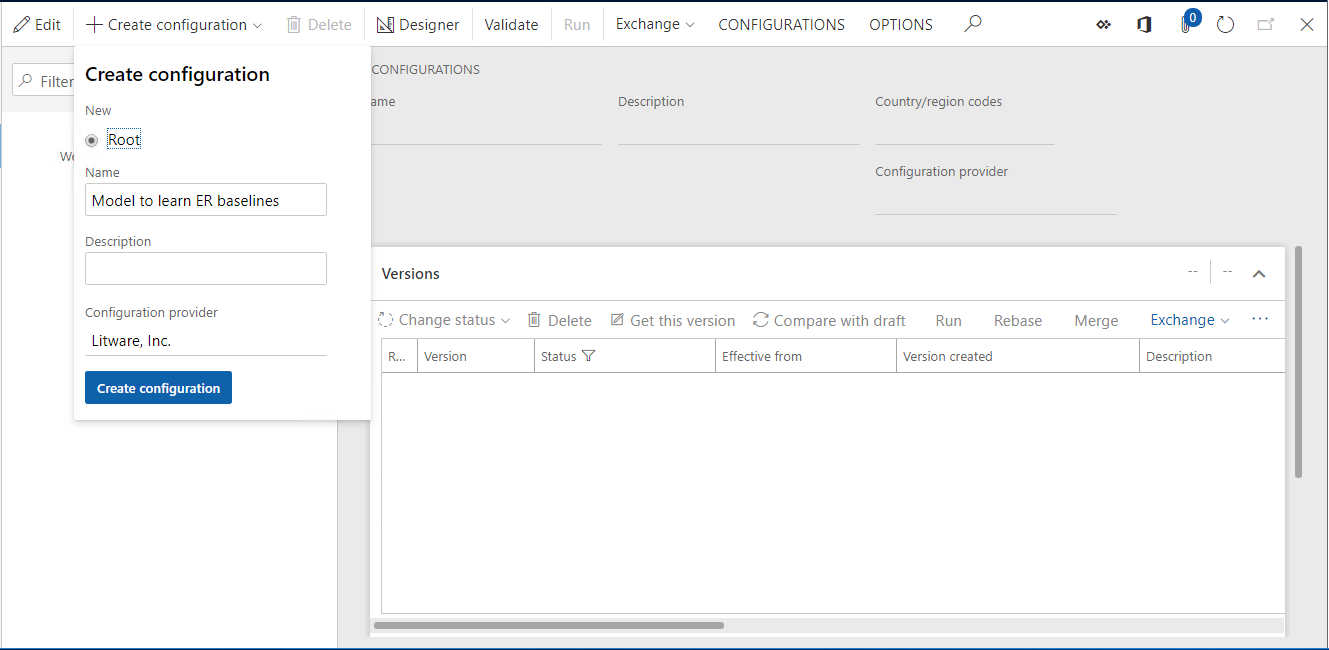
- On the Action Pane, select Create configuration.
- In the drop-down dialog box, in the Name field, enter Model to learn ER baselines.
- Select Create configuration to confirm the creation of a new ER data model entry.
Design a data model
- On the Configurations page, on the Action Pane, select Designer.
- Select New.
- In the drop-down dialog box, in the Name field, enter Root.
- Select Add.
- Select Root reference.
- Select OK, and then select Save.
- Close the Model designer page.
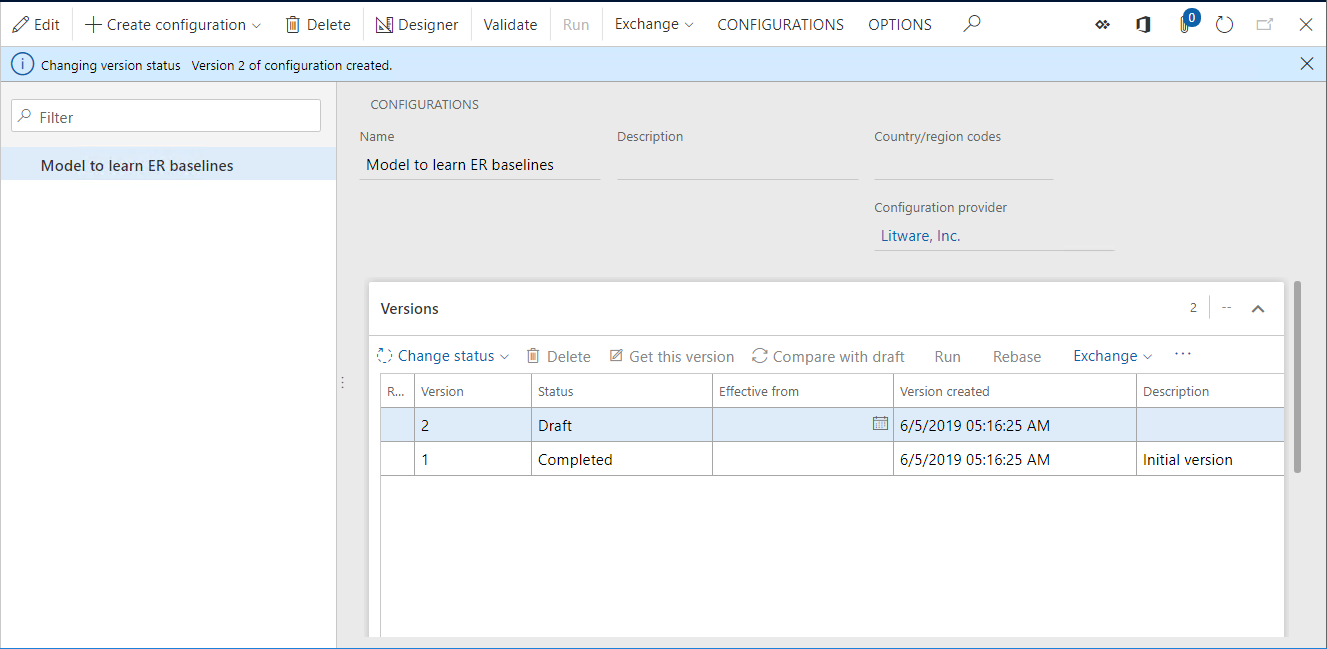
- Select Change status.
- Select Complete, and then select OK.
Add a new ER format configuration
- On the Configurations page, on the Action Pane, select Create configuration.
- In the drop-down dialog box, in the New field group, select Format based on data model Model to learn ER baselines.
- In the Name field, enter Format to learn ER baselines.
- Select Create configuration to confirm the creation of a new ER format entry.
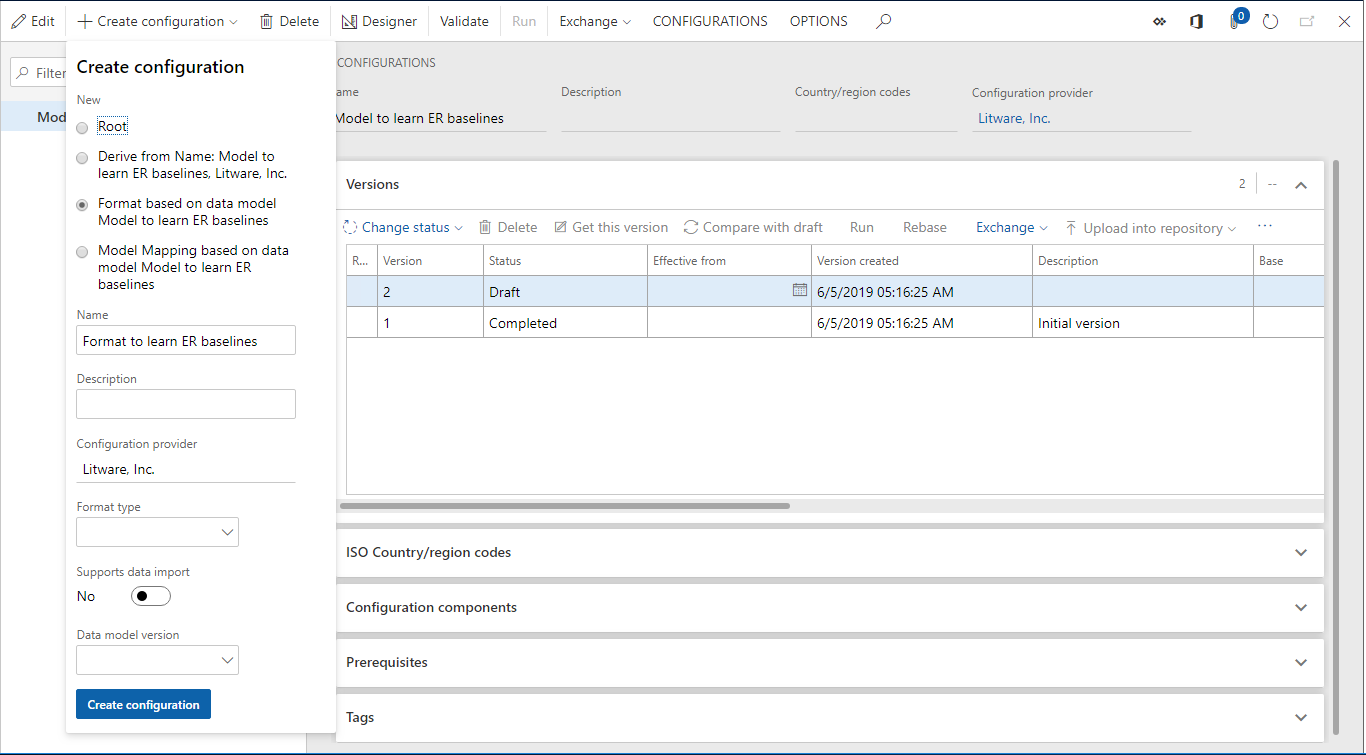
Design a format
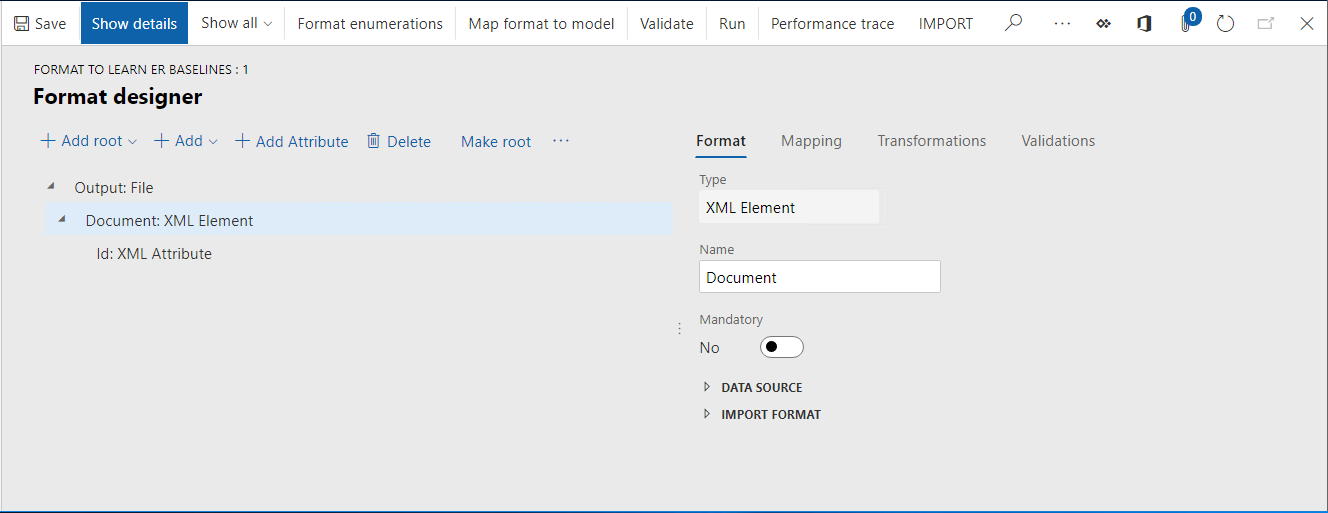
For this example, you will create a simple ER format to generate XML documents.
On the Configurations page, on the Action Pane, select Designer.
Select Add root.
In the drop-down dialog box, follow these steps:
- In the tree, select Common\File.
- In the Name field, enter Output.
- Select OK.
Select Add.
In the drop-down dialog box, follow these steps:
- In the tree, select XML\Element.
- In the Name field, enter Document.
- Select OK.
In the tree, select Output\Document.
Select Add.
In the drop-down dialog box, follow these steps:
- In the tree, select XML\Attribute.
- In the Name field, enter ID.
- Select OK.
On the Mapping tab, select Delete.
Select Add root.
In the drop-down dialog box, in the tree, select General\User input parameter, and then follow these steps:
- In the Name field, enter ID.
- In the Label field, enter Enter ID.
- Select OK.
In the tree, select Output\Document\Id.
Select Bind, and then select Save.
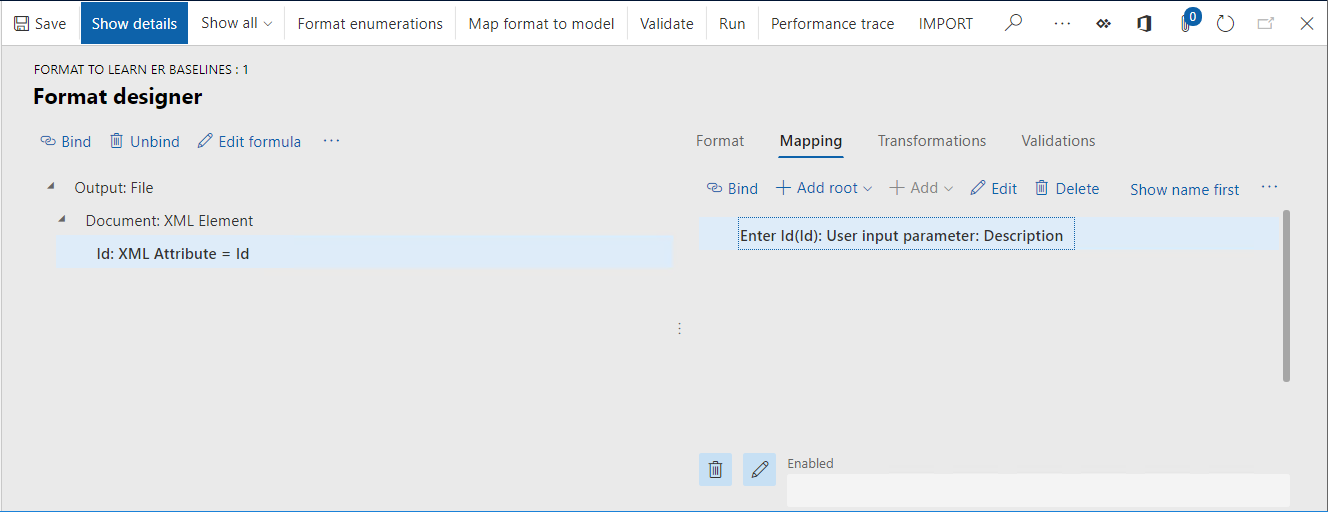
Based on the designed structure, the configured format will generate an XML file. This XML contains the Root element that has the ID attribute that is set to the value that the user enters in the ER runtime dialog box.
Generate a new baseline file for a designed ER format
On the Configurations page, on the Versions FastTab, select Run.
In the Enter ID field, enter 1.
Select OK.
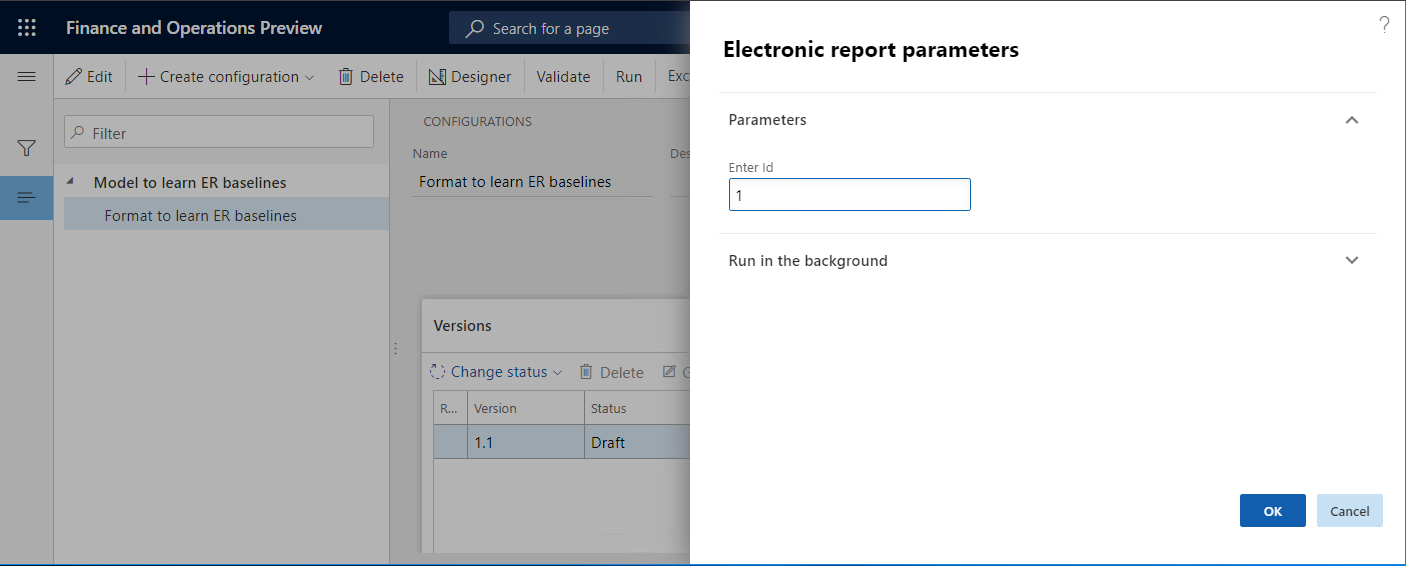
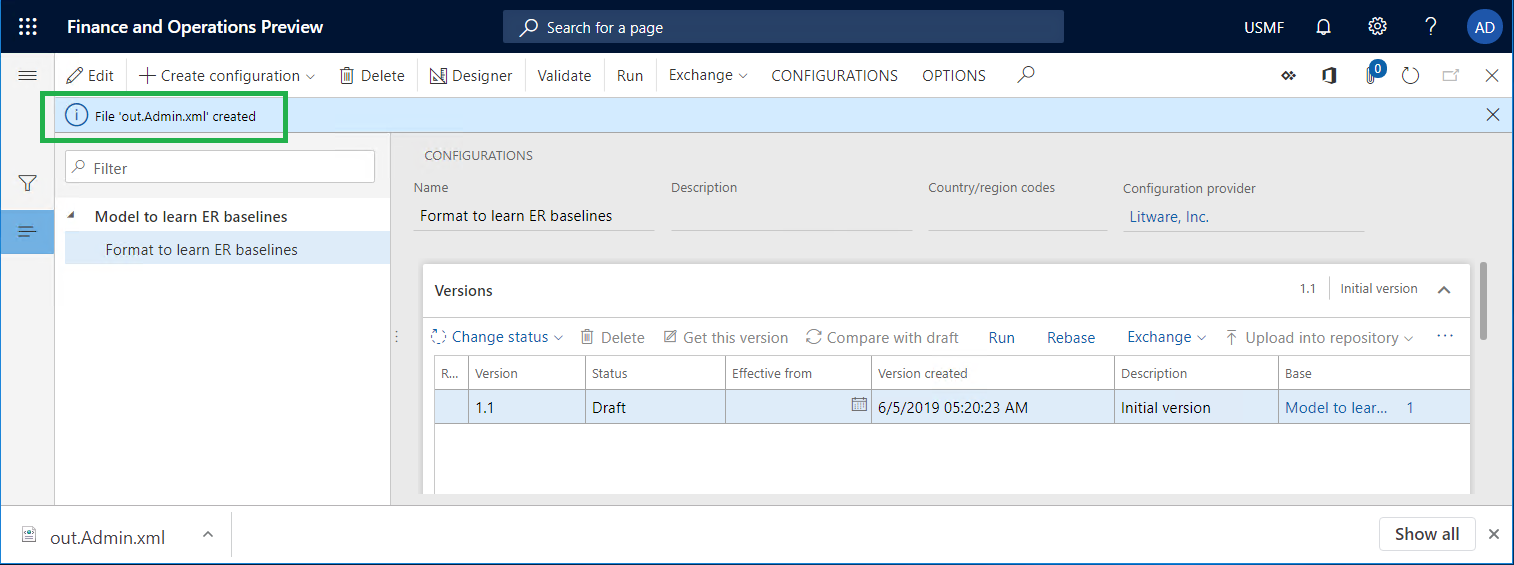
Save a local copy of the out.Admin.xml file that is generated, so that you can use it later as a baseline for this ER format.
Configure ER parameters to use the baseline feature
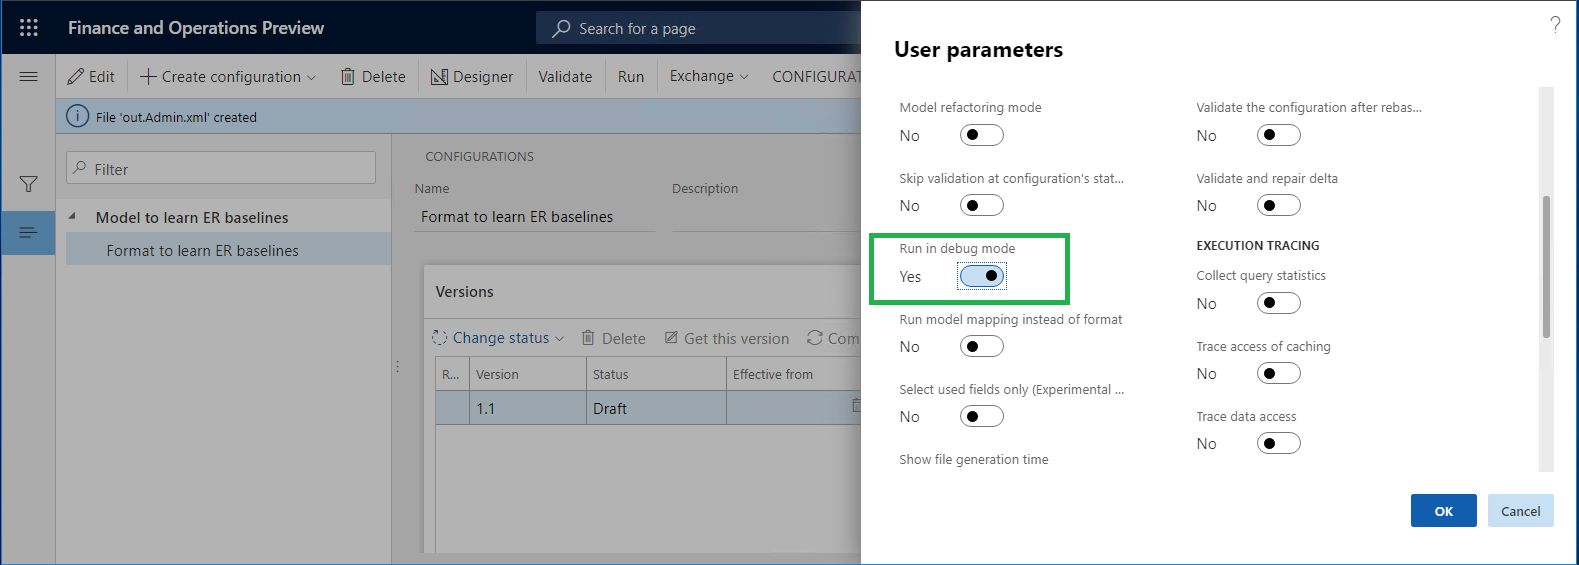
- On the Configurations page, on the Action Pane, on the Configurations tab, select User parameters.
- Set the Run in debug mode option to Yes.
- Select OK.
Add a new baseline for designed ER format
Go to Organization administration > Electronic reporting > Configurations.
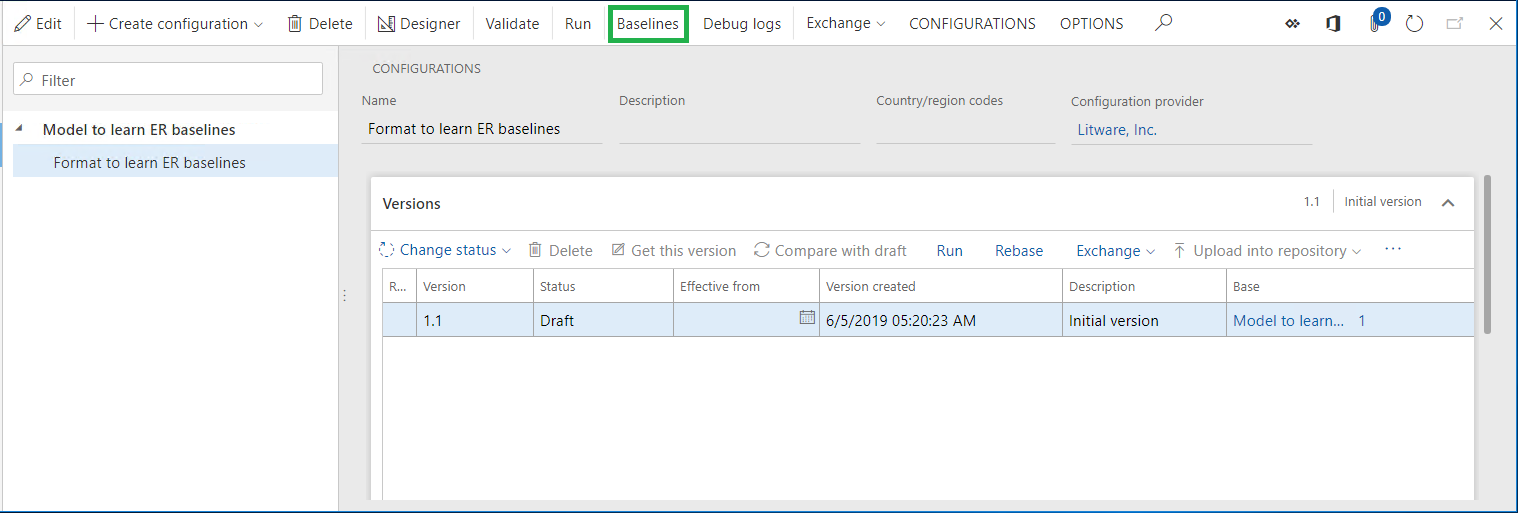
On the Action Pane, select Baselines.
On the Action Pane, select New.
Select the Format to learn ER baselines ER format that you designed earlier.
Select Save.
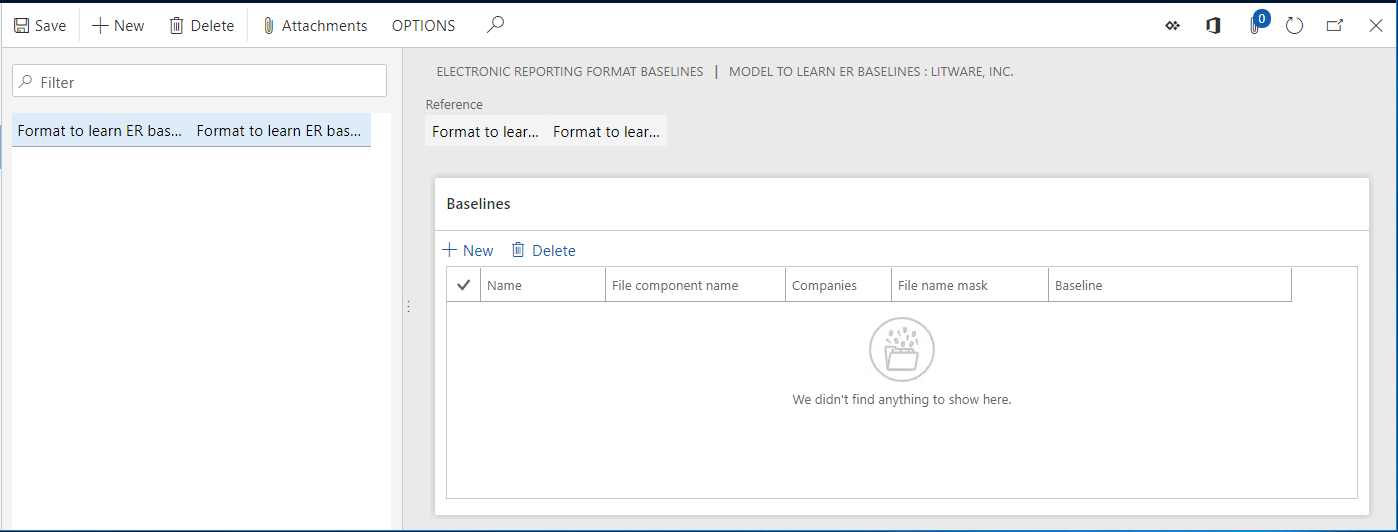
The baseline is added for the Format to learn ER baselines format.
Configure a baseline rule for the added baseline
On the Electronic reporting format baselines page, on the Action Pane, select the Attachments button (the paper clip symbol).
On the Action Pane, select New > File. In the ER parameters, the File document type should have been previously selected as the document type that is used to store baseline files.
Select Browse, and select the out.Admin.xml file that was generated when you ran the configured ER format earlier.
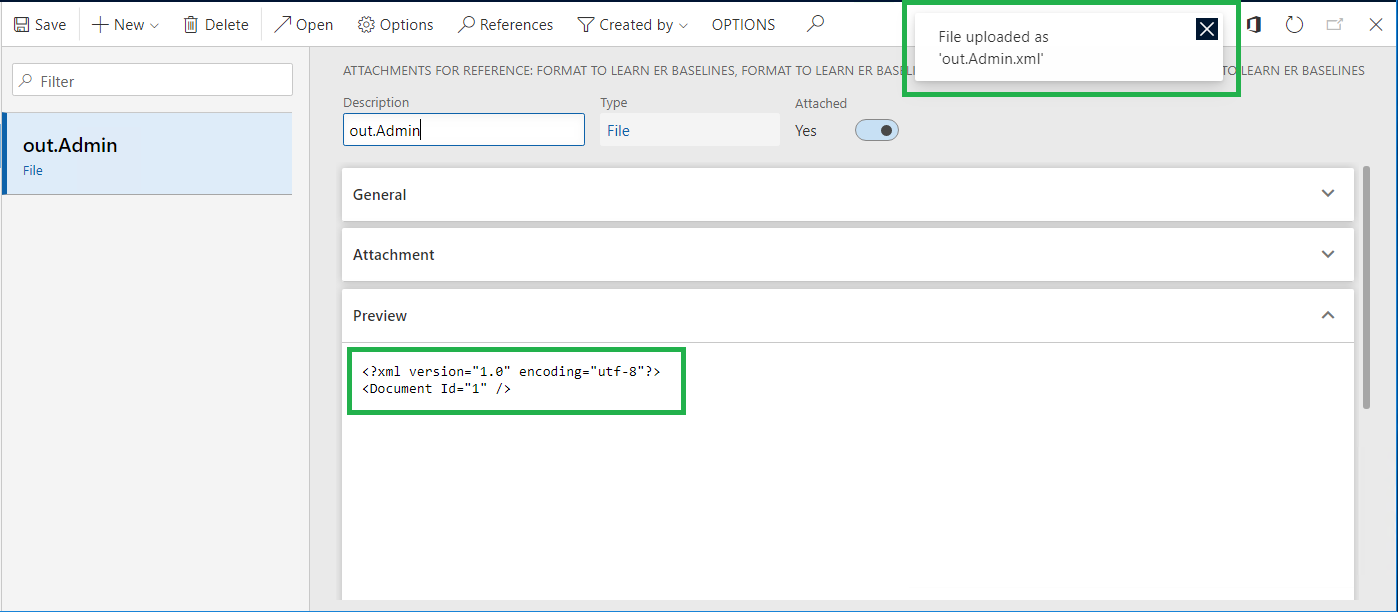
Close the Attachments page.
On the Baselines FastTab, select New.
In the Name field, enter Baseline 1.
In the File component name field, enter or select Output. This value indicates that the configured baseline will be compared with a file that is generated by using the Output format element.
In the File name mask field, enter *.xml.
Note
You can define the file name mask. When the file name mask is defined, the baseline record will be used to evaluate the generated output only when the name of the output file that is generated satisfies that mask.
If the configured baseline should be used only when the Format to learn ER baselines ER format is run by users who are signed in to specific companies, select those companies in the Companies field.
In the Baseline field, enter or select the out.Admin attachment.
Select Save.
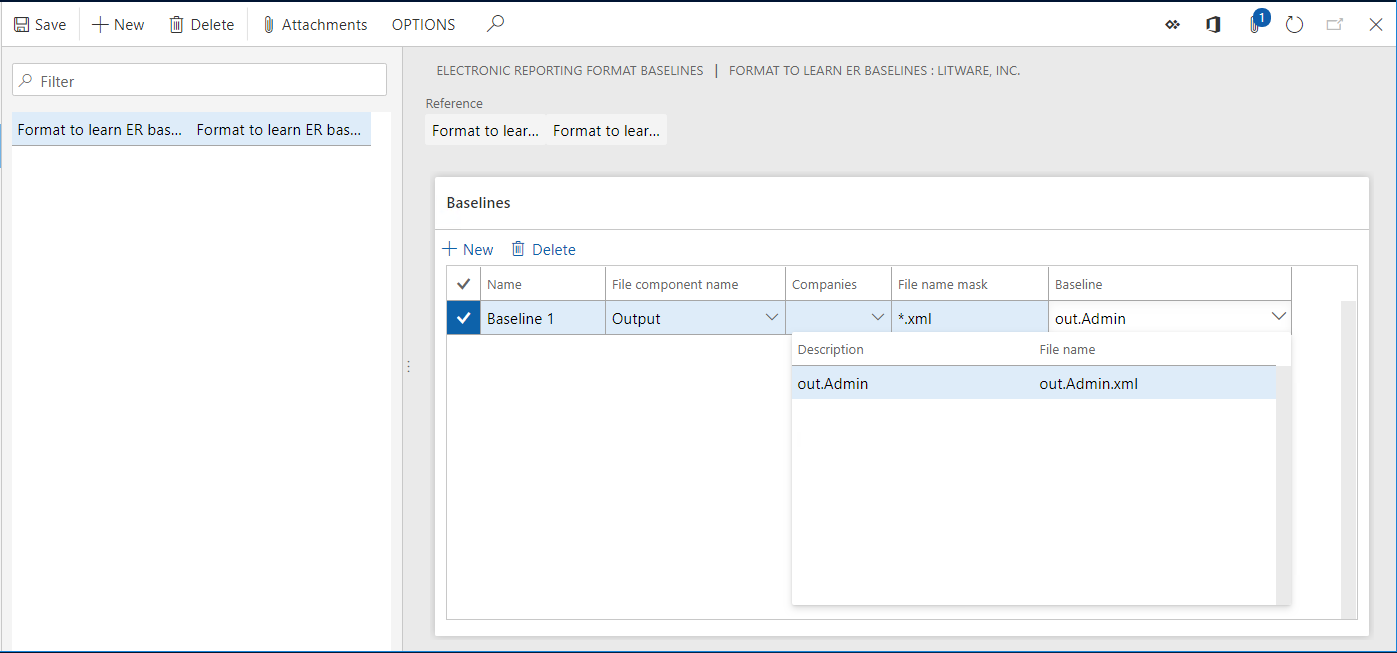
Run the designed ER format and review the log to analyze the results
Go to Organization administration > Electronic reporting > Configurations.
In the tree, expand Model to learn ER baselines, and then select Model to learn ER baselines\Format to learn ER baselines.
On the Versions FastTab, select Run.
In the Enter ID field, enter 1.
Select OK.
Go to Organization administration > Electronic reporting > Configuration debug logs.

Note
The execution log contains information about the results of the comparison of the generated file with the configured baseline. In this example, the log indicates that the generated file and the baseline are equal.
Select Delete all.
Run the designed ER format and review the log to analyze the results
Go to Organization administration > Electronic reporting > Configurations.
In the tree, expand Model to learn ER baselines, and then select Model to learn ER baselines\Format to learn ER baselines.
On the Versions FastTab, select Run.
In the Enter ID field, enter 2.
Select OK.
Go to Organization administration > Electronic reporting > Configuration debug logs.

Note
The execution log contains information about the results of the comparison of the generated file with the configured baseline. In this example, the log indicates that the generated file and the baseline differ.
Select Compare.
Note
The generated file and the baseline file are offered as a zip file. You can use external comparison tools such as WinDiff to compare the files and review the differences.