Azure Virtual Machines disaster recovery - High Churn support
Azure Site Recovery supports churn (data change rate) up to 100 MB/s per virtual machine. You'll be able to protect your Azure virtual machines having high churning workloads (like databases) using the High Churn option in Azure Site Recovery, which supports churn up to 100 MB/s per virtual machine. You may be able to achieve better Recovery Point Objective performance for your high churning workloads. With the default Normal Churn option, you can support churn only up to 54 MB/s per virtual machine.
Limitations
- Available only for disaster recovery of Azure virtual machines.
- Virtual machine SKUs with RAM of min 32 GB are recommended.
- Source disks must be Managed Disks.
Note
This feature is available in all regions where Azure Site Recovery is supported and Premium Blob storage accounts are available. When using High Churn with any other regions outside the supported regions, replication and/or reprotection may fail.
Data change limits
- These limits are based on our tests and don't cover all possible application I/O combinations.
- Actual results may vary based on your app I/O mix.
- There are two limits to consider:
- per disk data, churn
- per virtual machine data churn.
- Limit per virtual machine data churn - 100 MB/s.
The following table summarizes Site Recovery limits:
| Replica Disk type | Avg I/O Size | Avg Churn Supported |
|---|---|---|
| Standard | 8 KB | 2 MB/s |
| Standard | 16 KB | 4 MB/s |
| Standard | 24 KB | 6 MB/s |
| Standard | 32 KB and later | 8 MB/s |
| Premium SSD with disk size 128 GiB or more | 8 KB | 10 MB/s |
| Premium SSD with disk size 128 GiB or more | 16 KB | 20 MB/s |
| Premium SSD with disk size 128 GiB or more | 24 KB and later | 30 MB/s |
| Premium SSD with disk size 512 GiB or more | 8 KB | 10 MB/s |
| Premium SSD with disk size 512 GiB or more | 16 KB | 20 MB/s |
| Premium SSD with disk size 512 GiB or more | 24 KB and later | 30 MB/s |
| Premium SSD with disk size 1TiB or more | 8 KB | 20 MB/s |
| Premium SSD with disk size 1TiB or more | 16 KB | 35 MB/s |
| Premium SSD with disk size 1TiB or more | 24 KB and later | 50 MB/s |
How to enable High Churn support
From Recovery Service Vault
Select source virtual machines on which you want to enable replication. To enable replication, follow the steps here.
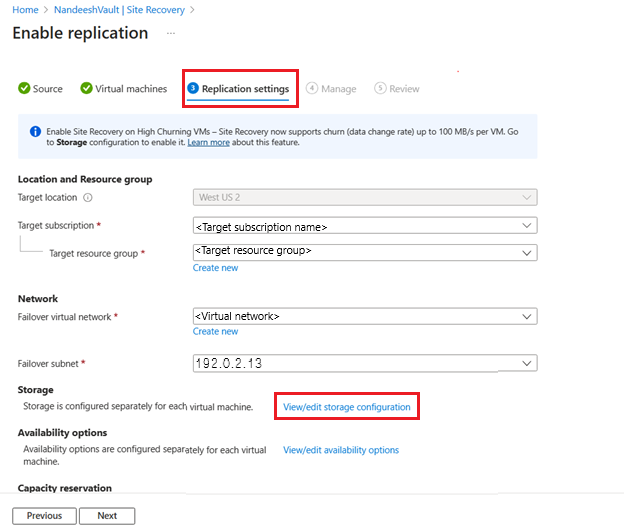
Under Replication Settings > Storage, select View/edit storage configuration. The Customize target settings page opens.
Under Churn for the VM, there are two options:
Normal Churn (this is the default option) - You can get up to 54 MB/s per virtual machine. Select Normal Churn to use Standard storage accounts only for Cache Storage. Hence, Cache storage dropdown lists only Standard storage accounts.
High Churn - You can get up to 100 MB/s per virtual machine. Select High Churn to use Premium Block Blob storage accounts only for Cache Storage. Hence, Cache storage dropdown lists only Premium Block blob storage accounts.
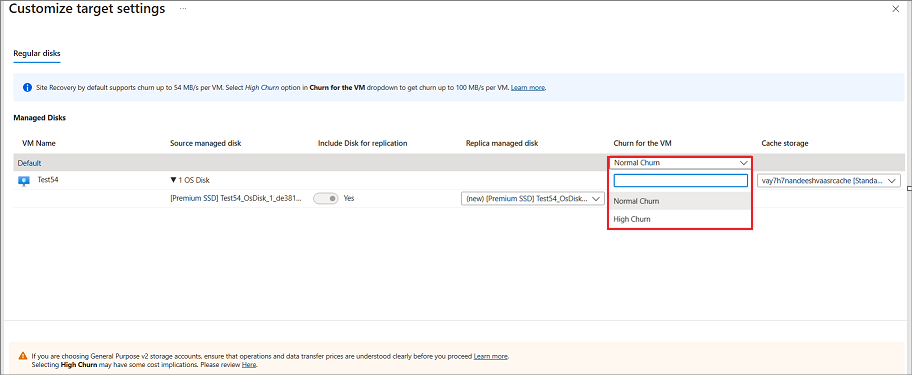
Select High Churn from the dropdown option.
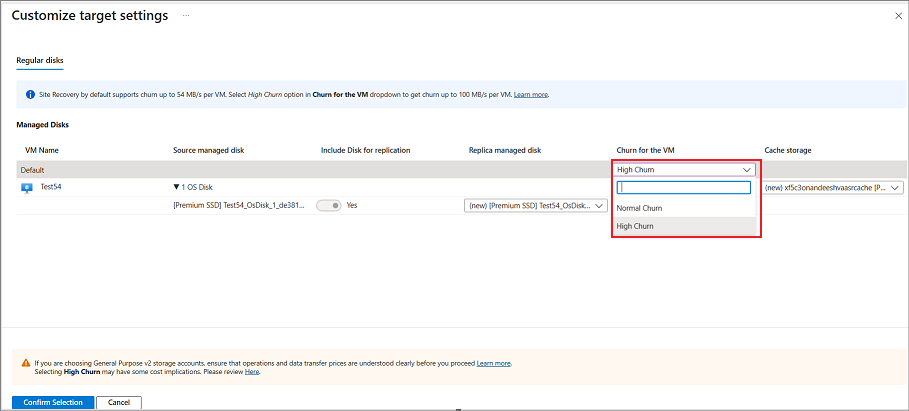
If you select multiple source virtual machines to configure Site Recovery and want to enable High Churn for all these virtual machines, select High Churn at the top level.
After you select High Churn for the virtual machine, you'll see Premium Block Blob options only available for cache storage account. Select cache storage account and then select Confirm Selection.
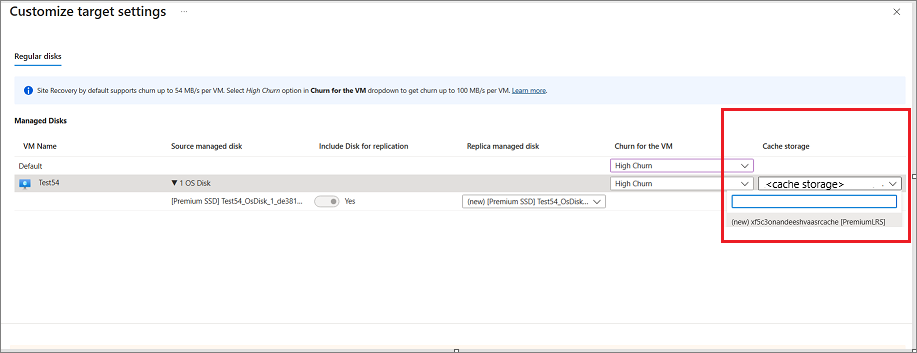
Configure other settings and enable the replication.
From Azure virtual machine screen
In the portal, go to Virtual machines and select the virtual machine.
On the left pane, under Operations, select Disaster recovery.
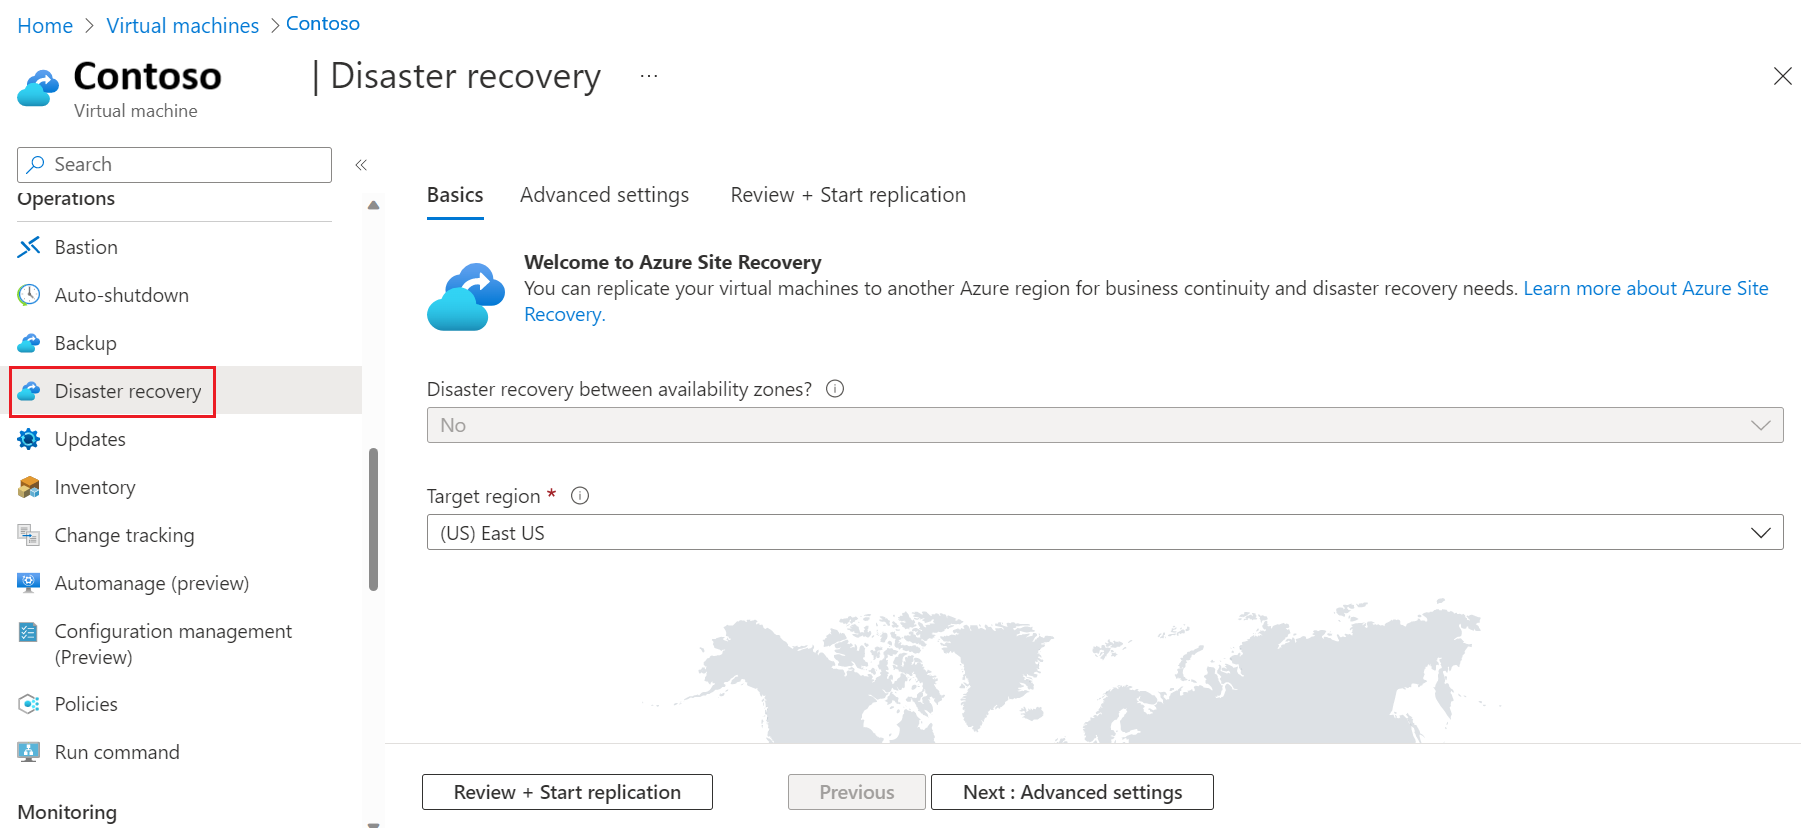
Under Basics, select the Target region and then select Next: Advanced settings.
Under Advanced settings, select Subscription, VM resource group, Virtual network, Availability, and Proximity placement group as required.
Under Advanced settings > Storage settings, select [+] Show details.
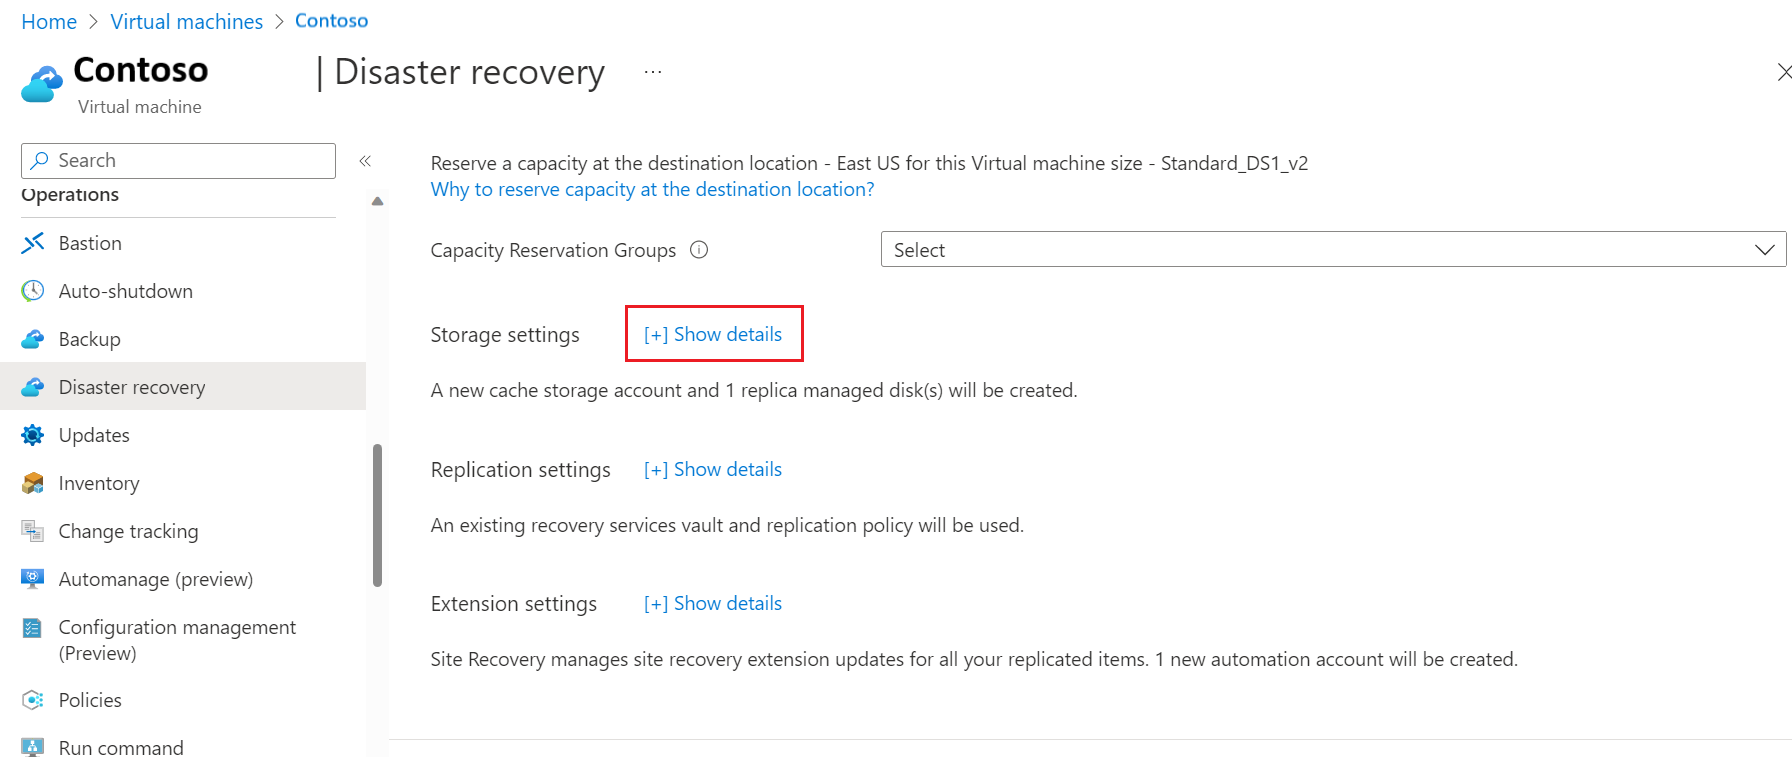
Under Storage settings > Churn for the VM, select High Churn. You are able to use Premium Block Blob type of storage accounts only for cache storage.
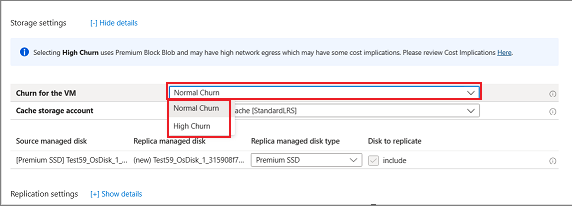
Select Next: Review + Start replication.
Note
- You can only enable High Churn only when you enable replication while configuring Azure Site Recovery on a virtual machine.
- If you want to enable High Churn support for virtual machines already protected by Azure Site Recovery, disable replication for those virtual machines and select High Churn while enabling replication again. Similarly, disable and enable replication again to switch back to Normal Churn.
Cost Implications
- High Churn uses Premium Block Blob storage accounts, which may have higher cost implications as compared to Normal Churn which uses Standard storage accounts. For more information, see pricing.
- For High churn virtual machines, more data changes may get replicated to target for High churn compared to Normal churn. This may lead to more network cost.
