Replicate Azure Disk Encryption-enabled virtual machines to another Azure region
This article describes how to replicate Azure VMs with Azure Disk Encryption (ADE) enabled, from one Azure region to another.
Note
Site Recovery currently supports ADE, with and without Microsoft Entra ID for VMs running Windows operating systems. For Linux operating systems, we only support ADE without Microsoft Entra ID. Moreover, for machines running ADE 1.1 (without Microsoft Entra ID), the VMs must be using managed disks. VMs with unmanaged disks aren't supported. If you switch from ADE 0.1 (with Microsoft Entra ID) to 1.1, you need to disable replication and enable replication for a VM after enabling 1.1.
Required user permissions
Site Recovery requires the user to have permissions to create the key vault in the target region and copy keys from source region key vault to the target region key vault.
To enable replication of Disk Encryption-enabled VMs from the Azure portal, the user needs the following permissions on both the source region and target region key vaults.
Key vault permissions
- List, Create and Get
Key vault secret permissions
- Secret Management Operations
- Get, List and Set
- Secret Management Operations
Key vault key permissions (required only if the VMs use key encryption key to encrypt disk encryption keys)
- Key Management Operations
- Get, List and Create
- Cryptographic Operations
- Decrypt and Encrypt
- Key Management Operations
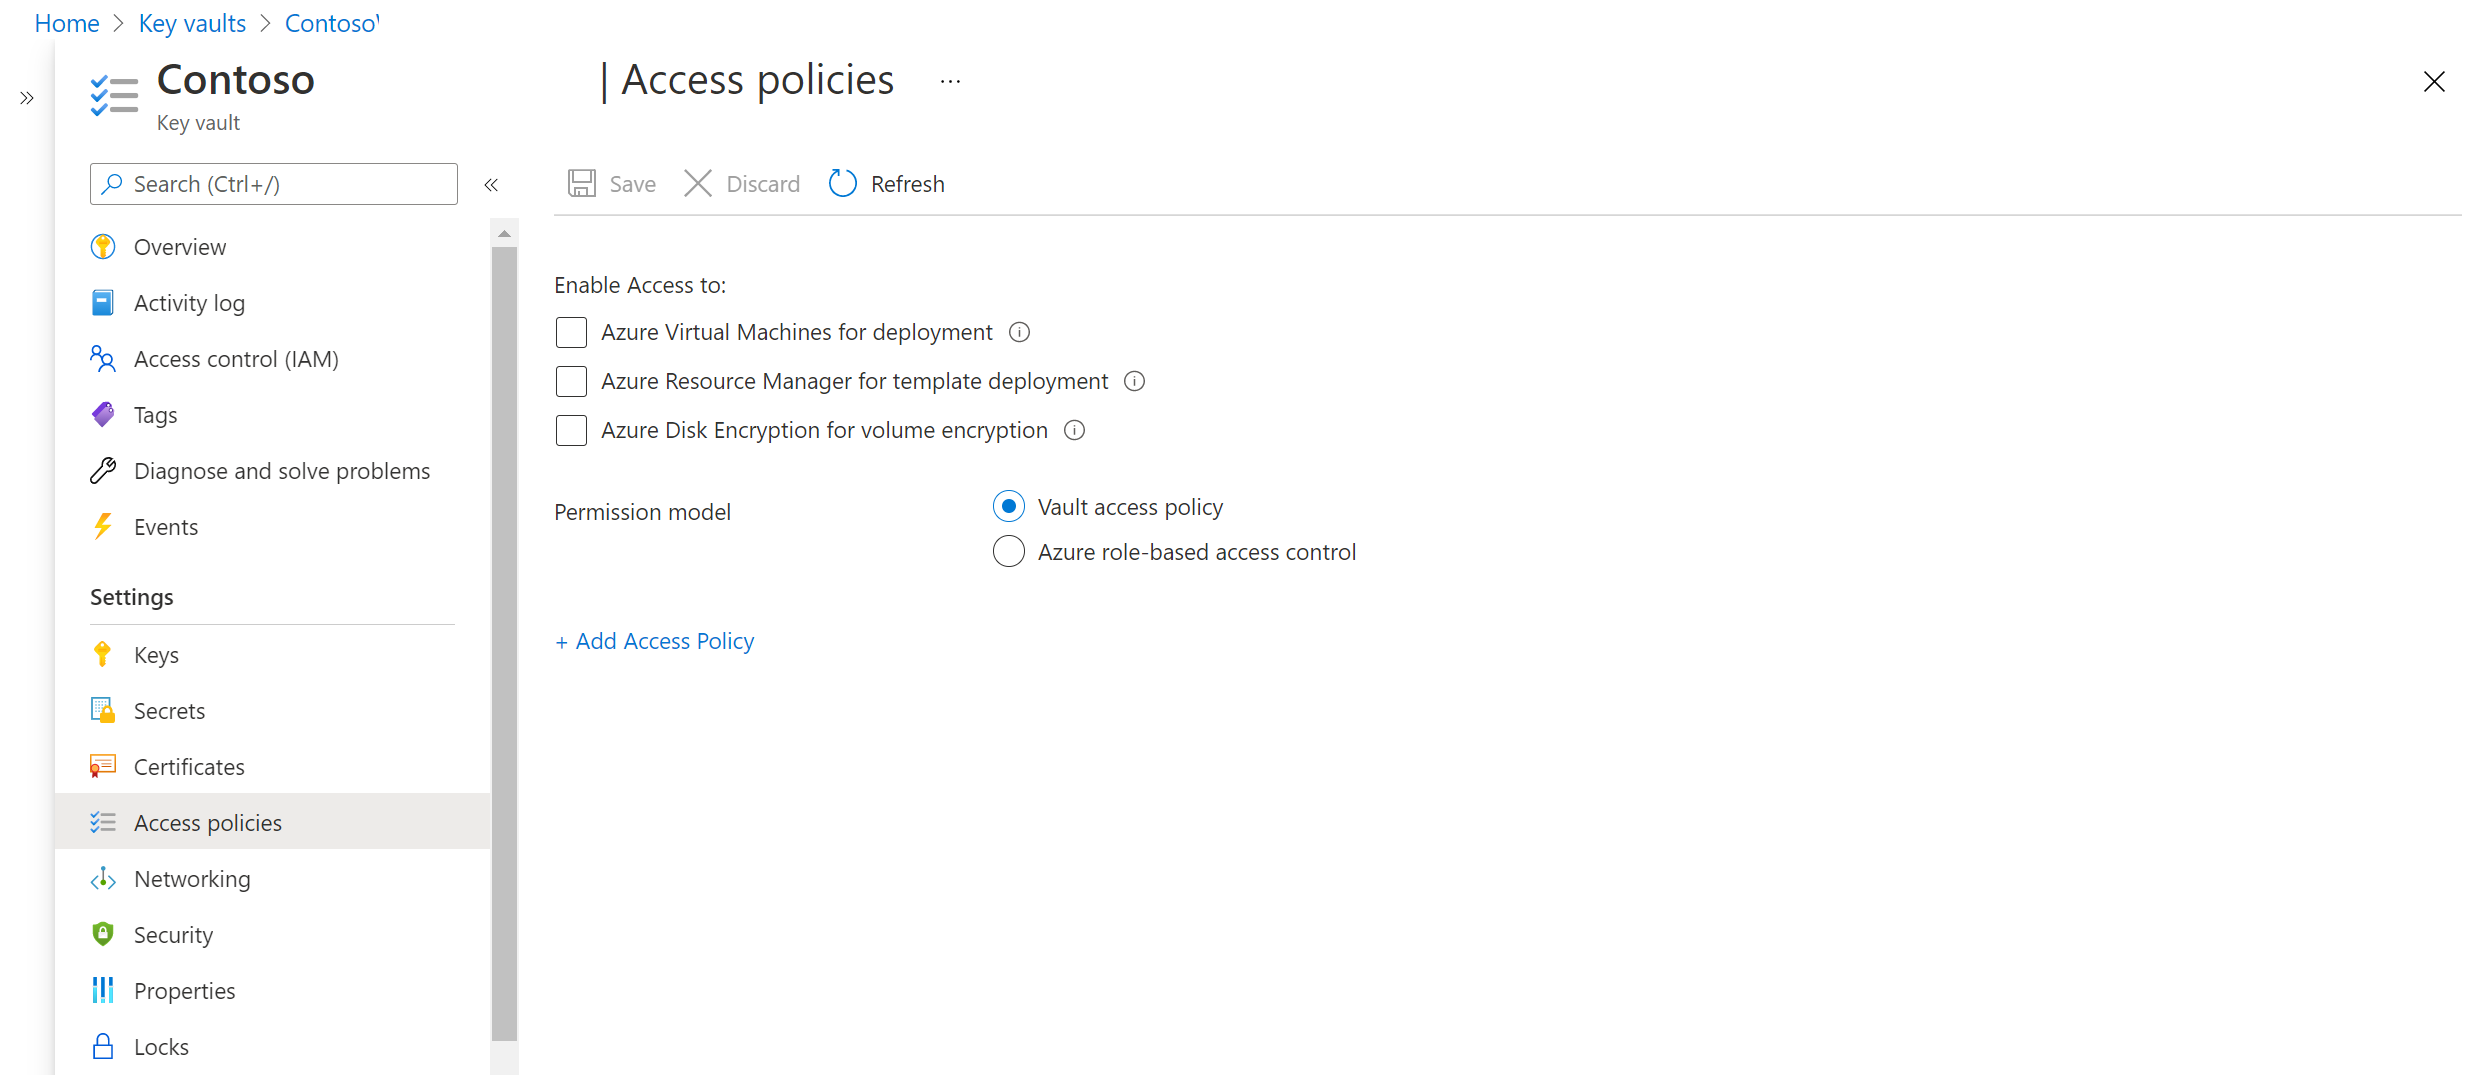
To manage permissions, go to the key vault resource in the portal. Add the required permissions for the user. The following example shows how to enable permissions to the key vault ContosoWeb2Keyvault, which is in the source region.
Go to Home > Keyvaults > ContosoWeb2KeyVault > Access policies.

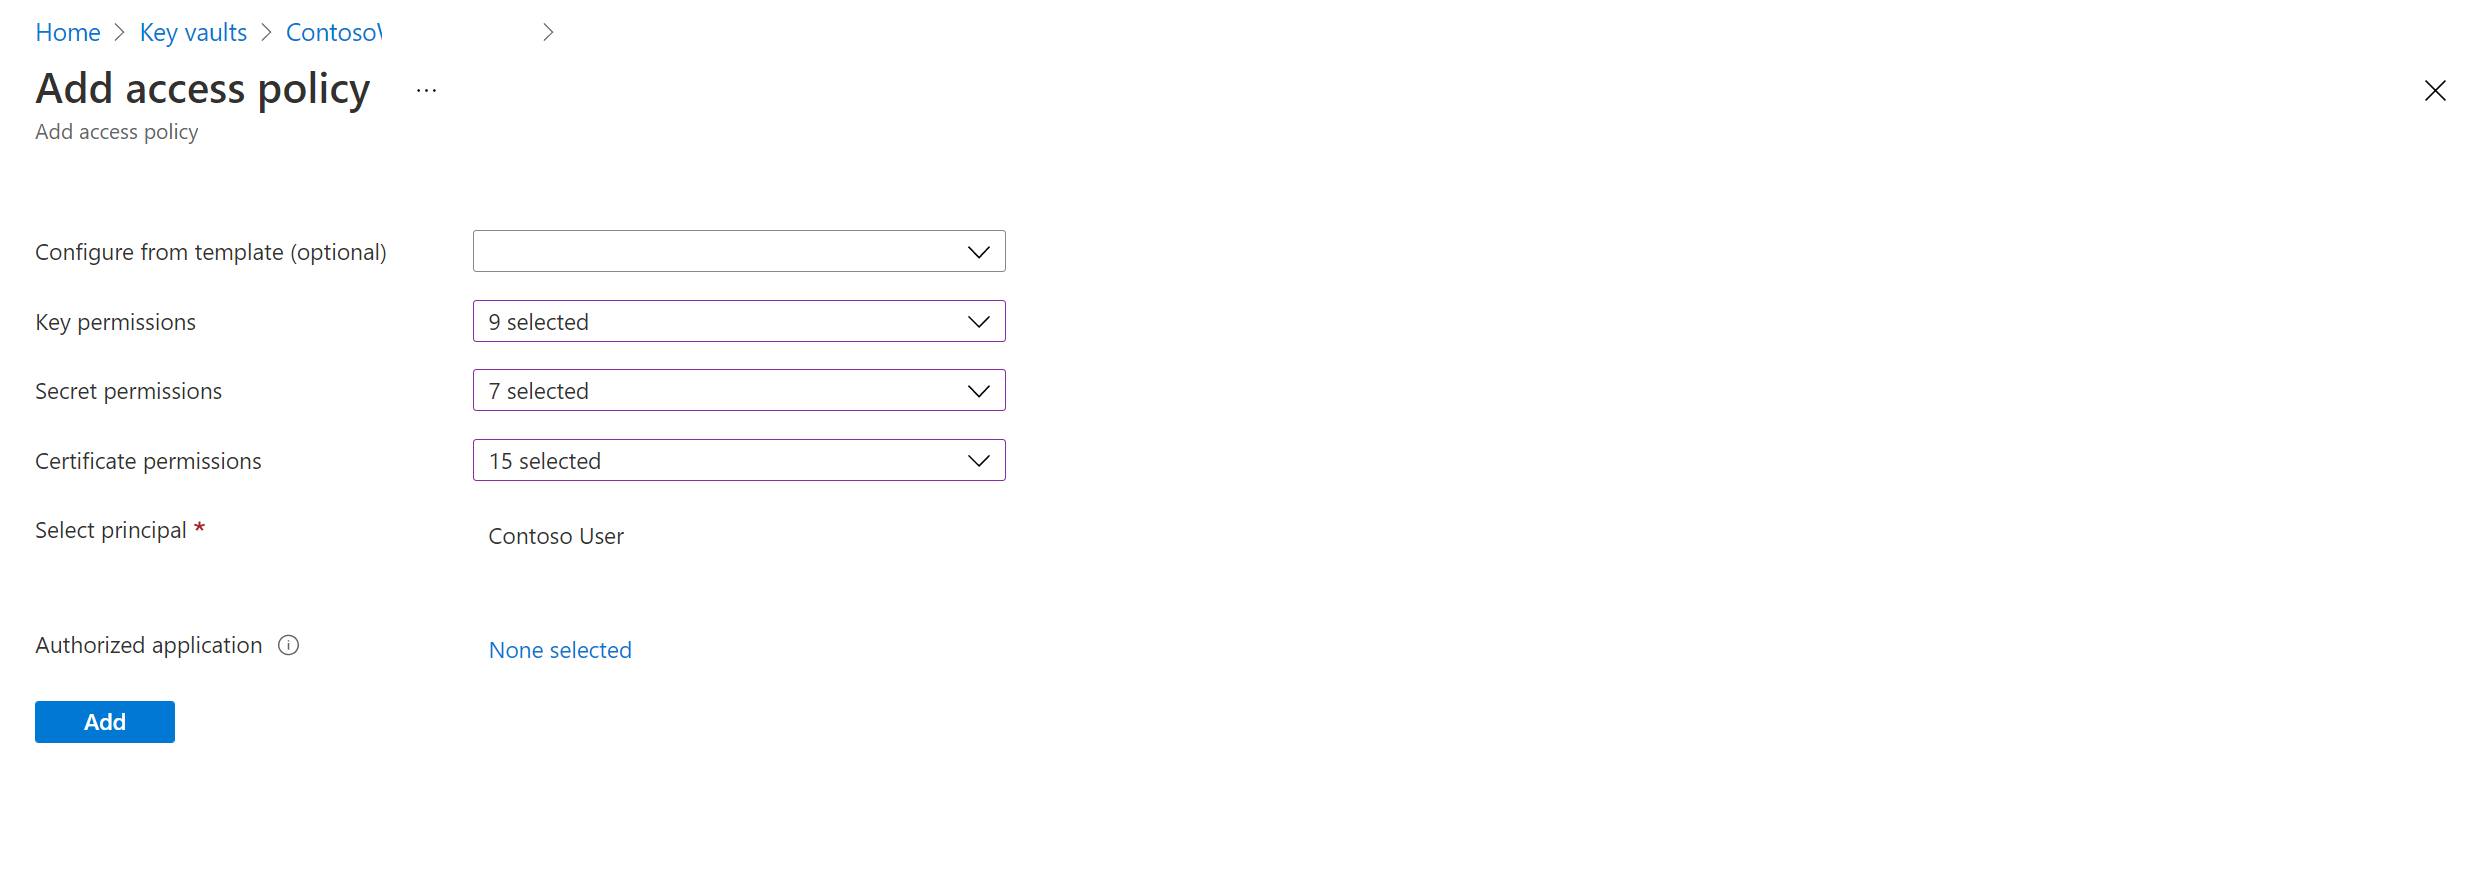
You can see that there are no user permissions. Select Add new. Enter the user and permissions information.

If the user who's enabling disaster recovery (DR) doesn't have permissions to copy the keys, a security administrator who has appropriate permissions can use the following script to copy the encryption secrets and keys to the target region.
To troubleshoot permissions, refer to key vault permission issues later in this article.
Note
To enable replication of Disk Encryption-enabled VMs from the portal, you need at least "List" permissions on the key vaults, secrets, and keys.
Copy Disk Encryption keys to the DR region by using the PowerShell script
Copy the script to a file, and name it Copy-keys.ps1.
Open the Windows PowerShell application, and go to the folder where you saved the file.
Execute Copy-keys.ps1.
Provide Azure credentials to sign in.
Select the Azure subscription of your VMs.
Wait for the resource groups to load, and then select the Resource group of your VMs.
Select the VMs from the list that's displayed. Only VMs that are enabled for disk encryption are on the list.
Select the Target location.
- Disk encryption key vaults
- Key encryption key vaults
By default, Site Recovery creates a new key vault in the target region. The vault's name has an "asr" suffix that's based on the source VM disk encryption keys. If a key vault already exists that was created by Site Recovery, it's reused. Select a different key vault from the list if necessary.
Note
Alternatively, you can download the key, import it in the secondary key vault region. You can then modify your replicas disks to use the keys.
Enable replication
Use the following procedure to replicate Azure Disk Encryption-enabled VMs to another Azure region. As an example, primary Azure region is East Asia, and the secondary is Southeast Asia.
In the vault > Site Recovery page, under Azure virtual machines, select Enable replication.
In the Enable replication page, under Source, do the following:
- Region: Select the Azure region where you want to protect your virtual machines. For example, the source location is East Asia.
- Subscription: Select the subscription to which your source virtual machines belong. This can be any subscription that's in the same Microsoft Entra tenant as your recovery services vault.
- Resource group: Select the resource group to which your source virtual machines belong. All the VMs in the selected resource group are listed for protection in the next step.
- Virtual machine deployment model: Select the Azure deployment model of the source machines.
- Disaster recovery between availability zones: Select Yes if you want to perform zonal disaster recovery on virtual machines.

Select Next.
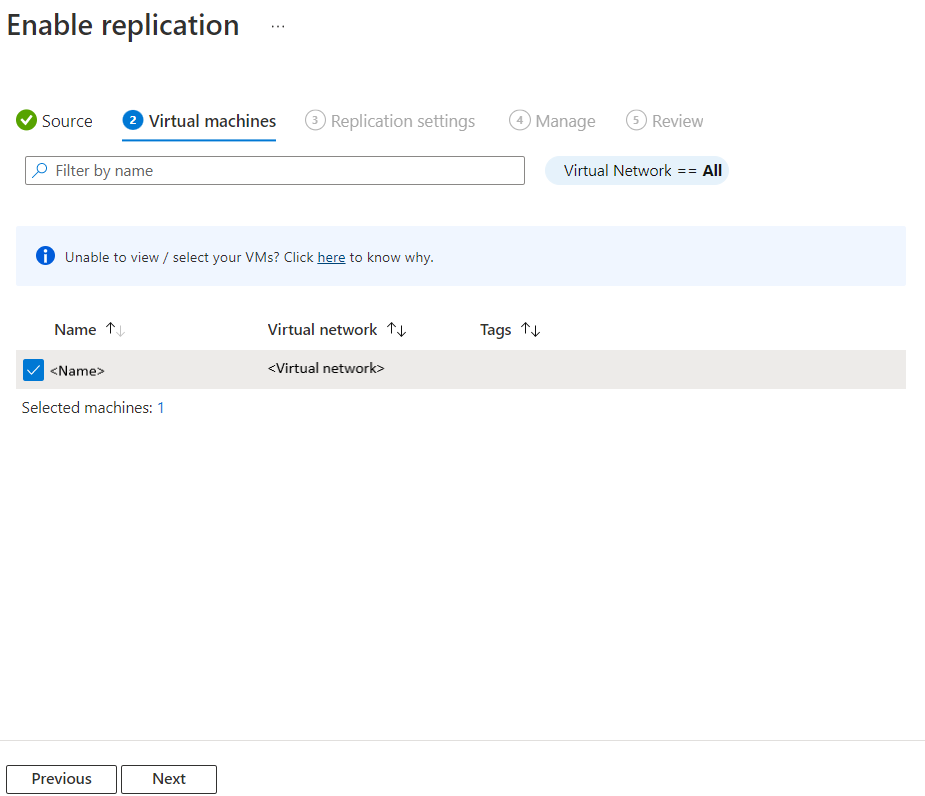
In Virtual machines, select each VM that you want to replicate. You can only select machines for which replication can be enabled. You can select up to ten VMs. Then, select Next.

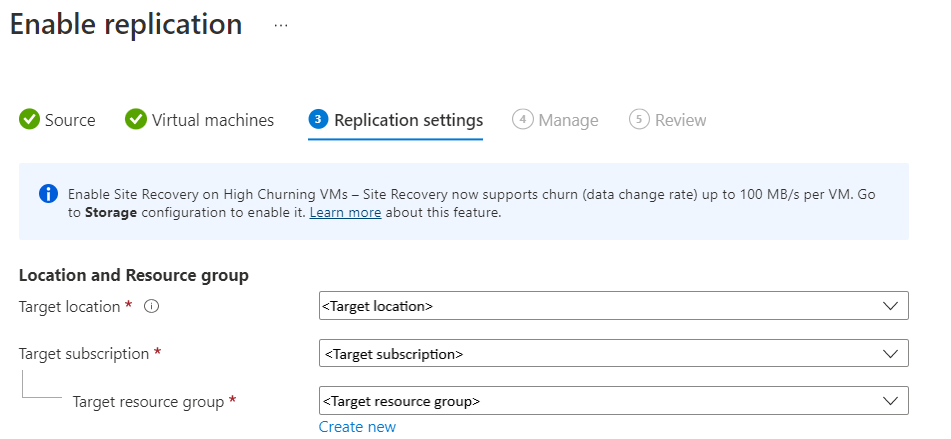
In Replication settings, you can configure the following settings:
Under Location and Resource group,
Target location: Select the location where your source virtual machine data must be replicated. Depending on the location of selected machines, Site Recovery will provide you the list of suitable target regions. We recommend that you keep the target location the same as the Recovery Services vault location.
Target subscription: Select the target subscription used for disaster recovery. By default, the target subscription will be same as the source subscription.
Target resource group: Select the resource group to which all your replicated virtual machines belong.
- By default, Site Recovery creates a new resource group in the target region with an asr suffix in the name.
- If the resource group created by Site Recovery already exists, it's reused.
- You can customize the resource group settings.
- The location of the target resource group can be any Azure region, except the region in which the source VMs are hosted.
Note
You can also create a new target resource group by selecting Create new.

Under Network,
Failover virtual network: Select the failover virtual network.
Note
You can also create a new failover virtual network by selecting Create new.
Failover subnet: Select the failover subnet.

Storage: Select View/edit storage configuration. Customize target settings page opens.

- Replica-managed disk: Site Recovery creates new replica-managed disks in the target region to mirror the source VM's managed disks with the same storage type (Standard or premium) as the source VM's managed disk.
- Cache storage: Site Recovery needs extra storage account called cache storage in the source region. All the changes happening on the source VMs are tracked and sent to cache storage account before replicating them to the target location.
Availability options: Select appropriate availability option for your VM in the target region. If an availability set that was created by Site Recovery already exists, it's reused. Select View/edit availability options to view or edit the availability options.
Note
- While configuring the target availability sets, configure different availability sets for differently sized VMs.
- You cannot change the availability type - single instance, availability set or availability zone, after you enable replication. You must disable and enable replication to change the availability type.

Capacity reservation: Capacity Reservation lets you purchase capacity in the recovery region, and then failover to that capacity. You can either create a new Capacity Reservation Group or use an existing one. For more information, see how capacity reservation works. Select View or Edit Capacity Reservation group assignment to modify the capacity reservation settings. On triggering Failover, the new VM will be created in the assigned Capacity Reservation Group.

Encryption settings: Select View/edit configuration to configure the Disk Encryption and Key Encryption key Vaults.
- Disk encryption key vaults: By default, Site Recovery creates a new key vault in the target region. It has an asr suffix that's based on the source VM disk encryption keys. If a key vault that was created by Azure Site Recovery already exists, it's reused.
- Key encryption key vaults: By default, Site Recovery creates a new key vault in the target region. The name has an asr suffix that's based on the source VM key encryption keys. If a key vault created by Azure Site Recovery already exists, it's reused.

Select Next.
In Manage, do the following:
- Under Replication policy,
- Replication policy: Select the replication policy. Defines the settings for recovery point retention history and app-consistent snapshot frequency. By default, Site Recovery creates a new replication policy with default settings of 24 hours for recovery point retention.
- Replication group: Create replication group to replicate VMs together to generate Multi-VM consistent recovery points. Note that enabling multi-VM consistency can impact workload performance and should only be used if machines are running the same workload and you need consistency across multiple machines.
- Under Extension settings,
- Select Update settings and Automation account.

- Under Replication policy,
Select Next.
In Review, review the VM settings and select Enable replication.

Note
During initial replication, the status might take some time to refresh, without apparent progress. Click Refresh to get the latest status.
Update target VM encryption settings
In the following scenarios, you'll be required to update the target VM encryption settings:
- You enabled Site Recovery replication on the VM. Later, you enabled disk encryption on the source VM.
- You enabled Site Recovery replication on the VM. Later, you changed the disk encryption key or key encryption key on the source VM.
Because of the above reasons, the keys are not in sync between source and target. So, you need to copy the keys to target and update the Azure Site Recovery metadata storage through:
- Portal
- REST API
- PowerShell
Note
Azure Site Recovery doesn't support rotating the key for an encrypted virtual machine while it is protected. If you rotate the keys, you must disable and re-enable the replication.
Update target VM encryption settings from the Azure portal
If you are using Site Recovery on a VM and have enabled disk encryption on it at a later point, then you might not have any key vault in the target settings. You must add a new key vault in the target.
If you are using a key vault, for example KV1, in the target settings, you can change the keys by using a different key vault in the target region. You can choose either an existing key vault that is different from original key vault KV1 or use a new key vault. As Azure Site Recovery doesn't allow changing the keys in place, you must use a different key vault in the target region.
For this example, we assume that you create a new empty key vault KV2 with the necessary permissions. You can then update the vault using the following steps:
- Navigate to Recovery services vault in the portal.
- Select replicated item > Properties > Compute
- Select
KV2from the menu to update the target key vault.
- Select Save to copy the source keys to the new target key vault
KV2with a new key/secret and update the Azure Site Recovery metadata.Note
Creating a new key vault might have cost implications. If you want to use your original target key vault (
KV1) that you were using before, you can do so after completing the above steps with a different key vault.
After you have updated the vault using a different key vault, to use your original target key vault (KV1), repeat the steps 1 to 4 and selectKV1in the target key vault. This copies the new key / secret inKV1and uses that for the target.
Update target VM encryption settings using REST API
- You must copy the keys to target vault using the Copy-Keys script.
- Use the
Replication Protected Items - UpdateRest API to update the Azure Site Recovery metadata.
Update target VM encryption settings using PowerShell
- Copy the keys to target vault using the Copy-Keys script.
- Use the
Set-AzRecoveryServicesAsrReplicationProtectedItemcommand to update the Azure Site Recovery metadata.
Troubleshoot key vault permission issues during Azure-to-Azure VM replication
Azure Site Recovery requires at least read permission on the Source region Key vault and write permission on the target region key vault to read the secret and copy it to the target region key vault.
Cause 1: You don't have "GET" permission on the source region Key vault to read the keys.
How to fix: Regardless of whether you are a subscription admin or not, it is important that you have get permission on the key vault.
- Go to source region Key vault which in this example is "ContososourceKeyvault" > Access policies
- Under Select Principal add your user name for example: "dradmin@contoso.com"
- Under Key permissions select GET
- Under Secret Permission select GET
- Save the access policy
Cause 2: You don't have required permission on the Target region Key vault to write the keys.
For example: You try to replicate a VM that has key vault ContososourceKeyvault on a source region. You have all the permissions on the source region key vault. But during protection, you select the already-created key vault ContosotargetKeyvault, which doesn't have permissions. An error occurs.
Permission required on target Key vault
How to fix: Go to Home > Keyvaults > ContosotargetKeyvault > Access policies and add the appropriate permissions.
Next steps
- Learn more about running a test failover.