Activate eligible Azure role assignments
Eligible Azure role assignments provide just-in-time access to a role for a limited period of time. Microsoft Entra Privileged Identity Management (PIM) role activation has been integrated into the Access control (IAM) page in the Azure portal. If you have been made eligible for an Azure role, you can activate that role using the Azure portal. This capability is being deployed in stages, so it might not be available yet in your tenant or your interface might look different.
Prerequisites
- Microsoft Entra ID P2 license or Microsoft Entra ID Governance license
- Eligible role assignment
Microsoft.Authorization/roleAssignments/readpermission, such as Reader
Activate group membership (if needed)
If you have been made eligible for a group (PIM for Groups) and this group has an eligible role assignment, you must first activate your group membership before you can see the eligible role assignment for the group. For this scenario, you must activate twice - first for the group and then for the role.
For steps on how to activate your group membership, see Activate your group membership or ownership in Privileged Identity Management.
Activate role using the Azure portal
These steps describe how to activate an eligible role assignment using the Azure portal.
Sign in to the Azure portal.
Click All services and then select the scope. For example, you can select Management groups, Subscriptions, or Resource groups.
On the Access control (IAM) page, you can activate eligible role assignments at management group, subscription, and resource group scope, but not at resource scope.
Click the specific resource.
Click Access control (IAM).
In the Action column, click Activate for the role you want to activate.
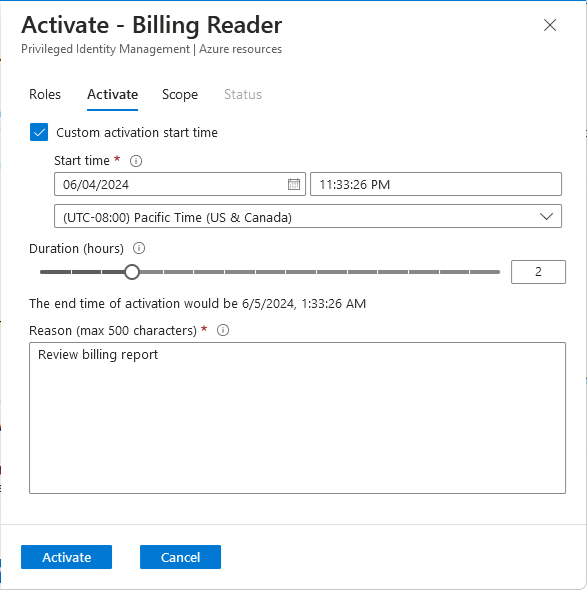
The Activate pane appears with activate settings.
On the Activate tab, specify the start time, duration, and reason. If you want to customize the activation start time, check the Custom activation start time box.
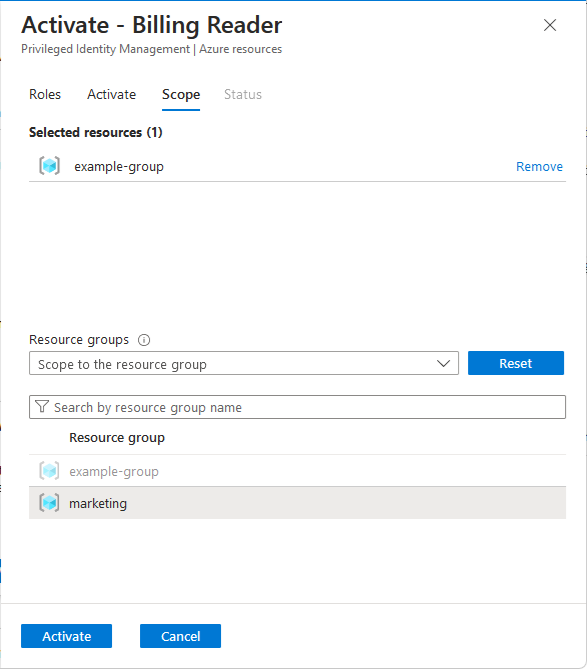
(Optional) Click the Scope tab to specify the scope for the role assignment.
If your eligible role assignment was defined at a higher scope, you can select a lower scope to narrow your access. For example, if you have an eligible role assignment at subscription scope, you can choose resource groups in the subscription to narrow your scope.
When finished, click the Activate button to activate the role with the selected settings.
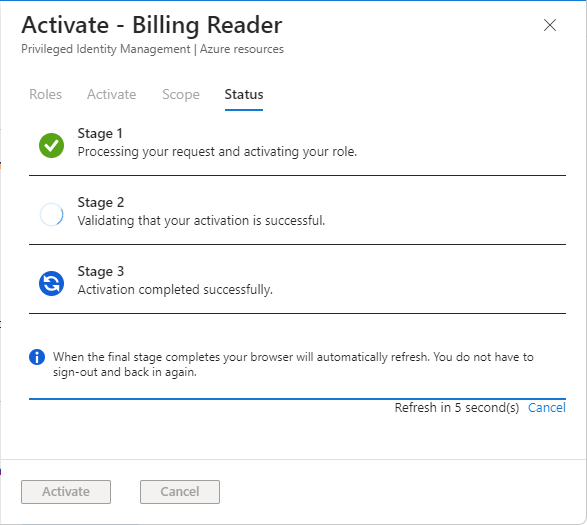
Progress messages appear to indicate the status of the activation.
When activation is complete, you see a message that the role was successfully activated.
Once an eligible role assignment has been activated, it will be listed as an active time-bound role assignment on the Check access and Role assignments tabs. For more information, see List Azure role assignments using the Azure portal.


