Create, change, or delete a Peering Service connection using the Azure portal
Azure Peering Service is a networking service that enhances connectivity to Microsoft cloud services such as Microsoft 365, Dynamics 365, software as a service (SaaS) services, Azure, or any Microsoft services accessible via the public internet.
In this article, you learn how to create, change, and delete a Peering Service connection using the Azure portal. To learn how to manage a Peering Service connection using Azure PowerShell or the Azure CLI, see Create or change a Peering Service connection using PowerShell or Create, change, or delete a Peering Service connection using the Azure CLI.
Prerequisites
An Azure account with an active subscription. Create an account for free.
A connectivity provider. For more information, see Peering Service partners.
Sign in to Azure
Sign in to the Azure portal.
Create a Peering Service connection
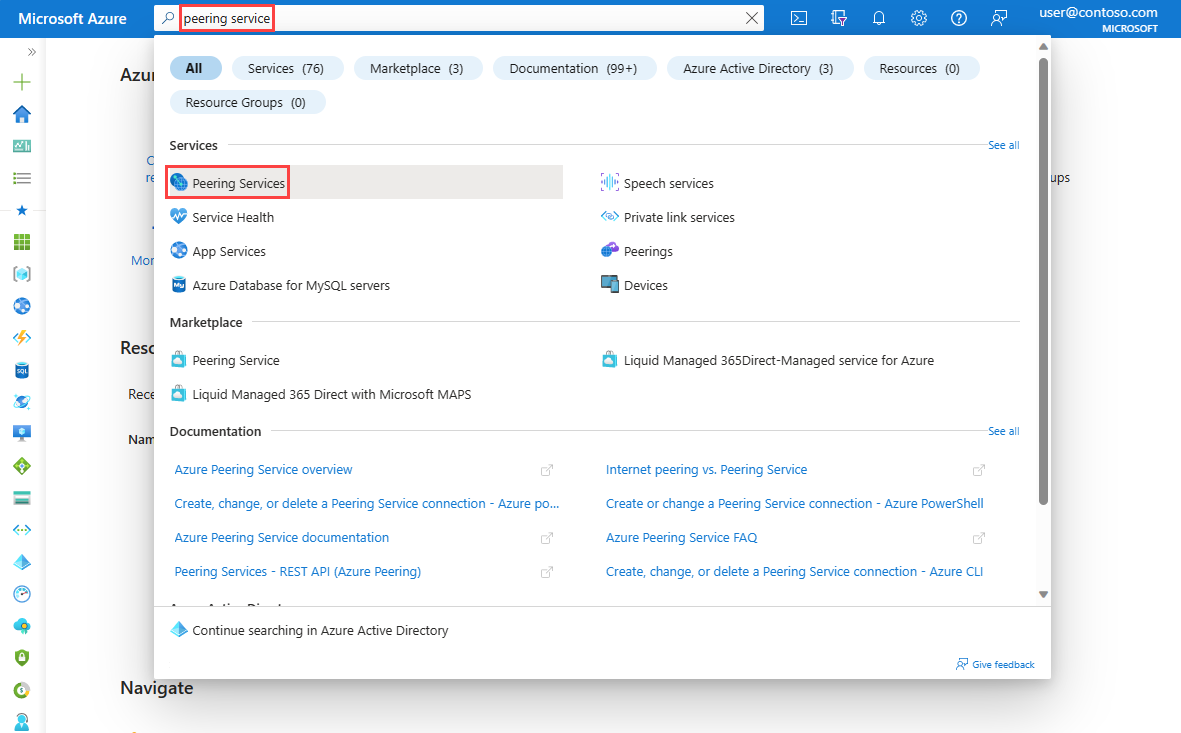
In the search box at the top of the portal, enter Peering Service. Select Peering Services in the search results.
Select + Create.
On the Basics of Create a peering service connection, enter or select the following information:
Setting Value Project Details Subscription Select your Azure subscription. Resource Group Select Create new.
Enter myResourceGroup.
Select OK.Instance details Name Enter myPeeringService. 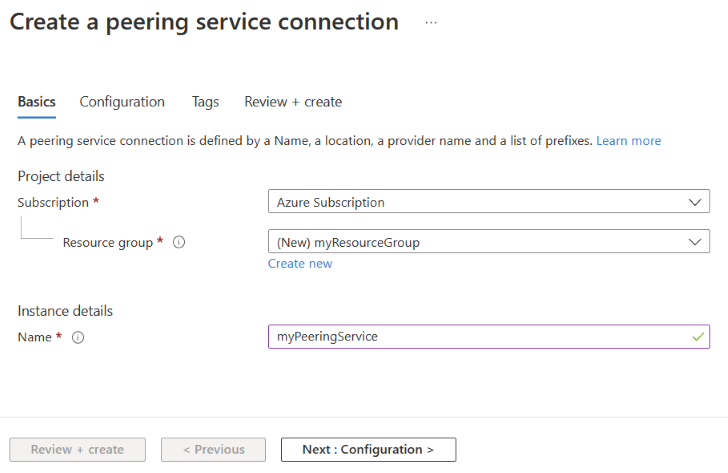
Select Next: Configuration.
Configure the Peering Service connection
On the Configuration page, select the Provider that you're using to enable the Peering Service. For more information, see Peering Service partners.
Select the provider primary peering location closest to your network location. This peering location is between Microsoft and the Partner.
Select the provider backup peering location as the next closest to your network location. A peering service will be active via the backup peering location only in the event of failure of primary peering service location for disaster recovery. If None is selected, internet is the default failover route in the event of primary peering service location failure.
Under the Prefixes section, select Create new prefix. In Name, enter a name for the prefix resource. Enter the prefixes that are associated with the service provider in Prefix. In Prefix key, enter the prefix key that was given to you by your provider (ISP or IXP). This key allows Microsoft to validate the prefix and provider who allocated your IP prefix. If your provider is a Route Server partner, you can create all of your prefixes with the same Peering Service prefix key.
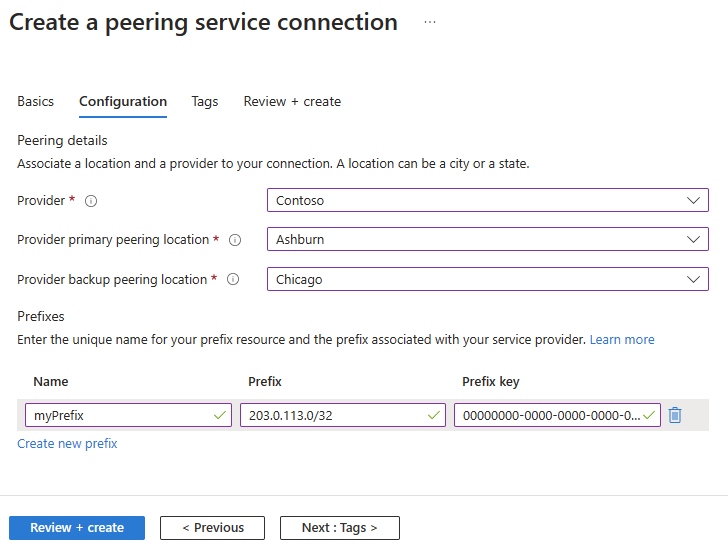
Select Review + create.
Review the settings, and then select Create.
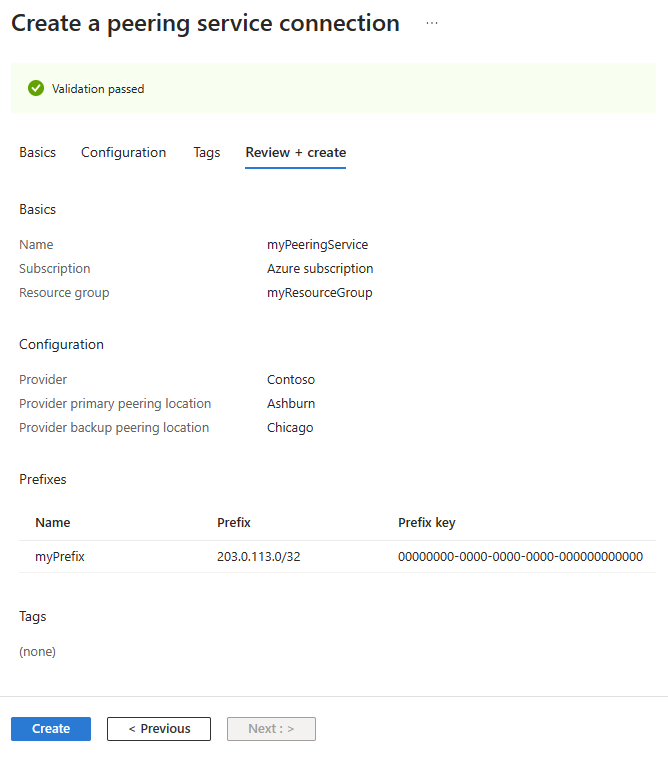
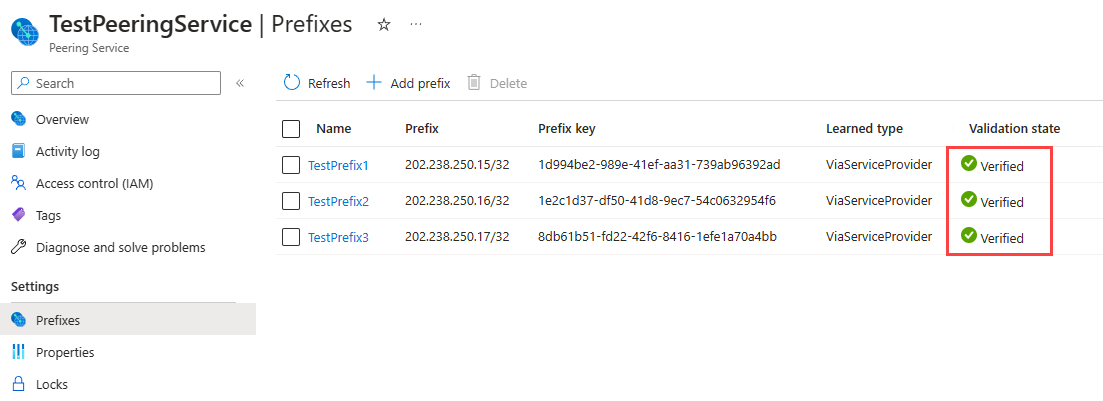
After you create a Peering Service connection, more validation is performed on the included prefixes. You can review the validation status under the Prefixes section of your Peering Service.
If the validation fails, you might see one of the following error messages:
- Invalid Peering Service prefix, the prefix should be valid format, only IPv4 prefix is supported currently.
- Prefix wasn't received from Peering Service provider, contact Peering Service provider.
- Prefix announcement doesn't have a valid BGP community, contact Peering Service provider.
- Prefix overlaps with an existing prefix, contact Peering Service provider
- Prefix received with longer AS path(>3), contact Peering Service provider.
- Prefix received with private AS in the path, contact Peering Service provider.
Review the Technical requirements for Peering Service prefixes for more help to solve peering service prefix validation failures.
Add or remove a prefix
In the search box at the top of the portal, enter Peering Service. Select Peering Services in the search results.
Select your Peering Service that you want to add or remove a prefix to or from it.
Select Prefixes, and then select Add prefix to add prefixes.
Select the ellipsis (...) next to the listed prefix, and select Delete.
Note
You can't modify an existing prefix. If you want to change the prefix, you must delete the resource and then re-create it.
Delete a Peering Service connection
In the search box at the top of the portal, enter Peering Service. Select Peering Services in the search results.
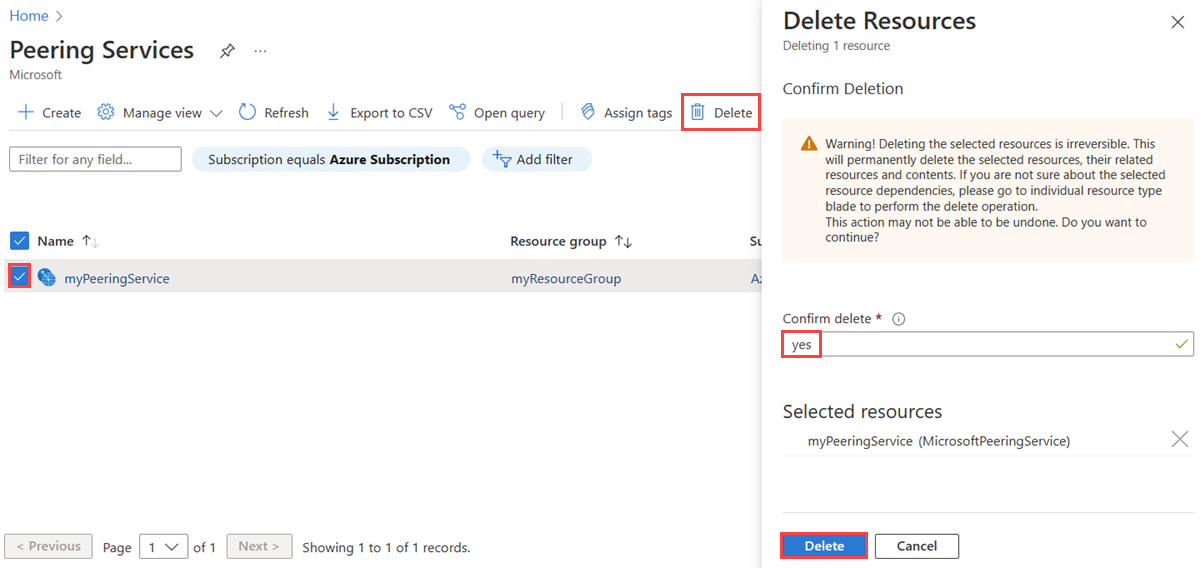
Select the checkbox next to the Peering Service that you want to delete, and then select Delete at the top of the page.
Enter yes in Confirm delete, and then select Delete.
Modify the primary or backup peering location
If you would like to change the primary or backup peering location in your Peering Service, reach out to peeringservice@microsoft.com. Provide the resource ID of the peering service to modify, and the new primary and backup locations you'd like to be configured.
Related content
- To learn more about Peering Service connections, see Peering Service connection.
- To learn more about Peering Service connection telemetry, see Access Peering Service connection telemetry.
