How to create and manage files in your workspace
Learn how to create and manage the files in your Azure Machine Learning workspace. These files are stored in the default workspace storage. Files and folders can be shared with anyone else with read access to the workspace, and can be used from any compute instances in the workspace.
Prerequisites
- An Azure subscription. If you don't have an Azure subscription, create a free account before you begin.
- A Machine Learning workspace. Create workspace resources.
Tip
This article shows how to manage files inside Azure Machine Learning studio. You can also connect to your workspace files from Visual Studio Code. To connect to your workspace files from VS Code, see Work in VS Code remotely connected to a compute instance.
Create files in studio
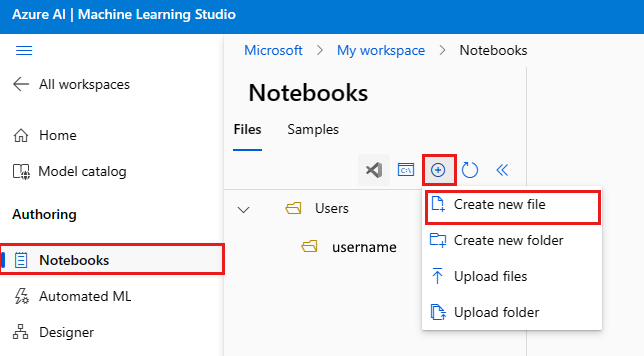
To create a new file in your default folder (Users > yourname):
Open your workspace in Azure Machine Learning studio.
On the left side, select Notebooks.
Select the + tool.
Select Create new file.
Name the file.
Select a file type.
Select Create.
Notebooks and most text file types display in the preview section. Most other file types don't have a preview.
Tip
If you don't see the correct preview for a notebook, make sure it has .ipynb as its extension. Hover over the filename in the list to select ... if you need to rename the file.
To create a new file in a different folder:
- Select the "..." at the end of the folder.
- Select Create new file.
Important
Content in notebooks and scripts can potentially read data from your sessions and access data without your organization in Azure. Only load files from trusted sources. For more information, see Secure code best practices.
Customize your file editing experience
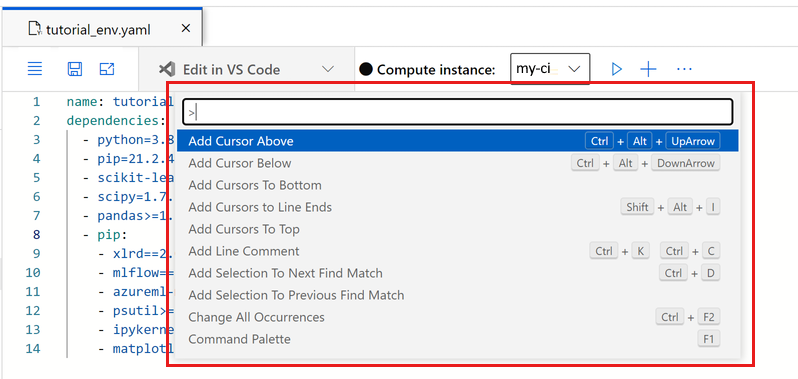
In the Azure Machine Learning studio file editor, you can customize your editing experience with Command Palette and relevant keyboard shortcuts. When you invoke the Command Palette, you see a selectable list of many options to customize your editing experience.

To invoke the Command Palette on a file, either use F1 or right-select anywhere in the editing space and select Command Palette from the menu.
For example, choose "Indent using spaces" if you want your editor to autoindent with spaces instead of tabs. Take a few moments to explore the different options you have in the Command Palette.
Manage files with Git
Use a compute instance terminal to clone and manage Git repositories. To integrate Git with your Azure Machine Learning workspace, see Git integration for Azure Machine Learning.
Clone samples
Your workspace contains a Samples folder with notebooks designed to help you explore the SDK and serve as examples for your own machine learning projects. Clone these notebooks into your own folder to run and edit them.
Share files
Copy and paste the URL to share a file. Only other users of the workspace can access this URL. Learn more about granting access to your workspace.
Delete a file
You can't delete the Samples files. These files are part of the studio and are updated each time a new SDK is published.
You can delete files found in your Files section in any of these ways:
- In the studio, select the ... at the end of a folder or file. Make sure to use a supported browser (Microsoft Edge, Chrome, or Firefox).
- Use a terminal from any compute instance in your workspace. The folder ~/cloudfiles is mapped to storage on your workspace storage account.
- In either Jupyter or JupyterLab with their tools.
