Quickstart: Send and receive messages from an Azure Event Grid namespace topic (.NET)
In this quickstart, you do the following steps:
- Create an Event Grid namespace, using the Azure portal.
- Create an Event Grid namespace topic, using the Azure portal.
- Create an event subscription, using the Azure portal.
- Write a .NET console application to send a set of messages to the topic
- Write a .NET console application to receive those messages from the topic.
Note
This quick start provides step-by-step instructions to implement a simple scenario of sending a batch of messages to an Event Grid Namespace Topic and then receiving them. For an overview of the .NET client library, see Azure Event Grid client library for .NET. For more samples, see Event Grid .NET samples on GitHub.
Prerequisites
If you're new to the service, see Event Grid overview before you do this quickstart.
- Azure subscription. To use Azure services, including Azure Event Grid, you need a subscription. If you don't have an existing Azure account, you can sign up for a free trial.
- Visual Studio 2022. The sample application makes use of new features that were introduced in C# 10. To use the latest syntax, we recommend that you install .NET 6.0, or higher and set the language version to
latest. If you're using Visual Studio, versions before Visual Studio 2022 aren't compatible with the tools needed to build C# 10 projects.
Create a namespace in the Azure portal
A namespace in Azure Event Grid is a logical container for one or more topics, clients, client groups, topic spaces and permission bindings. It provides a unique namespace, allowing you to have multiple resources in the same Azure region. With an Azure Event Grid namespace you can group now together related resources and manage them as a single unit in your Azure subscription.
Please follow the next sections to create, view and manage an Azure Event Grid namespace.
To create a namespace:
Sign-in to the Azure portal.
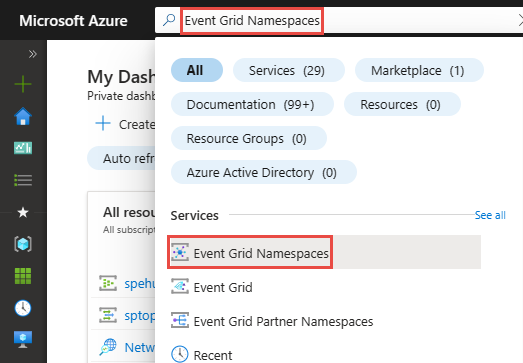
In the search box, enter Event Grid Namespaces and select Event Grid Namespaces from the results.
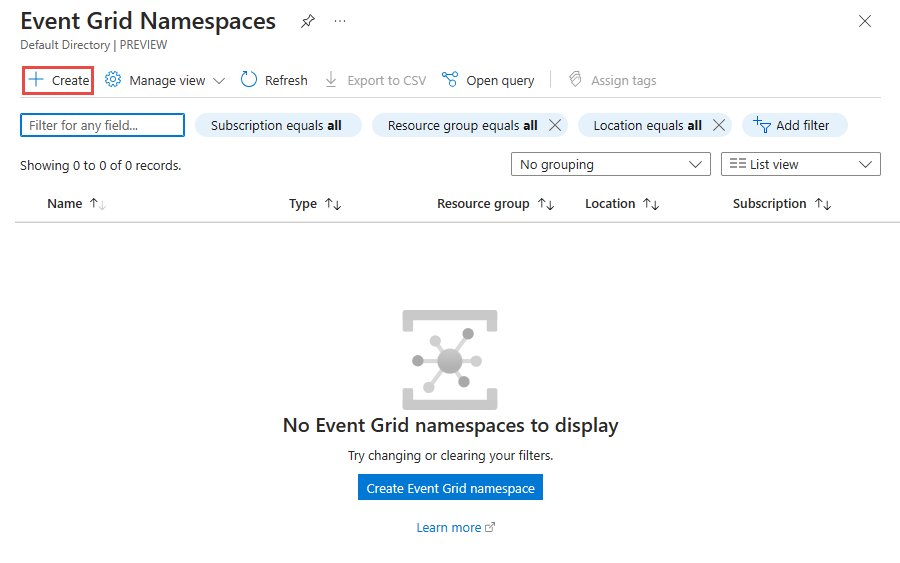
On the Event Grid Namespaces page, select + Create on the toolbar.
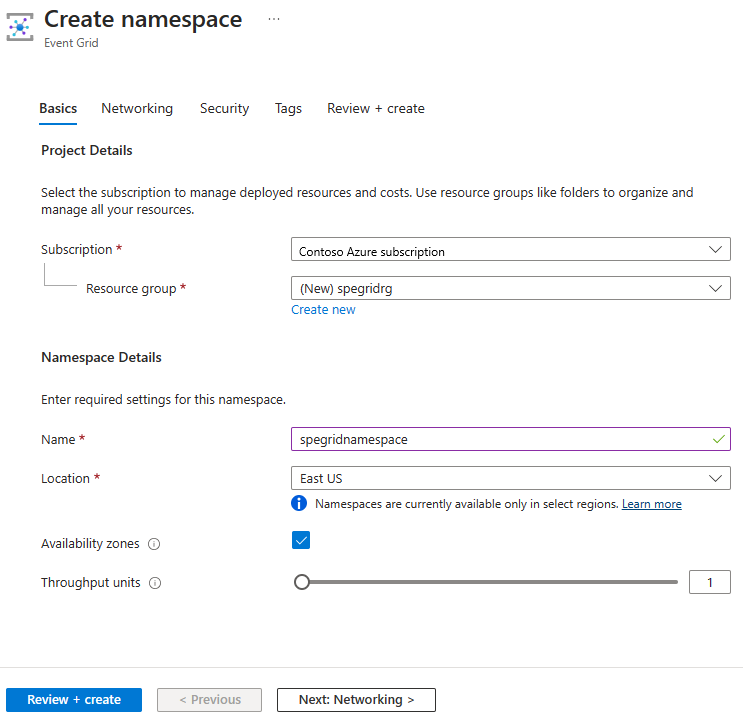
On the Basics page, follow these steps.
Select the Azure subscription in which you want to create the namespace.
Select an existing resource group or create a resource group.
Enter a name for the namespace.
Select the region or location where you want to create the namespace.
Select Review + create at the bottom of the page.
On the Review + create tab, review your settings and select Create.
On the Deployment succeeded page, select Go to resource to navigate to your namespace.
Create a namespace topic
If you aren't on the Event Grid Namespace page, follow the create, view, and manage namespaces steps to view the namespace you want to use to create the topic.
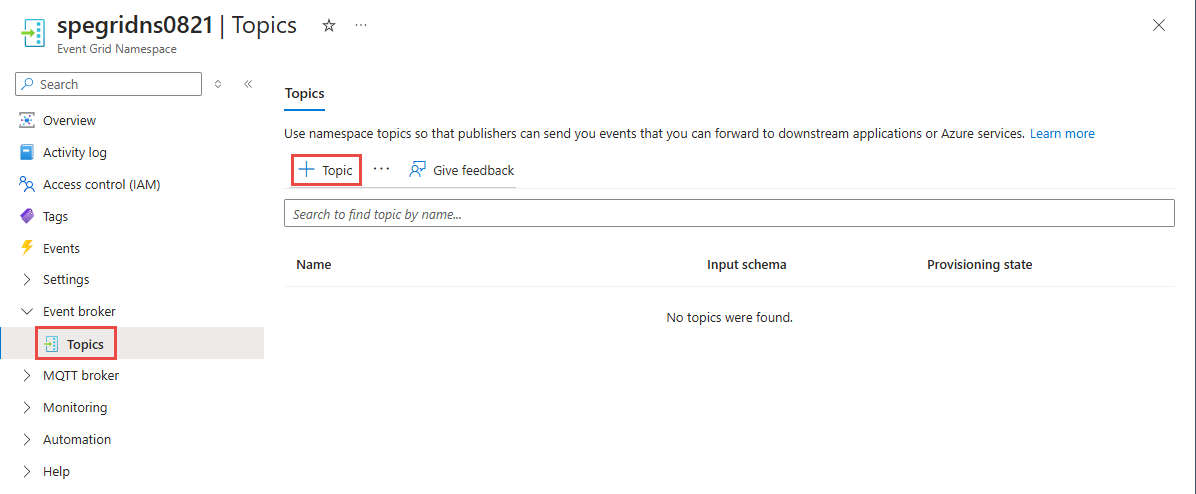
On the Event Grid Namespace page, select Topics option in the Event broker section on the left menu.
On the Topics page, select + Topic button on the command bar.
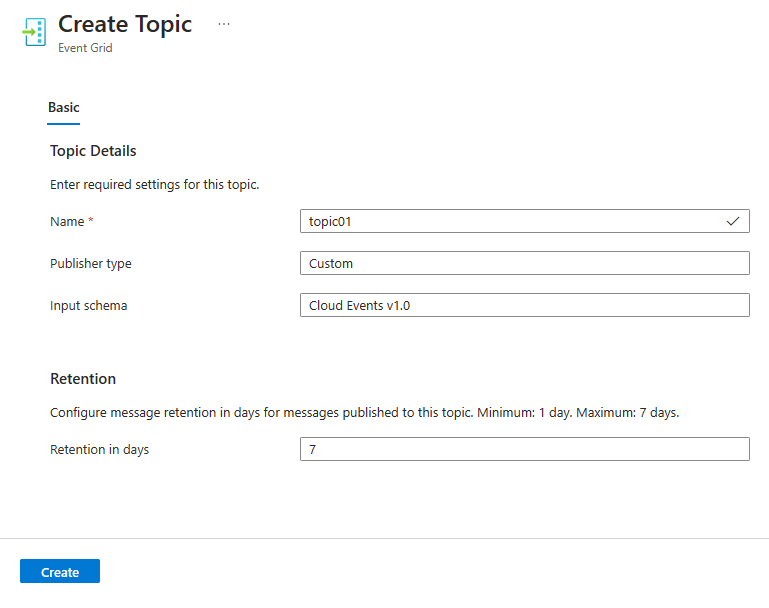
On the Create Topic page, type the name of the topic you want to create and select Create.
Create an event subscription
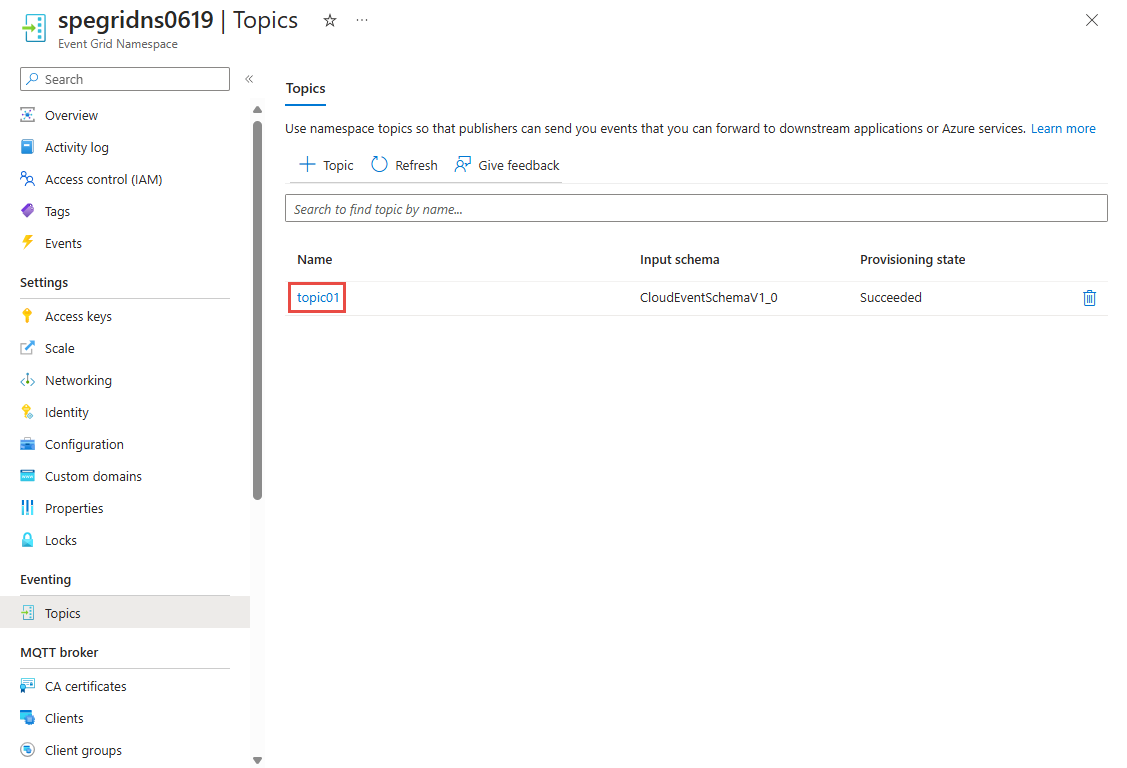
If you are on the Topics page of your Event Grid namespace in the Azure portal, select your topic from the list of topics. If you are on the Topics page, follow instructions from create, view, and manage a namespace topics to identify the topic you want to use to create the event subscription.
On the Event Gird Namespace Topic page, select Subscriptions option in the Entities section on the left menu.
On the Subscriptions page, select "+ Subscription" button on the command bar.
In the Basics tab, follow these steps:
Enter a name for the subscription you want to create
Confirm that the delivery schema is set Cloud Events v1.0.
Confirm that the delivery mode is set to Queue (pull mode).
Select Next: Filters at the bottom of the page.

In the Filters tab, add the names of the event types you want to filter in the subscription and add context attribute filters you want to use in the subscription. Then, select Next: Additional features at the bottom of the page.

In the Additional features tab, you can specify the event retention, maximum delivery count, lock duration, and dead-lettering settings.

Select Create to create the event subscription.
Authenticate the app to Azure
This quick start shows you ways of connecting to Azure Event Grid: connection string. This section shows you how to use a connection string to connect to an Event Grid namespace. If you're new to Azure, the connection string option is easier to follow. Creating a new Event Grid namespace automatically generates an initial primary and secondary key that each grant full control over all aspects of the namespace or topics. A client can use the connection string to connect to the Event Grid namespace. To copy the access keys for your namespace topic, follow these steps:
On the Event Grid Namespace page, select Topics.
Select the topic you need to access.
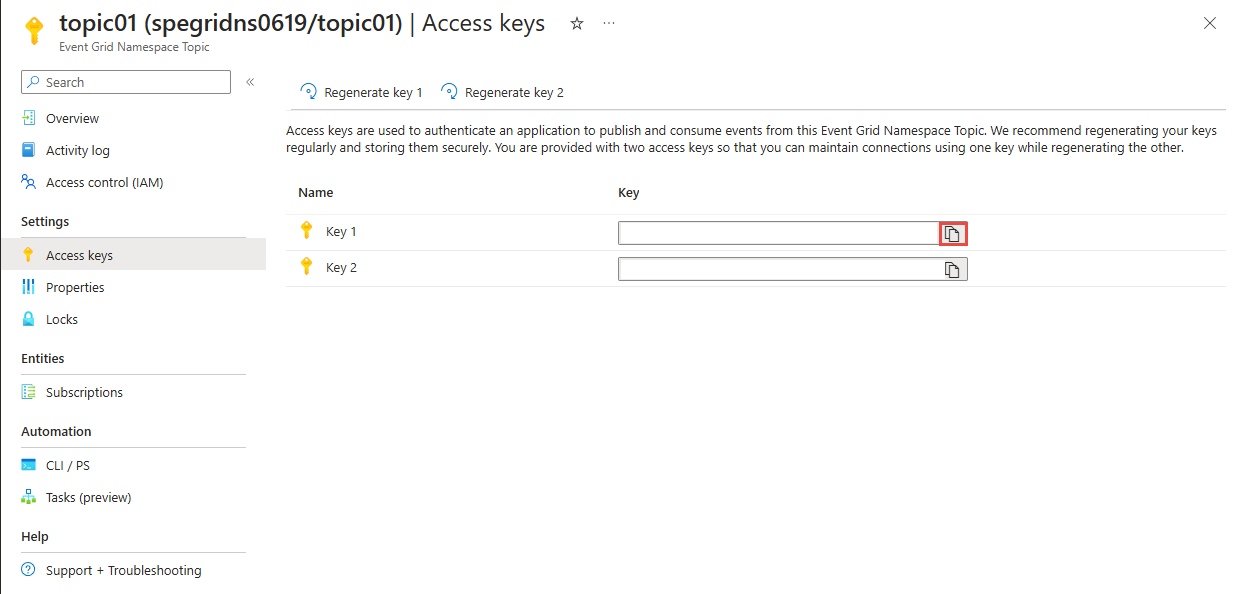
On the Access keys page, select the copy button next to Key 1 or Key 2, to copy the access keys to your clipboard for later use. Paste this value into Notepad or some other temporary location.
Launch Visual Studio
Launch Visual Studio. If you see the Get started window, select the Continue without code link in the right pane.
Send messages to the topic
This section shows you how to create a .NET console application to send messages to an Event Grid topic.
Create a console application
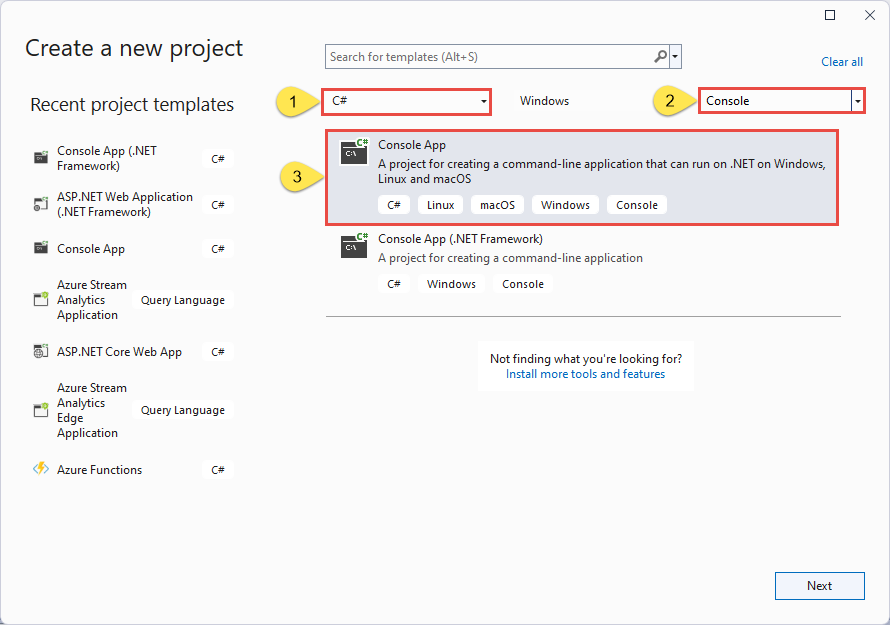
In Visual Studio, select File -> New -> Project menu.
On the Create a new project dialog box, do the following steps: If you don't see this dialog box, select File on the menu, select New, and then select Project.
Select C# for the programming language.
Select Console for the type of the application.
Select Console App from the results list.
Then, select Next.
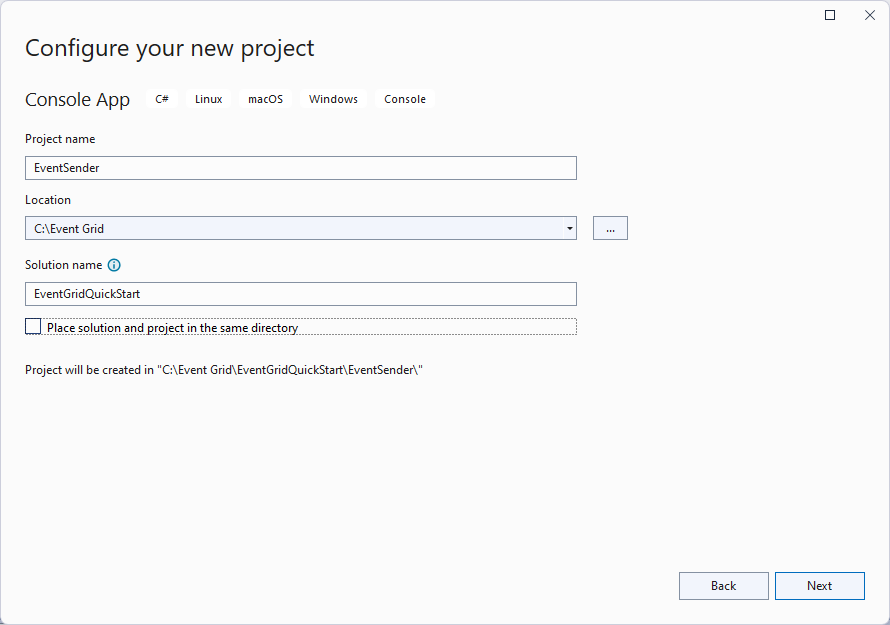
Enter EventSender for the project name, EventGridQuickStart for the solution name, and then select Next.
On the Additional information page, select Create to create the solution and the project.
Add the NuGet packages to the project
Select Tools > NuGet Package Manager > Package Manager Console from the menu.
Run the following command to install the Azure.Messaging.EventGrid NuGet package:
Install-Package Azure.Messaging.EventGrid.Namespaces
Add code to send event to the namespace topic
Replace the contents of
Program.cswith the following code. The important steps are outlined, with additional information in the code comments.Important
Update placeholder values (
<NAMESPACE-ENDPOINT>,<TOPIC-NAME>,<TOPIC-ACCESS-KEY>,<TOPIC-SUBSCRIPTION-NAME>) in the code snippet with your namespace endpoint, topic name, and topic key.using Azure.Messaging; using Azure; using Azure.Messaging.EventGrid.Namespaces; // TODO: Replace the following placeholders with appropriate values // Endpoint of the namespace that you can find on the Overview page for your Event Grid namespace. Prefix it with https://. // Should be in the form: https://namespace01.eastus-1.eventgrid.azure.net. var namespaceEndpoint = "<NAMESPACE-ENDPOINT>"; // Name of the topic in the namespace var topicName = "<TOPIC-NAME>"; // Access key for the topic var topicKey = "<TOPIC-ACCESS-KEY>"; // Construct the client using an Endpoint for a namespace as well as the access key var client = new EventGridSenderClient(new Uri(namespaceEndpoint), topicName, new AzureKeyCredential(topicKey)); // Publish a single CloudEvent using a custom TestModel for the event data. var @ev = new CloudEvent("employee_source", "type", new TestModel { Name = "Bob", Age = 18 }); await client.SendAsync(ev); // Publish a batch of CloudEvents. await client.SendAsync( new[] { new CloudEvent("employee_source", "type", new TestModel { Name = "Tom", Age = 55 }), new CloudEvent("employee_source", "type", new TestModel { Name = "Alice", Age = 25 })}); Console.WriteLine("Three events have been published to the topic. Press any key to end the application."); Console.ReadKey(); public class TestModel { public string Name { get; set; } public int Age { get; set; } }Build the project, and ensure that there are no errors.
Run the program and wait for the confirmation message.
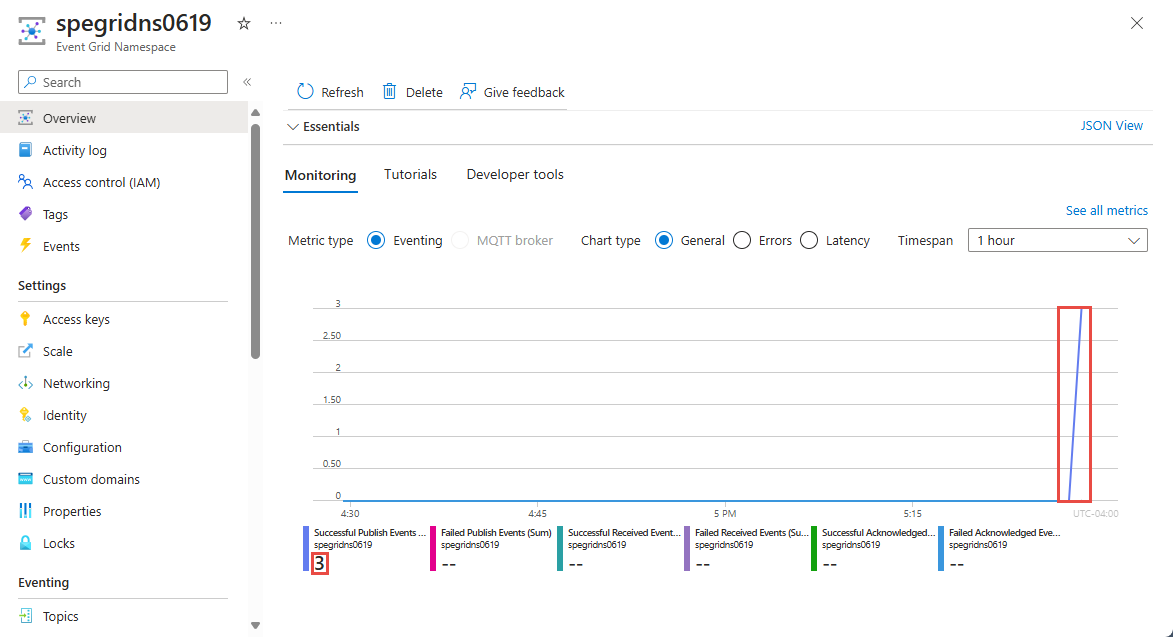
Three events have been published to the topic. Press any key to end the application.Important
In most cases, it will take a minute or two for the role assignment to propagate in Azure. In rare cases, it may take up to eight minutes. If you receive authentication errors when you first run your code, wait a few moments and try again.
In the Azure portal, follow these steps:
Pull messages from the topic
In this section, you create a .NET console application that receives messages from the topic.
Create a project to receive the published CloudEvents
- In the Solution Explorer window, right-click the EventGridQuickStart solution, point to Add, and select New Project.
- Select Console application, and select Next.
- Enter EventReceiver for the Project name, and select Create.
- In the Solution Explorer window, right-click EventReceiver, and select Set as a Startup Project.
Add the NuGet packages to the project
Select Tools > NuGet Package Manager > Package Manager Console from the menu.
Run the following command to install the Azure.Messaging.EventGrid NuGet package. Select EventReceiver for the Default project if it's not already set.
Install-Package Azure.Messaging.EventGrid.Namespaces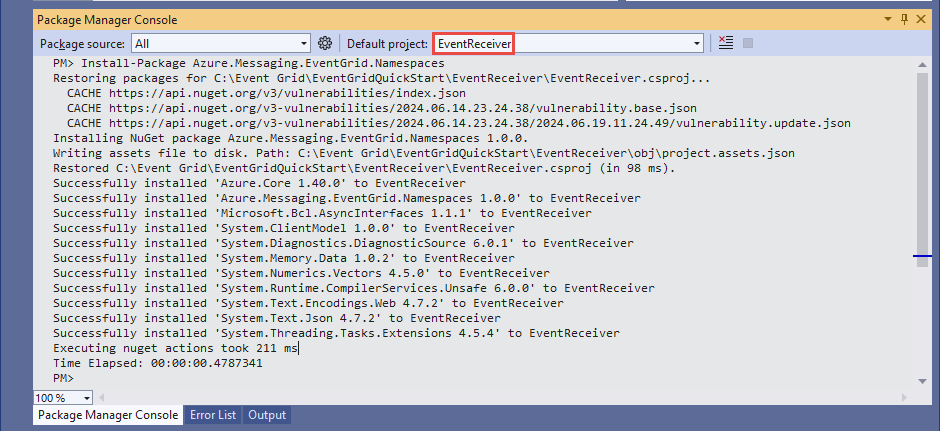
Add the code to receive events from the topic
In this section, you add code to retrieve messages from the queue.
Within the
Programclass, add the following code:Important
Update placeholder values (
<NAMESPACE-ENDPOINT>,<TOPIC-NAME>,<TOPIC-ACCESS-KEY>,<TOPIC-SUBSCRIPTION-NAME>) in the code snippet with your namespace endpoint, topic name, topic key, topic's subscription name.using Azure; using Azure.Messaging; using Azure.Messaging.EventGrid.Namespaces; // TODO: Replace the following placeholders with appropriate values // Endpoint of the namespace that you can find on the Overview page for your Event Grid namespace // Example: https://namespace01.eastus-1.eventgrid.azure.net. var namespaceEndpoint = "<NAMESPACE-ENDPOINT>"; // Should be in the form: https://namespace01.eastus-1.eventgrid.azure.net. // Name of the topic in the namespace var topicName = "<TOPIC-NAME>"; // Access key for the topic var topicKey = "<TOPIC-ACCESS-KEY>"; // Name of the subscription to the topic var subscriptionName = "<TOPIC-SUBSCRIPTION-NAME>"; // Maximum number of events you want to receive const short MaxEventCount = 3; // Construct the client using an Endpoint for a namespace as well as the access key var client = new EventGridReceiverClient(new Uri(namespaceEndpoint), topicName, subscriptionName, new AzureKeyCredential(topicKey)); // Receive the published CloudEvents. ReceiveResult result = await client.ReceiveAsync(MaxEventCount); Console.WriteLine("Received Response"); Console.WriteLine("-----------------");Append the following methods to the end of the
Programclass.// handle received messages. Define these variables on the top. var toRelease = new List<string>(); var toAcknowledge = new List<string>(); var toReject = new List<string>(); // Iterate through the results and collect the lock tokens for events we want to release/acknowledge/result foreach (ReceiveDetails detail in result.Details) { CloudEvent @event = detail.Event; BrokerProperties brokerProperties = detail.BrokerProperties; Console.WriteLine(@event.Data.ToString()); // The lock token is used to acknowledge, reject or release the event Console.WriteLine(brokerProperties.LockToken); Console.WriteLine(); // If the event is from the "employee_source" and the name is "Bob", we are not able to acknowledge it yet, so we release it if (@event.Source == "employee_source" && @event.Data.ToObjectFromJson<TestModel>().Name == "Bob") { toRelease.Add(brokerProperties.LockToken); } // acknowledge other employee_source events else if (@event.Source == "employee_source") { toAcknowledge.Add(brokerProperties.LockToken); } // reject all other events else { toReject.Add(brokerProperties.LockToken); } } // Release/acknowledge/reject the events if (toRelease.Count > 0) { ReleaseResult releaseResult = await client.ReleaseAsync(toRelease); // Inspect the Release result Console.WriteLine($"Failed count for Release: {releaseResult.FailedLockTokens.Count}"); foreach (FailedLockToken failedLockToken in releaseResult.FailedLockTokens) { Console.WriteLine($"Lock Token: {failedLockToken.LockToken}"); Console.WriteLine($"Error Code: {failedLockToken.Error}"); Console.WriteLine($"Error Description: {failedLockToken.ToString}"); } Console.WriteLine($"Success count for Release: {releaseResult.SucceededLockTokens.Count}"); foreach (string lockToken in releaseResult.SucceededLockTokens) { Console.WriteLine($"Lock Token: {lockToken}"); } Console.WriteLine(); } if (toAcknowledge.Count > 0) { AcknowledgeResult acknowledgeResult = await client.AcknowledgeAsync(toAcknowledge); // Inspect the Acknowledge result Console.WriteLine($"Failed count for Acknowledge: {acknowledgeResult.FailedLockTokens.Count}"); foreach (FailedLockToken failedLockToken in acknowledgeResult.FailedLockTokens) { Console.WriteLine($"Lock Token: {failedLockToken.LockToken}"); Console.WriteLine($"Error Code: {failedLockToken.Error}"); Console.WriteLine($"Error Description: {failedLockToken.ToString}"); } Console.WriteLine($"Success count for Acknowledge: {acknowledgeResult.SucceededLockTokens.Count}"); foreach (string lockToken in acknowledgeResult.SucceededLockTokens) { Console.WriteLine($"Lock Token: {lockToken}"); } Console.WriteLine(); } if (toReject.Count > 0) { RejectResult rejectResult = await client.RejectAsync(toReject); // Inspect the Reject result Console.WriteLine($"Failed count for Reject: {rejectResult.FailedLockTokens.Count}"); foreach (FailedLockToken failedLockToken in rejectResult.FailedLockTokens) { Console.WriteLine($"Lock Token: {failedLockToken.LockToken}"); Console.WriteLine($"Error Code: {failedLockToken.Error}"); Console.WriteLine($"Error Description: {failedLockToken.ToString}"); } Console.WriteLine($"Success count for Reject: {rejectResult.SucceededLockTokens.Count}"); foreach (string lockToken in rejectResult.SucceededLockTokens) { Console.WriteLine($"Lock Token: {lockToken}"); } Console.WriteLine(); } public class TestModel { public string Name { get; set; } public int Age { get; set; } }In the Solution Explorer window, right-click EventReceiver project, and select Set as Startup project.
Build the project, and ensure that there are no errors.
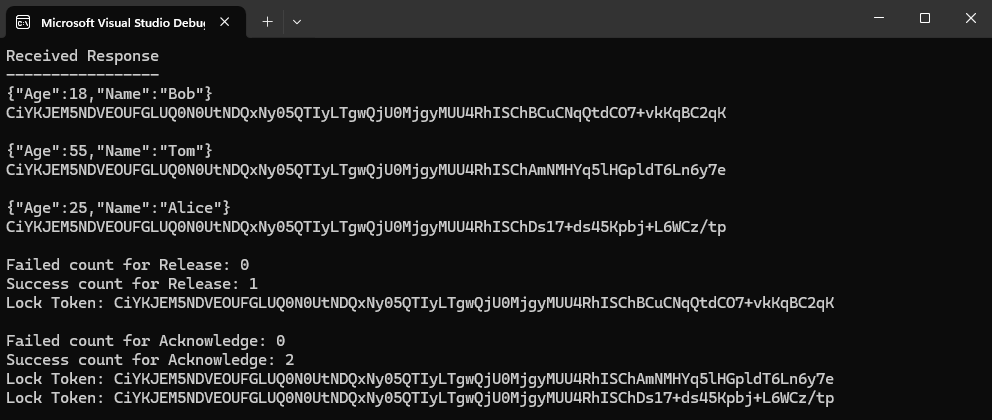
Run the EventReceiver application and confirmation you see the three events in the output window.
Clean up resources
Navigate to your Event Grid namespace in the Azure portal, and select Delete on the Azure portal to delete the Event Grid namespace and the topic in it.
Related topics
See .NET API reference.
