Quickstart: Create an Azure DNS zone and record using Azure CLI
This article walks you through the steps to create your first DNS zone and record using Azure CLI, which is available for Windows, Mac and Linux. You can also perform these steps using the Azure portal or Azure PowerShell.
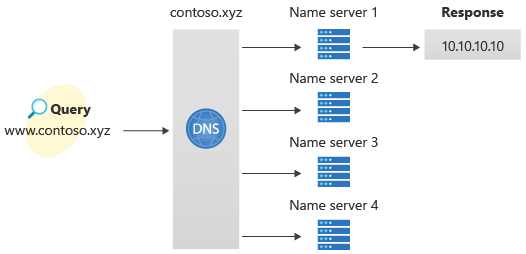
A DNS zone is used to host the DNS records for a particular domain. To start hosting your domain in Azure DNS, you need to create a DNS zone for that domain name. Each DNS record for your domain is then created inside this DNS zone. Finally, to publish your DNS zone to the Internet, you need to configure the name servers for the domain. Each of these steps is described below.
Azure DNS also supports private DNS zones. To learn more about private DNS zones, see Using Azure DNS for private domains. For an example on how to create a private DNS zone, see Get started with Azure DNS private zones using CLI.
If you don't have an Azure subscription, create an Azure free account before you begin.
Prerequisites
Use the Bash environment in Azure Cloud Shell. For more information, see Quickstart for Bash in Azure Cloud Shell.
If you prefer to run CLI reference commands locally, install the Azure CLI. If you're running on Windows or macOS, consider running Azure CLI in a Docker container. For more information, see How to run the Azure CLI in a Docker container.
If you're using a local installation, sign in to the Azure CLI by using the az login command. To finish the authentication process, follow the steps displayed in your terminal. For other sign-in options, see Sign in with the Azure CLI.
When you're prompted, install the Azure CLI extension on first use. For more information about extensions, see Use extensions with the Azure CLI.
Run az version to find the version and dependent libraries that are installed. To upgrade to the latest version, run az upgrade.
- This article requires version 2.0.4 or later of the Azure CLI. If using Azure Cloud Shell, the latest version is already installed.
Create the resource group
Before you create the DNS zone, create a resource group to contain the DNS zone:
az group create --name MyResourceGroup --location "East US"
Create a DNS zone
A DNS zone is created using the az network dns zone create command. To see help for this command, type az network dns zone create -h.
The following example creates a DNS zone called contoso.xyz in the resource group MyResourceGroup. Use the example to create a DNS zone, substituting the values for your own.
az network dns zone create -g MyResourceGroup -n contoso.xyz
Create a DNS record
To create a DNS record, use the az network dns record-set [record type] add-record command. For help on A records, see azure network dns record-set A add-record -h.
The following example creates a record with the relative name "www" in the DNS Zone "contoso.xyz" in the resource group "MyResourceGroup". The fully qualified name of the record set is "www.contoso.xyz". The record type is "A", with IP address "10.10.10.10", and a default TTL of 3600 seconds (1 hour).
az network dns record-set a add-record -g MyResourceGroup -z contoso.xyz -n www -a 10.10.10.10
View records
To list the DNS records in your zone, run:
az network dns record-set list -g MyResourceGroup -z contoso.xyz
Test the name resolution
Now that you have a test DNS zone with a test 'A' record, you can test the name resolution with a tool called nslookup.
To test DNS name resolution:
Run the following cmdlet to get the list of name servers for your zone:
az network dns record-set ns show --resource-group MyResourceGroup --zone-name contoso.xyz --name @Copy one of the name server names from the output of the previous step.
Open a command prompt, and run the following command:
nslookup www.contoso.xyz <name server name>For example:
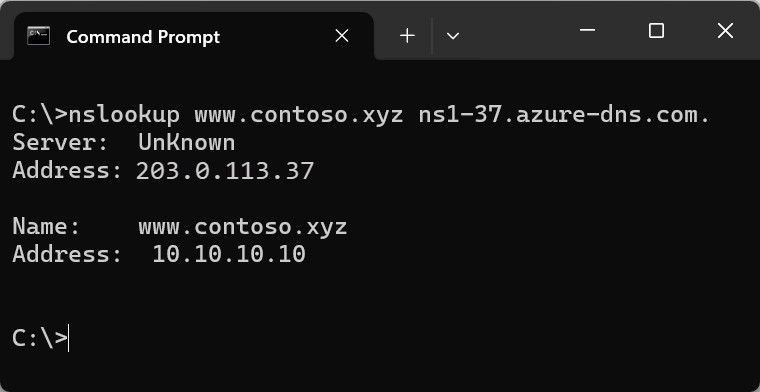
nslookup www.contoso.xyz ns1-08.azure-dns.com.You should see something like the following screen:

The host name www.contoso.xyz resolves to 10.10.10.10, just as you configured it. This result verifies that name resolution is working correctly.
Clean up resources
When no longer needed, you can delete all resources created in this quickstart by deleting the resource group:
az group delete --name MyResourceGroup
Next steps
Now that you've created your first DNS zone and record using Azure CLI, you can create records for a web app in a custom domain.

