Manage your OT device inventory from a sensor console
Use the Device inventory page from a sensor console to manage all OT and IT devices detected by that console. Identify new devices detected, devices that might need troubleshooting, and more.
For more information, see Devices monitored by Defender for IoT.
Tip
Alternately, view your device inventory from the Azure portal.
View the device inventory
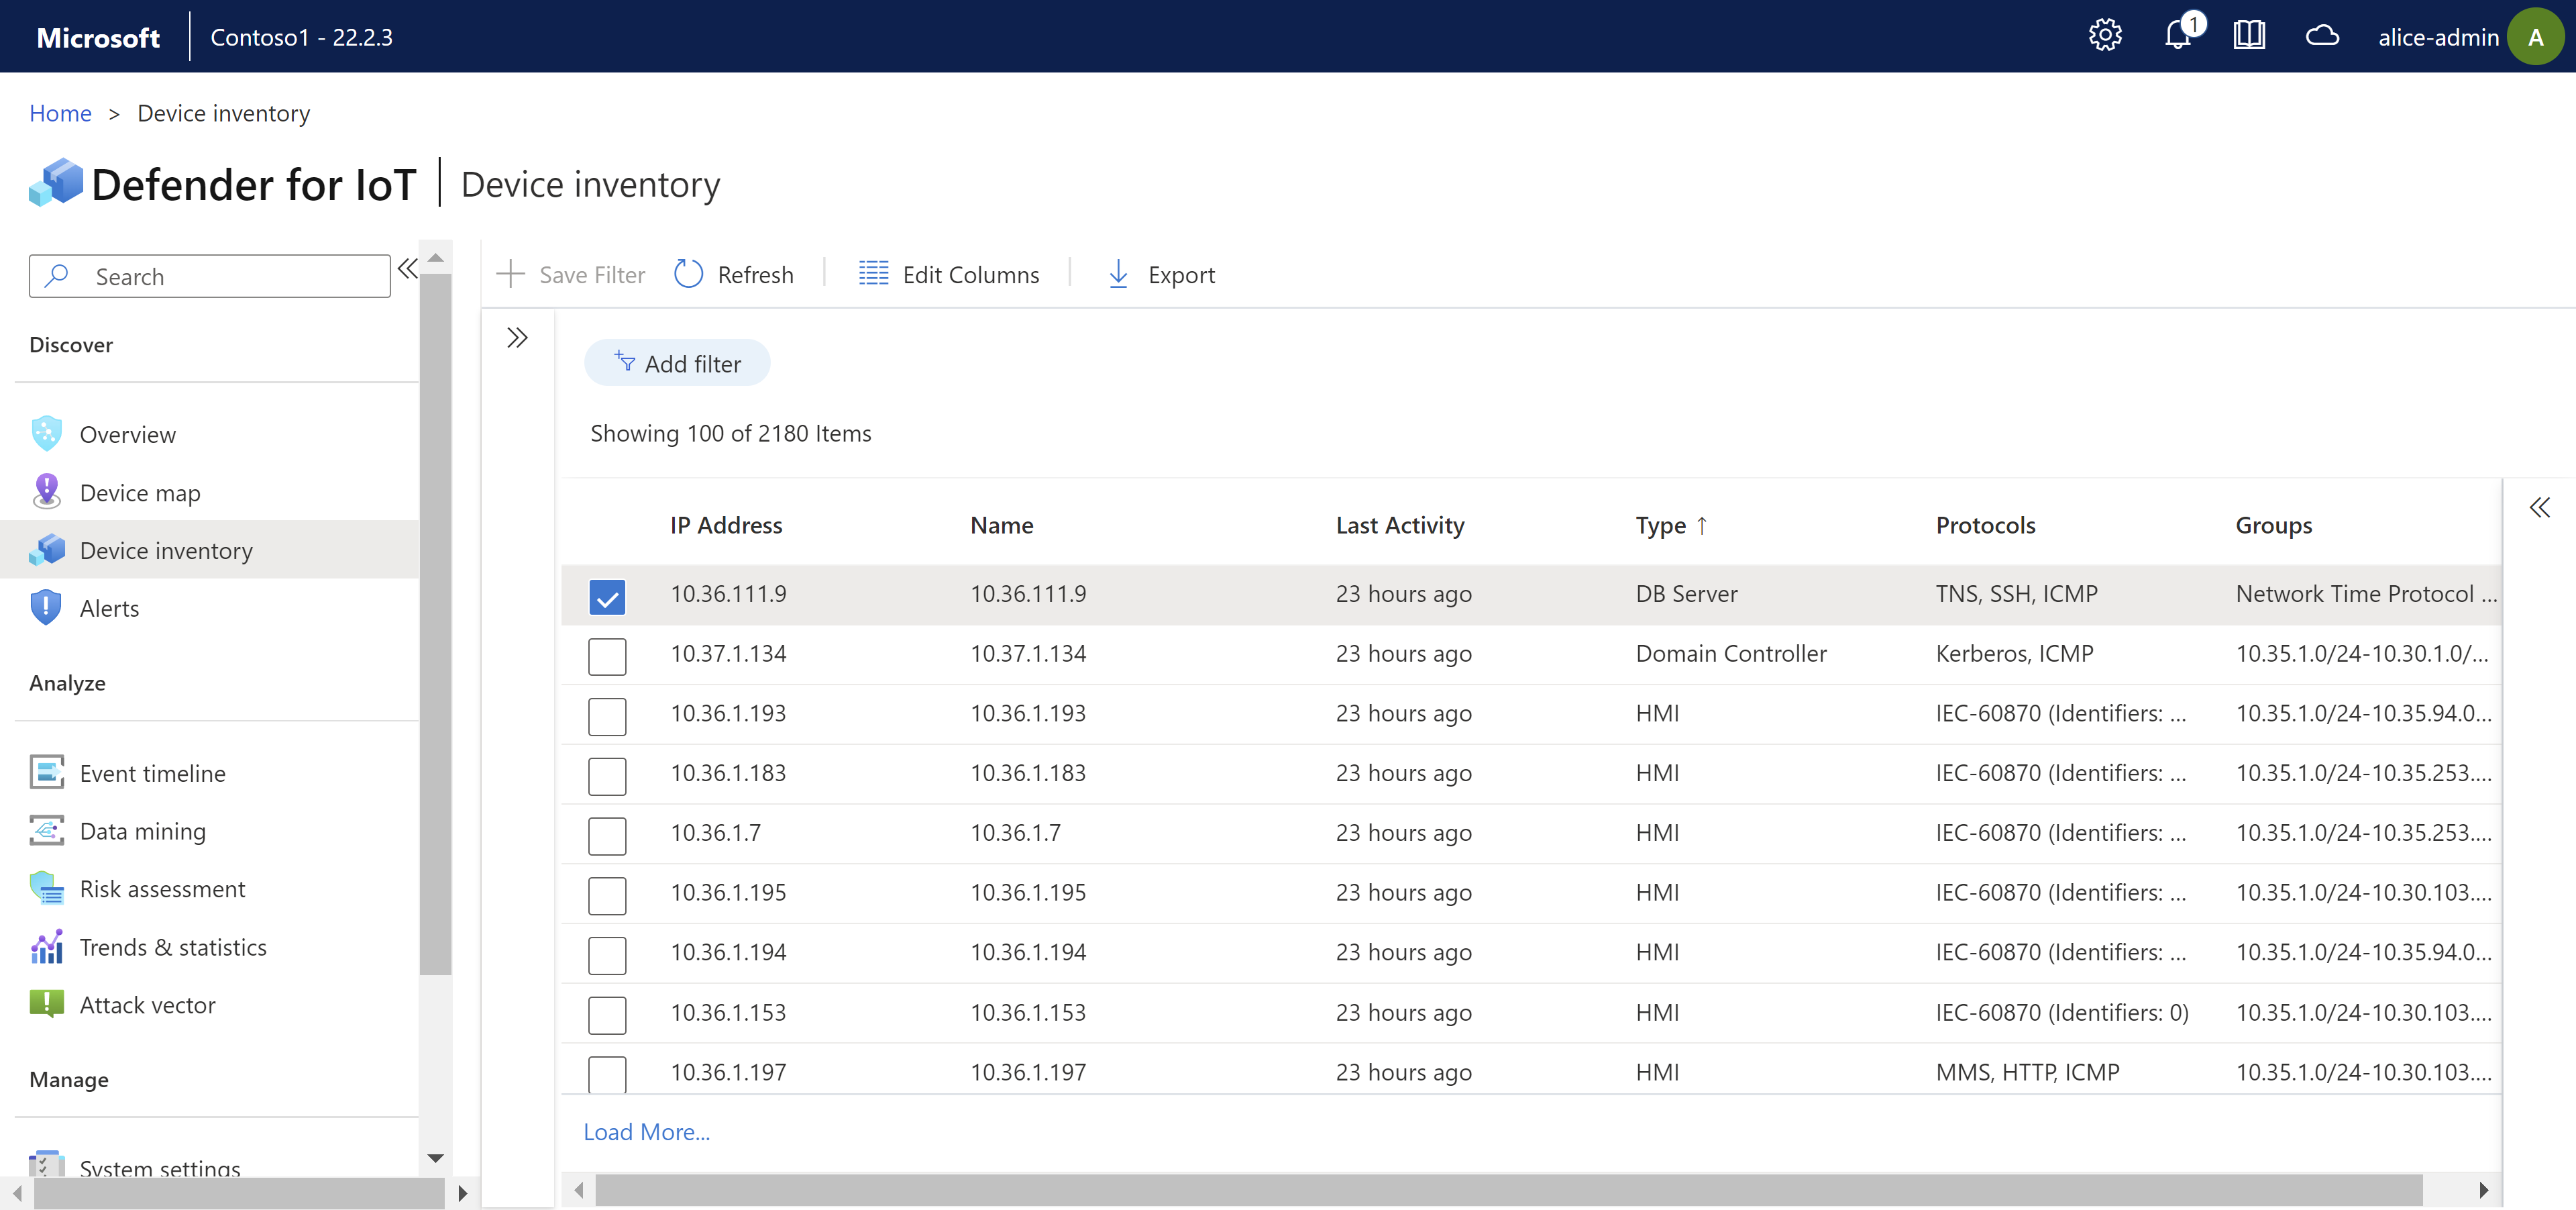
This procedure describes how to view detected devices in the Device inventory page in an OT sensor console.
Sign-in to your OT sensor console, and then select Device inventory.
Use any of the following options to modify or filter the devices shown:
Option Steps Sort devices Select a column header to sort the devices by that column. Filter devices shown Select Add filter to filter the devices shown.
In the Add filter box, define your filter by column name, operator, and filter value. Select Apply to apply your filter.
You can apply multiple filters at the same time. Search results and filters aren't saved when you refresh the Device inventory page.Save a filter To save the current set of filters:
1. Select +Save Filter.
2. In the Create New Device Inventory Filter pane on the right, enter a name for your filter, and then select Submit.
Saved filters are also saved as Device map groups, and provides extra granularity when viewing network devices on the Device map page.Load a saved filter If you have predefined filters saved, load them by selecting the show side pane  button, and then select the filter you want to load.
Modify columns shown Select Edit Columns  . In the Edit columns pane:
- Select Add Column to add new columns to the grid
- Drag and drop fields to change the columns order.
- To remove a column, select the Delete icon to the right.
- To reset the columns to their default settings, select Reset .
.
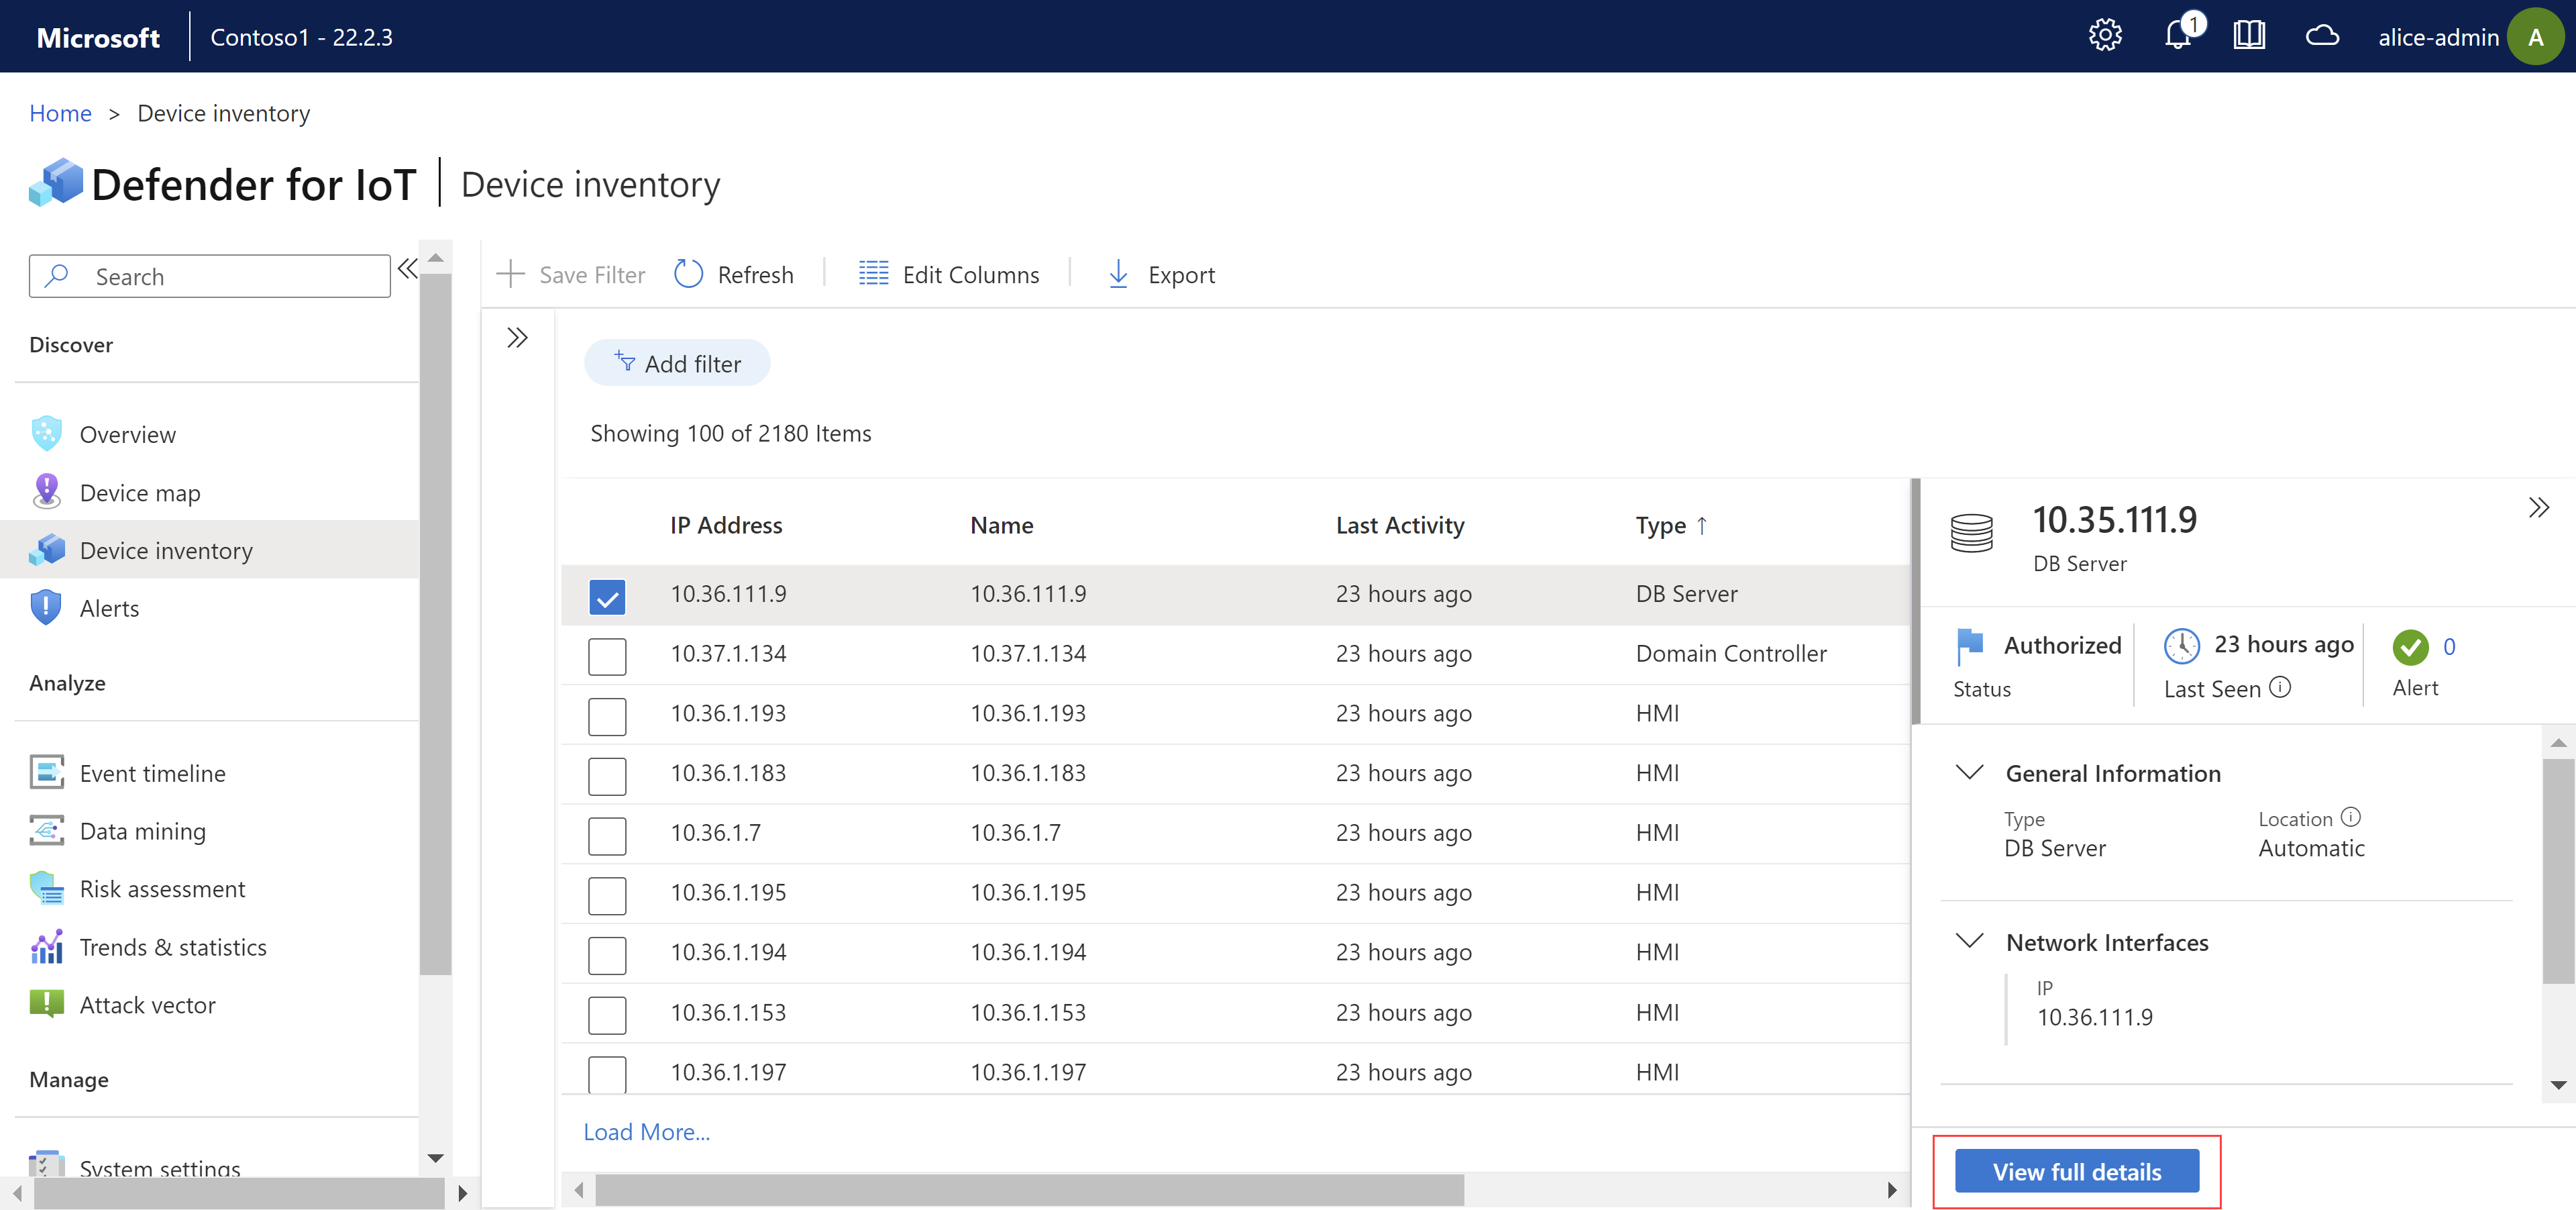
Select Save to save any changes made.Select a device row to view more details about that device. Initial details are shown in a pane on the right, where you can also select View full details to drill down more.
For example:
For more information, see Device inventory column data.
Edit device details
As you manage your network devices, you may need to update their details. For example, you may want to modify security value as assets change, or personalize the inventory to better identify devices, or if a device was classified incorrectly.
If you're working with a cloud-connected sensor, any edits you make in the sensor console are updated in the Azure portal.
To edit device details:
Select a device in the grid, and then select Edit in the toolbar at the top of the page.
In the Edit pane on the right, modify the device fields as needed, and then select Save when you're done.
You can also open the edit pane from the device details page:
Select a device in the grid, and then select View full details in the pane on the right.
In the device details page, select Edit Properties.
In the Edit pane on the right, modify the device fields as needed, and then select Save when you're done.
Editable fields include:
- Authorized status
- Device name
- Device type
- OS
- Purdue level
- Description
- Scanner or programming device
For more information, see Device inventory column data.
Export the device inventory to CSV
Export your device inventory to a CSV file to manage or share data outside of the OT sensor.
To export device inventory data, on the Device inventory page, select Export  .
.
The device inventory is exported with any filters currently applied, and you can save the file locally.
Note
In the exported file, date values are based on the region settings for the machine you're using to access the OT sensor. We recommend exporting data only from a machine with the same region settings as your sensor. For more information, see Synchronize time zones on an OT sensor.
Merge devices
You may need to merge duplicate devices if the sensor has discovered separate network entities that are associated with a single, unique device.
Examples of this scenario might include a PLC with four network cards, a laptop with both WiFi and a physical network card, or a single workstation with multiple network cards.
Note
- You can only merge authorized devices.
- Device merges are irreversible. If you merge devices incorrectly, you'll have to delete the merged device and wait for the sensor to rediscover both devices.
- Alternately, merge devices from the Device map page. When merging, you instruct the sensor to combine the device properties of two devices into one. When you do this, the Device Properties window and sensor reports will be updated with the new device property details.
For example, if you merge two devices, each with an IP address, both IP addresses will appear as separate interfaces in the Device Properties window.
To merge devices from the device inventory:
In the Device inventory page, select the devices you want to merge, and then select Merge in the toolbar at the top of the page.
At the prompt, select Confirm to confirm that you want to merge the devices.
The devices are merged, and a confirmation message appears at the top right.
View inactive devices
You may want to view devices in your network that have been inactive and delete them.
For example, devices may become inactive because of misconfigured SPAN ports, changes in network coverage, or by unplugging them from the network
To view inactive devices, filter the device inventory to display devices that have been inactive.
On the Device inventory page:
- Select Add filter.
- Select Last Activity in the column field.
- Choose the time period in the Filter field. Filtering options include seven days or more, 14 days or more, 30 days or more, or 90 days or more.
Tip
We recommend that you delete inactive devices to display a more accurate representation of current network activity, better evaluate the number of devices being monitored, and reduce clutter on your screen.
Delete devices
You may want to delete devices from your device inventory, such as if they've been merged incorrectly, or are inactive.
Deleted devices are removed from the Device map and the device inventories on the Azure portal, and aren't calculated when generating reports, such as Data Mining, Risk Assessment, or Attack Vector reports.
To delete one or more devices:
You can delete a device when it's been inactive for more than 10 minutes.
In the Device inventory page, select the device or devices you want to delete, and then select Delete
 in the toolbar at the top of the page.
At the prompt, select Confirm to confirm that you want to delete the device or devices from Defender for IoT.
The device or devices are deleted, and a confirmation message appears at the top right.
To delete all inactive devices:
This procedure is supported for the admin users only, including the default privileged admin user.
- Select the Last Activity filter icon in the Inventory.
- Select a filter option.
- Select Apply.
- Select Delete Inactive Devices. In the prompt displayed, enter the reason you're deleting the devices, and then select Delete.
All devices detected within the range of the filter will be deleted. If you delete a large number of devices, the delete process may take a few minutes.
For more information, see Default privileged on-premises users.
Next steps
For more information, see:

