Enable file integrity monitoring
In Defender for Servers Plan 2 in Microsoft Defender for Cloud, the file integrity monitoring feature helps to keep enterprise assets and resources secure by scanning and analyzing operating system files, Windows registries, application software, and Linux system files for changes that might indicate an attack.
After you enable Defender for Servers Plan 2, follow the instructions in this article to configure file integrity monitoring using the Microsoft Defender for Endpoint agent to collect data.
Note
- If you are using a previous version of file integrity monitoring that used the Log Analytics agent (also known as the Microsoft Monitoring agent(MMA)), or the Azure Monitor agent (AMA) you can migrate to the new file integrity monitoring experience.
- From June 2025 onwards, file integrity monitoring requires a minimum version. Update the agent as needed.
- Windows: 10.8760 or later.
- Linux: 30.124082 or later.
Prerequisites
- Defender for Servers Plan 2 should be enabled.
- The Defender for Endpoint agent should be installed on machines you want to monitor.
- You need Workspace owner or Security admin permissions to enable and disable file integrity monitoring. Reader permissions can view results.
Verify Defender for Endpoint client version
- For machines running Windows Server 2019 or later, the Defender for Endpoint agent is updated as part of continuous operating system updates. Make sure Windows machines have the latest update installed. Learn more about using the Windows Servers Update Service to install machines at scale.
- For machines running Windows Servers 2016 and Windows Server 2012 R2, update machines manually to the latest agent version. You can install KB 5005292 from the Microsoft Update Catalog. KB 5005292 is periodically updated with the latest agent version.
- For Linux machines, the Defender for Endpoint agent is automatically updated if autoprovisioning is turned on for the machines in Defender for Cloud. After the MDE.Linux extension is installed on a Linux machine, it attempts to update the agent version each time the VM reboots. You can also update the agent version manually.
Enable file integrity monitoring
Sign in to the Azure portal.
Search for and select Microsoft Defender for Cloud.
In the Defender for Cloud menu, select Environment settings.
Select the relevant subscription.
Locate the Defenders for Servers plan and select Settings.
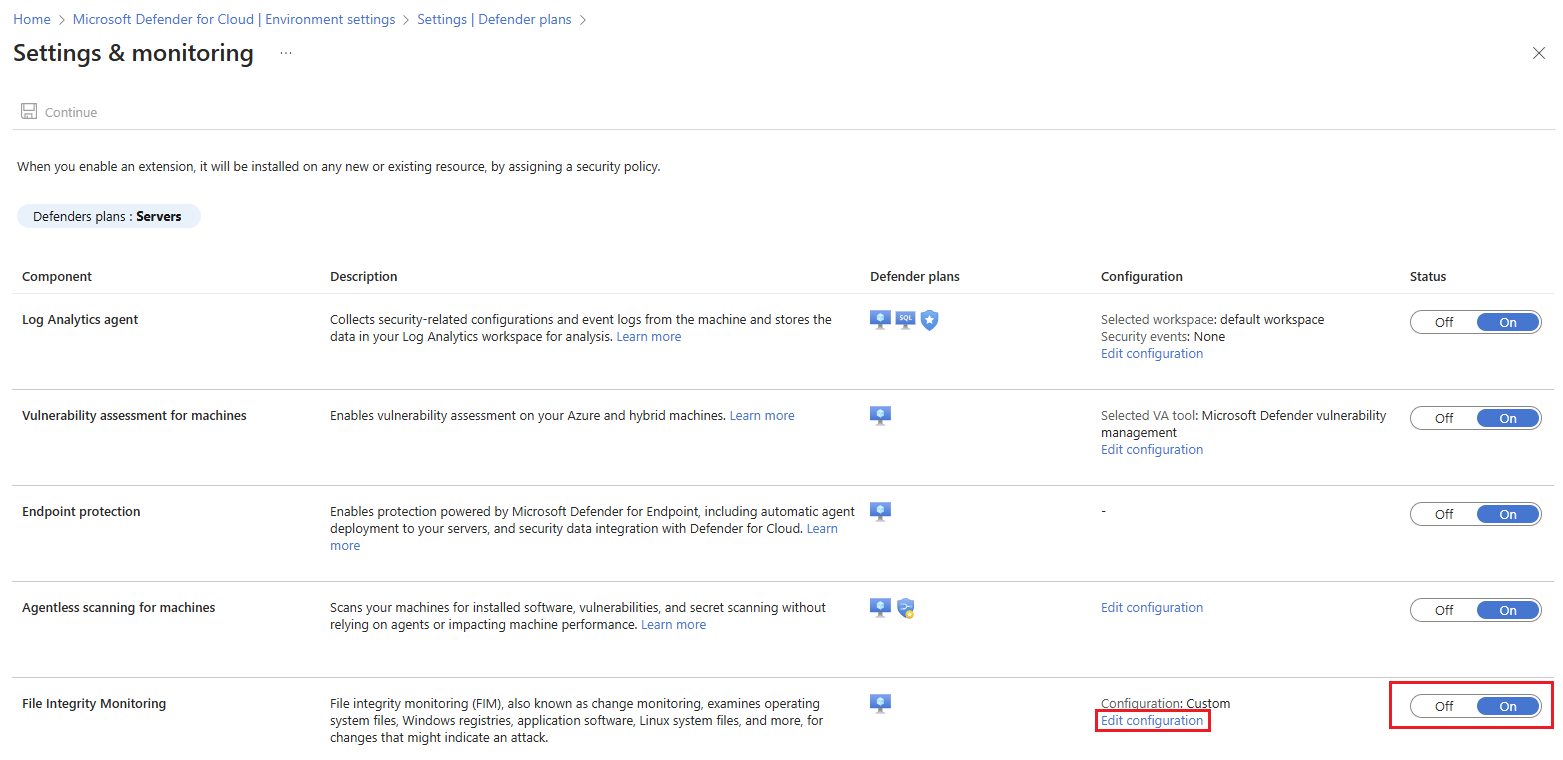
In the File Integrity Monitoring section, switch the toggle to On. Then select Edit configuration.
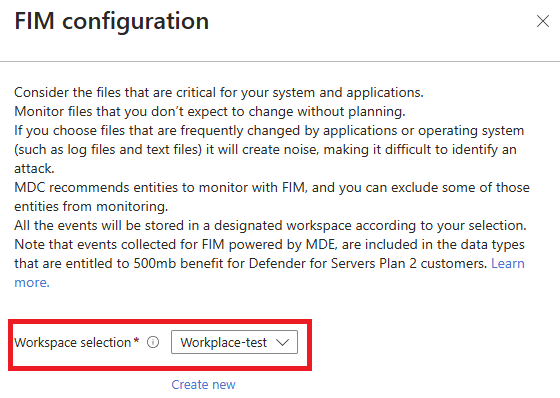
The FIM configuration pane opens. In the Workspace selection dropdown, select the workspace where you want to store the file integrity monitoring data. If you want to create a new workspace, select Create new.
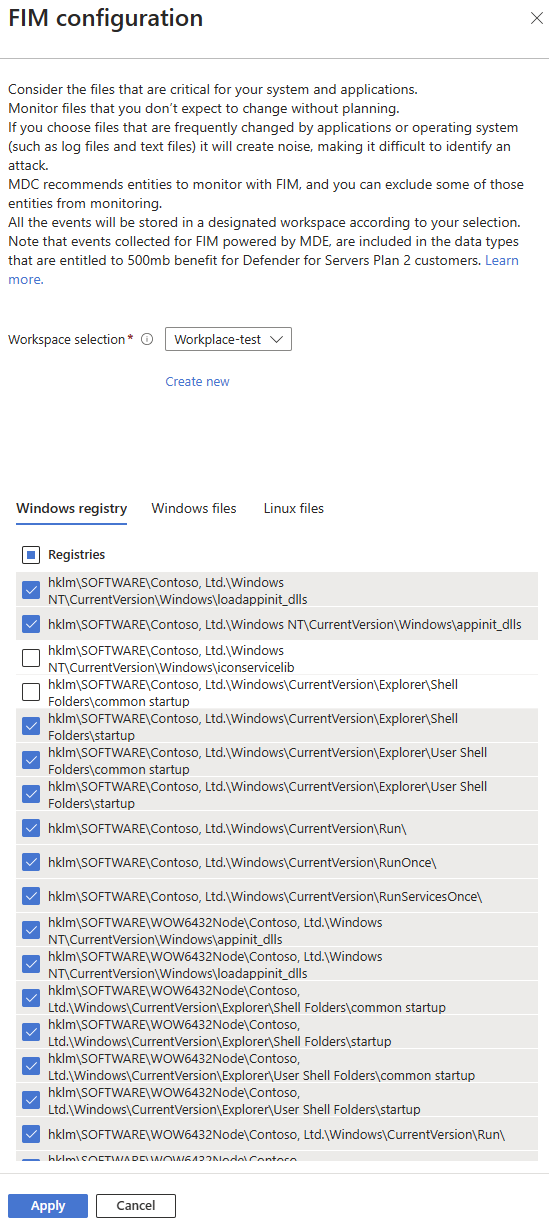
In the lower section of the FIM configuration pane, select the Windows registry, Windows files, and Linux files tabs to choose the files and registries you want to monitor. If you choose the top selection in each tab, all files and registries are monitored. Select Apply to save your changes.
Select Continue.
Select Save.
Disable file integrity monitoring
If you disable file integrity monitoring, no new events are collected. However, the data collected before you disabled the feature remains in the Log Analytics workspace, in accordance with the workspace retention policy.
Disable as follows:
Sign in to the Azure portal.
Search for and select Microsoft Defender for Cloud.
In the Defender for Cloud menu, select Environment settings.
Select the relevant subscription.
Locate the Defenders for Servers plan and select Settings.
In the File Integrity Monitoring section, switch the toggle to Off.
Select Apply.
Select Continue.
Select Save.
Next steps
- Events collected for file integrity monitoring are included in the data types eligible for the 500 MB benefit for Defender for Servers Plan 2 customers. Learn more about the benefit.
- Review changes in file integrity monitoring.


