Step 1. Clone code repository and create compute

See the GitHub repository for the sample code in this section. You can also use the repository code as a template with which to create your own AI applications.
Follow these steps to load the sample code to your Databricks workspace and configure the global settings for the application.
Requirements
- An Azure Databricks workspace with serverless compute and Unity Catalog enabled.
- An existing Mosaic AI Vector Search endpoint or permissions to create a new Vector Search endpoint (the setup notebook creates one for you in this case).
- Write access to an existing Unity Catalog schema where the output Delta tables that include the parsed and chunked documents and Vector Search indexes are stored, or permissions to create a new catalog and schema (the setup notebook creates one for you in this case).
- A compute resource with the dedicated access mode running DBR 14.3 or above that has access to the internet. Internet access is required to download the necessary Python and system packages. Do not use a compute resource running Databricks Runtime for Machine Learning, as these tutorials have Python package conflicts with Databricks Runtime ML.
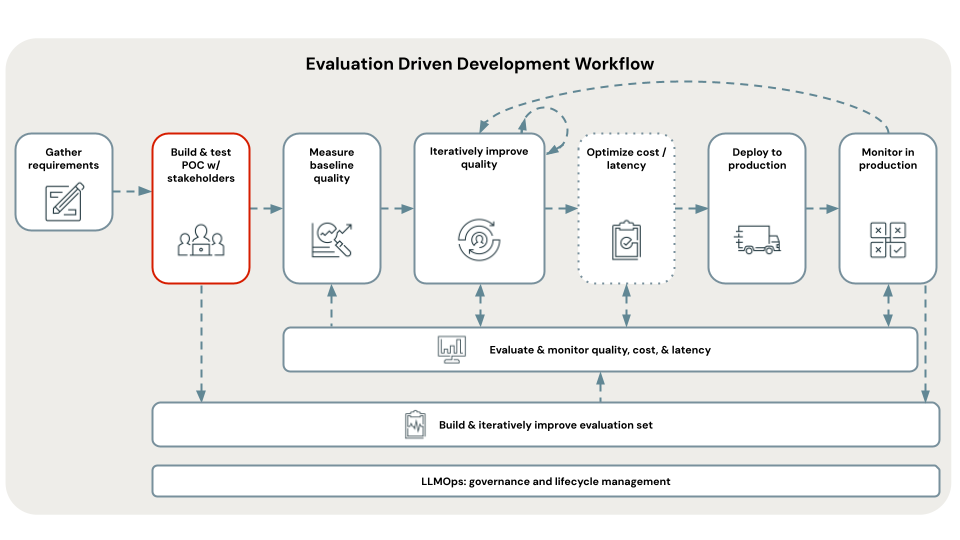
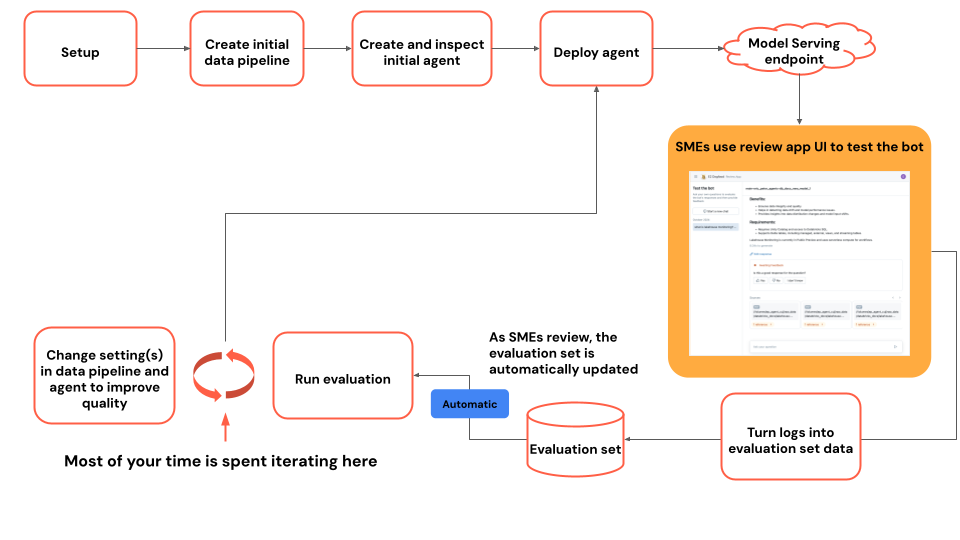
Tutorial flow diagram
The diagram shows the flow of steps used in this tutorial.

Instructions
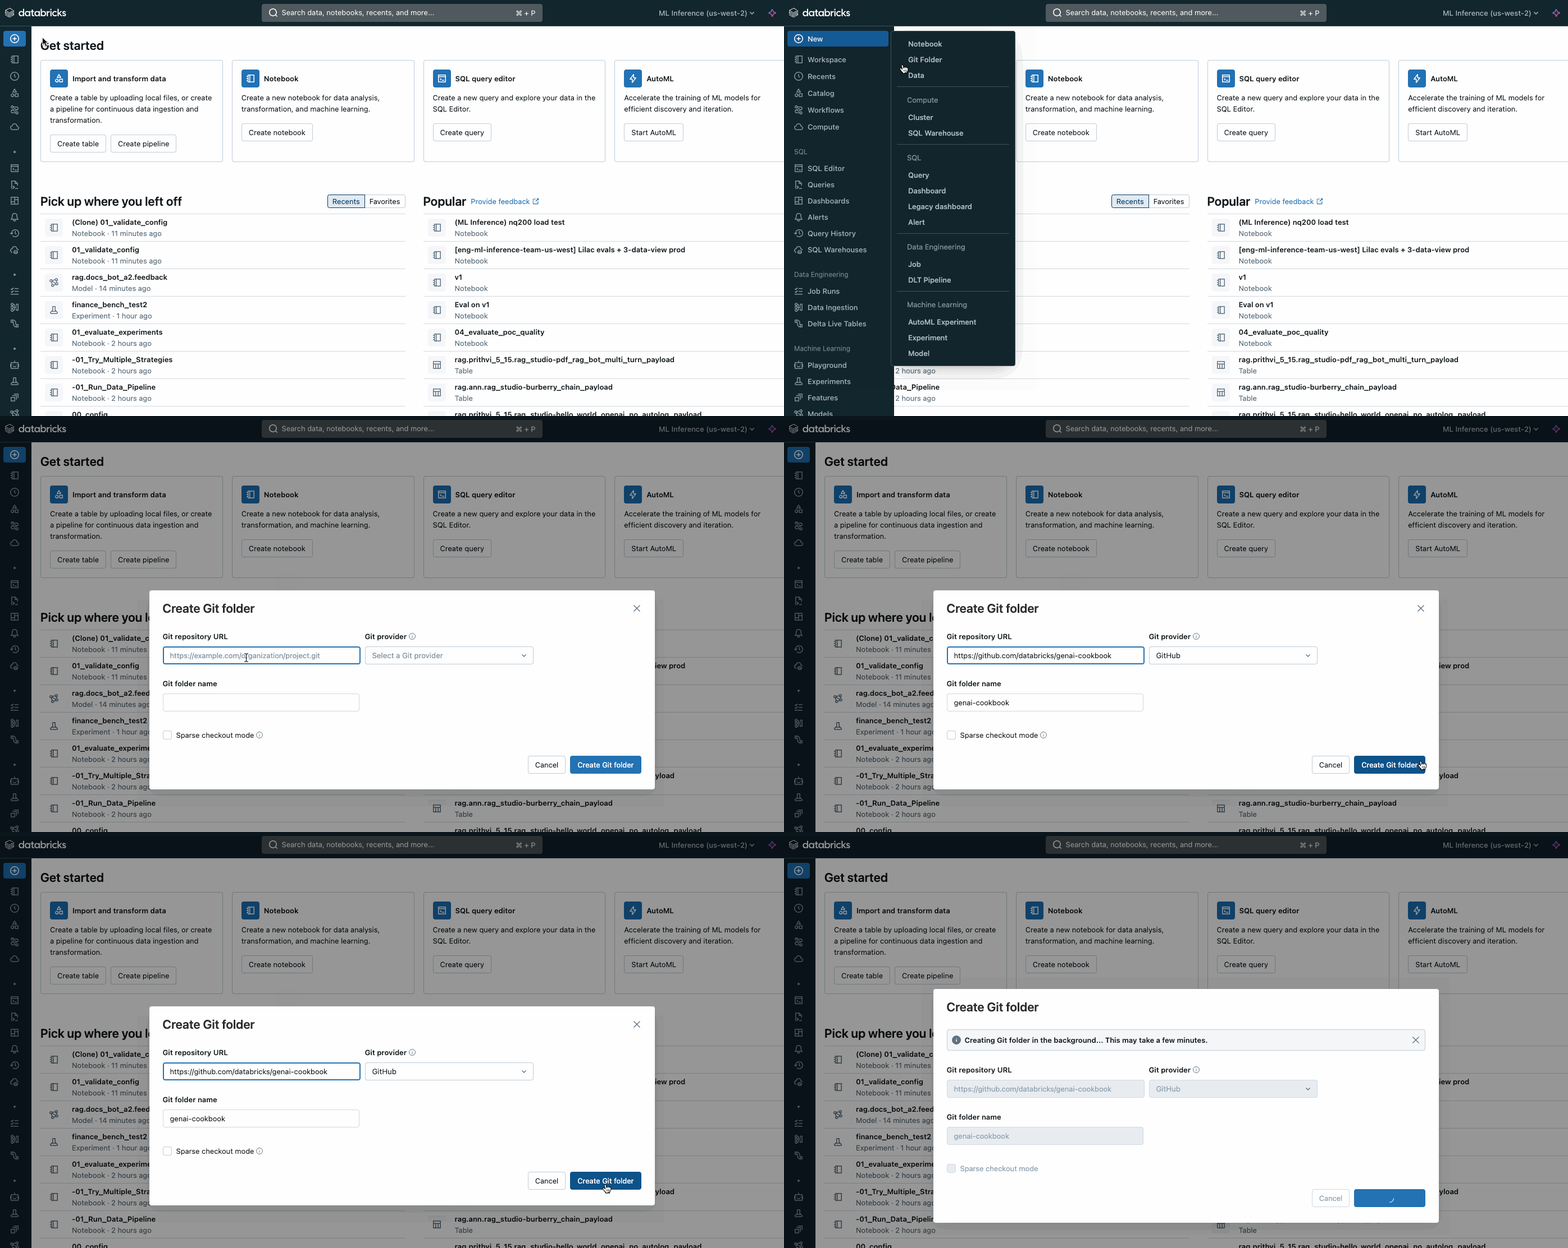
Clone this repository into your workspace using Git folders.

Open the rag_app_sample_code/00_global_config notebook and adjust the settings there.
# The name of the RAG application.  This is used to name the chain's model in Unity Catalog and prepended to the output Delta tables and vector indexes
RAG_APP_NAME = 'my_agent_app'

# Unity Catalog catalog and schema where outputs tables and indexes are saved
# If this catalog/schema does not exist, you need create catalog/schema permissions.
UC_CATALOG = f'{user_name}_catalog'
UC_SCHEMA = f'rag_{user_name}'

## Name of model in Unity Catalog where the POC chain is logged
UC_MODEL_NAME = f"{UC_CATALOG}.{UC_SCHEMA}.{RAG_APP_NAME}"

# Vector Search endpoint where index is loaded
# If this does not exist, it will be created
VECTOR_SEARCH_ENDPOINT = f'{user_name}_vector_search'

# Source location for documents
# You need to create this location and add files
SOURCE_PATH = f"/Volumes/{UC_CATALOG}/{UC_SCHEMA}/source_docs"
Open and run the 01_validate_config_and_create_resources notebook.
Next step
Continue with Deploy POC.